ESAB Aristo U6 Instruction Manual
Hide thumbs
Also See for Aristo U6:
- Instruction manual (56 pages) ,
- Service manual (28 pages) ,
- Service manual (36 pages)

Related Manuals for ESAB Aristo U6


Summary of Contents for ESAB Aristo U6
- Page 1 Aristo ® Instruction manual 0459 287 374 GB 120330 Valid from program version 2.01...
-
Page 2: Table Of Contents
1 INTRODUCTION ........... 1.1 Do this first . -
Page 3: Introduction
If this warning is shown in the display it means that the power source don't support this function. Contact an authorised ESAB service engineer to get an updated software. Do this first This menu appears on the display the first time that you start the power unit. -
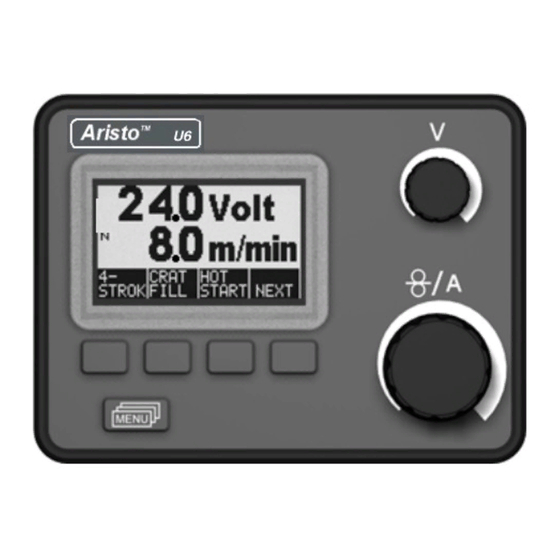
Page 4: Control Panel's Working Method
This pushbutton brings you to the selection menu (see item <>) if you are in the main menu. If you are in some other menu, it moves you back up one menu. - 4 - © ESAB AB 2003 bi08inte1... -
Page 5: Symbols In The Display
Use this menu to store, Use this menu to recall and/or erase change the language, various stored welding measurement units etc. data settings. There are ten storage positions for welding data. - 5 - © ESAB AB 2003 bi08inte1... -
Page 6: Mig/Mag Welding
Crater filling OFF or ON Crater fill time 0 - 5 s 0,1 s 1,0 s Hot start OFF or ON Hot start time 0 - 10 s 0,1 s 1,5 s - 6 - © ESAB AB 2003 bi08mige4... - Page 7 Crater filling can also be interrupted by quickly pressing and releasing the trigger switch while crater filling is in progress. - Activation of 2-stroke performed in the main menu. - 7 - © ESAB AB 2003 bi08mige4...
- Page 8 It continues as long as the button is held pressed, and prevents voltage from being applied and wire feed from starting. - Activation of gas purging performed in the main menu. - 8 - © ESAB AB 2003 bi08mige4...
- Page 9 Positive deviation is displayed with a bar above SYN, negative is displayed below. Synergy OFF: the main menu shows the set value for voltage and wire feed. - Activation of synergy performed in the process menu. - 9 - © ESAB AB 2003 bi08mige4...
- Page 10 33 most frequently used synergy lines. It is also possible to order other packages of synergy lines, but these must be installed by an authorised ESAB service engineer. Inductance Higher inductance produces a more flowing weld and less spatter. Lower inductance produces a harsher sound and a stable, concentrated arc.
- Page 11 The wire feed speed is the speed at which the filler wire is supplied, measured in m/min. Irrespective of which menu is displayed, the setting value for the wire feed speed can always be changed. The value is displayed in the main menu or selection menu. - 11 - © ESAB AB 2003 bi08mige4...
-
Page 12: Tig Welding
OFF or ON Lock code OFF or ON Min current 0 - 99% These functions cannot be changed while welding is in progress. Live TIG-start/Maximal current depends on which machine type is used. - 12 - © ESAB AB 2003 bi08tige5... - Page 13 Releasing the switch button (2) reduces the current (or starts slope down if in operation) and extinguishes the arc. Gas post-flow follows if it is in operation. - Activation of 2-stroke performed in the main menu. - 13 - © ESAB AB 2003 bi08tige5...
- Page 14 The button is then pressed (Step 2), and a low current flows. The arc strikes when the welder lifts the gun away from the workpiece (Step 3), which causes the current to rise automatically to the set value. - Activation of Lift-Arc performed in the process menu. - 14 - © ESAB AB 2003 bi08tige5...
- Page 15 - Setting of gas post-flow time performed in the settings menu. Pulse duration This is the length of time during which the pulse current is on during a pulse cycle. - Setting of pulse duration time performed in the settings menu. - 15 - © ESAB AB 2003 bi08tige5...
- Page 16 ON - Switching between memory positions can take place before, after or during welding. ARC OFF - Switching between memory positions can only take place before or after welding. - Activation of trigger data switching performed in the configuration menu. - 16 - © ESAB AB 2003 bi08tige5...
- Page 17 (16) appearing in the display and welding cannot be started whilst the error message is displayed. The VRD icon Note! The VRD function works for power sources where it is implemented. - 17 - © ESAB AB 2003 bi08tige5...
-
Page 18: Mma Welding
If the max current is 100 A and the min current is to be 90 A, set the min current to 90%. - Activation of min current performed in the settings menu. - 18 - © ESAB AB 2003 bi08mmae6... - Page 19 (16) appearing in the display and welding cannot be started whilst the error message is displayed. The VRD icon Note! The VRD function works for power sources where it is implemented. - 19 - © ESAB AB 2003 bi08mmae6...
-
Page 20: Arc-Air Gouging
0,25 V (Displayed with 37.0 V one decimal.) Electrode diameter A larger electrode diameter produces wider and deeper penetration into the workpiece. Voltage Higher voltage produces wider and deeper penetration into the workpiece - 20 - © ESAB AB 2003 bi08gouginge... -
Page 21: General Functions
By this function the settings menu can be locked, then it is only possible to select the main menu, the memory menu and the measurements menu, see chapter 9 Lock code . - Activation of lock code performed in the configuration menu. - 21 - © ESAB AB 2003 bi08gene7... -
Page 22: Memory Management
2. Press , a welding data setting is now stored in memory position 2. The other memory positions are empty. - 22 - © ESAB AB 2003 bi08mine8... -
Page 23: Recall Welding Data
Press YES if you want to recall welding data from memory position 2 and change the settings that are currently in the primary memory. (If you change your mind, press NO ) This icon in the main menu shows which memory position that is recalled. - 23 - © ESAB AB 2003 bi08mine8... -
Page 24: Delete Welding Data
PIN code is selected. Press , to store the first digit of the code. Repeat the procedure for the remaining digits. Press to unlock the control panel. - 24 - © ESAB AB 2003 bi08mine8... -
Page 25: Fault Codes
Lost contact with the wire feed unit Lost contact with the power unit Incorrect settings values in external RAM Memory allocation error Transmitter buffer overflow Receiver buffer overflow Watchdog Out of wire Stack overflow - 25 - © ESAB AB 2003 bi08fele9... -
Page 26: Fault Code Descriptions
Action: Check that the cooling air inlets or outlets are not obstructed or clogged with dirt. Check the duty cycle being used, to make sure that the equipment is not being overloaded. - 26 - © ESAB AB 2003 bi08fele9... - Page 27 High open-circuit voltage The open-circuit voltage has been too high. Action: Turn off the mains power supply to reset the unit. If the fault persists, send for a service technician. - 27 - © ESAB AB 2003 bi08fele9...
- Page 28 The current welding process is stopped, and cannot be restarted. Action: Check the cooling water circuit and the pump. No reply from the display unit The microprocessor is not in contact with the display board. Action: Send for a service technician. - 28 - © ESAB AB 2003 bi08fele9...
-
Page 29: Ordering Spare Parts
All guarantee undertakings from the supplier cease to apply if the customer himself attempts any work in the product during the guarantee period in order to rectify any faults. Spare parts may be ordered through your nearest ESAB dealer, see the last page of this publication. -
Page 30: Diagram
Diagram - 30 - © ESAB AB 2003 bi08e11a... -
Page 31: Wire And Gas Dimensions
4.0 5.0 6.0 8.0 The text on the display panel is available in the following languages: Swedish, Danish, Norwegian, Finnish, English, German, Dutch, French, Spanish (Castilian), Italian, Portuguese, Polish, Czech, Hungarian, Turkish and US English. - 31 - © ESAB AB 2003 bi08tabe3... -
Page 32: Menu Structure
Code lock ON / OFF Spot welding time Spot welding ON / OFF Trigger data ON / OFF MENU 2 / 4 Stroke Crater filling Hot start Creep start Gas purging Wire inching - 32 - © ESAB AB 2003 bi08men... - Page 33 Spot welding time Code lock ON / OFF Spot welding ON / OFF Trigger data ON / OFF MENU 2 / 4 Stroke Crater filling Hot start Creep start Gas purging Wire inching - 33 - © ESAB AB 2003 bi08men...
- Page 34 Delete Gas post-flow time Auto save ON / OFF Remote min Limits ON / OFF Trigger data ON / OFF Code lock ON / OFF MENU 2 / 4 Stroke Gas purging - 34 - © ESAB AB 2003 bi08men...
- Page 35 Limits ON / OFF Slope up time Code lock ON / OFF Slope down time Gas post-flow time Remote min Trigger data ON / OFF MENU 2 / 4 Stroke GAS purging - 35 - © ESAB AB 2003 bi08men...
- Page 36 SET- CON- CESS TING MORY Live-Tig Remote min Language Store Dimensions Recall Panel enable ON / OFF Delete Auto save ON / OFF Limits ON / OFF Code lock ON / OFF - 36 - © ESAB AB 2003 bi08men...
- Page 37 Electrode diameter Hot start time Dimensions Recall Remote min Panel enable ON / OFF Delete Auto save ON / OFF Limits ON / OFF Code lock ON / OFF MENU Hot start - 37 - © ESAB AB 2003 bi08men...
- Page 38 MORY PRO- CON- ME-- CESS MORY Electrode diameter Language Store Dimensions Recall Panel enable ON / OFF Delete Auto save ON / OFF Limits ON / OFF Code lock ON / OFF - 38 - © ESAB AB 2003 bi08men...
-
Page 39: Order Number
0459 287 391 Instruction manual SI 0459 287 392 Instruction manual LT 0458 818 990 Spare parts list M2, MA4, MA6, U6 Instruction manuals and the spare parts list are available on the Internet at www.esab.com - 39 - © ESAB AB 2003... - Page 40 ESAB Romania Trading SRL ESAB VAMBERK s.r.o. SOUTH AFRICA ESAB Mexico S.A. Bucharest Vamberk ESAB Africa Welding & Cutting Ltd Monterrey Tel: +40 316 900 600 Tel: +420 2 819 40 885 Durbanvill 7570 - Cape Town Tel: +52 8 350 5959...
Need help?
Do you have a question about the Aristo U6 and is the answer not in the manual?
Questions and answers