Table of Contents
Advertisement
Quick Links
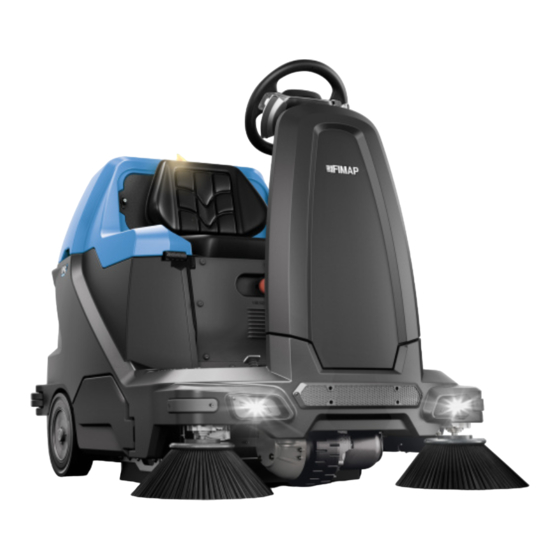
FSR7
PRO
PROFESSIONAL SCRUBBING MACHINES
OPERATOR INTERFACE
CONFIGURATION MANUAL
A TRANSLATION OF THE ORIGINAL INSTRUCTIONS
DOC. 10126398 - Ver. AA - 06-2023
The constructive elements and content of this manual, including the structure, text, diagrams, images and logo, are the exclusive property of FIMAP S.P.A..
They are protected, both collectively and individually, by the current regulations regarding intellectual property (including copyright laws), and cannot be either wholly or partially copied or imitated. Any
reproduction, reprocessing, distribution or dissemination is strictly prohibited.
Advertisement
Table of Contents

Subscribe to Our Youtube Channel
Related Manuals for Fimap FSR7 PRO


Summary of Contents for Fimap FSR7 PRO
- Page 1 DOC. 10126398 - Ver. AA - 06-2023 The constructive elements and content of this manual, including the structure, text, diagrams, images and logo, are the exclusive property of FIMAP S.P.A.. They are protected, both collectively and individually, by the current regulations regarding intellectual property (including copyright laws), and cannot be either wholly or partially copied or imitated. Any...
-
Page 3: Table Of Contents
CONTENTS CONTENTS ......................3 SETTING MENU NAVIGATION DIAGRAM ............5 SETTINGS MENU ..................... 12 GENERAL SETTINGS MENU (SETTINGS) ..............14 MAIN MENU (GENERAL SETS) ..................14 LANGUAGE SELECTION MENU (GENERAL MAIN)..............15 DISPLAY TUNE MENU (GENERAL MAIN) ..................15 DISPLAY BRIGHTNESS MENU (GENERAL MAIN) ...............16 BATTERY MENU (GENERAL SETS) ................. - Page 4 REVERSE RAMP #2 MENU (TRACTION SPEED SETTINGS) .............36 MAX FORWARD SPEED MENU (TRACTION SPEED SETTINGS) ..........37 MAX BACKWARD SPEED MENU (TRACTION SPEED SETTINGS) ..........37 MINIMUM SPEED MENU (TRACTION SPEED SETTINGS) ............38 MODE1 SPEED MENU (TRACTION SPEED SETS) ..............38 MODE1 CURRENT MENU (TRACTION SPEED SETTINGS) ............39 MODE2 SPEED MENU (TRACTION SPEED SETS) ..............39 SPEED LEVEL MENU (TRACTION SPEED SETS) ...............40 SPEED REF MENU (TRACTION SETTINGS) ..............
-
Page 5: Setting Menu Navigation Diagram
SETTING MENU NAVIGATION DIAGRAM “SETTINGS MENU” on page 12 PASSWORD ≤ “GENERAL SETTINGS CUSTOMER MENU (SETTINGS)” on page 14 “MAIN MENU (GENERAL SETS)” on page 14 “LANGUAGE SELECTION MENU (GENERAL MAIN)” on page 15 “DISPLAY TUNE MENU (GENERAL MAIN)” on page 15 “DISPLAY BRIGHTNESS MENU (GENERAL MAIN)”... - Page 6 “ACCESS MODE MENU (GENERAL SETS)” on page 19 “PASSWORD 3 CUSTOM MENU (GENERAL ACCESS MODE)” on page 19 “PASSWORD 4 USER MENU (GENERAL ACCESS MODE)” on page 20 “PASSWORD 5 PIN MENU (GENERAL ACCESS MODE)” on page 20 “PROT USER PASSWORD MENU (GENERAL ACCESS MODE)”...
- Page 7 “BRUSH SETTINGS MENU (SETTINGS)” on page 25 “BRUSHMOTOR MENU (BRUSH SETTINGS)” on page 25 “DELAY RESET MENU (BRUSHES BRUSHMOTOR)” on page 26 “SPEED REDUCTION MENU (BRUSHES BRUSHMOTOR)” on page 26 “PRESSURE LEVEL MENU (BRUSHES BRUSHMOTOR)” on page 27 “PRESSURE RANGE MENU (BRUSHES BRUSHMOTOR)”...
- Page 8 ACTUATOR SETS BRUSHES BRUSHES “OPTIONAL SETTINGS MENU (SETTINGS)” on page 30 “BRUSH FUNCTION MENU (OPTIONAL SETTINGS)” on page 31 “DELAY RESET MENU (OPTIONAL BRUSH FUNCTION)” on page 31 “TRACTION SETTINGS MENU (SETTINGS)” on page 32 “SPEED SETS MENU (TRACTION SETS)” on page 32 “ACCELERATION RAMP #1 MENU (TRACTION...
- Page 9 “DECELERATION RAMP STOP MENU (TRACTION SPEED SETTINGS)” on page 35 “REVERSE RAMP #1 MENU (TRACTION SPEED SETTINGS)” on page 36 “REVERSE RAMP #2 MENU (TRACTION SPEED SETTINGS)” on page 36 “MAX FORWARD SPEED MENU (TRACTION SPEED SETTINGS)” on page 37 “MAX BACKWARD SPEED MENU (TRACTION SPEED...
- Page 10 “SPEED REF MENU (TRACTION SETTINGS)” on page 40 “MIN POSITION SIGNAL MENU (TRACTION SPEED REF)” on page 41 “MAX POSITION SIGNAL MENU (TRACTION SPEED REF)” on page 41 “DEAD BAND SIGNAL MENU (TRACTION SPEED REF)” on page 42 “MID SIGNAL MENU (TRACTION SPEED REF)”...
- Page 11 “MONITOR MODE MENU (SETTINGS)” on page 44 “MONITOR SETTINGS MENU (MONITOR MODE)” on page 45 ENGINEER PARS Page 11...
-
Page 12: Settings Menu
SETTINGS MENU Proceed as follows to view the “GENERAL MACHINE SETTINGS” menu: Sit on the driver’s seat. Press buttons (1) and (2) (Fig. 1) simultaneously. Keeping them pressed, switch on the machine by making a quarter turn clockwise with the key (1) (Fig.2). After a few seconds, the “ID CHECK”... - Page 13 N.B.: when navigating the configuration menu, all the machine functions, including traction, are deactivated. The following sub-menus can be selected on the Settings menu screen: GENERAL Used to view and/or change the general machine parameters. See “GENERAL SETTINGS SETS MENU (SETTINGS)” on page BRUSHES Used to view and/or change the parameters of the machine's sweeping head.
-
Page 14: General Settings Menu (Settings)
GENERAL SETTINGS MENU (SETTINGS) Proceed as follows to view the “GENERAL SETS” menu: -SETTINGS- Display the “SETTINGS MENU” menu. See “SETTINGS MENU” on page General Use the buttons to select the “GENERAL sets... SETTINGS” screen (see picture alongside), then press to confirm. -
Page 15: Language Selection Menu (General Main)
LANGUAGE SELECTION MENU (GENERAL MAIN) Proceed as follows to change the display language: General Display the “MAIN” menu, see “MAIN MENU (GENERAL SETS)” Main on page Language selection: Use the buttons to select the “LANGUAGE SELECTION” screen (see picture alongside). Use the buttons to select the control display language. -
Page 16: Display Brightness Menu (General Main)
DISPLAY BRIGHTNESS MENU (GENERAL MAIN) To adjust the display contrast, proceed as follows: General Main Display the “MAIN” menu, see “MAIN MENU (GENERAL SETS)” on page Display brightness: Use the buttons to select the “DISPLAY min:0 max:10 BRIGHTNESS” screen (see picture alongside). Use the buttons to adjust the control display brightness. -
Page 17: Custom Level Menu (General Battery)
Press to confirm. The following can be selected in the battery type selection menu: Pb60 Gel80 Gel60 Custom Pure Lead LiPo Pb80 N.B.: the standard battery type selected is Gel60. CUSTOM LEVEL MENU (GENERAL BATTERY) Proceed as follows to change the type of custom battery discharge curve: General Battery View the “BATTERY”... -
Page 18: Partial Hmr O Display Menu (General Hour Meter)
The following personalised selections can be made on the hour meter menu screen: PARTIAL HMR Used to change the type of partial hour meter shown on the control display. See “PARTIAL TO DISPLAY HMR O DISPLAY MENU (GENERAL HOUR METER)” on page RESET Used to reset the partial hour meter shown on the control display. -
Page 19: Access Mode Menu (General Sets)
The following can be selected in the partial hour meter type selection menu: no partial hour meter will be reset only the partial hour meter related to the machine's starter key will be reset only the partial hour meter related to the machine's traction motor will be reset only the partial hour meter related to the machine's brush motor will be reset only the partial hour meter related to the machine's suction motor will be reset all partial hour meters will be reset... -
Page 20: Password 4 User Menu (General Access Mode)
N.B.: the password set in the factory is 2234, the new password must be between 2000 and 2999. N.B.: the CUSTOMER level password makes it possible to change the parameters for the machine functions. PASSWORD 4 USER MENU (GENERAL ACCESS MODE) To change the level 4 password (User), proceed as follows: General AccessMode... -
Page 21: Prot User Password Menu (General Access Mode)
PROT USER PASSWORD MENU (GENERAL ACCESS MODE) To activate or deactivate the USER level password request, proceed as General follows: AccessMode Display the “ACCESS MODE” menu. See “ACCESS MODE Password prot User: MENU (GENERAL SETS)” on page min:0 max:1 Use the buttons to select the “PASSWORD PROT USER”... -
Page 22: Config Menu (General Sets)
CONFIG MENU (GENERAL SETS) Proceed as follows to view the “ACCESS MODE” menu: General View the “GENERAL SETTINGS” menu. See “GENERAL SETTINGS MENU (SETTINGS)” on page Config Use the buttons to select the “GENERAL Config” screen (see picture alongside), then press to confirm. -
Page 23: Anti-Collision Menu (General Config)
ANTI-COLLISION MENU (GENERAL CONFIG) To activate or deactivate the anti-collision system on the machine, General proceed as follows: Config Display the “CONFIG” menu. See “CONFIG MENU (GENERAL SETS)” on page Anticollision: Use the buttons to select the “ANTI-COLLISION” screen (see picture alongside). Use the buttons to choose whether or not to activate the anti-collision system on the machine. -
Page 24: Manual Op Enabling Menu (General Config)
MANUAL OP ENABLING MENU (GENERAL CONFIG) To activate or deactivate the MANUAL MODE working program, proceed General as follows: Config Display the “CONFIG” menu. See “CONFIG MENU (GENERAL Manual Op SETS)” on page Enable: Use the buttons to select the “MANUAL OP ENABLING”... -
Page 25: Brush Settings Menu (Settings)
BRUSH SETTINGS MENU (SETTINGS) Proceed as follows to view the “BRUSHES SETS” menu: -SETTINGS- Display the “SETTINGS MENU” menu. See “SETTINGS MENU” on page Brushes Use the buttons to select the “BRUSH SETTINGS” sets... screen (see picture alongside), then press to confirm. -
Page 26: Delay Reset Menu (Brushes Brushmotor)
DELAY RESET MENU (BRUSHES BRUSHMOTOR) Proceed as follows to change the “RESET DELAY” parameter in the brush Brushes motor menu: Brush Mot View the “BRUSHMOTOR” menu. See “BRUSHMOTOR MENU Reset delay: (BRUSH SETTINGS)” on page min:1 max:300 Use the buttons to select the “DELAY RESET” screen (see picture alongside). -
Page 27: Pressure Level Menu (Brushes Brushmotor)
PRESSURE LEVEL MENU (BRUSHES BRUSHMOTOR) Proceed as follows to change the “PRESSURE LEVEL” parameter in the Brushes brush motor menu: Brush Mot View the “BRUSHMOTOR” menu. See “BRUSHMOTOR MENU Pressure Lev. 1: (BRUSH SETTINGS)” on page min:10 max:40 Use the buttons to select the “PRESSURE LEVEL”... -
Page 28: Vacuum Settings Menu (Settings)
N.B.: the “PRESSURE RANGE” parameter is expressed in amperes (A). The numerical value is between a minimum of 1.0 and a maximum of 4.0, with increments of five tenths of a unit. N.B.: the “PRESSURE RANGE” parameter is factory set at 2.0. VACUUM SETTINGS MENU (SETTINGS) Proceed as follows to display the “VACUUM SETS”... -
Page 29: Vacuum Noise Level Menu (Vacuum Motor)
VACUUM NOISE LEVEL MENU (VACUUM MOTOR) To change the “VACUUM NOISE LEVEL” parameter in the Vacuum Motor Vacuum menu, proceed as follows: Vac. Motor View the “VACUUM MOTOR” menu. See “VAC. MOTOR MENU Vac. Noise Level 1: (VACUUM SETTINGS)” on page min:12 max:24 Use the... -
Page 30: Shake Motor Frequency Menu (Vacuum Shake Motor)
SHAKE MOTOR FREQUENCY MENU (VACUUM SHAKE MOTOR) To change the “SHAKE MOTOR FREQUENCY” parameter in the shake Vacuum motor menu, proceed as follows: Shake Motor View the “SHAKE MOTOR” menu. See “SHAKE MOTOR MENU Shake Motor Freq. 1: (VACUUM SETTINGS)” on page [min] min:5 max:60... -
Page 31: Brush Function Menu (Optional Settings)
BRUSH FUNCTION MENU (OPTIONAL SETTINGS) To view the “BRUSH FUNCTION” menu, proceed as follows: Optional View the “OPTIONAL SETTINGS” menu. See “OPTIONAL SETTINGS MENU (SETTINGS)” on page BrushFunc. Use the buttons to select the “Brush function” screen (see picture alongside), then press to confirm. -
Page 32: Traction Settings Menu (Settings)
TRACTION SETTINGS MENU (SETTINGS) <Proceed as follows to display the “TRACTION SETS” menu: -SETTINGS- Display the “SETTINGS MENU” menu. See “SETTINGS MENU” on page Traction Use the buttons to select the “TRACTION sets... SETTINGS” screen (see picture alongside), then press to confirm. -
Page 33: Acceleration Ramp #1 Menu (Traction Speed Settings)
Used to modify the time interval to switch from forward movement to reverse and vice REVERSE versa (work mode). See “REVERSE RAMP #2 MENU (TRACTION SPEED SETTINGS)” RAMP #2 on page FORWARD MAX Used to modify the maximum forward movement speed (transfer mode). See “MAX SPEED FORWARD SPEED MENU (TRACTION SPEED SETTINGS)”... -
Page 34: Acceleration Ramp #2 Menu (Traction Speed Settings)
ACCELERATION RAMP #2 MENU (TRACTION SPEED SETTINGS) To change the “ACCELERATION RAMP #2” parameter in the Speed Traction Settings menu, proceed as follows: Speed Sets Display the “SPEED SETS” menu. See “SPEED SETS MENU Acceleration Ramp #2: (TRACTION SETS)” on page min:0.5 max:5.0 Use the... -
Page 35: Deceleration Ramp #2 Menu (Traction Speed Settings)
DECELERATION RAMP #2 MENU (TRACTION SPEED SETTINGS) To change the “DECELERATION RAMP #2” parameter in the Speed Traction Settings menu, proceed as follows: Speed Sets Display the “SPEED SETS” menu. See “SPEED SETS MENU Deceleration Ramp #2: (TRACTION SETS)” on page min:0.3 max:5.0 Use the... -
Page 36: Reverse Ramp #1 Menu (Traction Speed Settings)
REVERSE RAMP #1 MENU (TRACTION SPEED SETTINGS) To change the “REVERSE RAMP #1” parameter in the Speed Settings Traction menu, proceed as follows: Speed Sets Display the “SPEED SETTINGS” menu. See “SPEED SETS Reverse Ramp #1: MENU (TRACTION SETS)” on page min:0.3 max:5.0 Use the... -
Page 37: Max Forward Speed Menu (Traction Speed Settings)
MAX FORWARD SPEED MENU (TRACTION SPEED SETTINGS) To change the “MAX FORWARD SPEED” parameter in the Speed Traction Settings menu, proceed as follows: Speed Sets Display the “SPEED SETTINGS” menu. See “SPEED SETS Forward Max Speed: MENU (TRACTION SETS)” on page min:50 max:100 Use the... -
Page 38: Minimum Speed Menu (Traction Speed Settings)
MINIMUM SPEED MENU (TRACTION SPEED SETTINGS) To change the “MINIMUM SPEED” parameter in the Speed Settings Traction menu, proceed as follows: Speed Sets Display the “SPEED SETS” menu. See “SPEED SETS MENU Minimum Speed: (TRACTION SETS)” on page min:0 max:100 Use the buttons to select the “MINIMUM SPEED”... -
Page 39: Mode1 Current Menu (Traction Speed Settings)
MODE1 CURRENT MENU (TRACTION SPEED SETTINGS) To change the “MODE1 CURRENT” parameter in the Speed Settings Traction menu, proceed as follows: Speed Sets Display the “SPEED SETS” menu. See “SPEED SETS MENU Mode1 Current: (TRACTION SETS)” on page min:10 max:100 Use the buttons to select the “MODE1 CURRENT”... -
Page 40: Speed Level Menu (Traction Speed Sets)
SPEED LEVEL MENU (TRACTION SPEED SETS) To change the “SPEED LEVEL” parameter in the Speed Settings menu, Traction proceed as follows: Speed Sets Display the “SPEED SETS” menu. See “SPEED SETS MENU Speed level #1/3: (TRACTION SETS)” on page min:10 max:100 Use the buttons to select the “SPEED LEVEL”... -
Page 41: Min Position Signal Menu (Traction Speed Ref)
MIN POSITION SIGNAL MENU (TRACTION SPEED REF) To change the “MIN POSITION SIGNAL” parameter in the Speed Ref Traction menu, proceed as follows: Speed Ref Display the “SPEED REF” menu. See “SPEED REF MENU Signal Min Position: (TRACTION SETTINGS)” on page min:0 max:10 Use the... -
Page 42: Dead Band Signal Menu (Traction Speed Ref)
DEAD BAND SIGNAL MENU (TRACTION SPEED REF) To change the “DEAD BAND SIGNAL” parameter in the Speed Ref menu, Traction proceed as follows: Speed Ref Display the “SPEED REF” menu. See “SPEED REF MENU Signal Dead Band: (TRACTION SETTINGS)” on page min:0 max:500 Use the... -
Page 43: Motor Settings Menu (Traction Settings)
MOTOR SETTINGS MENU (TRACTION SETTINGS) To view the“MOTOR SETTINGS” menu, proceed as follows: Traction View the “TRACTION SETTINGS” menu. See “TRACTION SETTINGS MENU (SETTINGS)” on page Motor Sets Use the buttons to select the “Speed settings” screen (see picture alongside), then press to confirm. -
Page 44: Boost Time Menu (Traction Motor Settings)
BOOST TIME MENU (TRACTION MOTOR SETTINGS) To change the “BOOST TIME” parameter in the Motor Settings menu, Traction proceed as follows: Motor Sets Display the “MOTOR SETTINGS” menu. See “MOTOR Boost Time: SETTINGS MENU (TRACTION SETTINGS)” on page min:0 max:20 Use the buttons to select the “BOOST TIME”... -
Page 45: Monitor Settings Menu (Monitor Mode)
MONITOR SETTINGS MENU (MONITOR MODE) To change the “MONITOR SETTINGS” parameter in the Monitor Mode Monitor Sets menu, proceed as follows: No Monitor View the “MOTOR SETTINGS” menu. See “MONITOR MODE MENU (SETTINGS)” on page [Sel.item to display] Use the buttons to select the “MONITOR SETTINGS”... - Page 46 N.B.: the control display will return to the work screen, but the previously selected parameter will be shown in place of the partial hour meter. N.B.: to quit the “MONITOR MODE” function, switch the machine off and then back on again. Page 46...
- Page 48 FIMAP S.p.A. Via Invalidi del Lavoro, 1 37059 S. Maria di Zevio (VR) Italy +39 045 6060491 - +39 045 6060440 service@fimap.com www.fimap.com...
Need help?
Do you have a question about the FSR7 PRO and is the answer not in the manual?
Questions and answers