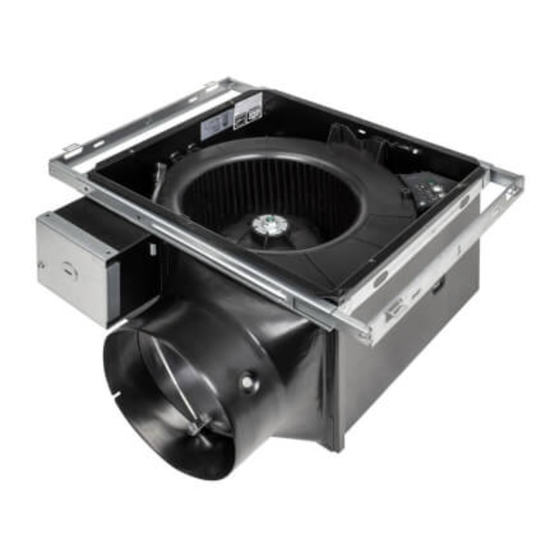
SystemAir fantech SC50-80-110 Installation Instructions Manual
Ceiling radiation damper for bathfan select
Hide thumbs
Also See for fantech SC50-80-110:
Advertisement
Available languages
Available languages
Quick Links
Installation Instructions — Ceiling
Radiation Damper for bathfan Select
(S) — EN/FR/ES
Warning
This product is intended for general
ventilation use only. If you have
questions, contact Fantech. To de-
crease the risk of fire, electric
shock, or injury, read and obey the
following warning instructions be-
fore you do work on the product:
• Because the product has rotating parts, exercise
safety precautions when installing, operating,
and maintaining the product.
• When installing the product, obey all applicable
local conditions and laws, and fire-rated con-
struction codes and standards.
• When cutting or drilling into walls or ceilings,
watch for electrical wiring and other hidden util-
ities to prevent damage.
• Before installing, servicing, troubleshooting, or
cleaning, set the product's electrical power sup-
ply source in the OFF position, and lock the serv-
ice disconnecting means. If the service
disconnecting means cannot be locked, attach a
large warning device to the service panel.
• Do not clean the product with chemicals that can
cause corrosion or water more than 60° Celsius
(140° Fahrenheit).
• Do not let unwanted objects enter the product.
• When removing the old product from the ceiling,
make sure that the product is held onto tightly to
prevent injury.
United States · 800.747.1762 — Canada · 800.565.3548
1
1.
Radiation Damper Casing, quantity 1
2.
Radiation Damper, quantity 1
3.
Cable Extender, quantity 1 (Not shown)
4.
Grille Springs, quantity 2 (Not shown)
Fan Family
Fan Models
• SC50–80–110
• SC50–80–110L
• S110–130–150
bathfan Select Radi-
• S110–130–150L
ation Dmpr
(#494046) — bath-
fan Select (S)
• SC110–130–
150H
• SC110–130–
150LH
• SC110–130–
150LHO
Note:
This radiation damper is UL classified for use in
up to 3 hour rated floor/roof ceiling designs.
Note:
Before this product is mounted, make sure all per-
sonnel knows that installing the radiation damper
will increase the size of this product. Adjust how
this product is installed as specified in the appli-
cable procedure.
1 (3)
2
Model
Numbers
• #484313
• #484314
• #484315
• #484316
• #484317
• #484318
• #484319
2023-07-18
484380 - 004
Advertisement

Summary of Contents for SystemAir fantech SC50-80-110
- Page 1 1 (3) Installation Instructions — Ceiling Radiation Damper for bathfan Select (S) — EN/FR/ES Warning This product is intended for general ventilation use only. If you have questions, contact Fantech. To de- Radiation Damper Casing, quantity 1 crease the risk of fire, electric Radiation Damper, quantity 1 shock, or injury, read and obey the Cable Extender, quantity 1 (Not shown)
- Page 2 2 (3) 4 Remove the (4) screws that attach the radiation Screw Hole damper to the radiation damper casing.¹ Screw 5 Remove the radiation damper from the radiation damper casing.¹ To Install the Radiation Damper to the bathfan Select (S) models 6 Open the cable slot on the corner of the radia- tion damper casing.¹...
- Page 3 3 (3) 12 Remove and discard (2) attached grille springs from the ceiling fan grille assembly. 13 Using (2) grille springs included with the damper assembly, attach (2) grille springs into the cor- rect holes of the ceiling fan grille. 14 Correctly connect cables from the ceiling fan grille to the exhaust fan.¹...
- Page 5 1 (3) Instructions d'installation – volet antirayonnement au plafond pour bathfan Select (S) — EN/FR/ES Avertissement Ce produit est destiné à une utilisa- tion de ventilation générale unique- ment. Si vous avez des questions, Caisson du volet antirayonnement, quantité 1 contactez Fantech.
- Page 6 2 (3) 4 Retirez les (4) vis qui fixent le volet antirayonne- Trou de vis ment au caisson du volet antirayonnement. 5 Retirez le volet antirayonnement du caisson du volet antirayonnement.¹ Pour installer le volet antirayonnement sur les modèles bathfan Select (S) 6 Ouvrez la fente du câble dans l'angle du caisson du volet antirayonnement.¹...
- Page 7 3 (3) 12 Déposer et mettre au rebut (2) les ressorts de grille fixés provenant de l'ensemble grille du ventilateur de plafond. 13 À l'aide des (2) ressorts de grille fournis avec l'ensemble volet, fixez les (2) ressorts de grille dans les trous appropriés de la grille du ventila- teur de plafond.
- Page 9 1 (3) Instrucciones de instalación: amortiguador de radiación de techo para bathfan Select (S) — EN/FR/ES Advertencia Este producto solo está previsto para usar como ventilación general. Si tiene alguna duda, póngase en Envolvente del amortiguador de radiación, cantidad 1 contacto con Fantech.
- Page 10 2 (3) 4 Retirar los (4) tornillos que fijan el amortiguador Agujero para tornillo de radiación a su envolvente. Tornillo 5 Retirar el amortiguador de radiación de su envolvente.¹ Instalación del amortiguador de radiación en los modelos bathfan Select (S). 6 Abrir la salida para cables que está...
- Page 11 3 (3) 12 Retirar y desechar (2) muelles de rejilla del con- junto de la rejilla del ventilador de techo. 13 Usar (2) muelles de rejilla que se incluyen con el conjunto del amortiguador y fijar estos (2) muelles de rejilla en los agujeros correctos de la rejilla del ventilador de techo.


Need help?
Do you have a question about the fantech SC50-80-110 and is the answer not in the manual?
Questions and answers