
Subscribe to Our Youtube Channel
Related Manuals for NoiseKen EPS-02Hv2


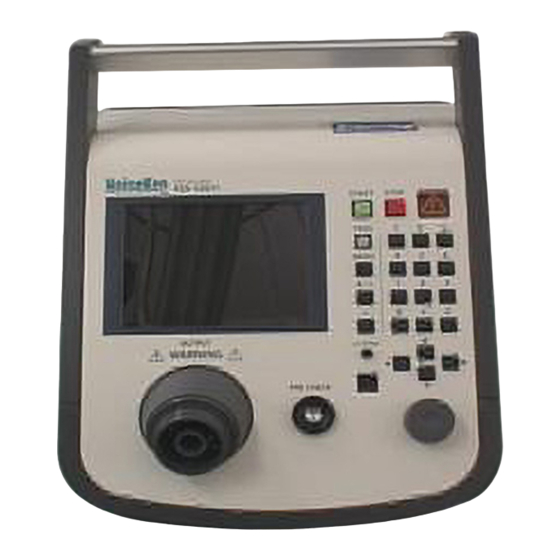
Summary of Contents for NoiseKen EPS-02Hv2
- Page 1 INSTRUCTION MANUAL Space-Magnetic Field Visualization System EPS-02Hv2 MODEL NOISE LABORATORY CO., LTD. Edition 2.00 AEA00083-00E-1...
- Page 2 NoiseKen or a party designated by NoiseKen. Regardless of the above, NoiseKen will not be liable for any test results obtained using this product or for its •...
-
Page 3: Software Licensing Terms
NoiseKen, these shall be followed by the Customer.) 8. Disclaimer NoiseKen and its dealers and affiliates will not be liable for any customer damages arising from the use of this software or for claims of damages by third parties against customers except in the case of intentional or gross negligence by NoiseKen, its dealer, or affiliates. -
Page 4: Important Safety Precautions
2. IMPORTANT SAFETY PRECAUTIONS This software performs visualization of magnetic field emissions in space. Important information for safe operation when performing visualization using this software is provided below, and so be sure to read it carefully before use. Also, be sure to carefully read this manual and the instruction manual for each device to be used before using this software. -
Page 5: Item Check List
A: Web camera ・ Main part ································································ 1 ・ Warranty ································································ 1 B: USB extension cable (2 m) ··············································· 1 C: Setup media (EPS-02Hv2) ··············································· 1 D: USB protect key ····························································· 1 E: Camera tripod ・ Main part ································································ 1 ・... -
Page 6: Introduction
4. Introduction Thank you for purchasing the EPS-02Hv2 Space-Magnetic Field Visualization System. Before using the EPS-02Hv2, be sure to carefully read this manual to ensure that you maximize its performance when operating the EPS-02Hv2. This User Guide is provided to ensure that people who follow the operating procedures and safety information can safely use the EPS-02Hv2 and maximize its performance. -
Page 7: Table Of Contents
4-1.Features ····················································································································· 4 5. CONTENTS ........................ 5 6. OVERVIEW ........................ 7 6-1.Notation Used in This Guide ···························································································· 7 6-2.EPS-02Hv2 Features ····································································································· 7 6-3.Measurement Principle ··································································································· 8 7. SYSTEM CONFIGURATION DIAGRAM ..............10 7-1.System Configuration Diagram ························································································ 10 7-2.Functions of Each Device ······························································································ 11 8. - Page 8 5.Contents Unit ................................ 21 MEASUREMENT RANGE ........................22 SLOW FUNCTION ..........................22 9-4.New Measurement (Performing Measurement) ·································································· 23 Performing Measurement........................23 Deleting Measurement Data ......................... 24 Recapturing Camera Image ........................25 9-5.Measurement Data Analysis ··························································································· 26 Measurement Data ..........................26 Auto Distribution ............................
-
Page 9: Overview
Indicates a setting restriction. Indicates that you must check before usage. 【 】 Indicates information inscribed on the panel of this testing device. 6-2. EPS-02Hv2 Features * Measurement sensor is detected from the image for recognizing the measurement location The measurement object and measurement sensor are captured by a camera, and the measurement sensor is found within the image for identifying the measurement location. -
Page 10: 6-3.Measurement Principle
6.Overview 6-3. Measurement Principle The EPS-02 system performs two main operations for enabling visualization of the electromagnetic field. First, it performs image recognition that identifies the measurement sensor location from the recording image. Second, it provides a color-coded distribution on the image indicating the strength of the signals detected by the measurement sensor. - Page 11 6.Overview Protection (ICNIRP), and they are available in a 1998 version and 2010 version. Most of the current restrictions and standards for human health protection are based on these guidelines. These guidelines are available for download free of charge from the websites below. http://www.icnirp.de/ ICNIRP website http://www.jeic-emf.jp/social/icnipr.html...
-
Page 12: System Configuration Diagram
The FT3470-91 magnetic field measuring instrument and FT3471-91 measurement sensor by Hioki are used. The magnetic field measuring instrument was specially adjusted for this system, and so its specifications are different from the typical product. For details, please contact NoiseKen or Hioki. -
Page 13: 7-2.Functions Of Each Device
7.System Configuration Diagram 7-2. Functions of Each Device ① Web camera This is a general-purpose web camera. The measurement object is displayed and transferred to the PC. The web camera is connected to the PC by a USB cable. If necessary, the connection can be extended by a USB extension cable. -
Page 14: Preparation
8-1. System Backup NoiseKen provides an optional service (additional charges apply) for installing the EPS-02Hv2 program in your PC before providing the program, but if the program is erased, install it from the supplied setup media. -
Page 15: 8-3.System Connections
8.Preparation 8-3. System Connections ① Connect the web camera to the PC using the USB cable. Any commercially-available USB cable can be used, but it must be a cable that supports the USB 2.0 standards. Be aware that the USB 2.0 standards limit the cables to a maximum of 1 extension and maximum length of 5 m. -
Page 16: Operation Procedure
9. Operation Procedure 9-1. Starting and Exiting the Software Starting the Software To start the software, double-click the EPS-02Hv2 shortcut icon on the desktop. Double-click Screen displayed immediately after the software is started Exiting the Software To exit the software, click the close button on the right end of the title bar or click Exit from the File menu. -
Page 17: 9-2.Image Recognition Settings
9.Operation Procedure 9-2. Image Recognition Settings Image Recognition Setting Dialog Box To open the Image Recognition Setting dialog box, click Image Recognition Setting from the Set menu. Click Image Recognition Setting dialog box Adjust the camera position so that the measurement object can be captured by the camera. Take the following conditions into account during adjustment. -
Page 18: Device Filters
9.Operation Procedure Device Filters To open the Webcam Properties dialog box, click the Device Filters button. In the dialog box, the camera properties, such as zoom, white balance, and anti-flicker, can be set. Click Zoom White balance Anti Flicker Video Proc Amp screen Camera Control screen ... -
Page 19: Other Settings
9.Operation Procedure Other Settings To open the Other Settings dialog box, click the Other Settings button. In the dialog box, the color space / compression and camera processing can be set. Click Other Settings dialog box (1) Color Space / Compression The color space / compression of the camera can be changed. -
Page 20: Image Recognition Setting
9.Operation Procedure Image Recognition Setting Adjust the three parameters, Hue, Saturation, and Value, in the Image Processing Setting so that the color of the magnetic sensor can be recognized. The binarized image on the right side can be changed by moving the slider of each parameter. Hue: Sets the hue, such as red, blue, or yellow Saturation: Sets the intensity and purity of a hue Value: Sets the lightness of a color. -
Page 21: 9-3.New Measurement (Setting Measurement Conditions)
9.Operation Procedure 9-3. New Measurement (Setting Measurement Conditions) View Window To open a View window, click New Measurement from the File menu or click the New Measurement button on the toolbar. Whenever a View window is newly opened, it is numbered as follows: View1, View2, View3 ... These names can be changed freely when the file is saved after measurement. -
Page 22: Condition Tab
9.Operation Procedure Condition Tab In the Condition tab, set the image division size, properties for the magnetic field measuring instrument, and other conditions. Condition items can be set only before measurement. After completion of measurement, all items are displayed but cannot be changed. Conditions (before measurement) Conditions (after measurement) Image Division Size... -
Page 23: Capturing
9.Operation Procedure Capturing How to store spectrum data at the same measurement point (the same square of the grid) can be selected from SINGLE, FREE RUN, or PEAK HOLD. SINGLE: done only one time FREE RUN: overwritten and the latest data is retained PEAK HOLD: overwritten and the measurement data with the maximum value is retained Measurement Mode Selectable between two measurement modes: Magnetic Flux Density (10 Hz to 400 kHz/10 Hz to 2... -
Page 24: Measurement Range
9.Operation Procedure MEASUREMENT RANGE Select either AUTO or Manual range. Different ranges are provided according to the selected measurement unit. Select an appropriate range in Manual range setting. In AUTO range, the system automatically selects the most appropriate range. Normally, select the AUTO range. Measurement Range [T] Measurement Range [G] Measurement Range [A/m]... -
Page 25: 9-4.New Measurement (Performing Measurement)
9.Operation Procedure 9-4. New Measurement (Performing Measurement) Performing Measurement To start measurement, click the START button in the upper right of the View window. During measurement, the PAUSE and STOP buttons are enabled. To suspend measurement, click the PAUSE button to suspend measurement, and to finish measurement, the STOP button. -
Page 26: Deleting Measurement Data
9.Operation Procedure The EPS-02Hv2 software sends a command for data in-take to the Hioki magnetic field meter immediately after the sensor is recognized. After completion of data in-take, the software recognizes the sensor position again, and only when the sensor is found at the same point (position) where it was placed at the start of data in-take, the data is stored. -
Page 27: Recapturing Camera Image
9.Operation Procedure Recapturing Camera Image If the STOP button is clicked after completion of measurement, the camera image switches from video to still image. If the still camera image includes an unnecessary object, such as the sensor, the camera image can be recaptured. Click Recapture Camera Image from the Window menu. -
Page 28: 9-5.Measurement Data Analysis
9.Operation Procedure 9-5. Measurement Data Analysis Measurement Data After completion of measurement, a square pointer will be displayed on the camera image. Dragging this pointer to the desired point can display the measurement data at the relevant point. The pointer automatically moves to the highest level point immediately after measurement is complete or the file is opened. -
Page 29: Auto Distribution
9.Operation Procedure Auto Distribution When the Auto Distribution checkbox is checked, the color map is made according to automatic distribution between the highest and lowest intensity. Immediately after measurement is complete or the file is opened, the Auto Distribution checkbox is always checked. To change the Upper/Lower Value to desired values, uncheck the Auto Distribution checkbox and click the Set button. -
Page 30: Interpolation
9.Operation Procedure Interpolation When the Interpolation checkbox is checked, the map data image is smoothly displayed by interpolation of the boundaries between divisions. Without interpolation With interpolation AXIS FOR MEASUREMENT Select the desired axis for measurement. Intensity distribution map is shown according to the selected axis. . -
Page 31: Transmittance
9.Operation Procedure Transmittance The transparency of the color map can be changed. When Transmittance is set to 100%, the map is invisible and only the camera image will be displayed. When Transmittance is set to 0%, the camera image is invisible at the points where data exist. -
Page 32: Matching Map View Data
9.Operation Procedure Matching Map View Data The same setting can be applied to all maps on the View windows that are currently open. When Match Map View Data in the Window menu is clicked, the map view settings of the last active View window will be applied to all of open View windows. -
Page 33: Exporting Measurement Data
9.Operation Procedure Exporting Measurement Data Measurement data can be exported to an external file. Select Export from the File menu, and select Map Data. The Save As dialog box will appear. Click In Save as type on the Save As dialog box, either CSV File or Bitmap File can be specified. Map Data ... -
Page 34: Setup
Run EPS-02Hv2_En.msi to start the installation process. Then, perform installation by following the instructions from the installer. * If a previous version of EPS-02Hv2 software is already installed, uninstall it before performing the installation. 2) Use of the supplied USB protect key The supplied protect key is not required for checking the measurement data. -
Page 35: Specifications
11. Specifications 11-1. Specifications Sensor Measurement Unit (FT3470-91 by Hioki) Item Specifications Measurement 10 Hz to 400 kHz frequency Sensor Loop coil Measurement axes X, Y, Z Rated magnetic flux 2 mT density Magnetic flux density: 10 Hz to 400 kHz, 10 Hz to 2 kHz, 2 kHz to 400 Measurement mode Exposure levels: General Public / Occupational Magnetic flux density: 2 μT / 20 μT / 200 μT / 2 mT... -
Page 36: 11-2.System Requirements
11.Specifications 11-2. System Requirements Microsoft Windows 10 (Japanese / English version) Microsoft Windows 11 (Japanese / English version) Dual Core 2.4 GHz or faster recommended Memory 8 GB or more recommended Storage 5 GB or more Display 1366 × 768 dots or more 1920 ×... -
Page 37: Warranty
If the customer incurs any damages due to the repair service or breakdown of the NoiseKen product purchased by the customer, the liability of compensation for damages by NoiseKen to the customer is limited to the amount paid by the customer for the applicable NoiseKen product or the applicable non-NoiseKen product (product by other manufacturer) only if these damages are due to the willful intent or negligence by NoiseKen. - Page 38 12.Warranty Product Warranty For breakdowns that occur within the product warranty period, NoiseKen will repair or replace the product free of charge. The extent and content of the repair work for the equipment will be determined by NoiseKen. This product warranty is valid in Japan only.
- Page 39 This warranty applies to the software produced by NoiseKen and its update files. Free Support If a fault occurs in the system as a result of this software by NoiseKen, NoiseKen will provide support free of charge through software fixes and updates or other means only within the warranty period.
-
Page 40: Noise Laboratory Support Network
13. NOISE LABORATORY SUPPORT NETWORK If a symptom which seems a trouble is found, check the symptom, software version, model name of connected device, and serial number, and inform this information to Noise Laboratory or your nearest sales agent of Noise Laboratory. - Page 41 Note...
- Page 42 NOISE LABORATORY CO., LTD. 1-4-4, Chiyoda, Chuo-ku, Sagamihara City, Kanagawa Pref., 252-0237, Japan TEL: +81-(0)42-712-2051 FAX: +81-(0)42-712-2050 URL: http://www.noiseken.co.jp Printed in Japan...
Need help?
Do you have a question about the EPS-02Hv2 and is the answer not in the manual?
Questions and answers