
Related Manuals for HOMCOM A91-176


Summary of Contents for HOMCOM A91-176
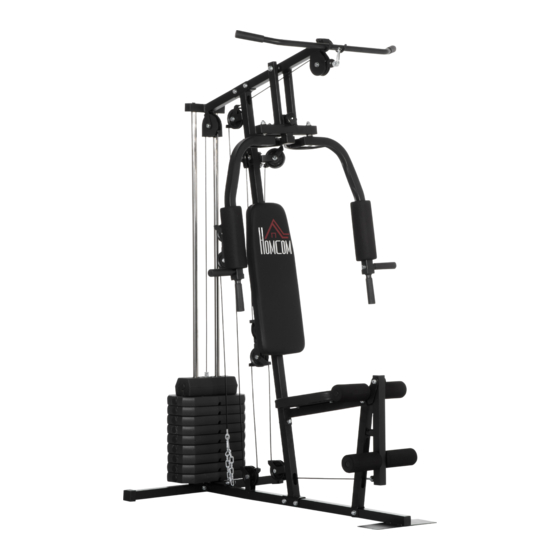
- Page 1 INald011V01_IT_EN A91-176 100KG Max 100kg IMPORTANT, RETAIN FOR FUTURE REFERENCE: READ CAREFULLY ASSEMBLY & INSTRUCTION MANUAL...
- Page 2 PACKING DETALS:TOTAL 3 BOXES BOX-1/3 PARTS PARTS PARTS Hardware Kit BOX-2/3 BOX-3/3 PARTS PARTS...
-
Page 3: Table Of Contents
INDICE • Importanti Istruzioni di Sicurezza ________________________________ • Lista di Controllo Pre-Montaggio ______________________________________ • Lista Viteria & Strumenti ________________________________________ • Lista Parti ____________________________________________________ • Vista Esplosa ___________________________________________ • Step di Assemblaggio ______________________________________________ • Istruzioni sull’Allenamento __________________________________________ • Consigli & Tecniche per il Fitness ________________________________________________ •... -
Page 4: Importanti Istruzioni Di Sicurezza
IMPORTANTI ISTRUZIONI DI SICUREZZA L'apparecchiatura è destinata esclusivamente all'uso domestico e non è destinata all'uso commerciale, istituzionale e/o in studio medico. AVVERTENZE SULLA SALUTE • Prima di iniziare qualsiasi esercizio o programma di allenamento è necessario consultare il proprio medico personale per verificare se si ha bisogno di un esame fisico completo. Ciò... - Page 5 ACCESSO CONTROLLATO •Soozier consiglia di utilizzare tutte le attrezzature ginniche in un'area sorvegliata. Si consiglia di posizionare l’attrezzatura in un'area ad accesso controllato. Il controllo è responsabilità del proprietario. Tenere i bambini lontani da tutte le attrezzature ginniche. •I genitori o altri adulti incaricati della supervisione devono sorvegliare strettamente i bam- bini se l'attrezzatura viene utilizzata in loro presenza.
-
Page 6: Lista Di Controllo Pre-Montaggio
LISTA DI CONTROLLO PRE-MONTAGGIO Barra trazioni Butterfly Arms per Pettorali Tubi Guida Pesi Cuscinetto dello Schienale Piastre Pesi Cuscinetto del Sedile Telaio Base Posteriore Supporto Estensione Gambe Telaio Base Anteriore Parti del Corpo Allenate Petto, spalle, schiena, gambe e braccia Pec deck da seduti, Chest press da seduti, Leg extension da seduti, Curl da in piedi su una gamba dei muscoli posteriori della coscia, Lat in basso, Lat in basso con presa stretta inversa, Lat all’indietro a braccia dritte, Spinta tricipiti in basso... -
Page 7: Lista Viteria & Strumenti
VITERIA & LISTA STRUMENTI ISTRUZIONI PER L’ASSEMBLAGGIO • Prima di iniziare l'assemblaggio, controllare la confezione della viteria per assicurarsi che tutte le parti siano incluse. •Ogni step ha il proprio pacchetto di bulloni e dadi (leggere l'adesivo che indica per quale pas- saggio va utilizzato un dato pacchetto). - Page 8 LISTA DE HERRAMIENTAS Y HARDWARE TUBO TUBO SPUGNA (2 PZ) IMPUGNATURA (2 BARRA #20 INVERSA A U (1 TRAZIONI (1 PZ) PERNO MORSA #22 PULEGGIA A U DADO SELEZIONE PESO (1 SINGOLA (1 PZ) MANOPOLA (1 PZ) PULEGGIA (2 PZ) ANELLO #26 RONDELLA IN ASTA...
- Page 9 LISTA DE HERRAMIENTAS Y HARDWARE PRE-ASSEMBLATO PRE-ASSEMBLATO PRE-ASSEMBLATO PRE-ASSEMBLATO PERNO PERNO TAPPO PERNO ESTREMITA’ ESTREMITA’ QUADRATO ESTREMITA’ QUADRATA QUADRATA MM) (3 PZ) QUADRATA (20 X 40 MM) (2 PZ) (8 PZ) (2 PZ) PRE-ASSEMBLATO TAPPO #53 PROTEZIONE PROTEZIONE CONCAVO PERNO IN PLASTICA (2 PZ) PULEGGIA (2 PZ) (38 X Ø26) (2 PZ)
-
Page 10: Lista Parti
LISTA PARTI No. Descrizione Qta’ No. Descrizione Qta’ Telaio Base Posteriore Boccola Lubrificata Grande Tappo Del Selettore Del Peso Telaio Base Anteriore PRE-ASSEMBLATO Tubo Guida Pesi Chiave A Brugola PRE-ASSEMBLATO Staffa Di Supporto Anteriore Catena Pre-Assemblato Asta Di Selezione Pesi Paraurti Supporto Estensione Gambe Boccola Dell’Asta Di Selezione... -
Page 11: Vista Esplosa
VISTA ESPLOSA... -
Page 12: Step Di Assemblaggio
STEP DI ASSEMBLAGGIO 1. PREPARAZIONE •Prima di montare, assicurarsi di disporre di abbastanza spazio intorno all’attrezzatura. Step1 •Utilizzare le parti e la viteria forniti per l'assemblaggio. •Prima del montaggio, verificare che siano state fornite tutte le parti richieste come da vista esplosa nella pagina a fianco. - Page 13 Step3 STEP DI ASSEMBLAGGIO PASSO 3: PASSO 3 Fissare la Staffa di Supporto (8) al Telaio Base Anteriore (20) usando 2 Bulloni Esagonali (58), 4 Rondelle (67) e 2 Dadi in Nylon (70). Fissare i 2 Morse Puleggia Singole (21) alla Staffa di Supporto (8) usando 2 Bulloni Esagonali (58), 4 Rondelle (67) e 2 Dadi in Nylon (70).
- Page 14 Step5 STEP DI ASSEMBLAGGIO PASSO 5: PASSO 5 Fissare la Traversa Superiore (9) ai Tubi Guida Pesi (3) usando 2 Bulloni (72). Fissare la Traversa Superiore (9) alla Staffa di Supporto (8) usando 2 Bulloni Esagonali (58), 4 Rondelle (67) e 2 Dadi in Nylon (70). Procedere a connettere il Supporto di Estensione Gambe (6) e il Supporto Base Sedile (7) usando 1 Bullone Esagonale (58), 2 Rondelle (67) e 1 Dado in...
- Page 15 STEP DI ASSEMBLAGGIO PASSO 7: PASSO 7 Fissare la Barra di Spinta (10) alla Traversa Superiore (9) usando 1 Bullone Esagonale (56), 2 Rondelle (66) e 1 Dado in Nylon (69). Si prega di notare che 2 Boccole Lubrificate Piccole piccole (38) sono state pre-assemblate sulla traversa superiore (9) e 4 Boccole Lubrifi- cate Grandi (39) nella Barra di...
- Page 16 STEP DI ASSEMBLAGGIO PROCESSO PASSO DOPO PASSO PER IL FISSAGGIO DELLE PULEGGE E DEI CAVI FILETTATICADOSCÂBLES PASSO 8 PASSO 8: CAVI 35 Installare il sistema di pulegge: Step 1 1.installare la Puleggia (32) sulla Traversa Superiore (9) con 1 Bullone Esagonale (60), 2 Rondelle (67) e 1 Dado in Nylon (70).
- Page 17 STEP DI ASSEMBLAGGIO PASSO 9 PASSO 9: CAVO 37 Installare il sistema di pulegge: 1.Fissare la Puleggia (32) e 2 Ganci (55) sull’Inversa a U (20) con 1 Bullone Esagonale (59), 2 Rondelle Step 2 (67) e 1 Dado in Nylon (70). 2.
- Page 18 STEP DI ASSEMBLAGGIO PASSO 10 PASSO 10: CAVO 36 Installare il sistema di pulegge: 1. Fissare 1 estremità del Cavo 36 al Supporto Estensione Gamba (6) con 1 Bullone Esagonale (63), 2 Rondelle (68) e 1 Dado in nylon (71) e infilare il cavo sotto la puleggia (J). Step 3 2.Fissare la Puleggia (32) e 2 Ganci Puleggia (55) sul Telaio Base Anteriore (2) con 1 Bullone Esagonale...
-
Page 19: Istruzioni Sull'allenamento
ISTRUZIONI SULL’ALLENAMENTO L’uso dellla vostra attrezzatura vi apporterà innumerevoli benefici, migliorando la vostra forma fisica, il tono muscolare e, associata ad un regime calorico controllato, vi aiuterà a perdere peso. Fase di riscaldamento Questa fase vi aiuterà a migliorare la circolazione del sangue nell’organismo e a far lavorare bene i muscoli. -
Page 20: Consigli & Tecniche Per Il Fitness
CONSIGLI & TECNICHE PER IL FITNESS ESERCIZIO AEROBICO Con esercizio aerobico si intende qualsiasi attività prolungata che porta ossigeno ai mus- coli attraverso il cuore e i polmoni. L'esercizio aerobico migliora la forma fisica dei polmoni e del cuore, il muscolo più importante del vostro corpo. L’esercizio aerobico deriva da qualsiasi attività... -
Page 21: Linee Guida Per L'allenamento
LINEE GUIDA PER L’ALLENAMENTO Il modo in cui si inizia un programma di allenamento dipende dalle proprie condizioni fisiche. Se siete stati inattivi per diversi anni o siete gravemente sovrappeso, dovete iniz- iare lentamente e aumentare il tempo delle sessioni di allenamento pochi minuti alla volta. Inizialmente, potreste essere in grado di allenarvi solo per pochi minuti nella vostra zona target, tuttavia, la vostra capacità... -
Page 22: Riscaldamento & Defaticamento
RISCALDAMENTO & DEFATICAMENTO LINEE GUIDA PER L’ALLENAMENTO Ogni sessione di allenamento dovrebbe includere le seguenti 3 sezioni: 1.RISCALDAMENTO: da 5 a 10 minuti di allungamento ed esercizi leggeri. Un adeguato riscaldamento aumenta la temperatura corporea, la frequenza cardiaca e facilita la circolazione in preparazione all’allenamento. -
Page 23: Manutenzione
MANUTENZIONI PULIZIA La Palestra Domestica attrezzatura può essere pulita passando un panno morbido e con un detergente delicato. Non utilizzare detergenti abrasivi o solventi sulle parti in plastica. Si prega di eliminare il sudore dalla Palestra Domestica attrezzatura dopo ogni sessione di allenamento. - Page 24 INDEX • Important Safety Instructions ________________________________ • Pre Assembly Check List ______________________________________ • Hardware & Tools List ________________________________________ • Parts List ____________________________________________________ • Exploded Drawing ___________________________________________ • Assembly Steps ______________________________________________ • Exercise Instructions __________________________________________ • Fitness Tips & Techniques ________________________________________________ •...
- Page 25 IMPORTANT SAFETY INSTRUCTIONS The equipment is only intended for home use and is not intended for commercial, institutional and/or studio facilities use. HEALTH WARNING • Before starting any exercise or conditioning program you should consult with your personal physician to see if you require a complete physical exam. This is especially important if you are inactive, pregnant or suffer from any illness.
- Page 26 INSPECTION • Do not use or permit use of any equipment that is damaged, or has worn or broken parts. For all Trojan equipment use only replacement parts supplied by Soozier. • Always make sure that all nuts and bolts are tightened prior to each use. •...
- Page 27 PRE ASSEMBLY CHECK LIST Lateral Bar Arms Weight Guide Tubes Back Cushion Weight Seat Plates Cushion Rear Base Frame Extension Frame Front Base Frame Exercise Parts Chest, Shoulders, Back, Legs and Arms Seated pec deck, Seated chest press, Seated leg extensions, Standing single leg hamstring curls, Lat pull downs, Narrow reverse grip lat pull down, Exercise Functions Straight arm lat pull backs, Reverse grip triceps push downs, Seated triceps...
- Page 28 HARDWARE & TOOLS LIST INSTRUCTIONS FOR ASSEMBLY • Before you start to assemble, please check the hardware packaging to make sure all parts are included. • Each step has its own packet of bolts and nuts (look for sticker indicating what step the packet will be used for).
- Page 29 HARDWARE & TOOLS LIST #17 FOAM TUBE (2 PCS) #18 HANDLE TUBE (2 PCS) #19 LAT BAR (1 PC) #20 REVERSE U (1 PC) #21 SINGLE PULLEY BLOCK (2 PCS) #22 PULLEY U (1 PC) #23 PLUM BLOSSOM NUT (1 PC) #24 WEIGHT SELECTOR PIN (1 PC) #25 RUBBER RING ( 2 PCS) #27 SELECTOR SHAFT PIN (1 PC)
- Page 30 HARDWARE & TOOLS LIST #59 HEX BOLT (M10 X 50 MM) #62 HEX BOLT (M8 X 50 MM) #61 HEX BOLT (M10 X 20 MM) #60 HEX BOLT (M10 X 45 MM) ( 9 PCS) ( 2 PCS) ( 2 PCS) ( 2 PCS) #65 HEX BOLT (M8 X 15 MM) #63 HEX BOLT (M8 X 40 MM) ( 2 PCS)
- Page 31 PARTS LIST Description Description Rear Base Frame Oil Bushing Big Selector Shaft End Cap Front Base Frame Weight Guide Tube Allen Key Front Support Frame Chain Selector Shaft Bumper Leg Extension Frame Selector Shaft Bushing Seat Base Frame Round Cap (Ø25mm) Support Frame Handle Grip Square End Plug (38 mm)
- Page 32 EXPLODED DRAWING...
- Page 33 ASSEMBLY STEPS Step1 1. PREPARATION • Before assembling make sure that you will have enough space around the item. • Use the supplied parts and hardware for the assembly. • Before assembling please check whether all the required parts have been supplied as per the exploded drawing on the opposite page.
- Page 34 Step3 ASSEMBLY STEPS STEP 3: STEP 3 Attach the Support Frame (8) to the Front Base Frame (20) using 2 Hex Bolts (58), 4 Washers (67) and 2 Nylon Nuts (70). Attach the 2 Single Pulley Blocks (21) to the Support Frame (8) using 2 Hex Bolts (58), 4 Washers (67) and 2 Nylon Nuts (70).
- Page 35 Step5 ASSEMBLY STEPS STEP 5: STEP 5 Attach the Upper Cross Beam (9) to the Weight Guide Tubes (3) using 2 Bolts (72). Attach the Upper Cross Beam (9) to the Support Frame (8) using 2 Hex Bolts (58), 4 Washers (67) and 2 Nylon Nuts (70).
- Page 36 ASSEMBLY STEPS STEP 7: STEP 7 Attach the Press Bar (10) to the Upper Cross Beam (9) using 1 Hex Bolt (56), 2 Washers (66) and 1 Nylon Nut (69). Please note that 2 Small Oil Bush- ings (38) have been pre-assembled onto the Upper Cross Beam (9) as well as 4 Big Oil Bushings (39) into the Press Bar (10).
- Page 37 ASSEMBLY STEPS STEP-BY-STEP PROCESS FOR ATTACHING THE PULLEYS & THREADING CABLES STEP 8 STEP 8: CABLE 35 Step 1 Installing the pulley system: 1. Install Pulley (32) A onto the Upper Cross Beam (9) using 1 Hex Bolt (60), 2 Washers (67) and 1 Nylon Nut (70).
- Page 38 COMPUTER FUNCTIONS STEP 9 STEP 9: CABLE 37 Installing the pulley system: 1. Install Pulley (32) F and 2 Pulley Hooks (55) to the Reverse U (20) using 1 Hex Bolt (59), 2 Washers (67) Step 2 and 1 Nylon Nut (70). 2.
- Page 39 EXERCISE INSTRUCTIONS STEP 10 STEP 10: CABLE 36 Installing the pulley system: 1. Attach 1 open side of Cable 36 to the Leg Extension Frame (6) using 1 Hex Bolt (63), 2 Washers (68) and 1 Nylon nut (71) and thread cable under Pulley (J). Step 3 2.
- Page 40 EXERCISE INSTRUCTIONS Using your machine provides you with several benefits, it will improve your physical fitness, tone muscle and in conjunction with calorie controlled diet help you lose weight. THE WARM UP PHASE This stage helps get the blood flowing around the body and the muscles working properly. It will also reduce the risk of cramp and muscle injury.
- Page 41 FITNESS TIPS & TECHNIQUES AEROBIC EXERCISE Aerobic exercise is any sustained activity that sends oxygen to your muscles via your heart and lungs. Aerobic exercise improves the fitness of your lungs and heart − your body’s most import- ant muscle. Aerobic exercise fitness is promoted by any activity that uses your large mus- cles (arms, legs, or buttock, for example).
- Page 42 CONDITIONING GUIDELINES How you begin your exercise program depends on your physical condition. If you have been inactive for several years, or are severely overweight, you must start slowly and increase your time on the equipment, a few minutes per workout. Initially, you may be able to exercise only for a few minutes in your target zone, however, your aerobic fitness will improve over the next six to eight weeks.
- Page 43 WARM UP & COOL DOWN WORKOUT GUIDELINES CLEANING Each workout should include the following three parts: 1. A WARM-UP: 5 to 10 minutes of stretching and light exercise. A proper warm-up increases your body temperature, heart rate, and circulation in preparation for exercise. 2.
- Page 44 MAINTENANCE CLEANING The machine can be cleaned with a soft cloth and mild detergent. Do not use abrasives or solvents on plastic parts. Please wipe your perspiration off the machine after each use. Please inspect all assembly bolts and pedals on the machine for proper tightness before use.
Need help?
Do you have a question about the A91-176 and is the answer not in the manual?
Questions and answers