Table of Contents
Advertisement
Quick Links
BIGLA30 Series
Gen II LOV
Installation, Operation and Maintenance Manual
This manual is updated as new information and models are released. Visit our website for the latest manual.
This equipment chapter is to be installed in the Fryer Section of the Equipment Manual.
FOR YOUR SAFETY
Do Not Store or use gasoline or other
flammable vapors and liquids in the vicinity
of this or any other appliance.
*8196286*
Part Number: FRY_IOM_8196286 05/2017
Original Instructions
™
Gas Fryer
READ THE INSTRUCTIONS BEFORE USING THE FRYER.
CAUTION
Advertisement
Table of Contents

Related Manuals for Welbilt Frymaster McDonald's LOV BIGLA30 Gen II Series


Summary of Contents for Welbilt Frymaster McDonald's LOV BIGLA30 Gen II Series
- Page 1 BIGLA30 Series ™ Gen II LOV Gas Fryer Installation, Operation and Maintenance Manual This manual is updated as new information and models are released. Visit our website for the latest manual. This equipment chapter is to be installed in the Fryer Section of the Equipment Manual. ...
- Page 2 NOTICE IF, DURING THE WARRANTY PERIOD, THE CUSTOMER USES A PART FOR THIS FRYMASTER EQUIPMENT OTHER THAN AN UNMODIFIED NEW OR RECYCLED PART PURCHASED DIRECTLY FROM FRYMASTER DEAN, OR ANY OF ITS FACTORY AUTHORIZED SERVICERS, AND/OR THE PART BEING USED IS MODIFIED FROM ITS ORIGINAL CONFIGURATION, THIS WARRANTY WILL BE VOID. FURTHER, FRYMASTER DEAN AND ITS AFFILIATES WILL NOT BE LIABLE FOR ANY CLAIMS, DAMAGES OR EXPENSES INCURRED BY THE CUSTOMER WHICH ARISE DIRECTLY OR INDIRECTLY, IN WHOLE OR IN PART, DUE TO THE INSTALLATION OF ANY MODIFIED PART AND/OR PART RECEIVED FROM AN UNAUTHORIZED SERVICER. NOTICE This appliance is intended for professional use only and is to be operated by qualified personnel only. A Frymaster Authorized Servicer (FAS) or other qualified professional should perform installation, maintenance, and repairs. Installation, maintenance, or repairs by unqualified personnel may void the manufacturer’s warranty. See Chapter 1 of this manual for definitions of qualified personnel. NOTICE This equipment must be installed in accordance with the appropriate national and local codes of the country and/or region in which the appliance is installed. See NATIONAL CODE REQUIREMENTS in Chapter 2 of this manual for specifics. NOTICE TO U.S. CUSTOMERS This equipment is to be installed in compliance with the basic plumbing code of the Building Officials and Code Administrators International, Inc. (BOCA) and the Food Service Sanitation Manual of the U.S. Food and Drug Administration. ...
- Page 3 DANGER Adequate means must be provided to limit the movement of this appliance without depending upon the gas line connection. All fryers equipped with casters must be stabilized by installing restraining chains. If a flexible gas line is used, an additional restraining cable must be connected at all times when the fryer is in use. CAUTION No warranty is provided for any Frymaster fryer used in a mobile or marine installation or concession. Warranty protection is only offered for fryers installed in accordance with the procedures described in this manual. Mobile, marine or concession conditions of this fryer should be avoided to ensure optimum performance. DANGER Instructions to be followed in the event the operator smells gas or otherwise detects a gas leak must be posted in a prominent location. This information can be obtained from the local gas company or gas supplier. ...
-
Page 4: Table Of Contents
Table of Contents Warranty Statement ..................... i Section 1 Introduction ....................... 1-1 Section 2 Installation ......................2-1 Section 3 Operation Instructions ..................3-1 Section 4 M3000 Controller Instructions ................. 4-1 Section 5 Operating the Built-In Filtration System ............5-1 Section 6 Preventative Maintenance ................ -
Page 5: Warranty Statement
LOV™ GAS WARRANTY STATEMENT Frymaster, L.L.C. makes the following limited warranties to the original purchaser only for this equipment and replacement parts: A. WARRANTY PROVISIONS - FRYERS 1. Frymaster L.L.C. warrants all components against defects in material and workmanship for a period of two years. - Page 6 E. PARTS RETURN All defective in-warranty parts must be returned to a Frymaster Authorized Factory Servicer within 60 days for credit. After 60 days, no credit will be allowed. F. WARRANTY EXCLUSIONS This warranty does not cover equipment that has been damaged due to misuse, abuse, alteration, or accident such as: •...
-
Page 7: Introduction
BIGLA30 SERIES GEN II LOV™GAS FRYER CHAPTER 1: INTRODUCTION NOTE: The Frymaster BIGLA30 fryer requires a start-up, demonstration and training before normal restaurant operations can begin. General Read the instructions in this manual thoroughly before attempting to operate this equipment. This manual covers all configurations of models and BIGLA30 LOV™... - Page 8 DANGER DANGER boxes contain information about actions or conditions that may cause or result in injury to personnel, and which may cause damage to your system and/or cause your system to malfunction. Your fryer is equipped with automatic safety features: 1.
- Page 9 Definitions QUALIFIED AND/OR AUTHORIZED OPERATING PERSONNEL Qualified/authorized operating personnel are those who have carefully read the information in this manual and have familiarized themselves with the equipment functions, or who have had previous experience with the operation of the equipment covered in this manual. QUALIFIED INSTALLATION PERSONNEL Qualified installation personnel are individuals, firms, corporations, and/or companies which, either in person or through a representative, are engaged in and are responsible for the installation of gas-fired appliances.
- Page 10 When ordering parts, the following information is required: Model Number: Serial Number: Type of Gas or Voltage: Item Part Number: Quantity Needed: Service information may be obtained by contacting your local FAS/Distributor. Service may also be obtained by calling the Frymaster Service Department at 1-800-551-8633 or 1-318-865-1711 or by email at service@frymaster.com.
- Page 11 BIGLA30 SERIES GEN II LOV™ GAS FRYER CHAPTER 2: INSTALLATION INSTRUCTIONS General Installation Requirements Proper installation is essential for the safe, efficient, trouble-free operation of this appliance. Qualified, licensed, and/or authorized installation or service personnel, as defined in Section 1.6 of this manual, should perform all installation and service on Frymaster equipment.
- Page 12 The fryer flue opening must not be placed close to the intake of the exhaust fan, and the fryer must never have its flue extended in a “chimney” fashion. An extended flue will change the combustion characteristics of the fryer, causing longer recovery time.
-
Page 13: Installation
DANGER This appliance is equipped with a special (grounding) plug for your protection against electrical shock, and must be plugged directly into a properly grounded re- ceptacle. Do not cut, remove, or otherwise bypass the grounding prong on this plug! DANGER This appliance requires electrical power for operation. - Page 14 3. Test the fryer electrical system: a. Plug the fryer electrical cord(s) into a grounded electrical receptacle. NOTE: To ensure the safe and efficient operation of the fryer and hood, the electrical plug for the 120-volt line, which powers the hood, must be fully engaged and locked in its pin and sleeve socket.
- Page 15 DANGER The appliance and its individual shutoff valve must be disconnected from the gas supply piping system during any pressure testing of the system at test pressures in excess of ½ PSI (3.45 kPa, 13.84 inches W.C.) to avoid damage to the fryer’s gas tubes and gas valve(s).
- Page 16 NOTICE- Australia Only The air pressure switch on the combustion blower should read: Full Vat units-122pa (0.5 inches W.C.) and for Split Vat units-180pa (0.72 inches W.C.). CE Approved Gas Categories by Country COUNTRIES CATEGORIES PRESSURE (MBAR) AUSTRIA (AT) II2H3B/P G30, G31 I2E(R)B G20, G25...
- Page 17 DO NOT apply compound to the first two threads. Doing so may allow some of the compound to enter the gas stream, resulting in clogging of burner orifices and/or the control valve. 2. Open the gas supply to the fryer and check all piping, fittings, and gas connections for leaks. A soap solution should be used for this purpose.
- Page 18 BIGLA30 LOV™ gas fryers manufactured for Non-CE countries use different burners for each type gas. The burners in fryers built for propane gas have a special gray-colored coating on the burner tiles to enable them to withstand the higher caloric value of the propane gas. Burners designed for use in propane units may be used in natural gas applications, but not vice versa.
- Page 19 After Fryers are Positioned at the Frying Station DANGER No structural material on the fryer should be altered or removed to accommodate placement of the fryer under a hood. Questions? Call the Frymaster Dean Service Hotline at 1-800-551-8633. 1. Once the fryer has been positioned at the frying station, use a carpenter’s level placed across the top of the frypot to verify that the unit is level, both side-to-side and front-to-back.
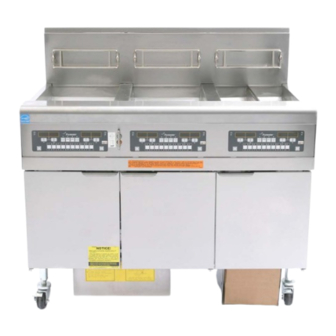
- Page 20 BIGLA30 SERIES GEN II LOV™ GAS FRYER CHAPTER 3: OPERATING INSTRUCTIONS TYPICAL CONFIGURATION (BIGLA330 SHOWN) NOTE: The appearance of your fryer may differ slightly from that shown depending upon configuration and date of manufacture.
- Page 21 Equipment Setup and Shutdown Procedures WARNING The on-site supervisor is responsible for ensuring that operators are made aware of the inherent hazards of operating a hot oil filtering system, particularly the aspects of oil filtration, draining and cleaning procedures. CAUTION Before lighting the fryer, make sure the fryer is OFF and the frypot drain valves are closed.
- Page 22 3.1.2 Lighting the Fryer 1. Press the computer ON/OFF switch to the OFF position. For CE Fryers For Non-CE Fryers Placing the ON/OFF switch in the OFF After placing the ON/OFF switch in the OFF position also turns off the gas valve. Wait five position, turn the gas valve knob to the OFF minutes before continuing with Step 2, which position.
- Page 23 adjust the position of the plate to open or close the air intake opening until a bright orange-red glow is obtained. Carefully hold the plate in position and tighten the locking nut. 3.1.3 Shutdown For short-term shut down during the workday: 1.
- Page 24 3.3 Low Oil Volume Automatic Refill When the Low Oil Volume (LOV™) system is in place on the fryer, the frypot oil levels are continually checked and topped off as necessary from a reservoir in the cabinet. The reservoir holds a 35 pound box of oil.
- Page 25 1. Open the cabinet and slide the JIB from 2. Remove the cap and pour any remaining oil in the the cabinet (see Figure 4). container into all fry vats equally (see Figure 5). Figure 5 Figure 4 3. Place new JIB upright and remove the 4.
- Page 26 BIGLA30 SERIES GEN II LOV™ GAS FRYER CHAPTER 4: M3000 COMPUTER INSTRUCTIONS Filter, Temp, Info, Programming and Navigation Buttons Heat Indicator FR FRIES FR FRIES Cook Channel Lamp and Selection Buttons ON/OFF ON/OFF Product Buttons M3000 General Information Welcome to the M3000, a computer that retains the one-button ease of the M2000 and 100B and the utility of 40-product menu capability.
- Page 27 Basic Operation...
- Page 28 Cooking with Multi-Product Display...
- Page 29 Cooking with Dedicated Display...
- Page 30 Changing from Breakfast Setup to Lunch Press and quickly Press and hold the cook release product button channel button under the for french fries. display until a beep is heard (approximately three seconds) and release. Computer will change from HASH BRN to Display changes to FR <<<<...
- Page 31 Changing from Lunch Setup to Breakfast Press and hold the cook channel Computer displays button under the display until a beep is heard (approximately three seconds) and release. Display changes to LOW Press and quickly TEMP until setpoint is release product button reached.
- Page 32 M3000 Button Description and Functions 4.7.1 Navigation Buttons The menu on the M3000 uses buttons to navigate the various menus and submenus. When programming, the left screen shows a menu or submenu item. The right screen is for data entry. Data is Left Display Right Display entered with alpha-numeric characters, scrolling through...
- Page 33 M3000 Menu Summary Tree Reflected below are the major programming sections in the M3000 and the order in which submenu headings will be found under the sections in the Installation and Operation Manual. Adding New Product Menu Items (Product Selection) See section 4.10.2 Storing Product Menu Items in Product Buttons See section 4.10.3...
- Page 34 Fryer Setup Mode Programming The computer, upon initial power up, when changing out a computer or accessed from Level 1, can have parameters set. The setup sets the time, date, date format, language, fryer type, vat type, oil system type and the temperature scale. These settings should only be changed by a technician. The computer displays OFF.
- Page 35 The computer displays time format on the left and 12 hr on the right. 10. Use the and buttons to toggle between 12hr and 24hR. 11. With the desired selection displayed, press the (1 yes) button . The computer displays ENTER TIME on the left and current time on the right in hh:MM format. AM or PM is displayed if 12 hours system is chosen.
- Page 36 20. Use the and buttons to toggle between split and full. 21. With the desired selection displayed, press the (1 yes) button. The computer displays OIl SYSTEM on the left and JIB on the right. 22. Use the and buttons to toggle between jib and bulk.
- Page 37 4.10.2 Adding New Product Items to the Menu (PRODUCT SELECTION) This function is used to add additional products to the computer menu. To add a new product to the menu: 1. With the computer OFF, enter Level 1 programming mode by pressing the TEMP and INFO buttons simultaneously until LEVEL 1 is displayed.
- Page 38 8. Press the button to advance the cursor to the next display space. Use the #0 key to insert a space. The button can be used to move the cursor back. For example, to enter “WINGS”, press the #8 key two times until W appears in the display. Then ...
- Page 39 17. With duty time 1 (shake time) entered, press the (INFO) button to save duty time one and scroll to DUTY TIME 2. If a product calls for a second duty to be preformed, it can be entered here. Use the instructions above to enter duty time two, otherwise press the ...
- Page 40 24. If no further programming is necessary, press the (2) button. The computer displays the select product option with the product (ex. FR FRIEs) on the right screen. Press the (2) button again. Computer displays Level 1 program changing to the Product selection prompt.
- Page 41 4.10.4 Draining and Refilling Vats, and Disposing of Oil When cooking oil is exhausted, drain the oil into an appropriate container for transport to the disposal container. Frymaster recommends a McDonald’s Shortening Disposal Unit (MSDU). Do not drain deep clean (boil-out) solution into an MSDU. NOTE: If using an MSDU built before January 2004 the filter pan cover must be removed to allow the unit to be positioned beneath the drain.
- Page 42 DANGER When draining oil into an appropriate METAL container, make sure the container will hold at least FOUR gallons (15 liters) or more, otherwise hot liquid could overflow and cause injury. The computer displays INSERT DISPOSAL UNIT. Once the filter pan is removed the computer displays alternating with IS DISPOSE UNIT IN PLACE? and YES NO.
- Page 43 1. With the computer OFF, press and hold the FLTR button of the corresponding vat for three seconds. The computer displays fltr menu for three seconds changing to Auto Filter. 2. Press the (INFO) button and scroll to dispose. 3.
- Page 44 The computer displays CLOSE DISPOSE VALVE. 11. Close the dispose valve by pushing the valve handle toward the rear of the fryer until it stops. Relock the valve if required by your manager. The vat is ready to be refilled with oil. Continue to Section 4.10.4.4 to fill the vat, otherwise press the ...
- Page 45 The first two menu items: AUTO FILTER and MANTAINENCE (MANUAL) FILTER are covered in Chapter 5. The other menu items are covered on the following pages. The DRAIN TO PAN and FILL VAT FROM DRAIN PAN functions are used primarily for diagnostic purposes.
- Page 46 DANGER Open the filter pan slowly to avoid splashing of hot oil that may cause severe burns, slipping and falling. 9. Carefully pull the filter pan from the fryer. The computer displays IS PAN EMPTY? alternating with yes no. NOTE: A small quantity of oil may remain in the pan after refilling. 10.
- Page 47 The computer displays FILLING while the vat is refilling. After filling the computer displays IS VAT FULL? alternating with yes NO. 5. Press the (1 yes) button if vat is full to exit and return to OFF. If vat is not full press ...
- Page 48 4.11.5 Pan to Waste Pan to waste selection is an option that allows bulk oil systems to pump excess oil in the pan to the bulk oil waste tanks without draining the existing oil in the frypot. 1. With the computer OFF, press and hold the filter button for the vat to be refilled for three seconds.
- Page 49 3. Press the and buttons to scroll between: a. Product selection See pg. 4-12 b. aif clock See pg. 4-24 c. DEEP CLEAN MODE See pg. 4-25 d. hi limit test See pg. 4-30 e. Fryer setup See pg. 4-9 4.
- Page 50 9. Press the (INFO) button. The computer displays 0 DUR. This is the amount of time the AIF is to remain suspended. 10. Use the number keys to enter a time between 0 and 999 minutes (ex. 1½ hours is entered as 90 minutes). Enter 90 for this example.
- Page 51 *If the bulk oil system waste tank is full, the computer displays RTI TANK FULL alternating with CONFIRM. Press the (1) button and call the bulk oil waste provider. The display returns to OFF. DANGER When draining oil into a disposal unit, do not fill above the maximum fill line located on the container.
- Page 52 9. Bulk Oil System: Press the (2) button to run the pump again if the pan has oil remaining; otherwise continue to the next step. 10. Bulk Oil System: Once the pan is empty, press the (1) button (see Figure 4.10.4.3.10).
- Page 53 18. Bulk or JIB System: The computer displays SCRUB VAT COMPLETE? alternating with yes. Press the (1 yes) button. 19. Bulk or JIB System: The computer displays DRAINING. The drain opens to drain the small amount of residual solution left in the vat. Rinse excess solution from vat. 20.
- Page 54 The vat begins to heat. The computer displays the actual vat temperature during the test. When the temperature reaches 410°F ± 10° F (210°C ± 12°C)*, the computer displays hot hi-1 alternating with the actual temperature (ex. 410F) and continues heating. *NOTE: In computers used in the European Union (those with the CE mark), the temperature is 395°F (202°C).
- Page 55 3. Press the and buttons to scroll between: a. Prod comp See pg. 4-30 b. e-log See pg. 4-31 c. password SETUP See pg. 4-31 d. alert tone See pg. 4-32 e. filter After See pg. 4-33 f. filter time See pg.
- Page 56 6. If changing this setting, enter a number between 0-9. 7. Press the (2) button to accept selection. 8. Press the (2) button two times to exit. The computer displays OFF. 4.13.2 E-LOG MODE The E-LOG mode is used to view the ten most recent error codes encountered on the fryer. These codes are displayed from 1-10 with the most recent displayed first.
- Page 57 b. usage – Established password to enter usage mode to reset usage statistics. (Default is 4321) c. level 1 – Establishes password to enter level 1 mode. (Default is 1234) d. level 2 – Establishes password to enter level 2 mode. (Default is 1234) 4.
- Page 58 The computer displays volume 1-9 on the left and 9 on the right. 3. Use the number keys to set volume level. Select from nine levels of volume with 1 being the softest and 9 the loudest. 4. Use the and buttons to scroll to tone 1-3. The computer displays tone 1-3 on the left and 1 on the right.
- Page 59 5. Press the (2) button again to exit. The computer displays OFF. 4.13.6 FILTER TIME The FILTER time option is used to set the elapsed time before a filtration prompt. This option is useful in lower volume stores, where filtration is desired more often than the amount the cook cycles would generate.
- Page 60 2. Press the and buttons to scroll between: FULL VAT CONFIGURATION a. filter stats See pg. 4-35 b. review usage See pg. 4-36 c. last load See pg. 4-37 d. TPM See pg. 4-38 SPLIT VAT CONFIGURATION a. filter stats See pg.
- Page 61 d. flt avg day, – Average number of cook cycles per filter and day. SPLIT VAT CONFIGURATION a. DAY (wed), DATE (03/20/07) – Current day and date. b. l fIltErEd # DAy – Number of times left vat filtered and day. c.
- Page 62 d. L on hrs # – Number of hours the left vat has been on e. R on hrs # – Number of hours the right vat has been on f. reset usage – Resets usage counters. 4. If resetting usage statistics, return to step 3 and scroll to RESET USAGE, otherwise skip to step 7.
- Page 63 i. ready yes – Displays if the fryer was back to proper temperature before the cook cycle was started. NOTE – Above numbers are examples. They do not reflect actual conditions. 4. Press the (2) button to return to INFO MODE changing to filter stats prompt.
- Page 64 BIGLA30 SERIES GEN II LOV™ GAS FRYER CHAPTER 5: FILTRATION INSTRUCTIONS Introduction The FootPrint Pro filtration system allows the oil in one frypot to be safely and efficiently filtered while the other frypots in a battery remain in operation. Section 5.2 covers preparation of the filter system for use. Operation of the system is covered in Section 5.3.
- Page 65 3. Then in reverse order, place the metal filter screen in the center of the bottom of the pan, then lay a filter pad over the screen, ensuring that the rough side of the pad is up. Make sure that the pad is in between the embossed ridges of the filter pan.
- Page 66 If the oil level is too low, the computer displays OIL LEVEL TOO LOW alternating with YES. Press (1) to acknowledge issue and return to idle cook mode. Check to see if the JIB is low on oil. If JIB is not low and this continues to occur, contact your ASA. is chosen, SKIM VAT is displayed for ten seconds changing to cOnfIRm alternating with YES NO.
- Page 67 2. Press the (1 yes) button to continue. The computer displays filter NOW? Alternating with YES/NO. 3. Go to step 1 section 5.3 on page 5-2 to continue. Troubleshooting the Auto Intermittent Filtration (AIF) 5.4.1 Incomplete Filtration Should the AIF procedure fail after the filter pad was changed an error message is generated. Use the chart on page 5-6 to clear the error.
- Page 68 *NOTE: If the filter pad change time has expired, normally every 25 hours, the CHANGE FILTER PAD? message repeats every 15 minutes instead of every four minutes. 6. Remove the pan. The computer display changes to CHANGE PAD. Change the filter pad and ensure the filter pan has been pulled forward, out of the cabinet for at least 30 seconds.
- Page 69 5.4.3 Filter Error Flowchart MESSAGE NORMAL DISPLAYED OPERATION RESUMES Call an Authorized Repair Technician SIXTH CONSECUTIVE FILTER ERROR TECH Fryer returns to ENTERS cook mode for 15 CODE minutes. This chart follows the process of clearing Change filter pad and a filtration issue.
- Page 70 5.4.4 Clogged Drain or Oil Sensor Fail Flowchart...
- Page 71 5.4.5 Filter Busy When FILTER BUSY is displayed the MIB board is waiting on another vat to be filtered or waiting on another issue to clear. Wait 15 minutes to see if problem is corrected. If not, call your local ASA. DANGER Do not drain more than one frypot at a time into the built-in filtration unit to avoid overflow and spillage of hot oil that may cause severe burns, slipping and falling.
- Page 72 Computer displays fIltEr menu for three seconds changing to Auto Filter. 2. Press the (INFO) button to scroll to maInT fIltEr. 3. When the desired selection is displayed press the (1) button to continue. The computer displays maInT fIltEr? alternating with Yes NO. 4.
- Page 73 The computer displays rinsing. The drain valve closes and the filter pump continues to run and refills the pot. The drain valve opens and remains open and the computer displays rinse again? alternating with yes no. 9. If the pot is clear of debris, press the (2 NO) button to continue and skip the rinse again cycle.
-
Page 74: Preventative Maintenance
BIGLA30 SERIES GEN II LOV™ GAS FRYER CHAPTER 6: PREVENTATIVE MAINTENANCE Fryer Preventive Maintenance Checks and Service DANGER The crumb tray in fryers equipped with a filter system must be emptied into a fireproof con- tainer at the end of frying operations each day. Some food particles can spontaneously combust if left soaking in certain shortening material. - Page 75 There are no periodic preventive maintenance checks and services required for your FootPrint Pro Filtration System other than daily cleaning of the filter pan with a solution of hot water and McDonald’s All Purpose Concentrate. If you notice that the systems is pumping slowly or not at all, verify that the filter pan screen is on the bottom of the filter pan, with the pad on top of the screen.
- Page 76 6.3.3 Clean Filter Pan, Detachable Parts and Accessories As with the frypot, a deposit of carbonized oil will accumulate on the filter pan and detachable parts and accessories such as baskets, sediment trays, or fishplates. Wipe the filter pan and all detachable parts and accessories with a clean dry cloth. Use a cloth dampened with a solution of McDonald’s All Purpose Concentrate to remove accumulated carbonized oil.
- Page 77 Wrap the motor and wires with plastic wrap or a plastic bag. Blower Housing Blower Wheel Figure 3 4. Remove the plastic wrap from the blower motor assembly. Reassemble the blower motor assembly and blower housing. Reinstall the blower assembly in the fryer. 5.
- Page 78 SOME CE BLOWER ASSEMBLIES TYPICAL BLOWER ASSEMBLY MAY BE CONFIGURED THIS WAY REPLACE THE O-RINGS Refer to McDonald’s MRC cards for specific details on replacing the O-rings on the filter connection. SEMI-ANNUAL CHECKS AND SERVICE 6.6.1 Clean Gas Valve Vent Tube NOTE: This procedure is not required for fryers configured for export to CE countries.
- Page 79 Verify that burners and associated components (i.e. gas valves, pilot assemblies, ignitors, etc.) are in good condition and functioning properly. Inspect all gas connections for leaks and verify that all connections are properly tightened. Verify that the burner manifold pressure is in accordance with that specified on the appliance’s rating plate. ...
-
Page 80: Operator Troubleshooting
BIGLA30 SERIES GEN II LOV™ GAS FRYER CHAPTER 7: OPERATOR TROUBLESHOOTING Introduction This chapter provides an easy reference guide to some of the common problems that may occur during the operation of your equipment. The troubleshooting guides that follow are intended to help you correct, or at least accurately diagnose, problems with your equipment. - Page 81 Troubleshooting Fryers 7.2.1 Computer and Heating Problems PROBLEM PROBABLE CAUSES CORRECTIVE ACTION A. Press the ON/OFF switch to turn the A. Computer not turned on. computer on. No display on the B. No power to fryer. B. Verify that the fryer is plugged in and computer.
- Page 82 7.2.2 Error Messages and Display Problems Problem Probable Causes Corrective Action Frypot temperature is more than 410ºF M3000 display shows Shut the fryer down immediately and call (210ºC) or, in CE countries, 395ºF hot-hi-1. your FAS for assistance. (202ºC). Frypot temperature has exceeded high Shut the fryer down immediately and call M3000 display shows limit temperature and has physically...
- Page 83 PROBLEM PROBABLE CAUSES CORRECTIVE ACTION A. Another filtration cycle or filter A. Wait until the previous filtration cycle M3000 display shows pad change is still in process. ends to start another filtration cycle. filter busy. B. MIB has not cleared checking Change filter pad if prompted.
- Page 84 Problem Probable Causes Corrective Action A. Clear filter error properly. If A. Filter error exists. problem persists c all your FAS for B. Service required error exists One vat doesn’t top off. assistance. C. Solenoid, pump, pin issue, RTD or B.
- Page 85 board failure ERROR PUMP NOT FILLING Dirty pad and it needs changed or it was bypassed; filter pump problem ERROR DRAIN VALVE NOT OPEN Drain valve was trying to open and confirmation is missing ERROR DRAIN VALVE NOT CLOSED Drain valve was trying to close and confirmation is missing ERROR RETURN VALVE NOT OPEN Return valve was trying to open and confirmation...
-
Page 86: Appendix Arti (Bulk Oil) Instructions
BIGLA30 SERIES GEN II LOV™ GAS FRYER APPENDIX A: RTI (BULK OIL) INSTRUCTIONS NOTE: The instructions in this manual for using a bulk oil system for filling and discarding oil are for an RTI system. These instructions may not be applicable to other bulk oil systems. A.1.1 Bulk Oil Systems Bulk oil systems have large oil storage tanks,... -
Page 87: Appendix Bjib Preparation With Solid Shortening Option
BIGLA30 SERIES GEN II LOV™ GAS FRYER APPENDIX B: JIB Preparation with Solid Shortening Option 1. Open right door of fryer and remove brace in JIB cabinet. 2. Attach alignment bracket to bottom of ATO box brace with provided nuts. See Figure 1. 3. -
Page 88: Appendix C Solid Shortening Melting Unit Use
BIGLA30 SERIES GEN II LOV™ GAS FRYER APPENDIX C: Solid Shortening Melting Unit Use Reset oil reservoir system Ensure shortening melting unit is on. Fill melting unit with shortening. Melting Allow 2-3 hours for solid shortening to unit melt. -
Page 89: Appendix D Using The Oil Quality Sensor (Oqs
BIGLA30 SERIES GEN II LOV™ GAS FRYER APPENDIX D: Using the Oil Quality Sensor Check TPM Value Display Action OFF, Dashed lines or menu item Press and hold INFO button until INFO MODE scrolls. Release Press and release INFO MODE button until TPM is displayed INFO Mode scrolls on left ... - Page 90 Display Action Press checkmark under YES if additional rinsing is necessary; press X RINSE AGAIN; YES/NO under NO if no additional rinsing is needed. POLISH; YES/NO Press the checkmark under YES. OQS; YES/NO Press the checkmark under YES to run the oil quality test. POLISHING ...
- Page 91 OQS Filter Display Action Dashed lines or Menu item; fryer is at Press and hold FLTR button (either for full vat, side- specific for split). operating temperature FILTER MENU scrolls, changing to Press INFO button two (2) times to scroll to OQS Auto Filter ...
-
Page 92: Appendix E Oil Quality Sensor (Oqs) Setup
BIGLA30 SERIES GEN II LOV™ GAS FRYER APPENDIX E: Oil Quality Sensor Setup OQS Filter Setup Display Action Press the TEMP and INFO buttons simultaneously for 10 OFF, - - - - - or menu item seconds until LEVEL 2 is displayed; When a third beep sounds release the buttons. - Page 93 THIS PAGE INTENTIONALLY LEFT BLANK...
- Page 94 EMAIL: FRYSERVICE@WELBILT.COM *8196286* Every new piece of Welbilt equipment comes with KitchenCare™ and you choose the level of service that meets your operational needs from one restaurant to multiple locations. StarCare – Warranty & lifetime service, certified OEM parts, global parts inventory, performance audited ExtraCare –...
Need help?
Do you have a question about the Frymaster McDonald's LOV BIGLA30 Gen II Series and is the answer not in the manual?
Questions and answers