Table of Contents
Advertisement
Quick Links
FilterQuick
Gas Fryer
Installation, Operation and Maintenance Manual
This manual is updated as new information and models are released. Visit our website for the latest manual.
FOR YOUR SAFETY
Do Not Store or use gasoline or other
flammable vapors and liquids in the vicinity
of this or any other appliance.
*8197423*
Part Number: FRY_IOM_8197423 09/2022
Original Instructions
FQGLA-T
™
READ THE INSTRUCTIONS BEFORE USING THE FRYER.
CAUTION
Advertisement
Chapters
Table of Contents

Subscribe to Our Youtube Channel
Related Manuals for Welbilt Frymaster FilterQuick FQGLA-T


Summary of Contents for Welbilt Frymaster FilterQuick FQGLA-T
- Page 1 FilterQuick FQGLA-T ™ Gas Fryer Installation, Operation and Maintenance Manual This manual is updated as new information and models are released. Visit our website for the latest manual. FOR YOUR SAFETY CAUTION Do Not Store or use gasoline or other READ THE INSTRUCTIONS BEFORE USING THE FRYER.
- Page 2 NOTICE IF, DURING THE WARRANTY PERIOD, THE CUSTOMER USES A PART FOR THIS FRYMASTER DEAN EQUIPMENT OTHER THAN AN UNMODIFIED NEW OR RECYCLED PART PURCHASED DIRECTLY FROM FRYMASTER DEAN, OR ANY OF ITS AUTHORIZED SERVICERS, AND/OR THE PART BEING USED IS MODIFIED FROM ITS ORIGINAL CONFIGURATION, THIS WARRANTY WILL BE VOID. FURTHER, FRYMASTER DEAN AND ITS AFFILIATES WILL NOT BE LIABLE FOR ANY CLAIMS, DAMAGES OR EXPENSES INCURRED BY THE CUSTOMER WHICH ARISE DIRECTLY OR INDIRECTLY, IN WHOLE OR IN PART, DUE TO THE INSTALLATION OF ANY MODIFIED PART AND/OR PART RECEIVED FROM AN UNAUTHORIZED SERVICER.
- Page 3 WARNING After installation of a gas fryer and after any maintenance to the gas system of a gas fryer-manifold, valve, burners, etc. – check for gas leaks at all connections. Apply a thick soapy solution to all connections and ensure there are no bubbles. There should be no smell of gas.
- Page 4 DANGER The crumb tray in fryers equipped with a filter system must be emptied into a fireproof container at the end of frying operations each day. Some food particles can spontaneously combust if left soaking in certain shortening material. WARNING Do not bang fry baskets or other utensils on the fryer’s joiner strip.
-
Page 5: Table Of Contents
Table of Contents Warranty Statement ..................... i Section 1 Introduction ...................... 1-1 Section 2 Installation ......................2-1 Section 3 Operation Instructions ..................3-1 Section 4 FQ4000 Controller Instructions ............... 4-1 Section 5 Filtration Menu Operation ................5-1 Section 6 Preventative Maintenance ................6-1 Section 7 Operator Troubleshooting ................ -
Page 6: Introduction
FILTERQUICK™ FQGLA-T GAS FRYER CHAPTER 1: INTRODUCTION NOTE: The Frymaster FQGLA-T fryer requires a start-up, demonstration and training before normal restaurant operations can begin. General Read the instructions in this manual thoroughly before attempting to operate this equipment. This manual covers all configurations of models and FQGLA-T fryers. - Page 7 DANGER DANGER boxes contain information about actions or conditions that may cause or result in injury to personnel, and which may cause damage to your system and/or cause your system to malfunction. Your fryer is equipped with automatic safety features: 1.
- Page 8 Installation, Operating, and Service Personnel Operating information for Frymaster equipment has been prepared for use by qualified and/or authorized personnel only, as defined in Section 1.6. All installation and service on Frymaster equipment must be performed by qualified, certified, licensed, and/or authorized installation or service personnel, as defined in Section 1.6.
- Page 9 Parts Ordering and Service Information For non-routine maintenance or repairs, or for service information, contact your local Frymaster Authorized Servicer (FAS). In order to assist you quickly, the Frymaster Authorized Servicer (FAS) or Service Department representative requires certain information about your equipment. Most of this information is printed on a da- ta plate affixed to the inside of the fryer door.
- Page 10 FILTERQUICK™ FQGLA-T GAS FRYER CHAPTER 2: INSTALLATION INSTRUCTIONS General Installation Requirements Proper installation is essential for the safe, efficient, trouble-free operation of this appliance. Qualified, licensed, and/or authorized installation or service personnel, as defined in Section 1.6 of this manual, should perform all installation and service on Frymaster equipment. Conversion of this appliance from one type of gas to another should only be performed by qualified, li- censed, and/or authorized installation or service personnel as defined in Section 1.6 of this manual.
- Page 11 The fryer flue opening must not be placed close to the intake of the exhaust fan, and the fryer must never have its flue extended in a “chimney” fashion. An extended flue will change the combustion characteristics of the fryer, causing longer recovery time. It also frequently causes delayed ignition. To provide the airflow necessary for good combustion and burner operation, the areas surrounding the fryer front, sides, and rear must be kept clear and unobstructed.
-
Page 12: Installation
DANGER This appliance is equipped with a special (grounding) plug for your protection against elec- trical shock, and must be plugged directly into a properly grounded receptacle. Do not cut, remove, or otherwise bypass the grounding prong on this plug! DANGER This appliance requires electrical power for operation. - Page 13 DANGER The appliance area must be kept free and clear of combustible material at all times. 2. Frymaster recommends that the minimum distance from the flue outlet to the bottom edge of the hood be 24 in. (600 mm) when the appliance consumes more than 120,000 BTU per hour. 3.
- Page 14 Connection to Gas Line DANGER Before connecting new pipe to this appliance, the pipe must be blown out thoroughly to remove all foreign material. Foreign material in the burner and gas controls will cause im- proper and dangerous operation. DANGER The appliance and its individual shutoff valve must be disconnected from the gas supply piping system during any pressure testing of the system at test pressures in excess of ½...
- Page 15 CE Approved Gas Categories by Country COUNTRIES CATEGORIES PRESSURE (MBAR) AUSTRIA (AT) II2H3B/P G30, G31 I2E(R)B G20, G25 20, 25 BELGIUM (BE) G30, G31 28-30, 37 BULGARIA (BG), CROATIA (HR), FINLAND (FI), ROMANIA (RO), II2H3B/P G30, G31 SLOVENIA (SI), TURKEY (TR) ESTONIA (EE), LATVIA (LV)
- Page 16 NOTE: Some fryers are configured for a rigid connection to the gas supply line. These units are connected to the gas supply line at the rear of the unit. When using thread compound, use very small amounts on male threads only. Use a pipe thread compound that is not affected by the chemical action of LP gases (Loctite™...
- Page 17 Non-CE Gas Conversion Kits for Australia Natural Gas to Propane (LP) Gas Propane (LP) Gas to Natural Gas Full Vat: PN 826-2969 Full Vat: PN 826-2971 Dual Vat: PN 826-2970 Dual Vat: PN 826-2972 Units manufactured for export to CE countries are equipped with “universal” burners that may be used with either Natural (G20, G25) gas or Butane (G30) and Propane (G31) gases.
- Page 18 DANGER Adequate means must be provided to limit the movement of this appliance without depending on the con- nector and the quick-disconnect device or its associated piping to limit the appliance movement. Clean, and fill frypot(s) with cooking oil. (See Equipment Setup and Shutdown Procedures in Chapter 3.)
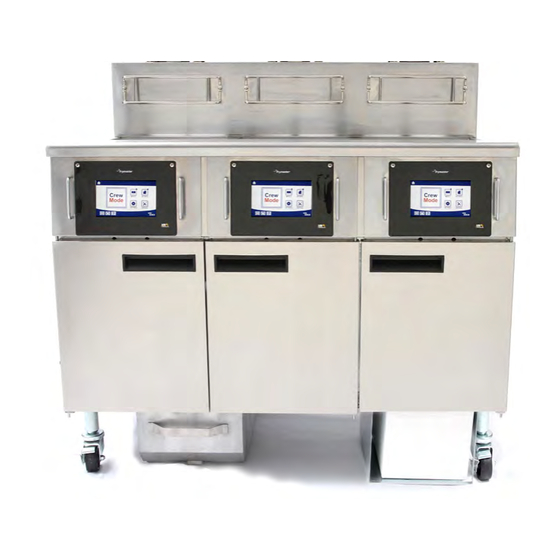
- Page 19 FILTERQUICK™ FQGLA-T GAS FRYER CHAPTER 3: OPERATING INSTRUCTIONS FINDING YOU WAY AROUND THE FQGLA-T™ SERIES GAS FRYER Flue Basket Holder Control Panel Top Cap (FQ4000 Controller shown) Bezel Gas Valve Bulk Dispose Handle and Lock JIB Behind Door (See Filter Pan Pre-Filter Screen Sec.
- Page 20 Equipment Setup and Shutdown Procedures WARNING The on-site supervisor is responsible for ensuring that operators are made aware of the in- herent hazards of operating a hot oil filtering system, particularly the aspects of oil filtra- tion, draining and cleaning procedures. CAUTION Before lighting the fryer, make sure the fryer is OFF and the frypot drain valves are closed.
- Page 21 3.1.2 Lighting the Fryer Press the controller ON/OFF switch to the OFF position. For CE Fryers For Non-CE Fryers Placing the ON/OFF switch in the OFF After placing the ON/OFF switch in the OFF position also turns off the gas valve. Wait five position, turn the gas valve knob to the OFF minutes before continuing with Step 2, which position.
- Page 22 3.1.3 Shutdown For short-term shut down during the workday: 1. Place the controller ON/OFF switch in the OFF position and put the frypot covers in place. When shutting the fryers down at closing time: 1. Place the controller ON/OFF switch in the OFF position to turn the fryer off. For CE Fryers For Non-CE Fryers Placing the ON/OFF switch in the OFF...
- Page 23 3.3 Manual Top-Off Low Oil Volume Automatic Refill The fryer can be configured for either manual top off or for both manual and automatic de- pending on the hardware. When a vat is low, press the manual top off (oil drop) button at the bottom of the screen (see Figure 3) to top off the vat.
- Page 24 Open the cabinet and slide the JIB from the Remove the cap and pour any remaining oil in the container cabinet (see Figure 4). into all fry vats equally (see Figure 5). Figure 5 Figure 4 Place new JIB upright and remove the cap Put the tube in the new full container (see Figure 7).
-
Page 25: Fq4000 Controller Instructions
FILTERQUICK™ FQGLA-T GAS FRYER CHAPTER 4: FQ4000 CONTROLLER INSTRUCTIONS FQ4000 General Information Welcome to the FQ4000, an easy to use touch screen controller with the utility of 40-product menu capability. One button push starts a cook cycle for a selected product. Just choose a menu item on a product button and press the START button under the display showing the desired item. - Page 26 4.2.1.3 Crew Mode Button The crew mode button switches from the home screen to the cooking mode (see Figure 3). Figure 3 4.2.1.4 Menus Button The menus button is used to set up multiple menus with specific products such as fry station, chicken, other products, breakfast, lunch or changeover menus (See Figure 4).
- Page 27 4.2.1.8 Power Button Pressing and holding the power button soft powers up the user interface and fryer. Pressing the power button when the fryer is on turns the fryer off (see Figure 8). Figure 8 4.2.1.9 Language Button Pressing the language button switches between a primary language and a secondary language if the feature is configured in manager settings (see Figure 9).
- Page 28 4.3 FQ4000 Menu Summary Tree Reflected below are the major programming sections in the FQ4000 and the order in which submenu headings will be found under the sections in the Installation and Operation Manual.
- Page 29 4.4 FQ4000 Information Summary Tree Reflected below are the information statistics in the FQ4000 and the order in which submenu headings will be found in the controller.
- Page 30 Basic Operation Turn Fryer ON or OFF Press and hold button to switch on. Press button to switch off. Select button on desired side of a split vat. If the vat is FULL press the check YES button. Changing a Product Press and hold the product button to change.
- Page 31 Cooking...
- Page 32 Fryer (Service) Setup Programming It is necessary upon initial power up or when changing out a controller to configure the parameters for the fryer. The setup includes locale, energy type, vat type, fresh oil type, waste oil type and auto top off settings. NOTE: These settings should ONLY be changed by a technician DISPLAY ACTION...
- Page 33 DISPLAY ACTION oil container. A bulk system has large storage oil tanks that are connected to the fryer that fills an onboard reservoir. SETUP COMPLETE RESTART THE 24. No action. SYSTEM 25. Press the √ (check) button. □ WASTE OIL 26.
- Page 34 DISPLAY ACTION Press the back button when complete. □ OQS SETUP 44. Press the OQS Setup button if an OQS sensor is installed. □ OQS ENABLE/DISABLE 45. Press OQS ENABLE/DISABLE button to enable/disable the OQS sensor. 46. Select ENABLE to enable the OQS sensor or DISABLE to disable ENABLE DISABLE the OQS sensor.
- Page 35 DISPLAY ACTION This value will display the Discard Soon message when the TPM Discard Soon value is attained. This serves as a notice to the staff that the oil will need to be discarded soon. 67. Use the keypad to enter the TPM discard soon value. 68.
- Page 36 DISPLAY ACTION 81. Press the down arrow button. □ BASIC AUTO FILTER 82. Press the Basic Auto Filter button. 83. Select ENABLE to enable Basic Auto Filter (Auto Filtration for ENABLE DISABLE units without AIF or OIB probes) or DISABLE to disable Basic Auto Filtration.
- Page 37 DISPLAY ACTION 11. Press the Back button. □ DATE & TIME 12. Press the Date & Time button. 13. Press the Set Time button 14. Press the hour’s box. 15. Using the key pad, enter the time in hours. Press the minute’s box. Using the key pad enter the time in minutes.
- Page 38 DISPLAY ACTION Select ON to enable DST or OFF to disable DST. SETUP COMPLETE No action. Press the smaller √ (check) button inside the SETUP COMPLETE box. □ DST SETTINGS Press the DST SETTINGS button. Select any of these and use the keypad to modify. The default □...
- Page 39 DISPLAY ACTION prompt is displayed. 51. Press the √ (check) button to continue or press the number button and enter the number of cooks and press the √ (check) button 52. Press the √ (check) button. 53. No action. SETUP COMPLETE 54.
- Page 40 DISPLAY ACTION SETUP COMPLETE RESTART THE SYSTEM 68. Press the √ (check) button. 69. Press the Back button. 70. Press the Energy Savings button. The Energy Savings option is □ ENERGY SAVINGS used during idle periods to lower the frypot temperature to save energy.
- Page 41 DISPLAY ACTION 88. Use the up down arrows to change the brightness of the screen. Brightness has nine levels with 100 being the brightest and 10 the darkest. 89. Press the √ (check) button when complete. 90. No action. SETUP COMPLETE 91.
- Page 42 Adding or Editing Existing Products This function is used to add additional products or edit existing products. DISPLAY ACTION 1. Press the Home button. 2. Press the Recipes button. 1 6 5 0 3. Enter 1650 4. Press the √ (check) button. 5.
- Page 43 DISPLAY ACTION 14. Use the keypad to enter or edit the cook time in minutes and seconds. 15. Press the √ (check) button. 16. Press the load compensation or sensitivity button. 17. Use the up and down arrows to change the load compensation or sensitivity setting recommended for this product.
- Page 44 DISPLAY ACTION 26. Press the Shake Timer 2 button if an additional shake is needed, otherwise skip to step 30. 27. Enter the time in minutes and seconds for the seconds shake to be performed. 28. Press the √ (check) button. 29.
- Page 45 DISPLAY ACTION 39. Press the Crew Mode button to return to main screen. CREW MODE 4.10 Adding or Editing Menus This function is used to add or edit menus. Menus allow the operator to group certain products together. For example setting up a breakfast menu allows grouping of breakfast only products. This is helpful when switching products by narrowing the amount of products to choose from.
- Page 46 4.11 Changing Menus If separate menus are created for Fry Station, Chicken or Other Product, pressing the MENU button from the main screen shall display menu change options. Pressing the desired menu shall switch the menus. DISPLAY ACTION 1. Press the Menu button. 2.
- Page 47 DISPLAY ACTION Press the Service button. Press the Crew button. Select LEFT VAT or RIGHT VAT for split vats. Press and hold the Press and Hold button to begin high limit test. PRESS AND HOLD While pressing and holding the button the vat begins to heat. The controller displays the actual vat temperature during the test.
- Page 48 DISPLAY ACTION 7. Press the Down button. The next three errors are shown. Continue pressing the down arrow to view additional errors. 8. Press the Back button to return to menu or press the Home button to exit. 9. Press the Crew Mode button. CREW MODE 4.12.2.2 Passcode Setup The password mode allows a restaurant manager to change passwords for various modes.
- Page 49 DISPLAY ACTION □ DIAGNOSTICS MANAGER 14. Press the Crew Mode button. CREW MODE 4.12.2.3 USB – Menu Operation This option allows the ability to upload menus to the controller. This allows products to be created in MenuSync to be saved to a USB drive and uploaded to the fryer. DISPLAY ACTION 1.
- Page 50 DISPLAY ACTION Press the Report Card button. □ TODAY’S REPORT □ YESTERDAY’S REPORT Select the desired report □ WEEKLY REPORT The report will display the grade based on if the crew is filtering when prompted; if OQS is being measured regularly;...
- Page 51 4.13.3 Life Statistics The life statistics function is used to view the commission date of the fryer which is automatically set once the fryer has completed 25 cooks, the serial number of the controller, the total time the fryer has operated in hours and the total heat cycle count of the fryer (the amount of times the controller has turned the heat on/off).
- Page 52 DISPLAY ACTION button to exit. 4.13.6 Filter Statistics The filter statistics function is used to view the number of cooks remaining until the next filter, the number of cooks per vat, the number of filters per vat, the number of skipped or bypassed filters per vat and the average number of cook cycles per filter per day.
- Page 53 4.13.7 Software Version The software version function provides the software versions of the controller and circuit boards in the fryer system; the values of the temperature probe; the values of the AIF RTD probe and the ATO RTD probe and information on any attached gateway.
- Page 54 DISPLAY ACTION 5. Press the √ (check) button. 6. Press the √ (check) button. ALL USAGE DATA HAS BEEN RESET 7. Press the up arrow to scroll up; the back button to return to menu or the home button to exit. 4.13.9 Fresh Oil Statistics The fresh oil statistics function is used to view information on the current fresh oil DISPLAY...
- Page 55 4.13.11 Last Load Statistics The last load statistics provides data for the last cook cycle. DISPLAY ACTION 1. Press the Home button and then the Information button. 2. Press the Last Load button. 1. LAST COOKED PRODUCT 2. LAST LOAD START TIME 3.
- Page 56 FILTERQUICK™ FQGLA-T GAS FRYER CHAPTER 5: FILTRATION MENU INSTRUCTIONS Introduction The filtration system allows the oil in one frypot to be safely and efficiently filtered while the other frypots in a battery remain in operation. Section 5.2 covers preparation of the filter system for use. Operation of the system is covered in Section 5.3. WARNING The on-site supervisor is responsible for ensuring that operators are made aware of the inherent hazards of operating a hot oil filtering system, particularly the aspects of oil filtration, draining and...
-
Page 57: Filtration Menu Operation
paper, lay a sheet of filter paper over the top of the pan overlapping on all sides. Position the hold down ring over the filter paper and lower the ring into the pan, allowing the paper to fold up and around the ring as it is pushed to the bottom of the pan. -
Page 58: Quick Filter - Filter Prompt
5.3.1 Quick Filter – Filter Prompt Quick Filter is a feature that, after a number of preset cook cycles or time, will automatically prompt to filter the frypots. This function can also be performed on demand as well and is covered in the next section. Note: Simultaneous filtering of multiple vats does not occur. -
Page 59: Quick Filter On Demand
5.3.2 Quick Filter on Demand Quick Filter on demand filtration is used to manually start a quick filter. Note: Simultaneous filtering of multiple vats cannot occur. DISPLAY ACTION 1. The fryer MUST be at setpoint temperature. Press the filtration menu button. 2. - Page 60 DRAINING 11. No action required as oil drains into filter pan. FLUSHING 12. No action required as debris is flushed from the vat. FILLING 13. No action required as the vat refills. 14. Ensure that all tools are removed from the frypot prior to the drain closing to prevent damage to the drain.
-
Page 61: Clean And Filter
NOTICE The filter pad or paper must be replaced 5.3.3 Clean and Filter (or End of Day Filter) daily The clean and filter operation is an extended filtration with additional prompts to thoroughly clean the vat. This typically WARNING is done once a day or at the endo of the day. Ensure that the Do not drain more than one frypot at a filter pad or paper is replaced daily to keep the system operating correctly. - Page 62 DISPLAY ACTION 10. Push the filter pan fully into place. Displayed if the filter pan is not INSERT PAN fully engaged. DRAINING 11. No action required as oil drains into filter pan. 12. Scrub the vat. Press the √ (check - YES) button when complete. SCRUB INSIDE VAT –...
-
Page 63: Polish
DISPLAY ACTION DISCARD SOON in step 26. If OQS = Text and if the TPM reading is above OQS SETUP – DISCARD limits, proceed to DISCARD NOW in step 26. If OQS = Number proceed to TPM - XX step in step 27. 25. -
Page 64: Oqs (Oil Quality Sensor) Filter
DISPLAY ACTION the JIB is low on oil. If JIB is not low and this continues to occur, contact your FAS. 6. Carefully pull the filter pan from the fryer. DANGER REMOVE FILTER PAN Remove the filter pan slowly to avoid splashing of hot oil that may cause severe burns, slipping and falling. - Page 65 5.3.5 OQS (Oil Quality Sensor) Filter cont. DISPLAY ACTION 1. The fryer MUST be at setpoint temperature. Press the filtration menu button. 2. Select LEFT VAT or RIGHT VAT for split vats. 3. Select OQS (Oil Quality Sensor) - FILTER. 4.
-
Page 66: Drain To Pan
DISPLAY ACTION DANGER Keep all items out of drains. Closing actuators may cause damage or injury. FILLING 30. No action required while the vat is refilled. 31. No action required while the OQS sensor calculates the oil MEASURING OIL QUALITY quality value of the oil. - Page 67 DISPLAY ACTION 3. Press the down arrow. 4. Select DRAIN TO PAN. 5. Press the √ (check - YES) button to continue. If the X (NO) button is DRAIN NOW? selected, the controller goes to OFF. 6. Carefully pull the filter pan from the fryer. DANGER REMOVE FILTER PAN Remove the filter pan slowly to avoid splashing of hot oil...
-
Page 68: Fill Vat From Pan
5.3.7 Fill Vat from (Filter) Pan The fill vat from pan function fills the vat from the filter pan. DISPLAY ACTION 1. The fryer MUST be OFF. 2. Press the filtration menu button 3. Select LEFT VAT or RIGHT VAT for split vats. 4. -
Page 69: Pan To Waste (Bulk Only)
DISPLAY ACTION 4. Press the down arrow. 5. Select FILL VAT FROM BULK. 6. Press the √ (check - YES) button to continue. If the X (NO) button is FILL VAT FROM BULK? selected, the controller goes to OFF. 7. Press and hold the button to fill the vat. The bulk oil refill pump START FILLING? uses a momentary switch. - Page 70 DISPLAY ACTION 3. Press the down arrow. 4. Select PAN TO WASTE. 5. Press the √ (check - YES) button to continue. If the X (NO) button is selected, the user returns to the filtration menu. If no pan is PAN TO WASTE? detected, the controller displays INSERT PAN until the pan is detected.
-
Page 71: Clean (Boil-Out [Hot] Or Cold Clean For Non-Bulk Systems)
DISPLAY ACTION 13. The controller switches off. 5.3.10 Clean (Boil-Out [Hot] or Cold Clean) for Non-Bulk Oil Systems The clean mode is used to remove carbonized oil from the frypot. The type of clean (hot or cold) will depend on the manager settings - filter attributes - clean settings (see section 4.8). DISPLAY ACTION 1. - Page 72 DISPLAY ACTION INSERT DISPOSAL UNIT 8. Remove the filter pan and insert the disposal unit. DANGER Ensure a SDU (Shortening Disposal Unit) or suitable metal container is in place under the drain with a capacity of FOUR (4) gallons (15 liters) or more. 9.
-
Page 73: Clean (Boil-Out [Hot] Or Cold Clean For Bulk/Front Dispose Waste Systems)
DISPLAY ACTION 20. Remove the filter pan and dump the contents of the filter pan. REMOVE PAN Rinse the pan of any residual solution. VAT AND PAN DRY? 21. Ensure the vat and filter pan are completely dry. Press the √ (check - YES) button when finished. - Page 74 DISPLAY ACTION 4. Select CLEAN. COLD CLEAN NOW? or 5. Press the √ (check - YES) button to continue. If the X (NO) button is selected, the user returns to the filtration menu. BOIL OUT NOW? 6. Carefully pull the filter pan from the fryer. DANGER REMOVE FILTER PAN Remove the filter pan slowly to avoid splashing of hot oil...
- Page 75 DISPLAY ACTION the dispose valve completely forward to start disposal. If using front dispose continue to next step. If disposing to bulk skip to step 17. DISPOSING CLOSE DISPOSE VALVE WHEN FULL 16. No action is required while the pump transfers the waste oil from the pan to the front dispose container.
- Page 76 DISPLAY ACTION DRAINING 28. No action is required while the vat drains the small amount of residual solution left in the vat. 29. Rinse excess solution from vat. Press the √ (check - YES) button RINSE COMPLETE? when the vat is completely rinsed. 30.
- Page 77 5.3.12 Dispose for Non-Bulk Oil Systems cont. DISPLAY ACTION 1. Press the filtration menu button 2. Select LEFT VAT or RIGHT VAT for split vats. 3. Press the down arrow two (2) times. 4. Select DISPOSE 5. Press the √ (check - YES) button to continue. If the X (NO) button is selected, the user returns to the filtration menu.
- Page 78 DISPLAY ACTION DANGER When draining oil into an appropriate METAL container, make sure the container will hold at least FOUR gallons (15 liters) or more, otherwise hot liquid could overflow and cause injury. START DISPOSE 8. Press the BLUE button to start draining. DISPOSING 9.
- Page 79 DISPLAY ACTION 3. Press the down arrow two (2) times. 4. Select DISPOSE. 5. Press the √ (check - YES) button to continue. If the X (NO) button is DISPOSE NOW? selected, the user returns to the filtration menu. REMOVE FILTER PAN 6.
- Page 80 DISPLAY ACTION IS DISPOSE ATTACHMENT AND CONTAINER IN PLACE? 15. Attach the dispose attachment and ensure that the METAL disposal can is in place under the discharge nozzle. Press the √ (check - YES) button to continue. DANGER When draining oil into an appropriate METAL container, make sure the container will hold at least FOUR gallons (15 liters) or more, otherwise hot liquid could overflow and cause injury.
- Page 81 DISPLAY ACTION 24. Press and hold the button to fill the vat. The bulk oil refill pump START FILLING? uses a momentary switch. It only pumps as long as the switch is PRESS AND HOLD depressed. RELEASE BUTTON WHEN FULL 25.
-
Page 82: Preventative Maintenance
FILTERQUICK™ FQGLA-T GAS FRYER CHAPTER 6: PREVENTATIVE MAINTENANCE Fryer Preventive Maintenance Checks and Service DANGER The crumb tray in fryers equipped with a filter system must be emptied into a fireproof container at the end of frying operations each day. Some food particles can spontaneously combust if left soaking in certain shortening material. - Page 83 6.2.4 Clean around ATO sensors – Daily 1. Clean the sediment from around the ATO sensors during clean and filter when the oil is drained from the frypot. 2. Use a screwdriver or other similar object which allows access around the probe (see photo right).
- Page 84 Blower Assembly Mounting Nuts QUARTERLY CHECKS AND SERVICE 6.5.1 Clean Combustion Air Blower Assembly 1. Disconnect the blower wiring harness and Wiring connection remove the four blower mounting nuts. (See Figure 1) 2. Remove the blower from the fryer cabinet. 3.
- Page 85 The air/gas mixture is properly adjusted when the burner manifold pressure is in accordance with the applicable table in Chapter 2, Section 2.3 and the burners display a bright orange-red glow. If a blue flame is observed, or if there are dark spots on a burner face, the air/gas mixture requires adjustment. On the side of the blower housing opposite the motor is a plate with one or two locking nuts (see illustration on the following page).
- Page 86 WARNING DO NOT remove the pre-filter cap when a filter cycle is under way. DO NOT operate the filter system with the cap removed. Wear protective gloves when handling the cap. The metal and the exposed oil are hot. SEMI-ANNUAL CHECKS AND SERVICE 6.6.1 Clean Gas Valve Vent Tube NOTE: This procedure is not required for fryers configured for export to CE countries.
- Page 87 Verify that the filter pan is properly prepared for filtering, then drain a frypot of oil heated to 350°F (177°C) into the filter pan by using the drain to pan selection (see section 5.3.6). Now using the fill vat from pan drain pan selection (see section 5.3.7), allow all oil to return to the frypot (indicated by bub- bles in the cooking oil).
-
Page 88: Operator Troubleshooting
FILTERQUICK™ FQGLA-T GAS FRYER CHAPTER 7: OPERATOR TROUBLESHOOTING Introduction This chapter provides an easy reference guide to some of the common problems that may occur during the operation of your equipment. The troubleshooting guides that follow are intended to help you correct, or at least accurately diagnose, problems with your equipment. - Page 89 Troubleshooting Fryers 7.2.1 Controller and Heating Problems PROBLEM PROBABLE CAUSES CORRECTIVE ACTION A. Verify that the fryer is plugged in and that No display on the A. No power to fryer. the circuit breaker is not tripped. B. Failed controller or other component controller.
- Page 90 7.2.2 Error Messages and Display Problems PROBLEM PROBABLE CAUSES CORRECTIVE ACTION It is normal for this message to appear during startup if the lines have air in FQ4000 displays E19 Gas valve off, failed controller, failed them. Check that the gas valve is on. If transformer, contactor or open high-limit or E28 HEATING the gas is on and it continues shut the...
- Page 91 PROBLEM PROBABLE CAUSES CORRECTIVE ACTION A. Another filtration cycle or filter pad A. Wait until the previous filtration FQ4000 display shows change is still in process. cycle ends to start another filtration B. Filter interface board has not cleared cycle. Change filter pad if prompted. FILTER BUSY.
- Page 92 7.3.1 Incomplete Filtration Should the auto filtration procedure fail an error message is generated. Follow the instructions on the screen to return the oil and clear the error. DISPLAY ACTION 1. Press the √ (check) button if the vat is full to continue. The IS VAT FULL? controller returns to idle cook mode or .
- Page 93 7.3.2 Clogged Drain Error The clogged drain error occurs during auto filtration when the oil level sensor detects that oil has not completely drained from the frypot. This may be due to a clogged drain or an oil sensor failure. Follow the instructions on the controller display to clear the error.
- Page 94 Troubleshooting Bulk Oil System Problems PROBLEM PROBABLE CAUSES CORRECTIVE ACTION A. Power cycle fryer by disconnecting and reconnecting 5-pin bulk oil control power cord on rear of fryer. B. If a filtration or any other filter menu A. Incorrect setup procedure. function is in process or FILTER NOW? Top off reservoir B.
- Page 95 Code ERROR MESSAGE EXPLANATION VALVE INTERFACE BOARD FAILURE - FILTRATION Valve Interface Board connections lost or board AND TOP OFF DISABLED - CALL SERVICE failure. Call service. AUTOMATIC INTERMITTENT FILTRATION PROBE AIF RTD reading out of range. Call service. FAILURE - FILTRATION DISABLED - CALL SERVICE CHANGE FILTER PAD 25 hour timer has expired or dirty filter logic has activated.
- Page 96 TPM RANGE LOW The TPM is too low for a valid OQS reading. This may also be seen with fresh new oil. The incorrect oil type may be selected in the setup menu. The sensor may not be calibrated for the oil type.
- Page 97 FILTERQUICK™ FQGLA-T GAS FRYER APPENDIX A: BULK OIL CONNECTION AND SETUP INSTRUCTIONS NOTE: The instructions in this manual for using a bulk oil system for filling and discarding oil are for a bulk oil system. These instructions may not be applicable to some bulk oil systems. Bulk oil wiring A.1.1 Bulk Oil Systems connection...
- Page 98 It is imperative that the fryer system be completely power cycled for at least seconds after changing oil system type or waste oil type. The FilterQuick™ FQGLA-T fryers, equipped for use with bulk oil systems, have an onboard fresh oil jug supplied by the fresh oil bulk provider.
- Page 99 A.1.2 Bulk Oil Wiring WARNING The FQGLA™ fryer will ONLY operate with bulk oil systems that have a three-pole float switch. If the float switch is the older two-pole switch, call the bulk oil provider. These float switches are polarity specific which may short to ground and damage an FIB board.
- Page 100 , Merrychef and Multiplex ® ® ® ® ® Bringing innovation to the table · welbilt.com ©2022 Welbilt Inc. except where explicitly stated otherwise. All rights reserved. Continuing product improvement may necessitate change of specifications without notice. Part Number FRY_IOM_8197423 09/2022...
Need help?
Do you have a question about the Frymaster FilterQuick FQGLA-T and is the answer not in the manual?
Questions and answers