Table of Contents
Advertisement
Quick Links
FilterQuick
Electric Fryer
Installation, Operation and Maintenance Manual
This manual is updated as new information and models are released. Visit our website for the latest manual.
FOR YOUR SAFETY
Do Not Store or use gasoline or other
flammable vapors and liquids in the vicinity
of this or any other appliance.
*8197053*
Part Number: FRY_IOM_8197053 09/2017
Original Instructions
™
FQE30
READ THE INSTRUCTIONS BEFORE USING THE FRYER.
CAUTION
Advertisement
Table of Contents
Troubleshooting

Subscribe to Our Youtube Channel
Related Manuals for Welbilt Frymaster FilterQuick 3FQE30U


Summary of Contents for Welbilt Frymaster FilterQuick 3FQE30U
- Page 1 ™ FilterQuick FQE30 Electric Fryer Installation, Operation and Maintenance Manual This manual is updated as new information and models are released. Visit our website for the latest manual. FOR YOUR SAFETY Do Not Store or use gasoline or other flammable vapors and liquids in the vicinity of this or any other appliance.
- Page 2 NOTICE IF, DURING THE WARRANTY PERIOD, THE CUSTOMER USES A PART FOR THIS FRYMASTER FOOD SERVICE EQUIPMENT OTHER THAN AN UNMODIFIED NEW OR RECYCLED PART PURCHASED DIRECTLY FROM FRYMASTER OR ANY OF ITS AUTHORIZED SERVICERS, AND/OR THE PART BEING USED IS MODIFIED FROM ITS ORIGINAL CONFIGURATION, THIS WARRANTY WILL BE VOID.
- Page 3 DANGER Improper installation, adjustment, maintenance or service, and unauthorized alterations or modifications can cause property damage, injury, or death. Read the installation, operating, and service instructions thoroughly before installing or servicing this equipment. DANGER No structural material on the fryer should be altered or removed to accommodate placement of the fryer under a hood.
- Page 4 WARNING Use caution and wear appropriate safety equipment to avoid contact with hot oil or surfaces that may cause severe burns or injury. DANGER This fryer must not be modified to serve as a water-bath unit. This is especially dangerous if adjoining frypots are used for conventional frying.
-
Page 5: Table Of Contents
™ FilterQuick FQE30 Series Electric Fryers Installation and Operation Manual TABLE OF CONTENTS CHAPTER 1: Introduction General ............................. 1-1 Safety Information ........................1-1 Computer Information ......................1-2 European Community (CE) Specific Information ..............1-2 Installation, Operating, and Service Personnel ................ 1-2 Definitions .......................... - Page 6 Monthly Checks and Service ....................5-3 ™ 5.4.1 Check FilterQuick Controller Setpoint Accuracy ............5-3 Quarterly Checks and Service ....................5-4 5.5.1 Replace O-rings ......................5-4 5.5.2 Pre-Filter Maintenance ....................5-4 Annual/Periodic System Inspection ..................5-4 5.6.1 Fryer ..........................5-4 ™...
-
Page 7: Chapter 1: Introduction
™ FILTERQUICK FQE30 SERIES ELECTRIC FRYER CHAPTER 1: INTRODUCTION ™ NOTE: The Frymaster FilterQuick FQE30 fryer requires a start-up, demonstration and training before normal restaurant operations can begin. General Read the instructions in this manual thoroughly before attempting to operate this equipment. This manual covers all configurations of FilterQuick™... -
Page 8: European Community (Ce) Specific Information
Controller Information This equipment has been tested and found to comply with the limits for a Class A digital device, pursuant to Part 15 of the FCC rules. While this device is a verified Class A device, it has been shown to meet the Class B limits. -
Page 9: Shipping Damage Claim Procedure
QUALIFIED INSTALLATION PERSONNEL Qualified installation personnel are individuals, firms, corporations, and/or companies which, either in person or through a representative, are engaged in and are responsible for the installation of electrical appliances. Qualified personnel must be experienced in such work, be familiar with all electrical precautions involved, and have complied with all requirements of applicable national and local codes. -
Page 10: Reading Model Numbers
Reading Model Numbers Service Information For non-routine maintenance or repairs, or for service information, contact your local Frymaster Authorized Servicer (FAS). In order to assist you quickly, the Frymaster Authorized Servicer (FAS) or Service Department representative requires certain information about your equipment. Most of this information is printed on a data plate affixed to the inside of the fryer door. -
Page 11: Chapter 2: Installation Instructions
™ FILTERQUICK FQE30 SERIES ELECTRIC FRYER CHAPTER 2: INSTALLATION INSTRUCTIONS General Installation Requirements Proper installation is essential for the safe, efficient, trouble-free operation of this appliance. Qualified, licensed, and/or authorized installation or service personnel, as defined in Section 1.6 of this manual, should perform all installation and service on Frymaster equipment. Failure to use qualified, licensed, and/or authorized installation or service personnel (as defined in Section 1.6 of this manual) to install or otherwise service this equipment will void the Frymaster warranty and may result in damage to the equipment or injury to personnel. -
Page 12: Clearance And Ventilation
NOTICE If the electrical power supply cord is damaged, it must be replaced by a Frymaster Authorized Servicer or a similarly qualified person in order to avoid a hazard. DANGER This appliance must be connected to a power supply having the same voltage and phase as specified on the rating plate located on the inside of the appliance door. -
Page 13: Australian Requirements
2.1.3 Australian Requirements To be installed in accordance with AS 5601 and AS/NZS 3000:2007 local authorities, gas, electricity, and any other relevant statutory regulations. If casters are fitted, the installation must comply with AS5601 and AS1869 requirements. Power Requirements The optional three phase supply plug for 208v and 240v delta configuration fryers are rated at 60 amps, 250 VAC and is NEMA configuration 15-60P. -
Page 14: Positioning The Fryer
Positioning the Fryer DANGER No structural material on the fryer should be altered or removed to accommodate placement of the fryer under a hood. Questions? Call the Frymaster Dean Service Hotline at 1-800-551-8633. 1. Once the fryer has been positioned at the frying station, use a carpenter’s level placed across the top of the frypot to verify that the unit is level, both side-to-side and front-to-back. -
Page 15: Chapter 3: Operating Instructions
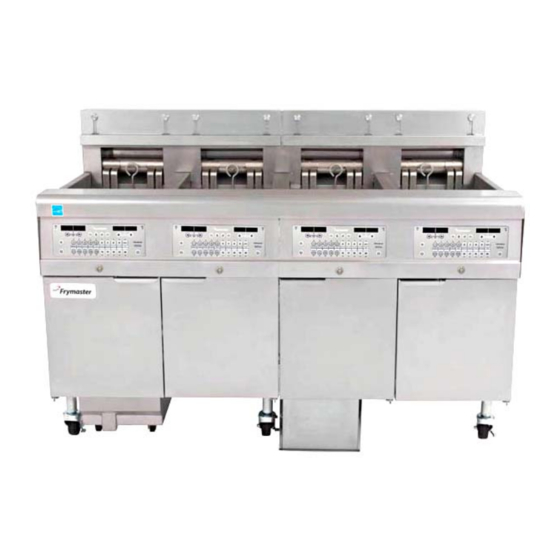
FILTERQUICK™ FQE30 SERIES ELECTRIC FRYER CHAPTER 3: OPERATING INSTRUCTIONS TYPICAL CONFIGURATION (FILTERQUICK™ FQE ELECTRIC 330 SHOWN) NOTE: The appearance of your fryer may differ slightly from that shown depending upon configuration and date of manufacture. 3–1... - Page 16 3.1 Equipment Setup and Shutdown Procedures Setup DANGER Never operate the appliance with an empty frypot. The frypot must be filled to the fill line with water or oil before energizing the elements. Failure to do so will result in irreparable damage to the elements and may cause a fire.
-
Page 17: Operation
3.2 Operation ™ ™ This fryer is equipped with FilterQuick controllers (illustrated below). Refer to the FilterQuick Controller Operation Manual 8197206 for programming and operating procedures. FILTERQUICK CONTROLLER Refer to Chapter 5 of this manual for operating instructions for the built-in filtration system. ®... -
Page 18: Routine Oil Changes
3.3.2 Routine Oil Changes When the oil reservoir level is low, the controller displays TOPOFF OIL EMPTY in the left display and CONFIRM in the right display. Press (CONFIRM). Some procedures may differ from photos shown. Follow manufacturer’s instructions for changing the JIB. If using solid shortening see Appendix C in the rear of this manual for instructions. -
Page 19: Chapter 4: Filtration Instructions
FILTERQUICK™ FQE30 SERIES ELECTRIC FRYERS CHAPTER 4: FILTRATION INSTRUCTIONS Introduction ™ The FilterQuick with fingertip filtration system allows the oil in one frypot to be safely and efficiently filtered while the other frypots in a battery remain in operation. Section 4.2 covers preparation of the filter system for use. Operation of the system is covered in Section 4.3. -
Page 20: Filterquick With Fingertip Filtration
2. Inspect the filter pan connection fitting to ensure that Inspect the filter both O-rings are in good condition (see Figure 2). connection fitting O-rings. 3. Then in reverse order, place the metal filter screen in the center of the bottom of the pan, then lay a sheet of filter paper on top of the screen, overlapping on all Figure 2 sides (see Figure1). -
Page 21: Incomplete Filtration
A FilterQuick™ controller controls the semi-automatic filtration system on the FilterQuick™ fryer. After a preset number of cook cycles the controller displays Filter now? alternating with YES NO. If NO is selected or a cook cycle is started, the controller will resume normal operation for a set amount of cooks and the prompt for a filter again. -
Page 22: Filter Busy
The controller displays REMOVE PAN. *NOTE: If the filter paper change time has expired, normally every 25 hours, the CHANGE FILTER PAPER? message repeats every 15 minutes instead of every four minutes. 6. Remove the pan. The controller display changes to CHANGE PAPER. Change the filter paper and ensure the filter pan has been pulled forward, out of the cabinet for at least 30 seconds. - Page 23 Filter Pump Reset Switch 4.6 Draining and Refilling Vats, and Disposing of Oil When cooking oil requires changing, drain the oil into an appropriate container for transport to the disposal container. (For safe, convenient draining and disposal of used oil, Frymaster recommends the use of the Frymaster Shortening Disposal Unit (SDU) for JIB systems.
- Page 24 WARNING NEVER drain boil-out solution into an SDU. Boil-out solution can cause damage to an SDU. 1. Turn the controller power switch to the OFF position. 2. Remove the filter pan and position the SDU or METAL container with a sealable cover with a capacity of FOUR gallons (15 liters) or larger under the fryer drainpipe to drain the oil.
-
Page 25: Chapter 5: Preventive Maintenance
FILTERQUICK™ FQE30 SERIES ELECTRIC FRYER CHAPTER 5: PREVENTATIVE MAINTENANCE Cleaning the Fryer DANGER The crumb tray in fryers equipped with a filter system must be emptied into a fireproof container at the end of frying operations each day. Some food particles can spontaneously combust if left soaking in certain shortening material. -
Page 26: Weekly Checks And Service
™ There are no periodic preventive maintenance checks and services required for your FilterQuick Filtration System other than daily cleaning of the filter pan and associated components with a solution of hot water and detergent. If you notice that the system is pumping slowly or not at all, verify that the filter pan screen is on the bottom of the filter pan, with the paper on top of the screen. -
Page 27: Monthly Checks And Service
3. Remove the filter pan and position a METAL container with a sealable cover with a capacity of FOUR gallons (15 liters) or larger under the fryer drainpipe to drain the boil out solution. The METAL container must be able to withstand the heat of the hot liquids. ™... -
Page 28: Quarterly Checks And Service
QUARTERLY CHECKS AND SERVICE 5.5.1 Replace the O-rings Refer to page 4-2 for inspection of O-rings. 5.5.2 PRE-FILTER MAINTENANCE (OQS units only) The pre-filter requires regular maintenance. Every 90 days, or more frequently if the flow of oil slows, remove the cap and clean the attached screen. -
Page 29: Filterquick Filtration System
Verify that the temperature and high-limit probes are properly connected, tightened and functioning properly, and that mounting hardware and probe guards are present and properly installed. Verify that component box and contactor box components (i.e. controller/controller, relays, interface boards, transformers, contactors, etc.) are in good condition and free from oil and other debris. -
Page 30: Chapter 6: Operator Troubleshooting
™ FILTERQUICK FQE30 SERIES ELECTRIC FRYER CHAPTER 6: OPERATOR TROUBLESHOOTING Introduction This section provides an easy reference guide to some of the common problems that may occur during the operation of this equipment. The troubleshooting guides that follow are intended to help correct, or at least accurately diagnose, problems with this equipment. -
Page 31: Troubleshooting
Troubleshooting 6.2.1 Controller and Heating Problems Problem Probable Causes Corrective Action A. Press the ON/OFF switch to turn A. Controller not turned on. the controller on. B. Verify controller power cord is No Display on B. No power to the fryer. plugged in and that circuit breaker Controller. - Page 32 Problem Probable Causes Corrective Action Fryers using the FilterQuick controller can toggle between F° to C° by pressing the button until Product setup is Controller display is in Press to scroll to Tech displayed. wrong temperature Mode and press . Enter 1658. Press the Incorrect display option programmed.
-
Page 33: Filtration Problems
6.2.3 Filtration Problems Problem Probable Causes Corrective Action Fryer filters after Filter prompt setting incorrect. Change the filter prompt setting. each cook cycle. Temperature too low or A. Ensure fryer is at setpoint before starting; controller displays OFF. ensure the controller is ON. Filter menu Another function is still in B. -
Page 34: Basket Lift Problems
Problem Probable Causes Corrective Action filtration won’t B. Check that MIB board is not sensor. start. in manual mode. B. Ensure MIB board is in “A” automatic C. Check to see that the MIB mode. Power cycle the fryer. cover is not damaged and C. -
Page 35: Error Log Codes
6.2.6 Error Log Codes (For FilterQuick™ Controller Only) CODE ERROR MESSAGE EXPLANATION ERROR TEMP PROBE Temp probe reading out of range FAILURE HI 2 BAD High limit reading is out of range. HOT HI 1 High limit temperature is past more than 410°F (210°C), or in CE countries, 395°F (202°C) HEATING FAILURE A component has failed such as controller, interface board, gas... -
Page 36: High Limit Test
CODE ERROR MESSAGE EXPLANATION OQS TEMP LOW Oil temperature is too low for a valid OQS reading. Filter at a temperature between 300ºF (149ºC) and 375ºF (191ºC). TPM RANGE LOW The TPM is too low for a valid OQS reading. The incorrect oil type may be selected in the setup menu. -
Page 37: Oqs (Oil Quality Sensor)
temperature (ex. 430F). 10. Release the () button. If the high-limit fails, the controller displays HIGH LIMIT FAILURE alternating with DISCONNECT POWER. If this happens, disconnect power to the fryer and call for service immediately. The vat stops heating and the controller displays the current temperature setting alternating with the actual temperature (ex. -
Page 38: Appendix A: Bulk Oil Instructions
FILTERQUICK™ FQE30 SERIES ELECTRIC FRYER APPENDIX A: BULK OIL INSTRUCTIONS A.1.1 Bulk Oil Systems Bulk oil systems have large oil storage tanks, typically located in the rear of the restaurant, that are connected to a rear manifold on the fryer. Waste oil is pumped from the fryer, via a fitting located on the rear of the fryer labeled DISPOSE (see Figure 1). - Page 39 A.1.2 Bulk Oil Wiring WARNING ™ The FilterQuick fryer will ONLY operate with bulk oil systems that have a three- pole float switch. If the float switch is the older two-pole switch, call the bulk oil provider. These float switches are polarity specific which may short to ground and damage an MIB board.
- Page 40 FILTERQUICK™ FQE30 SERIES ELECTRIC FRYER APPENDIX B: JIB Preparation with Solid Shortening Option 1. Open right door of fryer and remove brace in JIB cabinet. 2. Attach alignment bracket to bottom of ATO box brace with provided nuts. See Figure 1. 3.
- Page 41 FILTERQUICK™ FQE30 SERIES ELECTRIC FRYER APPENDIX C: Solid Shortening Melting Unit Use Reset oil reservoir system Ensure shortening melting unit is on. Fill melting unit with shortening. Melting Allow 2-3 hours for solid shortening to unit melt. DO NOT attempt to use the top off power switch system with unmelted oil in the top off...
- Page 42 DELFIELD® FRYMASTER® KOLPAK® MANITOWOC® MERRYCHEF® CONVOTHERM® FITKITCHEN™ GARLAND LINCOLN MERCO® MULTIPLEX® ©2017 Welbilt Inc. except where explicitly stated otherwise. All rights reserved. Continuing product improvement may necessitate change of specifications without notice. Part Number FRY_IOM_8197053 09/2017...
Need help?
Do you have a question about the Frymaster FilterQuick 3FQE30U and is the answer not in the manual?
Questions and answers