Raymarine SportPilot User Manual
Raymarine sportpilot: user guide
Hide thumbs
Also See for SportPilot:
- Quick reference manual (3 pages) ,
- Owner's handbook manual (62 pages)

Related Manuals for Raymarine SportPilot


Summary of Contents for Raymarine SportPilot
- Page 1 Distributed by Any reference to Raytheon or RTN in this manual should be interpreted as Raymarine. The names Raytheon and RTN are owned by the Raytheon Company.
- Page 2 SportPilot and SportPilot Plus Owner’s Handbook Document number: 81057-5 Date: May 2001...
- Page 3 SportPilot and SportPilot Plus - Owner’s Handbook Autohelm, HSB (High Speed Bus), SailPilot, SeaTalk and SportPilot are registered trademarks of Raymarine Ltd. Raymarine, AST (Advanced Steering Technology), AutoAdapt, AutoLearn, AutoRelease, AutoSeastate, AutoTack, AutoTrim, FastTrim, GyroPlus, RayGyro, RayPilot and WindTrim are trademarks of Raymarine Ltd.
-
Page 4: Table Of Contents
4.6 Installing the SportPilot ... 41 Step 1 – Remove the steering wheel ... 41 Step 2 – Mount the torque bracket ... 42 Step 3 – Plug the cables into the SportPilot ... 45 Step 4 – Assemble and secure the SportPilot ... 47... - Page 5 Chapter 5: Compass Calibration ...51 Index ... 55 SportPilot and SportPilot Plus - Owner’s Handbook Important note ... 51 Introduction ... 51 5.1 Compass linearization and heading alignment ... 52 5.2 Heading alignment without linearizing ... 54...
-
Page 6: Chapter 1: Introduction
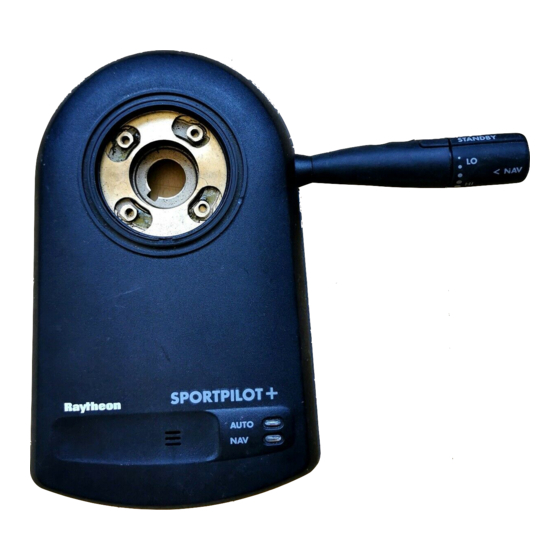
Chapter 1: Introduction Congratulations on the purchase of your Raymarine SportPilot. The SportPilot fits neatly over the steering column directly behind the steering wheel. All of the autopilot controls are located on a rotary switch at the end of a control stalk. These controls consist of: Standby mode ( STANDBY ) •... - Page 7 SportPilot and SportPilot Plus specifications There are two versions of the SportPilot: the SportPilot and the SportPilot Plus. It is vital to use the appropriate pilot for your boat. The SportPilot will not perform effectively if you exceed the following boat compatibility specifications.
-
Page 8: About This Handbook
About this handbook This handbook contains two main parts: Part 1: Using the SportPilot This part of the handbook explains how to use your SportPilot: Chapter 2: Operating the SportPilot Explains how to use the SportPilot. Chapter 3: Maintenance & Fault Finding Provides maintenance and fault finding information. -
Page 9: Safety Notices
Your Raymarine autopilot will add a new dimension to your boating enjoyment. However, it is the skipper’s responsibility to ensure the safety of the boat at all times by following these basic rules: •... -
Page 10: Emc Conformance
Chapter 1: Introduction EMC conformance All Raymarine equipment and accessories are designed to the best industry standards for use in the recreational marine environment. The design and manufacture of Raymarine equipment and accessories conform to the appropriate Electromagnetic Compatibility (EMC) standards, but correct installation is required to... - Page 11 SportPilot and SportPilot Plus - Owner’s Handbook...
- Page 12 Part 1: Using the SportPilot...
-
Page 14: Chapter 2: Operating The Sportpilot
As soon as the pilot is engaged (see below), the red LED glows permanently to confirm this selection. Switching off Switching off your boat’s power supply will switch off the SportPilot. To prevent the SportPilot draining the battery, always switch off the power supply when leaving the boat for long periods. -
Page 15: Making Course Changes
Disengaging the pilot You can disengage the SportPilot at any time by turning the rotary control switch to STANDBY . Making course changes Large course changes When your boat is under autopilot control, you can override the pilot at any time by steering the wheel in the normal way. -
Page 16: Adjusting Autopilot Gain
Adjusting autopilot gain The autopilot gain setting determines the amount of rudder the pilot applies during course change. Autopilot gain is relative to the speed of your boat.There are five available gain settings on the SportPilot: LO : lowest gain setting •... -
Page 17: Using Navigator (Track) Mode
Initially set the control stalk to the gain position most suited to your boat. The SportPilot will then automatically adjust the gain (up or down) from this setting as your boat speed changes. - Page 18 In Navigator (Track) mode, the SportPilot automatically determines the direction to the target waypoint: • if a turn to port is required, the SportPilot emits 2 short beeps • if a starboard turn is needed, the SportPilot emits 1 short beep To accept the turn, press in the end of the control stalk ( NAV ).
-
Page 19: Safety Points
Safety points The SportPilot can only follow a user defined route if the navigation equipment transmits all of the following information: • bearing to waypoint (BTW) • cross track error (XTE) • waypoint number If cross track error (XTE) is the only available information, the SportPilot will advance to the next waypoint without requesting permission. -
Page 20: Chapter 3: Maintenance & Fault Finding
Examine the cables for signs of wear or damage – replace any damaged cables. Cleaning the SportPilot • If the SportPilot is dirty, wipe it with a clean, damp cloth. • Never use chemical or abrasive materials to clean the SportPilot. EMC advice •... -
Page 21: Fault Finding
3.2 Fault finding All Raymarine products are designed to provide many years of trouble-free operation. We also put them through comprehensive testing and quality assurance procedures before shipping. In the unlikely event that a fault does occur with your autopilot, use the following table to help identify the problem and provide a solution. -
Page 22: Chapter 4: Installing The Sportpilot
Part 2: Installing the SportPilot... -
Page 24: Chapter 4: Installing The Sportpilot
Chapter 4: Installing the SportPilot Chapter 4: Installing the SportPilot Introduction The SportPilot fits neatly over your boat’s existing steering shaft with the steering wheel bolted directly onto the pilot. The unit can accommodate either tapers using a simple adaptor collar (supplied). -
Page 25: Planning The Installation
(x4) SportPilot and SportPilot Plus Owner's Handbook Owner's Handbook SportPilot and SportPilot Plus - Owner’s Handbook Steering boss parts Raymarine woodruff key Adaptor collar Retaining nuts (3/8in, 1/2in, 5/8in) and washers (M12 x 1, M16 x 2) Torque restraint parts... -
Page 26: Installation Instructions
Always use these ferrites supplied by Raymarine. During installation you should position these ferrites as close as possible to the SportPilot, just behind the bulkhead. You may need to remove the ferrites during installation. If you do so, you MUST reassemble them around the cable when installation is complete. -
Page 27: Emc Installation Guidelines
Connections to other equipment If your Raymarine equipment is to be connected to other equipment using a cable not supplied by Raymarine, a suppression ferrite MUST always be attached to the cable near to the Raymarine unit. -
Page 28: Installing The Compass
To achieve the best performance from the compass, mount it: • With the Raymarine logo facing the bow. Note: If it is not possible to install the fluxgate compass with the logo facing the bow, you must complete the Compass Calibration procedures (see Chapter 5:Compass Calibration). -
Page 29: Compass Mounting
2. Secure the cable at regular intervals with suitable cable clips/ties. Note: You will plug the moulded connector into the COMPASS socket when installing the SportPilot (see page 45). You will also need to attach the supplied suppression ferrite behind the bulkhead as close as possible to the SportPilot. - Page 30 Chapter 4: Installing the SportPilot D1515-2 Cutting and joining the compass cable You should not cut and rejoin the fluxgate compass cable unless absolutely necessary. If you do have to cut the cable, use Scotchlock connectors to re-join the wires color for color.
-
Page 31: Installing The Rudder Position Sensor - Optional
4.3 Installing the rudder position sensor – optional A rudder position sensor will improve your SportPilot’s performance by providing precise information about the rudder’s position. CAUTION: If your boat has a hydraulic helm pump, you MUST fit a rudder position sensor for the SportPilot to function accurately. - Page 32 Chapter 4: Installing the SportPilot Equal travel port and starboard Un-equal travel port and starboard Mounting the linear rudder position sensor 1. Use the steering system to position the bullhorn ram amidships. 2. If necessary, release the hydraulic pressure from the boat’s...
- Page 33 2. We recommend installing the sensor with its shaft pointing to starboard. If you cannot install the unit in this orientation, you can fit it with the shaft pointing to port. If you do this, the SportPilot will automatically correct itself, so no manual adjustment is necessary.
-
Page 34: Post Installation Checks
Note: You will plug the moulded connector into the RUDDER REF socket when installing the SportPilot (see page 45). Post installation checks When you have connected the sensor to your SportPilot, pressurize the steering system (if required). Note: Contact your steering gear manufacture for advice on this step. - Page 35 Before you start installing the rotary rudder position sensor, make sure that you have a spare cotter/split pin available in case the original is lost or cannot be used again. SportPilot and SportPilot Plus - Owner’s Handbook Steering arm Raymarine...
-
Page 36: Mounting The Sensor
2. Use the three self-tapping screws to attach the sensor directly to the transom (or a fabricated mounting base). 3. Remove the pin securing the steering arm to the power steering. 4. Fit the Raymarine steering pin and retain with a split/cotter pin. Steering arm Raymarine steering pin... - Page 37 8. Turn the steering from side to side to make sure that the linkage is free from obstructions at all angles. Power Steering steering Single drive system with horizontal steering arm SportPilot and SportPilot Plus - Owner’s Handbook Lock Connecting Socket Plastic sleeve Steering arm...
- Page 38 This will not affect autopilot performance, but will slightly alter the scaling of the data sent to the SportPilot. Preventing steering pin movement Note: This section does not apply to Volvo steering systems.
- Page 39 3. Measure 75 mm (3 in) to 310 mm (12.2 in) along the tie-bar from the center of the sensor steering pin. 4. Mark the tie-bar at this point. SportPilot and SportPilot Plus - Owner’s Handbook Rotary rudder position sensor...
- Page 40 Chapter 4: Installing the SportPilot 5. Use the two stainless steel hose clamps/jubilee clips to secure the steering pin to the tie-bar. View from above Steering pin Hose clamps/Jubilee clips 6. Cut the connecting rod to length. 7. Screw the lock-nuts and sockets onto the connecting rod.
- Page 41 Note: Connect the cables close to the SportPilot so that the connectors remain dry and free from strain. 2. Route the cable to the SportPilot, taking into account the EMC installation guidelines (page 22). Note: You will plug the moulded connector into the RUDDER REF socket when installing the SportPilot (see page 45).
-
Page 42: Providing Power For The Sportpilot
2. Protect the circuit with a 15 A fuse or 10 A thermal over-current circuit breaker (not supplied). 3. Route the cable to the SportPilot. You will plug the moulded end into the POWER/NMEA socket when installing the SportPilot. Notes: 1. -
Page 43: Interfacing With Nmea Equipment
Interfacing with NMEA equipment Using the NMEA cores in the Power/NMEA cable, the SportPilot can interface directly with equipment capable of transmitting NMEA 0183 data format. Sentences decoded are: Information Cross Track Error Bearing to Waypoint Distance to Waypoint Waypoint Number... -
Page 44: Connecting Seatalk Equipment
Chapter 4: Installing the SportPilot 4.5 Connecting SeaTalk equipment You can use the SportPilot’s dedicated SeaTalk port to connect it to SeaTalk instruments or autopilot control units. The SportPilot can then share SeaTalk data with the instruments. It can also provide them with power if required. -
Page 45: Typical Seatalk Connections
Extension cable cable Connecting SportPilot to ST50 instrument and handheld remote To connect just a remote to the SportPilot, either: • use an interface cable (D229 – see page 39) and a 3-pin SeaTalk socket and plug (deck connector), or •... -
Page 46: Installing The Sportpilot
1. Turn the wheel all the way over to starboard lock. You MUST do this so you can tighten the retaining nut at the end of installation (see page 48) without damaging the SportPilot. 2. Remove the steering wheel hub. -
Page 47: Step 2 - Mount The Torque Bracket
If you have assembled it correctly, the front will lay flat against the back. SportPilot and SportPilot Plus - Owner’s Handbook Adaptor collar Woodruff key Torque restraint... - Page 48 Chapter 4: Installing the SportPilot 4. Temporarily assemble the torque restraint to the cable holder. 5. Temporarily assemble the cable holder to the SportPilot using the screws and washers. 6. Temporarily assemble the SportPilot to the steering shaft. Do NOT tighten the retaining nut at this stage.
- Page 49 12. Remove the bolt from the torque restraint. 13. Remove the cable holder from the back of the SportPilot. 14. Apply the self-adhesive template (supplied) to the bulkhead, using the pencil outline as a guide.
-
Page 50: Step 3 - Plug The Cables Into The Sportpilot
16. Remove the template and smooth any rough edges. Step 3 – Plug the cables into the SportPilot 1. Pass the plugged ends of the power, compass, rudder position sensor (if fitted) and SeaTalk cables (if required) through the aperture. - Page 51 SportPilot and SportPilot Plus - Owner’s Handbook 2. Cut the cable sealing mat must be cut (as shown) with a knife to allow the plugged cables to pass through it. D1368-2 3. Pass the cables through the sealing mat. SeaTalk cable (3-core)
-
Page 52: Step 4 - Assemble And Secure The Sportpilot
Step 4 – Assemble and secure the SportPilot 1. Assemble the free end of the torque restraint to the cable holder. 2. Fit the cable holder to the SportPilot using the washers and screws. inch (19 mm) taper: Assemble the adaptor collar and the Raymarine woodruff key to the steering shaft. - Page 53 4. Secure the torque bracket and cable sealing mat to the bulkhead using the four self tapping screws. 5. Assemble the SportPilot to the steering shaft. 6. Retain the SportPilot using the split washer and retaining nut. CAUTION: Do NOT attempt to support the SportPilot during tightening.
- Page 54 Chapter 4: Installing the SportPilot Wheel Nut Washer Fitting the SportPilot to Wheel Nut Washer Fitting the SportPilot to 1 inch steering shaft Original woodruff key Screws and Steering washers boss Split washer Retaining inch steering shaft Adaptor Raymarine collar...
- Page 55 14. Reposition/reassemble the suppression ferrites close to the bulkhead. CAUTION: EMC conformance Always check the installation before going to sea to make sure that it is not affected by radio transmissions, engine starting, etc. SportPilot and SportPilot Plus - Owner’s Handbook Bulkhead Suppression ferrite D1372-2 D3106-2...
-
Page 56: Chapter 5: Compass Calibration
Chapter 4: Installing the SportPilot). However, if you are unable to mount the compass in this way or if the SportPilot steers onto the wrong heading, you must carry out compass linearization and heading alignment procedures in this chapter. -
Page 57: Compass Linearization And Heading Alignment
3 knots • you should take at least 2 minutes to complete 360° 4. Keep turning your boat in circles until the SportPilot indicates that compass linearization is complete by: flashing the red AUTO and yellow NAV lights together, and •... - Page 58 Chapter 5: Compass Calibration 5. The SportPilot beeps again after the 5 second beep to let you know how much deviation has been detected. Each beep represents 5° of deviation: • 1 beep indicates 0° to 5° of deviation •...
-
Page 59: Heading Alignment Without Linearizing
If required, you can align the heading to magnetic North without carrying out compass linearization: 1. With the SportPilot in Standby mode, press and hold the end of the control stalk ( NAV ) for 10 seconds – the red AUTO and yellow NAV lights will begin to flash alternately. -
Page 60: Index
Guidelines 21 Linear rudder position sensor 28 NMEA 38 Power 37 Rotary rudder position sensor 36 Routine checks 15 SeaTalk 39 Cleaning the SportPilot 15 – Compass calibration 51 Alignment (no linearizing) 54 Linearization and alignment 52 – Compass installation 23... - Page 61 Step 2 - Mount torque bracket 42 Step 3 - Plug-in cables 45 Step 4 - Secure SportPilot 47 Switching off 9 Switching on 9 Track mode see Navigator (Track) mode Waypoint arrival and advance 13 SportPilot and SportPilot Plus - Owner’s Handbook...
-
Page 62: Warranty Limitations
During this period, except for certain products, travel costs (auto mileage and tolls) up to 100 round trip highway miles (160 kilometres) and travel time of 2 hours, will be assumed by Raymarine only on products where proof of installation or commission by authorized service agents, can be shown. -
Page 63: Factory Service Centers
Factory Service Centers United States of America Raymarine Inc 22 Cotton Road, Unit D Nashua, NH 03063-4219, USA Telephone: +1 603 881 5200 Fax: +1 603 864 4756 www.raymarine.com Sales & Order Services Telephone: +1 800 539 5539 Ext. 2333 or +1 603 881 5200 Ext.
Need help?
Do you have a question about the SportPilot and is the answer not in the manual?
Questions and answers