Table of Contents
Advertisement
Advertisement
Table of Contents

Related Manuals for Leica Ivesta 3 Series


Summary of Contents for Leica Ivesta 3 Series
- Page 1 Ivesta 3 Series User Manual...
-
Page 2: Table Of Contents
The Ivesta 3 Series Using the Eyepieces What Your Stereo Microscope has to Offer You Setting the Correct Interpupillary Distance Microscopes of Ivesta 3 Series Changing Magnification (Zooming) Regulating the Resistance of the Focusing Drive Overview of Ivesta 3 and Ivesta 3 (C-mount) -
Page 3: Dimensional Drawings Ivesta
Contents (Continued) Specifications Spare Parts Optional Sales Items Technical Data Dimensional Drawings Ivesta 3 Dimensional Drawings Ivesta 3 (C-mount) Dimensional Drawings Ivesta 3 (Integrated camera) Appendix Calculating the Total Magnification/Field of View Diameter Ivesta 3 Series User Manual... -
Page 4: General Notes
General Notes Ivesta 3 Series User Manual General Notes... -
Page 5: Important Safety Notes
Important Safety Notes This user manual describes the usage of For information on the Enersight OSD in To maintain the camera in its original condition Ivesta 3 Series and contains important instruc- stand-alone mode, Enersight Desktop and to ensure safe operation, the user must... -
Page 6: Symbols Used
This warning label warns of dange- rous electrical voltage. The instruc- Read and understand this user tions must be followed without fail, manual before using this device. otherwise there is a risk of serious or fatal injury. Ivesta 3 Series User Manual General Notes... -
Page 7: Safety Instructions
Safety concept Cleaning Responsibilities of person in charge of camera Before using your Leica camera for the first Do not use any unsuitable cleaning agents, time, please read the "Safety Concept" booklet chemicals or techniques for cleaning. Refer to "Safety Concept" booklet. - Page 8 Place of use Refer to "Safety Concept" booklet. Refer to "Safety Concept" booklet. Never use Ivesta 3 Series or its components Place electrical components at least 10 cm for diagnostic or surgery procedures if it is away from the wall and from flammable not expressly intended for such use.
- Page 9 After the end of the product’s life, please Workplaces with microscopes and cameras faci- camera), please reset the mircoscope to contact Leica Service or Leica Sales on how to litate and improve the viewing task, but they the factory default, so that no personal dispose of it.
- Page 10 EMC precautions the radiated electromagnetic emissions are Prior installation Ivesta not interfering with other electronic devices. (Integrated camera), electromagnetic environment needs to be evaluated. It is the responsibility of the operator to ensure Ivesta 3 Series User Manual General Notes...
-
Page 11: End User License Agreement (Eula)
When sending or forwarding Ivesta 3 (Integra- red into by and between Leica Microsystems ted camera) to third parties for any reason, or ("Leica") and you, the end user, as the context when returning Ivesta 3 (Integrated camera) requires, either individually or as an authorized... - Page 12 Introduction Ivesta 3 Series User Manual Introduction...
-
Page 13: The Ivesta 3 Series
The Ivesta 3 Series Congratulations on obtaining your new Leica Despite this, you will notice that the controls stereo microscope from the Ivesta 3 Series. We and individual components do not differ signi- are convinced it will exceed your expectations, ficantly. -
Page 14: What Your Stereo Microscope Has To Offer You
What Your Stereo Microscope has to Offer You Apochromatic correction The optical system of the Ivesta 3 Series stereo Patented FusionOptics Technology microscopes consists of two beam paths The Ivesta 3 Series features the Leica patented The Ivesta 3 Series is a completely apochro- converging at 10°. -
Page 15: Microscopes Of Ivesta 3 Series
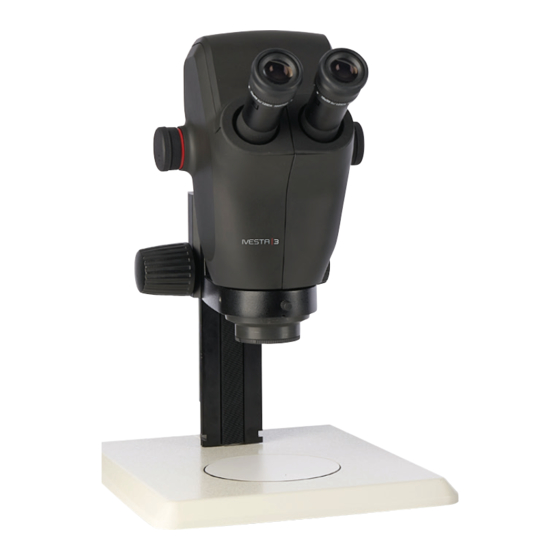
Microscopes of Ivesta 3 Series Ivesta 3 Ivesta 3 (C-mount) Ivesta 3 (Integrated camera) Ivesta 3 Series User Manual Introduction... -
Page 16: Overview Of Ivesta 3 And Ivesta 3 (C-Mount)
Overview of Ivesta 3 and Ivesta 3 (C-mount) 1. Leica microscope camera (available for Ivesta 3 (C-mount)) 2. C-mount adapter and video/photo tube (in Ivesta 3 (C-mount)) 3. Eyepieces 4. Adjustable tube: Interpupillary distance adjustable from 50 to 76 mm 5. -
Page 17: Overview Of Ivesta 3 (Integrated Camera)
50 to 76 mm 4. Fixing screw for optics carrier in the microscope carrier 5. Threads for fastening the light arm (both sides and rear) 6. Focusing drive 7. Magnification changer, right drive knob with magnification scale Ivesta 3 Series User Manual Introduction... - Page 18 The white balance is 3,840 × 2,160 (4K UHD). To be used on Quick Start Guide with a download link to the set to match LED illumination from Leica at the 4K monitors. latest "Enersight Desktop" software.
- Page 19 Detailed instructions about this topic can be found in the down- load section of Ivesta 3 (Integrated camera) on our website. Ivesta 3 Series User Manual Introduction...
-
Page 20: Operating Elements And Connectors Of Ivesta 3 (Integrated Camera)
– keyboard, – Wi-Fi dongle or – USB-to-Ethernet adapter (USB Type-A) – 5. USB SPEED port (insert USB thumb drive for data storage here) (stand-alone operation) 6. PC / power supply connection (USB Type-C) Ivesta 3 Series User Manual Introduction... -
Page 21: Standard Delivery And Optional Accessories Of Ivesta 3 (Integrated Camera)
Barcode scanner or Barcode reader enables you The USB-Ethernet adapter allows you to to assign tags for images and videos. connect an Ethernet cable to a USB-A port on the camera to set up a Ethernet network. Ivesta 3 Series User Manual Introduction... -
Page 22: Installation
Installation Ivesta 3 Series User Manual Installation... -
Page 23: Installing The Camera On Ivesta 3 (C-Mount)
(C-mount adapter) which allows the simple, fast moun- and the microscope camera. ting of digital cameras for photos and video. Please ask your Leica consultant about the options. NOTICE Always close the video/photo output with the protective dust cover if no 2. -
Page 24: Connectivity Of Ivesta 3 (Integrated Camera)
(Integrated camera) to your computer. connecting it to the Ethernet (via adapter) or back panel. Next, connect the power supply by connecting a Wi-Fi dongle. unit on the back panel of Ivesta 3 (Integrated camera). Ivesta 3 Series User Manual Installation... -
Page 25: Stand-Alone Mode: General Notes
USB-C / USB-A cable (PC mode). 1. Press "USB Eject" button but do not remove the stick. 2. Go to the settings page to format. During this process all data on the stick are erased. Ivesta 3 Series User Manual Installation... -
Page 26: Stand-Alone Mode: Cables And Terminals
1. Use the 4K HDMI cable to connect the HDMI port (1) of Ivesta 3 (Integrated camera) and the HD/4K monitor. 2. Use the USB-C/USB-A cable to connect the port (2) of Ivesta 3 (Integrated camera) to a suitable power socket. Ivesta 3 Series User Manual Installation... -
Page 27: Stand-Alone Mode: Installing Usb Thumb Drive
Stand-Alone Mode: Installing USB Thumb Drive Saving data on the Ivesta 3 (Integrated camera) To ensure the quickest possible way to store data, insert the USB thumb drive with sufficient free memory in the USB SPEED ports (1). Ivesta 3 Series User Manual Installation... -
Page 28: Stand-Alone Mode: Installing Wireless Usb Mouse
2. Switch on the wireless USB mouse. The connection between the wireless trans- mitter and the camera will be arranged automatically. It is not necessary to "pair" the devices with each other. Ivesta 3 Series User Manual Installation... -
Page 29: Pc Mode: Connecting A Computer, Installing Software
1. Connect Ivesta 3 (Integrated camera) to ling the software. a USB-C port (1) of the computer using a USB-C/USB-A cable . The camera is powered by the computer via the USB-C/USB-A cable. 2. Run Enersight Desktop on your PC. Ivesta 3 Series User Manual Installation... -
Page 30: Assembly
Assembly Ivesta 3 Series User Manual Assembly... -
Page 31: Assembling The Optics Carrier And Additional Objective
Screw the desired objective counter clock- Screw the objective protective glass microscope carrier and fasten it in the desi- wise into the optics carrier. directly onto the objective. red position with the clamping screw. Optical carrier: 76 mm (standard) Ivesta 3 Series User Manual Assembly... -
Page 32: Available Optional Graticules
Graticule 5 mm/0.05 mm eye piece in place. Graticule 100 Div./0.002" Graticule 100 Div./0.001" Graticule 150 Div./0.0005" Crosshairs Stage micrometer 50 mm, 0.1/0.01/ mm graduation Stage micrometer 1", 0.001" graduation Ivesta 3 Series User Manual Assembly... -
Page 33: Inserting The Graticules
4. Replace the insert in the eyepiece and press it firmly into place. 5. Insert the eyepiece in the tube and turn the eyepiece in the tube to align the graticule correctly. Ivesta 3 Series User Manual Assembly... -
Page 34: Inserting The Eyepieces
Inserting the Eyepieces Inserting the eyepieces Risk of infection You can use your Ivesta 3 Series 1. Push eyepieces as far as they will go into Direct contact with eyepieces is a stereo microscope together with the tubes. potential transmission method for a fixed or adjustable eyepiece. -
Page 35: Operation
Operation Ivesta 3 Series User Manual Operation... -
Page 36: Using The Eyepieces
All stereo microscopes from the object field seen through the Leica Microsystems are parfocally eyepieces. matched. However, the parfocality requires a personal dioptric correc- tion for the user. Ivesta 3 Series User Manual Operation... -
Page 37: Setting The Correct Interpupillary Distance
With the 10×/23B wide- at a specimen. field eyepiece for eyeglass wearers, it is approx. 22 mm. For those who do not use the eyepiece for eyeglass wearers, it is 12 mm. Ivesta 3 Series User Manual Operation... -
Page 38: Changing Magnification (Zooming)
The basis for the calculation of the total magnification and the field of view can be found in chapter "Calcu- lating the Total Magnification/Field of View Diameter", page 63. Ivesta 3 Series User Manual Operation... -
Page 39: Regulating The Resistance Of The Focusing Drive
Grip the outer drive knobs with both hands and turn them towards each other until the desired resistance is reached during focu- sing. Ivesta 3 Series User Manual Operation... -
Page 40: Changing The Position Of The Optics Carrier
1. Unscrew the clamping screw. sideways in the microscope carrier if the user wants to work from the side. 2. Turn the optics carrier laterally to the desi- red position. 3. Carefully tighten the clamping screw. Ivesta 3 Series User Manual Operation... -
Page 41: Switching On Ivesta 3 (Integrated Camera)
2. Start the Enersight Desktop software. For additional information on Ener- Ensure the following points: sight Desktop, refer to the website The microscope is connected to Microscope Software Platform a HD/4K monitor and the power Enersight. supply. Ivesta 3 Series User Manual Operation... -
Page 42: Operation In Stand-Alone Mode
Ivesta 3 (Integrated camera) in stand-alone mode, refer to chapter "Switching on Ivesta 3 (Integrated camera)" subchapter "Stand-alone mode", page 41. For information on working with the OSD menu, refer to Tutorials or the OSD User Manual. Ivesta 3 Series User Manual Operation... -
Page 43: Operation In Pc Mode
HD-capable monitor to the HDMI port of the microscope. The resolution on the connected HD/4K monitor is always a 16:9 format and independent of the computer resolution. Additionally the on-screen display (OSD) functionality is turned off on the HDMI monitor. Ivesta 3 Series User Manual Operation... -
Page 44: Operation In Network Mode
Connecting to the network You can connect to the network with the Wi-Fi dongle or with the USB-to-Ethernet adapter. Plug in the Wi-Fi dongle or the USB-to- Ethernet adapter to the USB port (1) on the back panel. Ivesta 3 Series User Manual Operation... - Page 45 IP address of the device. 4. Restart Ivesta 3 (Integrated camera). 2. Connect your mobile device to this AP (via Perform this step only once during Settings on your smartphone/tablet). the initial setup. Ivesta 3 Series User Manual Operation...
- Page 46 To switch from one mode to 3. Click on the latest IP address in the history another, the Wi-Fi button on the list. Enersight OSD must be disabled. Ivesta 3 (Integrated camera) is connected. Ivesta 3 Series User Manual Operation...
- Page 47 Troubleshooting Ivesta 3 Series User Manual Troubleshooting...
-
Page 48: Troubleshooting
"out of range" image will appear. or something similar, you can reset the micro- 4. Plug in the USB mouse again and configure scope resolution to 1,080 p. the correct live image resolution. Ivesta 3 Series User Manual Troubleshooting... -
Page 49: Recovery Mode
Please insert an USB flash drive with the latest firmware. Download the latest firmware from www.leica-microsystems.com. Please make sure the USB stick is inserted in the speed port so the system will automati- cally install the provided firmware. Ivesta 3 Series User Manual Troubleshooting... -
Page 50: Care And Maintenance
Care and Maintenance Ivesta 3 Series User Manual Care and Maintenance... -
Page 51: Care, Maintenance, Contact Persons
Leica microscope will continue to clean. Do not grease guide surfaces or mechanical work as well as it did on the very first day. - Page 52 Have technical service Servicing carried out by a Leica Microsystems Ensure that repairs are only be carried out authorized dealer. by Leica Microsystems-trained service tech- nicians. Only original Leica Microsystems spare parts may be used.
-
Page 53: Specifications
Specifications Ivesta 3 Series User Manual Specifications... -
Page 54: Spare Parts
USB Thumbdrive 64 GB × × 10726529 HDMI cable 2 m 10726962 USB power supply × × 10726783 USB dummy plug in 10726785 HDMI dummy plug in × 10640643 Cap for C-mount × 10725987 Lens shield × × × Ivesta 3 Series User Manual Specifications... -
Page 55: Optional Sales Items
Item Leica article number Designation 12730524 Wi-Fi Adapter 5 GHz (US) 12730557 Wi-Fi Adapter 5 GHz (EU) 12730559 Wi-Fi Adapter 2.4 GHz (EU) 12730601 USB-to-Ethernet Adapter 10450961 USB Barcode Reader 12730359 USB Footswitch 10450859 4K HDMI Monitor Ivesta 3 Series User Manual Specifications... -
Page 56: Technical Data
Ergonomic eyepieces for eyeglass wearers, 10× / 23, 16× / 15, adjustable, with eyecups 25× / 9.5, 40×/ 6 Interpupillary distance* 50–76 mm * Values with basic outfit (no supplementary lens, 10×/23 eyepieces) Ivesta 3 Series User Manual Specifications... - Page 57 5 V DC / 3 A Power consumption 15 W Supported software Enersight Color filter IR-cut coating 650 nm, not replaceable File formats JPG, TIF, BMP, MJPG; for overlays also PNG Compatibility USB 3.0, standard USB type C Ivesta 3 Series User Manual Specifications...
- Page 58 SPU25A-102 Input voltage 90–264 V AC Input frequency 47–63 Hz Output voltage 5 V DC Output current max. 3.3 A Output power max. 16.5 W Average active efficiency 82.5 % Efficiency at high load (10 %) 79.5 % No-load power consumption 0.014 W Ivesta 3 Series User Manual Specifications...
- Page 59 Dimensional Drawings Ivesta 3 Dimensions in mm Ivesta 3 Series User Manual Specifications...
-
Page 60: Dimensional Drawings Ivesta 3 (C-Mount)
Dimensional Drawings Ivesta 3 (C-mount) Dimensions in mm Ivesta 3 Series User Manual Specifications... -
Page 61: Dimensional Drawings Ivesta 3 (Integrated Camera)
Dimensional Drawings Ivesta 3 (Integrated camera) Dimensions in mm Ivesta 3 Series User Manual Specifications... -
Page 62: Appendix
Appendix Ivesta 3 Series User Manual Appendix... -
Page 63: Calculating The Total Magnification/Field Of View Diameter
Magnification in the binocular tube Calculation example: Field of view diameter in the specimen × M TOT VIS E × z ∅ OF: = 1.9 mm × z 1.6 ×4 1.6 × 20 × 4 = 128 Ivesta 3 Series User Manual Appendix... - Page 64 CONNECT WITH US! Leica Microsystems (Schweiz) AG · Max-Schmidheiny-Strasse 201 · 9435 Heerbrugg, Switzerland T +41 71 726 34 34 · F +41 71 726 34 44 www.leica-microsystems.com...
Need help?
Do you have a question about the Ivesta 3 Series and is the answer not in the manual?
Questions and answers