Table of Contents
Advertisement
Advertisement
Table of Contents

Related Manuals for Leica ASP300 S


Summary of Contents for Leica ASP300 S
- Page 1 Leica ASP300 S Advanced Smart Processor Automated vacuum tissue processor Operating Manual Leica ASP300S V1.0 English - 07/2006 Always keep this manual together with the instrument. Read this instruction manual carefully before working with the instrument.
- Page 3 Leica reserves the right to change technical following thorough investigation in this field. specifications as well as manufacturing process- We are under no obligation to update the present es without prior notice.
-
Page 4: Table Of Contents
Table of Contents Important information ......................... 6 Safety .............................. 7 Safety instructions ............................ 7 Warnings ..............................7 Integrated safety devices ........................11 Instrument components and specifications ................. 12 Overview - instrument components ..................... 12 Specific instrument options ........................14 Standard delivery - packing list ......................15 Technical Data ............................ - Page 5 7.1.2 Wax clean program ..........................65 7.1.3 Smart Clean ............................. 66 General cleaning steps .......................... 67 7.2.1 Daily cleaning and maintenance ......................69 7.2.2 Periodic cleaning and maintenance ....................71 Preventative maintenance schedule ....................72 Warranty and Service ....................... 74 Leica ASP300 S...
-
Page 6: Important Information
All information provided in this manual applies only to the instrument type indicated on the title Qualification of personnel page. • The Leica ASP300 S may be operated only by A name plate trained laboratory personnel. indicating the • The instrument may be operated only accord- instrument ing to the instructions contained in this manual. -
Page 7: Safety
Make sure to comply with the safety instructions and warnings in this chapter. Make sure to read these instructions, even if you are already familiar with the operation and use of other Leica products. 2.1 Safety instructions This instruction manual includes important infor-... - Page 8 The instrument must be set up in a well ventilated area, free from any ignition sources. The chemicals to be used in the Leica ASP300 S are both flammable and noxious. Do not operate the instrument in rooms with explosion hazard.
- Page 9 2. Safety Warnings - Operating the instrument The Leica ASP300 S may only be operated by trained laboratory personnel, according to its designated use and per the present instruction manual. The ON/STOP switch at the side of the instrument may be used in an emergency to stop the instrument during operation.
- Page 10 Safety Warnings -handling reagents Be careful when handling solvents! Always wear rubber gloves and safety goggles when handling the chemicals used in this instrument. Reagents used for tissue infiltration can be both toxic and/or flammable. To avoid damaging the instrument only use those reagents that are listed in chapter 3.5! Do not use acetone, benzene or trichlorethane in the instrument!
-
Page 11: Integrated Safety Devices
2. Safety 2.3 Integrated safety devices In the case of power failures or other processing problems the Leica ASP300 S incorporates specimen protection features such as a fluid level sensor and sophisticated software controls which ensure that processing can be completed successfully without damage to the tissue specimens. -
Page 12: Instrument Components And Specifications
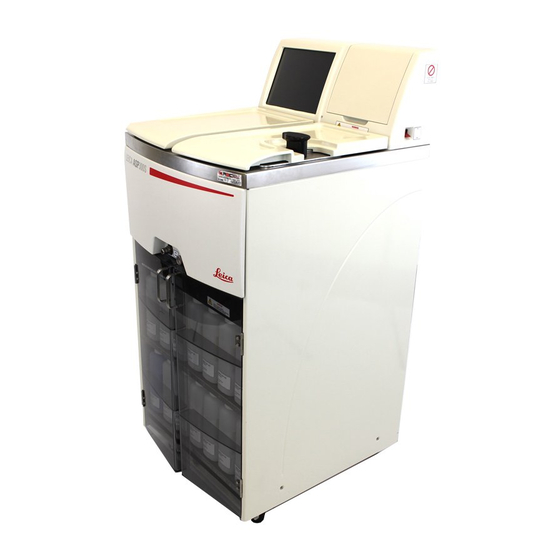
Instrument components and specifications 3.1 Overview - instrument components 12 11 Fig. 2 Operating Manual V 1.0 – 07/2006... - Page 13 15 - Reagent bottle (13 units) 16 - Drip tray 17 - Wax drain connection 18 - Remote drain connection 19 - Retort 20 - Wax baths 21 - Specimen basket 22 - Lid for specimen basket 23 - Splash protection Leica ASP300 S...
-
Page 14: Specific Instrument Options
Instrument components and specifications 3.2 Specific instrument options • Reagent Management System option (RMS) that displays the usage (length and frequency of use) of each reagent and also allows automatic ordering of reagent sequence, thus eliminating the need to physically move reagent bottles. -
Page 15: Standard Delivery - Packing List
Instrument components and specifications 3.3 Standard delivery - packing list The basic version of the Leica ASP300 S includes the following parts: Part no. 1 Leica ASP300 Basic Instrument 1 Set of power cords 230-240 V version: 1 Mains cable "D"... -
Page 16: Technical Data
Instrument components and specifications 3.4 Technical Data Nominal voltage: Two factory-preset voltages (not user-adjustable): 100 to 120 V 230 to 240 V Nominal frequency: 50 to 60 V Main fuses: Two fast-blowing melting fuses, 20 x 5 mm, UL-approved • for 100 to 120 V ;... - Page 17 ON/OFF (a) Time before 1st cycle: 16 min (b) Time between cycles: 20 min System setup Password status: Supervisor / User Type of password: alphanumeric, freely selectable Reagent Management Status: ON/OFF Software access control (lock mode): ON/OFF Leica ASP300 S...
- Page 18 Instrument components and specifications 3.4 Technical Data (continued) Hardware and Software: • Large color Liquid Crystal Display (LCD) and touchscreen. • User-friendly, intelligent software. • 3,5" floppy drive and printer port. • Alarm system with two remote alarm sockets. • Password-protected instrument supervisor mode. •...
-
Page 19: Compatible Reagents
Instrument components and specifications 3.5 Compatible reagents The following reagents may be used in the Leica ASP300 S: Fixatives 1. Formalin, buffered or unbuffered 2. Formalin saline Dehydration 1. Ethanol 4. Butanol 2. Isopropanol 5. Industrial Methylated Spirits 3. Methanol Clearing 1. -
Page 20: Setting Up The Instrument
• The instrument needs approx. 650 x 700 mm ca ASP300S are both flammable and floor space. noxious. The Leica ASP300S must • Practically vibration-free floor. be set up in a well ventilated area • Room temperature constantly between +10 °C free from any ignition sources. - Page 21 OFF) (41) should always remain in socket. position ON. It is recommended that the ASP300 S be plugged into a wall socket that has Ground Fault Circuit Interruption Important:! (GFCI) protection - as an additional Specification for connection (40) is electrical safeguard.
-
Page 22: Installing The Accessories
Setting up the instrument 4.3 Installing the accessories • Place the instrument in the definitive installa- tion position. Activated carbon filter • Unpack the activated carbon filter and insert it into the instrument (see Fig. Make sure to in- sert the filter with the correct side facing upwards. -
Page 23: Setting Up The Data Connections
Other connections • For additional data transfer and storage the instrument console is equipped with a stan- dard 1,44 MB floppy disc drive (11) and an RS 232 serial interface (12). Fig. 8 Leica ASP300 S... -
Page 24: Alarm Functions
Setting up the instrument Remote alarm 4.5 Alarm functions This alarm is also external to the Leica ASP300 S. The Leica ASP300 S is equipped with 3 different If installed, it might typically be connected to a alarm functions: remote dialer that sends an automated phone... -
Page 25: Switching The Instrument On
Caution! The instrument MUST be connected to an earthed mains power outlet socket. It is recommended that the ASP300 S be plugged into a wall socket that has Ground Fault Circuit Interruption (GFCI) protection - as an additional electrical safeguard. - Page 26 Setting up the instrument System Diagnostics Menu If, during initialization, "Touch here ..." (refer Fig. 10) is touched and subse- quently the supervisor password is entered, the SYSTEM DIAGNOSTICS menu+ (Fig. 12) opens up, giving ac- cess to standard instrument settings. Attention! These settings must be modified by experienced operators only.
-
Page 27: Touchscreen Functions
4. Setting up the instrument 4.7 Touchscreen functions The Leica ASP300 S is programmed and operated via a colored LCD touch screen. The control software contains an on-line help feature where detailed information on the operation of each screen, on error messages and on the software functions can be found. -
Page 28: Checklist For First Operation
Setting up the instrument 4.8 Checklist for first operation Once the instrument is ready to be switched on, the menus below have to be accessed to set the required parameters. For detailed instructions on each individual parameter, refer to the On-line help feature. →... -
Page 29: Operation
Fig. 16 In the window 5.1.1 System setup MORE MENU FUNCTIONS press SYSTEM SETUP. SYSTEM SETUP screen is divid- ed up into five selection fields: • Program Options • Display/Buzzer • Date/Time • Security • Instrument Fig. 18 Leica ASP300 S... - Page 30 5. Operation PROGRAM OPTIONS Select the options with which programs are executed here. Press a button to change the associated value. • STATION ALLOCATION: by Age or Sequential by Age RMS is activated, reagents will automatically be used in order of increasing cleanliness. Sequential - reagents will be used in sequential order of stations.
- Page 31 The options selected will be applied to ALL programs! A printer option will be dis- played only, if a printer has been configured for the in- strument. The individual options are described in chapter 5.3.1. Fig. 23 Leica ASP300 S...
-
Page 32: Access Levels
Enabling SUPERVISOR MODE already requires entering the password. 5.1.2 Access levels The Leica ASP300 S may be configured to allow two levels of user access. "Operator" symbol Operator access level: • Operators may run programs and view results. On this level, the OPERATOR symbol is displayed in the upper right corner of the touch screen;... - Page 33 5. Operation LOCK MODE: Enabled or Disabled The Leica ASP300 S provides a feature called "Lock" to prevent access to any operations of the Leica ASP300 S to unauthorized users. Enabled: The LOCK button is enabled in the menu func- tions.
-
Page 34: Installation Menu
5. Operation 5.1.3 INSTALLATION menu Use this menu to set the name of the instrument, the language of the user interface and configure → → a connected printer. The serial number of the instrument and the cur- rent software version are entered at the factory and cannot be edited. - Page 35 Fig. 30 Updating software: New versions of the ASP300 S operating software are provided on diskette. Such upgrades generally contain two to three diskettes. Do not perform a software upgrade if you do not have all of the diskettes in the upgrade package.
- Page 36 → → display the list of the printers that can be connected. • The Leica ASP300 S works with any printers that are com- patible with commercial PC’s. • With a Centronics standard cable, connect the printer to the ↓...
-
Page 37: Editing The Reagent List
• Press OK to confirm. • You will then automatically be prompted to select the reagent group: Select the reagent group Fig. 34 Allocate the new reagent to the desired group and press OK to confirm. Fig. 33 Leica ASP300 S... - Page 38 5. Operation Allocation of reagents to the correct reagent group is the basis for compatibility monitoring. Allocation to the wrong reagent group can lead to reagent cross contamination. Entering / modifying reagent thresholds Changeable parameters If warning thresholds are required for a certain reagent, enter them as follows: •...
- Page 39 • In the reagent list, highlight the station/ reagent that has been filled manually. ↓ • Press SET AS FULL to mark the station as "full". Upon activation of the RMS all warning thresholds for the se- lected reagent are automatically reset to "0". Leica ASP300 S...
-
Page 40: Viewing The Program List
5.1.5 Viewing the program list This list (Fig. 38) displays all programs currently existing in the → ASP300 S. You can create: • Up to 15 processing programs • 3 retort cleaning programs • 1 wax cleaning program. At supervisor access level: •... -
Page 41: Adding And/Or Modifying Programs
• Duration of step (with the exception of fill and drain steps). • Retort temperature (if "Ambient" is selected, the retort temperature indication remains empty). • Type of pressure and/or vacuum cycle. • Retort drain time. • Delay step. Leica ASP300 S... - Page 42 5. Operation Editing program steps • To edit a step, highlight the corresponding line and press the respective headline. • In the entry windows that pop up enter / select the program step settings. ↓ ↓ ↓ ↓ ↓ Fig. 40 Operating Manual V 1.0 –...
- Page 43 • Highlight the step you wish to delete. • Press DELETE. Remember that it is not possible to delete a step from a program containing only one single step. Programs must consist of at least one step. Leica ASP300 S...
-
Page 44: Favorites
5. Operation 5.1.7 Favorites In the ASP300 S you can define up to five Favorites. Favorites can be programmed to end either • "as soon as possible" (ASAP) or • at a predetermined finish time. ↓ Fig. 41 Adding and/or modifying favorites •... - Page 45 • Highlight the Favorite you wish to delete. Fig. 44 • Press DELETE. The Favorite is deleted without any further queries. The "Favorite" is only deleted from the FAVORITES list. The pro- gram itself is not deleted. Leica ASP300 S...
-
Page 46: Editing The Stations
5. Operation 5.1.8 Editing the stations The list below (Fig. 45) shows all stations / allocated → → reagents currently defined in the instrument. ↓ Fig. 45 Adding / changing reagents Allocating reagents Highlight the desired station, either by pressing •... -
Page 47: Reagent Groups
• Select the desired color and press OK to confirm. • If you want to close the entry field without changing the color, press CANCEL. • The new color will be used in all stations to symbolize the reagent group it has been allocated to. Leica ASP300 S... -
Page 48: Reagent Handling
Operation 5.2 Reagent handling 5.2.1 Fill/drain reagents (other than wax) 1. Manually changing the reagents • Remove the appropriate reagent bottle from the reagent cabinet, remove the bottle screw cap. ↓ • Drain/refill the reagent by pouring to/from a bulk container. Use the in- cluded funnel for clean filling. - Page 49 • On the screen, select an empty reagent bottle (no. 3) and the bulk container (Remote). Press STATION REFILL. • The remote fill procedure should be complet- ed in less than 170 seconds. • Make sure no reagent has been spilled. Fig. 49 Leica ASP300 S...
-
Page 50: Changing The Wax
5. Operation 5.2.2 Changing the wax Draining the wax • Connect the paraffin drain hose (36) to the wax drain connection (17) on the front of the instru- ment (Fig. 50) and insert the loose end of the hose into a collecting container. Make sure that the hose is pushed all of the way onto the O-rings of the wax drain connection. - Page 51 • Fill the wax bath with wax pellets up to the max- imum level line (1 in Fig. 53). This requires ap- prox. 3.5 kg pellets per wax bath (Leica pellets). → → • Press BACK and REAGENT STATUS to access the reagent status table (Fig.
- Page 52 5. Operation Adding molten paraffin To avoid damage to the thermal fuse, molten wax that is added to the wax baths may have a maximum temperature of 70 °C. • If filling with molten wax, do not fill above the →...
-
Page 53: Running Programs
FAVORITES ALL PROGRAMS Fig. 56 Fig. 57 In the ASP300 S you can define up to five Favorites. In the Favorites screen, press ALL PROGRAMS to access the All Pro- A "Favorite" is a processing program that is fre- grams screen, where all existing... -
Page 54: Editing A Selected Program
5. Operation 5.3.1 Editing a selected program Redefine the program finish time: • Press FINISH TIME. In the entry window, set a new finish time. ↓ Fig. 58 To modify a program before running it, press EDIT. A message will be displayed indicating that the changes will only affect the currently running program. - Page 55 The options selected will be applied to ALL programs! All run options can be enabled / disabled during the program run, if necessary. The printer option will be displayed only, if a printer has been configured for the instrument. Leica ASP300 S...
-
Page 56: Starting A Program
5. Operation 5.3.2 Starting a program ↓ Fig. 63 Fig. 62 • Press START to start the program. Press OK to confirm the query that follows. The NUMBER OF BLOCKS must be entered if RMS has been enabled. • The FINISH TIME button shows the time, when the current program will be finished. -
Page 57: Reagent Status
REAGENT STATUS screen. • number of programs carried out In addition, warning messages (on a yellow back- • number of days lapsed ground) are displayed in the program start since the wax has last been cleaned. screens. Leica ASP300 S... -
Page 58: System Monitor
5.5 System Monitor The SYSTEM MONITOR screen supplies important infor- → → mation on the Leica ASP300 S system status. PUMP AGE: Indication of hours of service of the pressure/ vacuum pump. A warning message is displayed according to the warning threshold set. After ap- prox. -
Page 59: On-Line Help
5. Operation 5.6 On-line help The Leica ASP300 S contains an on-line help feature, accessible from any of the principal screens. For information on basic problems refer to the Help Index which can be accessed by pressing INDEX on the Help screen. -
Page 60: Solutions
Power failure during a processing program • If a power failure occurs during a processing program, the Leica ASP300 S counts the time during as contributing to the step duration, i.e. the step is not prolonged by the power failure. -
Page 61: Troubleshooting
6. Solutions 6.3 Troubleshooting When a problem occurs in the Leica ASP300 S, take the following steps to diagnose the problem: • Check for error messages indicating the nature of the problem. • If an error message is displayed, press the Help button on the message for any information relating to the cause. -
Page 62: Typical Fill Or Drain Problems
2. Insufficient pressure or vacuum The Leica ASP300 S is unable to create sufficient vacuum (for a fill) or pressure (for a drain) in the retort. • Verify that the reagent bottle in question is correctly inserted in the reagent cabinet. -
Page 63: Cleaning And Maintenance
(Fig. 38, page 40). To display a clean program, highlight the respective line and press EDIT. The ASP300 S offers three retort clean programs and one paraffin clean program. Clean programs cannot be copied or deleted. 7.1.1 Retort clean programs... - Page 64 7. Cleaning and Maintenance Editing steps • To edit a program step highlight the corresponding line and press the respective table header. • To disable a step, set the number of cycles to "0". Only cleaning water steps can be disabled. The following characteristics of each step can be edited: •...
-
Page 65: Wax Clean Program
7. Cleaning and Maintenance 7.1.2 Wax clean program The Leica ASP300 S contains a wax clean feature that removes xylene from used wax. On the CLEAN PROGRAMS screen select the wax bath symbol corresponding to the wax bath ↓ the content of which you wish to clean. -
Page 66: Smart Clean
7. Cleaning and Maintenance 7.1.3 Smart Clean The smart clean prepares the ASP300 S for transport. During a smart clean, a series of air cleaning steps will be applied which will remove any excess liquid (condensate) from all internal tubing. -
Page 67: General Cleaning Steps
Clean the instrument exterior as necessary. Wipe with a damp cloth moist- ened with mild detergent and dry. Do not use solvents on painted surfaces and/or the touch screen! Checking the drip tray Regularly check the drip tray (16) for spilled reagents. (Fig. Fig. 71 Leica ASP300 S... - Page 68 7. Cleaning and Maintenance Draining the condensate bottle • Remove and empty the blue condensate bot- tle and reinsert (Fig. 72). Dispose of waste solvents with care according to local regulations and the waste management policy of the company or institution. Fig.
-
Page 69: Daily Cleaning And Maintenance
Cleaning the touch screen • On the MENU FUNCTIONS screen press CLEAN TOUCH SCREEN. • Clean the touchscreen. • Press ENABLE EXIT to enable the BACK key symbol. Press BACK to re- turn to MENU FUNCTIONS. Leica ASP300 S... - Page 70 7. Cleaning and Maintenance Cleaning the processor module top surface To ensure proper sealing of the lids at all times it is important that you: • remove both lids for cleaning • first scrape the stainless steel surface with the plastic scraper and then wipe down to remove all solid matter around the retort and paraffin wax stations.
-
Page 71: Periodic Cleaning And Maintenance
• While the reagent bottles are outside of the reagent cabinet, wipe the stainless steel inner walls of the reagent cabinet with a damp cloth moistened with a mild detergent. For further periodic cleaning and maintenance steps, refer to the mainte- nance schedule on the following pages. Leica ASP300 S... -
Page 72: Preventative Maintenance Schedule
7. Cleaning and Maintenance 7.3 Preventative maintenance schedule Maintenance activity daily weekly monthly every 3 months √ ∗ ∗ ∗ ∗ ∗ √ Lubricate reagent bottle "O" rings * by using the re- and check for damage. mote fill/drain system. √... - Page 73 Inspect and, if necessary, clean inside reagent bottles. √ Check that the bottle caps and seals of the reagent bottles are in place and tight. √ Check that the reagent bottles are fully inserted in the connection manifolds . Leica ASP300 S...
-
Page 74: Warranty And Service
The scope of warranty depends on the contents of the individual contract concluded. The terms of warranty of the Leica sales organization or other organization from which the contract product was purchased shall apply solely. - Page 75 Notes Leica ASP300 S...
- Page 76 Notes Operating Manual V 1.0 – 07/2006...
Need help?
Do you have a question about the ASP300 S and is the answer not in the manual?
Questions and answers