
Subscribe to Our Youtube Channel
Related Manuals for Leica RM2125


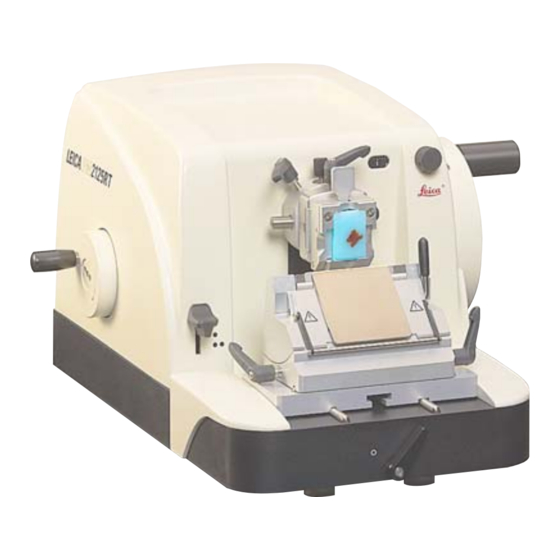
Summary of Contents for Leica RM2125
- Page 1 Leica RM2125/ Leica RM2125 RT Rotary microtome Instruction manual Leica RM2125 / RM2125 RT V2.3 English - 02/2009 Always keep this manual together with the instrument. Read carefully before working with the instrument.
- Page 3 Leica reserves the right to change technical stand it following thorough investigation in this specifications as well as manufacturing pro- field.
-
Page 4: Table Of Contents
Table of contents 1. Important notes ....................................5 Symbols in the text and their meaning ............................... 5 Qualification of personnel ..................................... 5 Designated use ....................................... 5 Instrument type ....................................... 5 2. Safety ........................................6 Safety instructions ......................................6 Warnings .......................................... 6 Integrated safety devices ..................................... -
Page 5: Important Notes
1. Important notes 1.1 Symbols in the text and their meaning 1.3 Designated use The Leica RM2125 / Leica RM2125 RT are manu- Dangers, warnings and cautions ap- ally operated rotary microtomes, used to pro- pear in a grey box and are marked by... -
Page 6: Safety
Safety Be sure to comply with the safety instructions and warnings in this chapter. Be sure to read these instructions, even if you are already familiar with the operation and use of other Leica products. 2.1 Safety instructions This instrument was built and tested in accor-... - Page 7 • Always wear safety goggles when sectioning brittle specimens! Specimen may splinter! • No fluid must enter the interior of the instrument during work! • Leica RM2125 RT only: Specimen blocks must not be oriented during the retraction phase. If a block is oriented during retraction, prior to the next section the block will advance by the retraction value PLUS the selected section thickness.
-
Page 8: Integrated Safety Devices
Safety Warnings - cleaning and maintenance • Only authorized and qualified service personnel may repair the instrument and access the instrument’s internal components. • Lock the handwheel before you starting to clean the instrument! • Do not use any solvents containing acetone or xylene for cleaning! •... - Page 9 Fig. 3 Knife holder E The knife guard of the knife holder E consists of a hinged shackle (5). To cover the edge, turn the shackle (5) upwards as shown in Fig. Fig. 4 Leica RM2125...
-
Page 10: Instrument Components And Specifications
Smooth-turning without lateral handwheel displacement feature Lever for activating the handwheel Clamping lever for brake knife holder base Fig. 5 Leica RM2125 RT Control knob for section Orientable fixture for thickness setting specimen clamps Section Coarse feed thickness wheel indication... -
Page 11: Instrument Specifications
• Both models are equipped with a slot cover preventing section waste from entering the interior of the instrument. Both the Leica RM2125 and Leica RM2125 RT are available in two ver- sions: 1. Leica RM2125 / RM2125 RT, course-feed wheel left, clockwise sense of rotation. -
Page 12: Technical Data
10 - 20 μm in 2-μm steps from 20 - 60 μm in 5-μm steps Total horizontal specimen feed: 25 mm Vertical specimen stroke: 59 mm Specimen retraction (RM2125 RT only): 220 μm Dimensions and weight Width 400 mm Depth... -
Page 13: Setup
4.2 Standard delivery The Leica RM2125 standard delivery includes: 1 Leica RM2125 basic instrument (without retraction) ..... 14 0457 37986 Basic instrument includes the following accessories: 1 Fixture for spec. clamps, orientable (attached to instrument) ... 14 0457 37990 1 Tool set - consisting of: 1 Allen key with handle, size 3 .......... -
Page 14: Unpacking Andinstallation
Setup 4.3 Unpacking andinstallation • Open the crate. • Remove all accessories (1) and the instruc- tion manual. • Remove Allen key, size 8 and set aside. • Remove cardboard tray (2). • Remove cushioning material. • Remove cardboard cover (3). •... -
Page 15: Inserting The Specimen Clamp
• Slide the dovetailed tenon (13) of the speci- men clamp from the left into the dovetail mortise of the clamping device (14) of the fix- ture. • To secure the specimen clamp, rotate the clamping lever (11) clockwise as far as it will Fig. 8 Leica RM2125... -
Page 16: Fastening The Specimen Clamp Directly To The Fixture
Setup 4.5 Fastening the specimen clamp directly to the fixture The specimen clamps (standard or universal cassette clamp) can also be fastened directly to the fixture (with- out dovetail clamping system). To do so, proceed as follows: • Move fixture (10) to uppermost position (turning the handwheel) and activate the handwheel locking mechanism. -
Page 17: Mounting The Knife Holder Base
Fig. 10 4.7 Mounting the knife holder • Rotate lever (24) counterclockwise to re- lease. • Slide groove of knife holder (25) onto T-piece (26) of knife holder base (21). • Rotate lever (24) clockwise to clamp. Fig. 11 Leica RM2125... -
Page 18: Operation
Operation 5.1 Clamping the specimen Always clamp the specimen block BEFORE clamping the knife. Lock the handwheel and cover the knife edge with the knife guard prior to any manipulation of knife or specimen, prior to changing the specimen block and during all work breaks! •... -
Page 19: Adjusting The Clearance Angle
Enlarged detail showing a clearance angle setting of 5°. For knife holder E we recommend clearance angle settings between 1° and 3°. • Hold the knife holder in the selected position and rotate lever (24) clockwise to clamp. Fig. 12 Leica RM2125... -
Page 20: Orienting The Specimen (Possible Only With Orienting Fixture For Specimen Clamps)
Fig. 10, p.17 Fig. 26, p. .28. Important for Leica RM2125 RT! Specimen blocks must not be oriented during the retraction phase! If a block is oriented during retrac- tion, prior to the next section the... -
Page 21: Trimming The Specimen
• Select a section thickness appropriate for trimming (e.g. 50 μm) with the section thick- ness selection knob (33). The thickness selected shows through win- dow (34). • Turn handwheel (15) until the specimen has been trimmed down to the desired level. Fig. 15 Leica RM2125... - Page 22 Operation Trimming with the mechanical trimming function (Leica RM2125 RT only) The Leica RM2125 RT is equipped with a me- chanical trimming function which is activated via de trimming lever (35). The trimming lever can be locked in 3 positions: 0 μm, 10 μm and 50 μm.
-
Page 23: Sectioning
• Remove the specimen from the specimen clamp and insert a new specimen block. • Use the coarse feed wheel to move the specimen clamp backwards far enough to be able to start trimming the new specimen block. Leica RM2125... -
Page 24: Accessories
Operation 5.8 Accessories All specimen clamps available as accessories fit into the orientable as well as in the non- orientable fixture for specimen clamps. 5.8.1 Standard specimen clamp The standard specimen clamp is available in two sizes: 40 x 40 mm and 50 x 55 mm. Rectangular blocks can be clamped directly in the standard specimen clamp. -
Page 25: Foil Clamp Type 1
• To clamp the specimen, screw setscrew (52) inwards bringing the movable jaw (48) close to the fixed jaw (47). • Insert foil clamp into standard specimen clamp as shown. • Rotate knurled screw (40) clockwise until the foil clamp is securely clamped. Fig. 21 Leica RM2125... -
Page 26: Foil Clamp Type 2
Operation 5.8.4 Foil clamp type 2 Foil clamp type 2 is appropriate for clamping ribbons of foil. Foil clamp type 2 is clamped in the standard specimen clamp. • To open the jaws (56) and (57) release the three screws (55) somewhat using an Allen key size 4 ( •... -
Page 27: Holder For Round Specimens
• To orient the specimen insert pin (67) into hole (68) and turn counterclockwise to re- lease the clamping mechanism. The speci- men can now be oriented as desired. • Turn pin (67) clockwise to secure the speci- men. Fig. 24 Leica RM2125... -
Page 28: Knife Holder Base
Operation 5.8.7 Knife holder base Knife holder base without lateral displacement The knife holder base without lateral adjustment Knife holder base without feature (21. ) can only be moved on the micro- lateral displacement (21. tome base plate in north-south direction. North-south adjustment The north-south orientation allows you to bring the knife holder as closely as possible to the... -
Page 29: Knife Holder N
(76) (see enlarged detail) of the rear clamping jaws. • To clamp the knife (74) evenly screw the two knife clamping screws (75) inward (turn clockwise). Fig. 27 Leica RM2125... -
Page 30: Knifeholder E
Operation 5.8.9 Knifeholder E Knife holder E is appropriate for all common brands of conventional disposable knives. It is available in two versions: with rear pressure plate (80) for low profile blades (77) or for high profile blades (78). Both rear pressure plates are also available separately and one type can easily be exchanged for the other. - Page 31 • When doing the adjustment, also make sure that the pressure plate is parallel to the lat- eral jaws of the knife holder. • Tighten screws (82). Fig. 30 Leica RM2125...
- Page 32 Operation Adjusting the front pressure plate The setscrews (87) on the underside of the knife holder (accessible through openings in the underside of the knife holder) enable you to height-adjust the front pressure plate. A size- 2 Allen key is needed to do the adjustment.
-
Page 33: Overview - Accessories
Standard cassette Holder for round Fixture for specimen Knife holder N specimens clamps, non-orientable for steel and tungsten carbide knives Leica RM2125 basic instrument Knife holder base Pressure plate, without lateral exchangeable displacement features Knife holder E for disposable blades... -
Page 34: Optional Accessories (Ordering Information)
Operation 5.9 Optional accessories (ordering information) Fixture non-orient.silver....................... 14 0502 38006 UCC with adapter RM2125, silver ....................14 0502 37999 Standardclamp with adapter 40x40, silver ................14 0502 37998 V-insert for Standardclamp, silver ..................... 14 0502 38000 Foil clamp - type I, black ......................14 0402 09307 Foil clamp - type 2, black ...................... -
Page 35: Cleaning And Maintenance
• Remove section waste with a dry brush. • Remove specimen clamp and clean separately. Instrument and outside surfaces If necessary, the varnished outside surfaces can be cleaned with a mild commercial household cleaner or soap water and then be dried with a most cloth. Leica RM2125... - Page 36 Cleaning and maintenance Knife holder E • Remove the front pressure plate for cleaning. • Fold knife guard (5) downward. • Rotate the blade clamping lever (89) down- ward. • Carefully remove the blade. • Pull out clamping lever (89) sideways. •...
-
Page 37: Maintenance Instructions
Leica. • At the end of the warranty period enter into a service contract. For more information, please contact your local Leica technical service center. • Clean the instrument daily. • Once a month, lubricate the following com- ponents with oil no. -
Page 38: Troubleshooting
7. Troubleshooting The table below shows the most frequent problems that occur when working with the instru- ment and gives advice for troubleshooting. Problem Possible causes Corrective action 7.1 Possible errors 1. Thick/thin sections • Blade insufficiently clamped. • Re-clamp blade. Alternately thick and thin sections •... -
Page 39: Warranty And Service
The scope of warranty depends on the contents of the individual contract concluded, being regarded as binding only the warranty conditions of your local Leica sales unit or of the company from which you acquired the product. Technical service information If you require technical service or replacement parts, please contact your Leica sales office or dealer who sold the product. -
Page 40: Ec Declaration Of Conformity
EC Declaration of Conformity EC Declaration of Conformity We herewith declare, in exclusive responsibility, that the instrument Leica RM2125/RM2125 RT – Rotary Microtome was developed, designed and manufactured to conform with the • Directive 98/79/EC of the European Parliament and of the Council (in-vitro diagnostic medical devices) •...
Need help?
Do you have a question about the RM2125 and is the answer not in the manual?
Questions and answers