Advertisement
Quick Links
Advertisement

Subscribe to Our Youtube Channel
Related Manuals for Link LK-RAV19R


Summary of Contents for Link LK-RAV19R
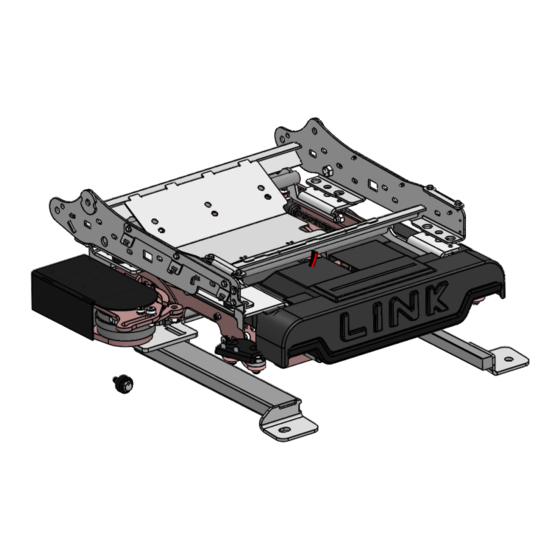
- Page 1 LINK INSTALLATION MANUAL LK-RAV19R TOYOTA RAV4 2019 & UP PASSENGER SIDE FRONT...
- Page 2 Take a moment and watch the video that shows all the features of the tablet. To do this, open the LINK IT app and tap on ‘INFO’. Make sure your volume is turned up and tap on App-101.
- Page 3 LK000R-01 Short Model LINK -Right- MANUAL SEAT LK-UNI-008R 008 Assembly Top Bearing Plate -Right- LK-RAV19R-03 Adaptateur au siege - Right- LINK RAV4 2019 + LIMITED L-LK912 Communication Cable Support PRD 333-107 Nylon Insert Locknut 5/16-18 PRD 339-136P Socket Shoulder Screw Zinc Plated 3/8 x 1/2 x 5/16-18 THD...
- Page 4 ITEM PART NUMBER DESCRIPTION LINK TOYOTA RAV4 2019 & UP LK000R-01 Short Model LINK -Right- LK-UNI-308R 008 Top Bearing Plate -Right- LK-UNI-408 408 Cam Pusher LK-UNI-508R 508R Pusher Frame -Right- PRD 333-107 Nylon Insert Locknut 5/16-18 PRD 192-135 Spring Tension Pin 5/32 x 3/4...
- Page 5 ITEM PART NUMBER DESCRIPTION LINK TOYOTA RAV4 2019 & UP LK-RAV19R-01 Adaptateur au Plancher - Right- LINK RAV4 2019 + LIMITED U-LK-KIA16R-05 Floor Fixing Screw -Right- PRD 332-164P Socket Head Cap Screw Zinc Plated 3/8-16 x 7/8 PRD 332-166P Socket Head Cap Screw Zinc Plated 3/8-16 x 1 1/4...
- Page 6 ITEM PART NUMBER DESCRIPTION LINK TOYOTA RAV4 2019 & UP LK-RAV19R-03 Adaptateur au siege - Right- LINK RAV4 2019 + LIMITED PRD 339-136P Socket Shoulder Screw Zinc Plated 3/8 x 1/2 x 5/16-18 THD PRD 333-107 Nylon Insert Locknut 5/16-18...
- Page 7 ITEM PART NUMBER DESCRIPTION LINK TOYOTA RAV4 2019 & UP LK-RAV19R-04 Seat cushion support adaptor - Right LK-RAV19R-05 Cushion support PRD 130-115 Slotted Hexagon Washer Head Tapping Screw #10 x 1/2 PRD 341-147P Flat Washer Zinc Plated I.D. 13/32 SAE for 3/8...
- Page 8 You may wish to take your own pictures and notes to help you reassemble it. Start by removing the four OEM seat bolts keeping for later reinstallation of the LINK floor adapter. Unplug all the wiring connectors and remove the seat.
- Page 9 2. Remove the recline handle and plastic trims on both sides of the seat. 3. Unhook the fabric flap under the seat, disconnect all the seat back wiring connecters, and unbolt and remove the seat back. LINK Toyota Rav 4 2019 & up |Passenger FRONT p. 4...
- Page 10 4. Remove the seat cushion. 5. Remove the seat base airbag. LINK Toyota Rav 4 2019 & up |Passenger FRONT p. 5...
- Page 11 6. Disconnect the seat fan, load cell sensors, and then remove the seat wiring along with the plastic support that holds the seat heating and load cell modules. 7. Remove the seat fan, it will not be reinstalled. LINK Toyota Rav 4 2019 & up |Passenger FRONT p. 6...
- Page 12 8. The metal seat pan, which is riveted to the seat base will have to be removed for reinstallation to the LINK. Cut the rivets and punch them out to remove the seat pan. 9. Remove the seat belt receiver and the interior plastic shrouds.
- Page 13 10. Remove the two load cells; they will be reinstalled onto the LINK seat adapter. LINK Toyota Rav 4 2019 & up |Passenger FRONT p. 8...
- Page 14 (If you wish to keep a record of your wire extensions for reference, you will find a lined sheet at the very end of this manual for that purpose.) WIRING BEFORE EXTENTION LINK Toyota Rav 4 2019 & up |Passenger FRONT p. 9...
- Page 15 LINK Toyota Rav 4 2019 & up |Passenger FRONT p. 10...
- Page 16 LINK Toyota Rav 4 2019 & up |Passenger FRONT p. 11...
- Page 17 LINK Toyota Rav 4 2019 & up |Passenger FRONT p. 12...
- Page 18 WIRING AFTER EXTENTION NOTE: Once the extension is finished place it, along with the seat back and seat base air bag, on the second row seat ready to be reinstalled to the LINK. LINK Toyota Rav 4 2019 & up |Passenger FRONT p. 13...
- Page 19 12. Install the provided door shim Part # LK-RAV419R-02, this will allow the door to open wider for better access. Use the M8-1.25X30mm bolt and washer provided. LINK Toyota Rav 4 2019 & up |Passenger FRONT p. 14...
- Page 20 13. Run the power from the battery to the LINK. To do this, thread the red power cable (+) under the doorstep moulding and through the firewall. Make sure you pass through a grommet in the firewall to prevent the cable from chaffing.
- Page 21 (Part # U-LK-KIA16R-05) at the back right hand side. 17. Place the LINK in the vehicle on the floor adapters. Use the four longer (3/8’’-16 x 1¼’’) socket cap bolts to secure the LINK by the pivot, and use the four shorter (3/8’’-16 x 7/8’’) bolts to secure the interior of the LINK.
- Page 22 18. Connect the LINK to the vehicle’s 12V power supply. Using the ‘BYPASS’ mode on the tablet, carefully use ‘PIVOT’ ‘TRAVEL’ and ’TILT’ to move the LINK out of the vehicle. Install the OEM load cells on the left hand side of the seat adapter using the four provided 5/16-18x3/4 button head allen screws.
- Page 23 20. Install the OEM nuts on to the load cells and then tighten down all the bolts that hold the top seat adapter. 21. Pass the LINK control box wire through the hole on the right hand side of the seat adapter and install the wire support onto the bolt of the tilt arm.
- Page 24 22. Install the seatbelt receiver to the LINK seat adapter using the provided 7/16-20x1’’1/2 bolt. Screw the bolt through the adapter towards the exterior, leave enough thread for the seat belt receiver and OEM nut. Clip the wire into the provided hole.
- Page 25 Attach the wires on the left hand side with zip ties. 25. Install the provided bracket # LK-RAV419R-06 that holds the seat trim using the provided self-tapping screws. LINK Toyota Rav 4 2019 & up |Passenger FRONT p. 20...
- Page 26 26. Install the seat pan onto the LINK seat adapter using the provided self-tapping screws. 27. Reinstall the seat-base airbag onto the seat-pan. Run the wires from the extension and reconnect to the airbag and load cells, attach with zip ties. Attach the load cell module under the pan with zip ties and attach all loose wiring.
- Page 27 28. Next, install the seat cushion. Securely attach all the fabric flaps under the seat with zip ties. LINK Toyota Rav 4 2019 & up |Passenger FRONT p. 22...
- Page 28 Make sure it is tight and is not hanging down where it could get caught in the LINK mechanism. The extended wiring, which comes out of the bottom right- hand corner of the seat between the seat base and the seat back, must be securely attached with zip ties.
- Page 29 31. The right hand plastic seat trim on will have to be cut and modified. Cut off 2 inches from the bottom of the trim. LINK Toyota Rav 4 2019 & up |Passenger FRONT p. 24...
- Page 30 Use zip ties as required. 33. Install the modified seat trim and reinstall the recline handle. LINK Toyota Rav 4 2019 & up |Passenger FRONT p. 25...
- Page 31 34. Attach the extended wiring temporarily at the back of the seat. Bring the LINK out to verify if you have enough wire to follow the LINK in and out. Attach the wire at the back of the seat and at the lower corner of the LINK.
- Page 32 36. Now that the LINK is in its ‘HOME’ position, RESET the unit by pressing ‘CONFIRM RESET’. A screen will pop up to ask: ‘ARE YOU SURE YOU WANT TO RESET?’. Press ‘ACCEPT’. The LINK will emit two (2) audible beeps to confirm ‘RESET’, and will now be in reduced power mode.
- Page 33 9 Volt Battery The LINK is designed to run off of the vehicle’s 12 volt battery. It is equipped with many safeguards to ensure that the controller box always retains its programing sequence. One of those safeguards is the 9 volt memory backup battery.
-
Page 34: Normal Use
Normal All systems functional and ready to go. To exit, simply run the LINK a full cycle. Power Reduce Mode Do not use the LINK - contact your Mobility Equipment Dealer Major Problem No Response No 12V Power DIAGNOSTIC MODE... -
Page 35: Year Limited Warranty
ADAPT-SOLUTIONS #1 LTD. 3 YEAR LIMITED WARRANTY Adapt-Solutions # 1 Ltd. (Adapt Solutions), warrants to the original purchaser of a LINK that the equipment is free from defects in material and workmanship for a period of three years from date of purchase. - Page 36 LINK Toyota Rav 4 2019 & up |Passenger FRONT p. 31...
Need help?
Do you have a question about the LK-RAV19R and is the answer not in the manual?
Questions and answers