Subscribe to Our Youtube Channel
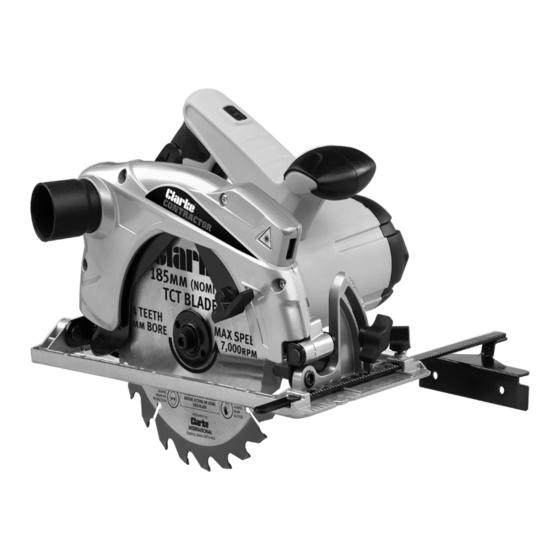
Summary of Contents for Clarke CONTRACTOR CON185B
- Page 1 185MM CIRCULAR SAW WITH LASER GUIDE (230V) MODEL NO: CON185B PART NO: 6462502 OPERATION & MAINTENANCE INSTRUCTIONS ORIGINAL INSTRUCTIONS DL0222...
-
Page 2: Environmental Protection
INTRODUCTION Thank you for purchasing this CLARKE 185mm (230V) Circular Saw. Before attempting to use this product, please read this manual thoroughly and follow the instructions carefully. In doing so you will ensure the safety of yourself and that of others around you, and you can look forward to your purchase giving you long and satisfactory service. -
Page 3: Specifications
SPECIFICATIONS Model Number CON185B Rated Voltage 230V~50Hz Power Input 1500 W IP Rating IPX0 No Load Speed 4700 RPM Maximum Depth of Cut 63 mm @ 90 - 43 mm @ 45 Dust Port Dimension 35mm (Internal) Laser Guide Class 2 Laser Blade Dimensions 185 mm Ø... - Page 4 OVERVIEW Parts & Service: 020 8988 7400 / E-mail: Parts@clarkeinternational.com or Service@clarkeinternational.com...
-
Page 5: Carton Contents
CARTON CONTENTS The following items should be supplied in the carton. If any parts are missing or damaged, please contact the CLARKE dealer where you purchased the tool. • 1 x 1500 Watt Circular Saw. • 1 x 185 mm Ø x 20 mm Bore x 24 Tooth TCT blade. -
Page 6: Power Tool Safety Warnings
POWER TOOL SAFETY WARNINGS WORK AREA 1. Keep the work area clean and well lit. Cluttered and dark areas invite accidents. 2. DO NOT operate this saw in explosive atmospheres, such as in the presence of flammable liquids, gases or dust. Power tools create sparks which may ignite the dust or fumes. - Page 7 5. DO NOT overreach. Keep proper footing and balance at all times. This enables better control of the saw in unexpected situations. 6. Dress appropriately, DO NOT wear loose clothing or jewellery. Keep your hair, clothing and gloves away from moving parts. Loose clothes, jewellery or long hair can be caught in moving parts.
-
Page 8: Safety Instructions For All Saws
SAFETY INSTRUCTIONS FOR ALL SAWS 1. Keep hands away from cutting area and the blade. Keep your second hand on the auxiliary handle, or motor housing. If both hands are holding the saw, they cannot be cut by the blade. 2. -
Page 9: Prevention Of Kickback
PREVENTION OF KICKBACK Kickback is a sudden reaction to a pinched, bound or misaligned saw blade, causing an uncontrolled saw to lift up and out of the workpiece toward the operator. When the blade is pinched or bound tightly by the kerf closing down, the blade stalls and the motor reaction drives the unit rapidly back toward the operator. -
Page 10: Electrical Connections
ELECTRICAL CONNECTIONS WARNING: READ THESE ELECTRICAL SAFETY INSTRUCTIONS THOROUGHLY BEFORE CONNECTING THE PRODUCT TO THE MAINS SUPPLY. Before switching the product on, make sure that the voltage of your electricity supply is the same as that indicated on the rating plate. This product is designed to operate on 230VAC 50Hz. -
Page 11: Depth Of Cut Adjustment
ADJUSTMENTS DEPTH OF CUT ADJUSTMENT 1. Pull up the depth adjustment lever to loosen the lever bolt. 2. Adjust the base plate until the required depth of blade is protruding through the base plate. 3. Push down the depth adjustment lever to tighten. -
Page 12: Mounting And Using The Parallel Guide
MOUNTING AND USING THE PARALLEL GUIDE MOUNTING 1. Slide the parallel guide into the base plate as shown. 2. Secure in place using the parallel guide locking screw. ADJUSTING 1. Loosen the Parallel Guide Locking Screw. 2. Adjust the Parallel Guide to the required length. -
Page 13: Operation And Use
OPERATION & USE CORRECT HAND POSITION For your own safety, always hold the circular saw as shown in this picture, with your right hand on the main handle and your left hand on the auxiliary handle. SWITCHING ON/OFF The on/off trigger is fitted with a safety button which prevents the circular saw from being started accidentally. -
Page 14: Maintenance
5. Tighten the blade clamping screw using the hexagon key supplied. Replacement blades can be purchased from your local CLARKE dealer. • CLARKE 185mm TCT Circular Saw Blade 24 tooth, Part No. 6490045 Parts & Service: 020 8988 7400 / E-mail: Parts@clarkeinternational.com or Service@clarkeinternational.com... -
Page 15: Parts Diagram
PARTS DIAGRAM PARTS LIST Power Cable Screw, M4 x 8 Left & Right Side of Handles Laser Components Power Cable Clamp Cover Line Board Screw, ST4 x 16 Screw, M3 x 16 Parts & Service: 020 8988 7400 / E-mail: Parts@clarkeinternational.com or Service@clarkeinternational.com... - Page 16 On/Off Trigger Switch Gear Assembly Capacitor Screw, M4 x 12 Cable Sheath Blade Guard Torsion Spring Connection Block Screw, ST4 x 10 Transformer Assembly Blade Guard Assembly Laser Switch Button Blade Guard Lever Screw, ST4 x 25 Split O Ring Back Cover Lower Splint Brush Holder Shatterproof Mat...
- Page 17 DECLARATION OF CONFORMITY - UKCA Parts & Service: 020 8988 7400 / E-mail: Parts@clarkeinternational.com or Service@clarkeinternational.com...
-
Page 18: Declaration Of Conformity (Ce)
DECLARATION OF CONFORMITY - CE Parts & Service: 020 8988 7400 / E-mail: Parts@clarkeinternational.com or Service@clarkeinternational.com... - Page 19 NOTES Parts & Service: 020 8988 7400 / E-mail: Parts@clarkeinternational.com or Service@clarkeinternational.com...


Need help?
Do you have a question about the CONTRACTOR CON185B and is the answer not in the manual?
Questions and answers