
Subscribe to Our Youtube Channel
Related Manuals for Clarke CSS16V


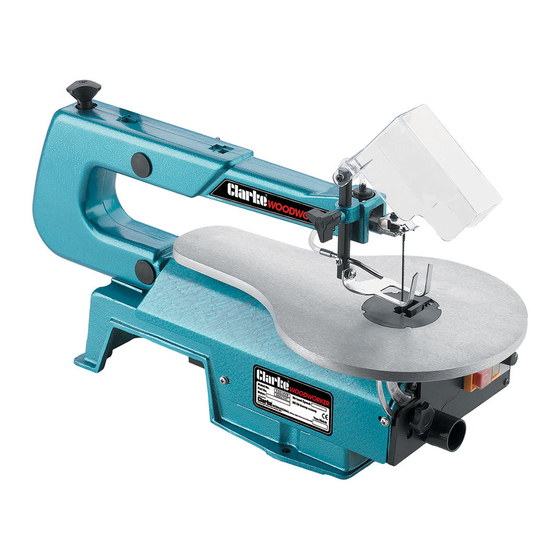
Summary of Contents for Clarke CSS16V
- Page 1 400mm (16") 400mm (16") VARIABLE SPEED SCROLL SAW VARIABLE SPEED SCROLL SAW Model No. CSS16V Part No. 6460112 Operating and Maintenance Instructions 1004 ©...
- Page 2 © Copyright Clarke International. All rights reserved. August 1999...
-
Page 3: Table Of Contents
Thank you for purchasing this CLARKE 400mm (16") Scroll Saw, designed for DIY or hobby use. Before operating this machine, please read this manual thoroughly and carefully follow the instructions given. In doing so you will ensure the safety of yourself and that of others around you, and you can look forward to the Scroll Saw giving you long and satisfactory service. -
Page 4: Safety Precautions General
SAFETY PRECAUTIONS GENERAL SAFETY RULES FOR OPERATING MACHINERY WARNING: As with all machinery, there are certain hazards involved with their operation and use. Exercising respect and caution will considerably lessen the risk of personal injury. However, if normal safety precautions are overlooked or ignored, personal injury to the operator may result. -
Page 5: Additional Precautions For Scroll Saws
18. Be sure to use the correct blade size and type. 19. Use ONLY approved replacement saw blades. Contact your local CLARKE dealer for advice. The use of inferior blades may increase the risk of injury. -
Page 6: Electrical Connections
ELECTRICAL CONNECTIONS Connect the mains lead to a standard, 230 Volt (50Hz) electrical supply through an approved 13 amp BS 1363 plug, or a suitably fused isolator switch. WARNING! THIS APPLIANCE MUST BE EARTHED IMPORTANT: The wires in the mains lead are coloured in accordance with the following code: Green &... -
Page 7: Principal Parts
PRINCIPAL PARTS OF THE SCROLL SAW ASSEMBLY 1. Should the sawdust blower hose not be fitted, Fig. 2 attach as shown in Fig.2 2. Line up the hole in the blade guard with the hole at the top of the Drop Foot Post, arrowed at ‘A’... -
Page 8: Installation
INSTALLATION (All parts referred to are shown in Fig. 1) Plan your installation. Ensure adequate space is available, with good lighting and ventilation, and an adequate electrical supply is close at hand. 1. MOUNTING THE SAW Your Scroll Saw is provided with 4 mounting holes, and it is strongly recommended that for safety and stability, you mount the machine either directly to a solid workbench, or to a solid sheet pf ply, the best dimensions being - 24"... -
Page 9: Bevel Alignment
3. BEVEL ALIGNMENT Fig. 4 (see fig. 4) To align the bevel indicator, loosen the table bevel lock knob, and level the table until it is at right angles to the blade. Use a small square to be sure that the angle between blade and table is 90 When the table is perpendicular to the blade, tighten the bevel lock knob. -
Page 10: Operating Characteristics
SCROLL SAW OPERATING CHARACTERISTICS The scroll saw’s unique ability is cutting intricate curves which other saws cannot do. A scroll saw can also be used for straight line cutting such as cross cuts, ripping and bevels. The following is a list of points to remember when using a Scroll Saw. -
Page 11: Saw Blade Notes
NOTES ON SAW BLADES IMPORTANT: ALWAYS USE GOOD QUALITY BLADES BLADES BREAK FOR FIVE PRINCIPAL REASONS: 1. Too much tension or too little tension on the blade. 2. Overworking the blade by feeding the workpiece too fast. 3. Twisting or bending the blade by feeding the workpiece off-centre. 4. -
Page 12: Maintenance
Motor Will Not Run. 1. 5 Amp fuse blown 1. Check fuses - on front panel. and elec. plug. Replace where necessary.If problem persists contact your Clarke dealer 2. Defective cord, plug or outlet. 2. Unplug saw, replace defective parts. 3. Defective motor. -
Page 13: Specifications
Gross / Net weight: ............... 14 / 16kg Please note that the details and specifications contained herein, are correct at the time of going to print. However, CLARKE International reserve the right to change specifications at any time without prior notice. Always consult the machine’s data... -
Page 14: Parts List
PARTS LIST No. Description Part No. No. Description Part No. DDCSS16V01 Blade Box DDCSS16V47 Fuse Holder DDCSS16V49 Power Cable complete DDCSS16V02 Hex Nut M6 DDCSS16V04 Switch Cover DDCSS16V50 Motor DDCSS16V51 Pan Head Screw M5x10 DDCSS16V05 Plate Cover DDCSS16V06 Eccentric DDCSS16V52 Table DDCSS16V53 Hex Head Screw M8x25... -
Page 15: Parts Diagram
PARTS DIAGRAM...
Need help?
Do you have a question about the CSS16V and is the answer not in the manual?
Questions and answers