
Related Manuals for Norton Clipper Blockbuster BBC347


Summary of Contents for Norton Clipper Blockbuster BBC347
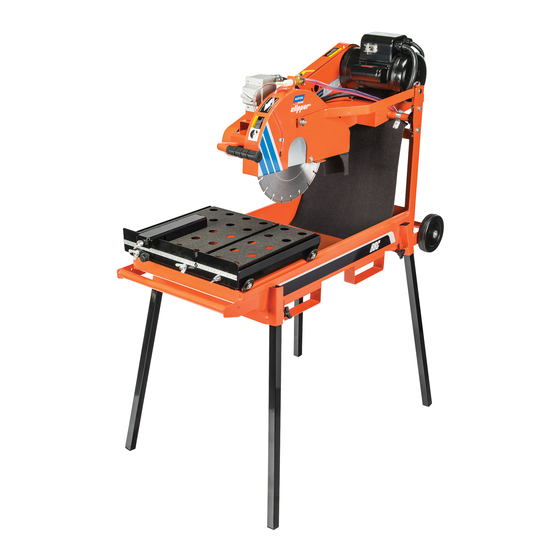
- Page 1 OWNERS MANUAL Blockbuster® Compact Masonry Saw MODELS BBC157 BBC207 BBC307 BBC347 BBC547 BBC507 Form BBC157-207-307-347-547-507 Manual Rev 5-2022...
- Page 2 In no event shall Norton be liable for consequential or incidental damages arising out of the failure of any product to operate properly.
-
Page 3: Table Of Contents
34-35 Cutting Head All: BBC157/BBC207/BBC307/BBC547/BBC507 36-37 Cutting Table All: BBC157/BBC207/BBC307/BBC547/BBC507 38-39 C. Baldor Service Policy D. Honda Service Policy Read Owners Manual Before Use Safety Alert Symbol: Information Following This Symbol Is Very Important. Use Only Norton Clipper Diamond Blades... -
Page 4: Preparation
I. PREPARATION A. Safety Precautions Important! The following safety precautions must always be observed. Hazard Symbols Fuel (gasoline) is extremely flammable and its vapors can explode if ignited. Store gasoline only in approved containers, in well-ventilated, unoccupied approved areas, and away from sparks or flames. Do not fill the fuel tank while the engine is hot or running. - Page 5 Dust and Silica Warning Grinding/cutting/drilling of masonry, concrete, metal and other materials can generate dust, mists and fumes containing chemicals known to cause serious or fatal injury or illness, such as respiratory disease, cancer, birth defects or other reproductive harm. If you are unfamiliar with the risks associated with the particular process and/or material being cut or the composition of the tool being used, review the material safety data sheet and/or consult your employer, the material manufacturer/supplier, governmental agencies such as OSHA and NIOSH and other...
- Page 6 1. Before mounting any blade on the saw, the blade should be inspected for any damage which might have occurred during shipment, handling or previous use. 2. The blade collars and arbors should be cleaned and examined for damage before mounting the blade.
-
Page 7: Assembly
Head Locking Bar. Inspect the saw for shipping damage. If any damage is found, contact the shipper immediately and file a freight claim. The Norton Company is not responsible for any freight-related damages. Remove the saw from the pallet. - Page 8 Figure 1: Head Locking Screw Removal Figure 2: Head Locking Handle Installation Depth Limiting Bolt: Remove the 12mm Carriage Bolt, 12mm Large Flat Washer (DIN9021), 12mm Flat Washer, 12mm Lock Washer, and 12mm Nut from the plastic Bag. Place the 12mm Large Washer over the 12mm Carriage Bolt.
- Page 9 Leg Assembly: Remove the four (4) Legs from the Saw Water Pan, and the four (4) Plastic Handle Knobs and four (4) Square Nuts from the plastic bag. Place one (1) Square Nut into each of the Nut Retaining Brackets located on each of the Leg Holders. Attach one (1) Plastic Knob to each of the Square Nuts as shown in Figure 4: Plastic Knob Attachment.
- Page 10 Conveyor Cart Assembly: Remove the Conveyor Cart and Back Stop from the Saws Water Pan, and the Wing Nuts, Carriage Bolts, Washers, and Cart Stop from the plastic bag. Slide one (1) Carriage Bolt thru each of the three (3) Square Holes located on the front of the Conveyor Cart. Slide the Back Stop Over each of the Carriage Bolts.
- Page 11 Figure 8: Guide-A-Cut Assembly Water Curtain Assembly: Remove the Water Curtain from the Saw Water Pan. Attach the Water Curtain Spring Clips to the Pivoting Bar Located Under the Cutting Head. Note that the rough side of the Water Curtain should face towards the front of the saw. The Water Curtain material is made is designed to be easy to clean.
- Page 12 Figure 10: Wrench Placement Water Pump Assembly: The Water Pump requires no additional assembly.
-
Page 13: Specifications
I. PREPARATION C. BBC157/207/307/347/547/507 Series Masonry Saw Specifications Dimensions/Weight Length (Working) 60” (1524mm) Width 24” (965mm) Height (Electric) 34” (864mm) Height (Gas) 38” (965mm) Weight (Electric) Uncrated 250lbs (kg) Weight (Gas) Uncrated 275lbs (kg) Electric Motor Motor Mfg. Baldor Motor Type TEFC, Thermal Protection Motor Voltages 115-230 (Switch able) 60 Hz single Phase... - Page 14 1) The sound measures have been made following pr EN 12638, Annex A; 2)“ Floor sawing, grooving and milling machines – Safety “...
-
Page 15: Electrical Connections
I. PREPARATION D. Electrical Connections Important-Before connecting the motor leads to the power supply be sure that the voltage, cycles and phase shown on the nameplate of the motor correspond to the available power supply. Voltage Selection For Single Phase Motors 1-1/2 HP and 2 HP single phase masonry saw motors have a dual voltage capable. -
Page 16: Wiring Diagram
D. Wiring Diagram Be sure to ground the saw properly before operating, such as a ground wire connection provided by the power company. Model Part# UPC# Description Volts Hz PH Baldor Baldor Specification Drawing BBC157 232084 00510003896 MOT 1.5HP 115-230v W/Switch 1.5 115-230v 60 35R833X136G1 CD0526... - Page 17 Wiring Diagram BBC157: 1.5 HP 115-230v/60 Hz/1 Phase Model Part# UPC# Description HP Volts Hz PH Baldor Baldor Specification Drawing BBC157 232084 00510003896 MOT 1.5HP 115-230v W/Switch 1.5 115-230v 60 1 35R833X136G1 CD0526...
- Page 18 Wiring Diagram BBC207: 2 HP 115-230v/60 Hz/1 Phase Model Part# UPC# Description HP Volts Hz PH Baldor Baldor Specification Drawing BBC207 232085 00510003897 MOT 2HP 115-230v W/Switch 115-230v 60 1 35R834X459G1 CD0392...
- Page 19 Wiring Diagram BBC307 and BBC347: 3 HP 230v/60 Hz/1 Phase Model Part# UPC# Description HP Volts Hz PH Baldor Baldor Specification Drawing BBC207 232085 00510003897 MOT 2HP 115-230v W/Switch 115-230v 60 1 35R834X459G1 CD0392...
-
Page 20: Electrical Motor Trouble Shooting
F. Electrical Motor Trouble Shooting: Circuit Breaker During Start Up or Not Cutting: Verify that the power supply voltage matches the motor name plate voltage Failure to run the motor on the proper voltage will damage the motor and is not covered under warranty. Improperly wired motors are not covered under warranty. - Page 21 2. Check Fuel: Fill if low. Use only unleaded gasoline with a pump sticker octane rating of 86 or higher is recommended. Never use an oil and gasoline mixture! 3. Air Cleaner: Never run the engine without the air cleaner! Rapid engine wear will result from contaminants being drawn through the carburetor and into the engine.
-
Page 22: Operation
4. Place the blade on the blade shaft. Use only Norton Clipper Diamond Blades. 5. Slide the outside blade shaft collar onto the blade shaft. 6. Tighten the blade shaft nut (clockwise) securely against the outside collar by using the... -
Page 23: How To Use "Step Cutting" With Abrasive Blades
II. OPERATION B. How to Use " Step Cutting " With Abrasive Blades Use "step cutting" without exception when cutting wet or dry with abrasive blades. "Jam cutting", which is discussed and illustrated in the section following, is to be used only with wet and dry cutting diamond blades. -
Page 24: How To Use "Jam Cutting" And "Step Cutting" With Diamond Blades
II. OPERATION C. How To Use "Jam Cutting" (Fixed Cutting) and "Step Cutting" With Diamond Blades In "Jam" cutting the head is locked in a fixed position and the material is pushed into it as shown in the sketch at the bottom. "Jam" cutting with the head locked in a fixed position usually provides greater efficiency. -
Page 25: Dry Cutting
II. OPERATION D. Dry Cutting 1. Use a proper blade, which is marked for dry cutting. 2. Remove the water curtain. 3. Disconnect the water pump. 4. Use "step" cutting as explained previously when using abrasive blades. 5. Use "jam" or "step" cutting when using dry cutting diamond blades. E. -
Page 26: Maintenance
III. MAINTENANCE The Blockbuster® Compact requires very little maintenance for long satisfactory operation. However, the following points must be watched: A. V-Belts The drive belts are made of premium oil and heat resistant materials. They require very little adjustment, but should be tightened after the first few days of running. Adjustment and Alignment Warning: Never make adjustments to v-belts and pulleys while engine is running. - Page 27 Main Causes of Belt Failures: Premature Belt failure can be attributed to the following issues: Tension (too much or too little), Pulley Misalignment, Damaged Pulleys, Improper Handling or Storage, Incorrect Blade Specification for Material Being Cut, and Cutting Too Deep. Symptom Possible Cause Corrective Action...
-
Page 28: Electric Motor
C. Gasoline Engine Gasoline Engine Warranty: Norton does not warranty or service the gasoline engine. If any warranty or service of the engine is required contact your nearest Honda service center, or from the Internet: http://engines.honda.com/dealer-locator Honda Engine Maintenance Schedule (refer to owner's manual for complete maintenance.) - Page 29 Check the engine oil level before each use when the engine is cool and the engine is level. Add oil if the level is low. The oil level should be within the operating range (see the engine owner’s manual for details). Only use a high-detergent, premium quality motor oil certified to meet or exceed U.S.
-
Page 30: Blade Shaft Bearings
Dry Cutting Engine Maintenance When operating the engine in dry cutting or dusty environments the following is required: Engine oil changed more often. Every 50 hours (or more often if conditions require) clean all of the engine cooling fins. ... - Page 31 motor. The electrical powered water pumps must be submerged in water when connected to an electrical supply to reduce over heating of the pump. When cutting dry disconnect the electrical water pump from the power source. The mechanical driven pump of the gasoline powered masonry saw is designed to run wet or dry, but for continued dry cutting, disconnect the pump.
-
Page 32: Ordering Information
Any wear due to normal use of the machine will not be considered as a case of warranty for items designated as Wear Parts (W). For best performance and life Genuine Norton Clipper replacement parts should always be used. Changes to part specifications, are subject to change without notice. -
Page 33: Parts List
PARTS LIST SECTION Power Gasoline Plant: BBC547/BBC507... - Page 34 Power Gasoline Plant: BBC547/BBC507 Item Part No Description Type NOTES Engine 5.5HP Honda GX160K1QXC9 Engine Only 70184649829 216264 Pulley Ø70MM X 3/4"B 1G XPZ Belt Includes Pulley and Key 00310007337 83716 Engine Pulley 70MM X 3/4"B 1G XPZ Belt Belt XPZ 562 LW (1) Sold as each 70184682606 83717...
-
Page 35: Power Plant Electric: Bbc157/Bbc207/Bbc307
Power Plant Electric: BBC157/BBC207/BBC307/BBC347 Item Part No Description Type NOTES Motor Assembly w/Switch 1-1/2HP 115/230v/60/1 Motor and Switch 00510003896 232084 00510003897 Motor Assembly w/Switch 2 HP 115/230v/60/1 Motor and Switch 232085 70184630439 Motor Assembly w/Switch 3HP 230v/60/1 Motor and Switch 232160 70184683525 TERMINAL BOX BBC157-207... - Page 36 Type: S = Service Part, W = Wear Part, All Parts Are Sold As Individual (each) Unless Noted Otherwise...
-
Page 37: Frame Common All: Bbc157/Bbc207/Bbc307/Bbc547/Bbc507
Frame Common All: BBC157/BBC207/BBC307/BBC347/BBC547/BBC507... - Page 38 Electrical Water Pump Frame Common All: BBC157/BBC207/BBC307/BBC347/BBC547/BBC507 Item Part No Description Type NOTES Screws For Water Pump 00310004671 75280 00310007348 Frame Only 83727 00310002135 Leg Kit (4) BBC Set of Four (4) Legs 75817 00310004345 Knob M10 X 20 1.5 (1) 72856 00510005107 Nut M10 Square (1)
- Page 39 Cutting Head All: BBC157/BBC207/BBC307/BBC347/BBC547/BBC507...
-
Page 40: Cutting Head All: Bbc157/Bbc207/Bbc307/Bbc547/Bbc507
Cutting Head All: BBC157/BBC207/BBC307/BBC547/BBC507 Item Part No Description Type NOTES Locking Handle W/Stud For Cutting Head 00310006528 82738 00310004305 Spring 72567 00310007345 Cutting Head BBC 14” BBC157/BBC207/BBC547 BBC157/BBC207/ 83724 BBC547 70184647230 Cutting Head BBC307/BBC347/BBC507 BBC307/BBC347/BBC5 232192 00310004792 Bearing Protection Plate 76111 00310004767 Support Blade Shift (2) -
Page 41: Cutting Table All: Bbc157/Bbc207/Bbc307/Bbc547/Bbc507
Cutting Table All: BBC157/BBC207/BBC307/BBC547/BBC507... - Page 42 Cutting Table All: BBC157/BBC207/BBC307/BBC347/BBC547/BBC507 Item Part No Description Type NOTES Includes: Wheels, 00310007367 Conveyor Cart (aka Cutting Table) Complete BBC Backstop, Top, and 83754 Conveyor Cart Stop Top For Cutting Table Only Screws Not Included 00310004943 76742 Screw 4x 12mm DIN 7976 Sold Each, 11 Required 70184600556 30373...
-
Page 43: Baldor Service Policy
C. Baldor Service Policy... -
Page 44: Honda Service Policy
D. Honda Service Policy... - Page 45 NOTES:...
- Page 46 Saint-Gobain Abrasives 2770 West Washington Stephenville, TX 76401 Phone: 254-918-2310 Fax: 254-918-2312...
Need help?
Do you have a question about the Clipper Blockbuster BBC347 and is the answer not in the manual?
Questions and answers