
Related Manuals for MRC DPETTE Series


Summary of Contents for MRC DPETTE Series
- Page 1 Simple Electronic Pipette User Manual DPETTE-SERIE PLEASE READ THIS MANUAL CAREFULLY BEFORE OPERATION 27.4.23 3, Hagavish st. Israel 58817 Tel: 972 3 5595252, Fax: 972 3 5594529 mrc@mrclab.com...
-
Page 2: Table Of Contents
CONTENTS 1. PRODUCT OVERVIEW ..................1 2. PARTS DESCRIPTION ..................3 3. DISPLAY ......................5 4. OPERATION ..................... 6 5. STORAGE ...................... 11 6. CARE AND MAINTENANCE ................11 7. CALIBRATION AND PERFORMANCE TESTS ..........16 8. TROUBLESHOOTING GUIDE ................ 17 9. -
Page 3: Product Overview
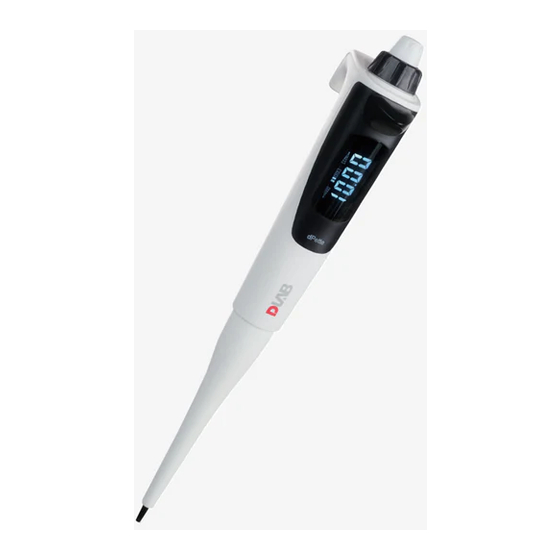
1. Product Overview A versatile, motor-driven pipetting instrument, delivers accurate and precise performance in liquid handling. Its design and operation is based on the principle of air displacement and use disposable pipette tips. Frequency,Voltage:5W/4.2V It has been tested according to ISO8655 quality management standards. In compliance with the quality control requirements of ISO8655-6 / DIN 12650, each and every pipette, fitted with original tip of the manufacturer, has been tested for gravity with distilled water (DIN / ISO3696, grade 3) at 22℃. - Page 4 1.2 Pipette Tip It is compatible with most universal tip brands covering full volume range. Note! Never use the pipette without a tip attached. Contents of Package Include: Electronic pipette X 1 AC Adapter X 1 USB cable X 1 ...
-
Page 5: Parts Description
2. Parts Description... - Page 6 Reset Slot Poke here with a pointed tool to restart the pipette USB-charging Port Fully charge in approximate 4 hours Stand Charging Port Fully charge in approximate 4 hours.
-
Page 7: Display
3. Display Aspiration status Battery Indicator Volume Range Dispensing status... -
Page 8: Operation
4. Operation 4.1 Power On Press the Parameter Knob or about 2 seconds. 4.2 Volume Setting ①Fast turn the Parameter Knob. ②Volume parameter to be blinking. - Page 9 ③ Turn the Parameter Knob anticlockwise to increase, turn clockwise to decrease. Press Parameter Knob to confirm. Note! Do volume range setup in Aspiration mode only. 4.3 Aspiration When upward arrow blinks, press Parameter Knob for Aspiration.
- Page 10 4.4 Dispensing When downward arrow blinks, press Parameter Knob for dispensing. 4.5 Mixing Press Parameter Knob until mixing activity begins. Then release the Parameter Knob at any time during the process of mixing will exit the mixing mode. Note! Take the operation (100-1000μL) for the purpose of illustration.
- Page 11 Three mixing volume modes: ①If the pipetting volume is set larger than 30% of the total volume range, 30% of the maximum volume of the pipette will be mixed. e.g. set volume: 700μL actual mixing volume: 300μL ②If the pipetting volume is set less than 30% of the total volume range, and more than its minimum volume range, 50% of the set volume will be mixed.
- Page 12 4.6. Speed adjustment Turn Function wheel right or left for speed settings. Turn black function wheel right or left to select resorption delay speed. 1. Choose dl interface to adjust resorption delay speed: Turn white knob left and right to choose the delay time from 0.2s-2s, then press white knob to confirm. 2.Choose SP interface to adjust aspiration or dispensing speed: Turn white knob left and right to choose 1/2/3 speed, then press white knob to...
-
Page 13: Storage
4.7 Power off The Electronic pipette will power off automatically after 8minites when stop use. 5. Storage ①Recommend storing electronic pipette on the stand in vertical position when not in use. ②Please every month to charging if being unused in long time , make sure there are 50% power in battery at least. - Page 14 Note! Check the performance of the pipette every three months. Performance test is recommended to be carried out after each in-house care and maintenance. 6.1 Cleaning the Outer Surface Spay the outer surface with a dedicated pipette detergent or 75% ethanol. Wipe with lint-free cloth.
- Page 15 Note! The unidentified parts can never be autoclaved or disassembled prior to authorization. 6.3 Disassembly Procedures ① Unscrew ejector collar anticlockwise and remove it. NOTE! THIS PART CANNOT BE AUTOCLAVED...
- Page 16 ②Remove the ejector spring. Unscrew the piston cover anticlockwise and remove it. ③Separate the seal gasket and O ring from piston cover. NOTE! MINOR PARTS FOR SAFE KEEPING PLEASE.
- Page 17 ④ Separate the remaining piston from piston spring. ⑤Clean the above-mentioned parts with 75% ethanol, or sterilize the parts at 121 , 1 bar overpressure for 20 minutes. ⑥Apply an appropriate layer of silicone grease to the O ring, seal gasket and piston. Reassembling.
-
Page 18: Calibration And Performance Tests
7. Calibration and Performance Tests Calibration should take place at 20-25℃, kept constant within ±0.5℃. A dedicated calibration software will write calibration values in your electronic pipette, after the distilled water has been repeatedly weighed at least five times. Hardware needed: Electronic balance with readability of 0.01 mg ... -
Page 19: Troubleshooting Guide
8. Troubleshooting Guide Problem Possible cause Solution Remaining Incompatible tip Use original tip droplets Plastic self-lubrication of the tip is not even Leakage or Tip is loose Attach the tip firmly inadequate Foreign objects between tip and Clean the tip cone and aspiration connector replace the tip... - Page 20 Problem Possible cause Solution Leakage or Calibration needed or huge difference Recalibrate according to the inadequate of density compared with water instructions in the User aspiration Manual Pipette is broken Send the pipette for service Inadequate liquids leak into the tip connector and Clean and grease O ring aspiration dry.
-
Page 21: Warranty
9. Warranty The electronic pipette is covered by one-year warranty against defects in workmanship and materials. Please contact us or your nearest distributor. ANY WARRANTY WILL, HOWEVER, BE DEEMED AS VOID DUE TO NORMAL WEAR AND TEAR OR FOR OPERATIONS CONTRARY TO THE INSTRUCTIONS GIVEN IN THIS MANUAL. - Page 22 Step2 Insert the stander charging port contact the stander. Connecting USB cable.
Need help?
Do you have a question about the DPETTE Series and is the answer not in the manual?
Questions and answers