
Subscribe to Our Youtube Channel
Related Manuals for Freescale Semiconductor TWR-K70F120M


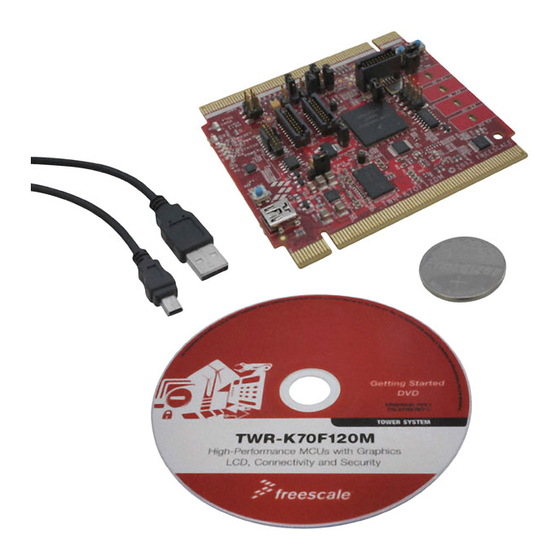
Summary of Contents for Freescale Semiconductor TWR-K70F120M
- Page 1 TWR-K70F120M Quick Start Demo Lab Guide for MQX 3.8 Rev. 0.2 Freescale Semiconductor Inc. TWRK70N512QSDLAB...
-
Page 2: Table Of Contents
5.1 IAR Embedded Workbench for ARM 6.30 ........................ 7 6 Task Aware Debugging ........................10 7 Demo Software Overview ........................10 8 Creating a new MQX project ......................11 9 OSJTAG ..............................12 TWR-K70F120M Quick Start Demo Lab Guide Page 2 of 15... -
Page 3: Purpose
This is only required for running the USB demo. 7) Note that the default jumper settings are in the Quick Start Guide for the TWR-K70F120M and TWR-SER if you want to change back to the default settings after you are done running the demo. - Page 4 JM60 boot loader jumper header. It is J10 and is labelled JM60 Boot on the silk screen. Then re-connect the board to your computer. TWR-K70F120M Quick Start Demo Lab Guide Page 4 of 15...
-
Page 5: Run The Demo
4 Run the Demo 1) Connect a mini-B USB cable to the TWR-K70F120M tower module. 2) Allow the PC to automatically configure the OSJTAG drivers used for debugging and the serial- to-USB feature. If you have trouble connecting to the board or using the Serial Terminal, see... - Page 6 18) Open a web browser and go to the target device address. In this case, 169.254.3.3 19) You should see the web server welcome page in the browser window, as seen in figure below: TWR-K70F120M Quick Start Demo Lab Guide Page 6 of 15...
-
Page 7: Development Software And Programming The Board
4) You will need to enable the ESHDC and I2C0 drivers in the BSP library to use this demo. 5) Open the workspace at C:\Program Files\Freescale\Freescale MQX 3.8\config\twrK70F120M\iar\build_libs.eww 6) Open the user_config.h file in the bsp_twrK70F120M – Debug project TWR-K70F120M Quick Start Demo Lab Guide Page 7 of 15... - Page 8 3.8\ directory during installation, you must first recompile the rest of the MQX libraries. See the MQX release notes for more information before continuing on with the lab. 11) Download the Kinetis TWR-K70F120M Quick Start Demo Lab from the TWR-K70F120M website.
- Page 9 “Download and Debug” button 21) The code will download Flash, and the debugger screen will come up and pause at the first instruction. Hit the “Go” button to start running. TWR-K70F120M Quick Start Demo Lab Guide Page 9 of 15...
-
Page 10: Task Aware Debugging
Inside the initialization task, global variables are initialized and then the GPIO driver is initialized. Next the Accl_Task is started, which polls the MMA7660 sensor on the TWR-K70F120M over I2C. Then the ADC_Task is started, which polls the ADC channel connected to the potentiometer, and the ADC temperature sensor. -
Page 11: Creating A New Mqx Project
2. Rename the folder to the new project name, with no spaces. For example, k70_demo 3. Inside the k70_demo folder, go into the iar folder 4. Rename the four IAR files to k70_demo TWR-K70F120M Quick Start Demo Lab Guide Page 11 of 15... -
Page 12: Osjtag
To fix this, right click on the OSBDM driver and select “Uninstall”. Then unplug and re-plug in the board, and it should enumerate correctly. TWR-K70F120M Quick Start Demo Lab Guide Page 12 of 15... - Page 13 If there are still problems with enumerating correctly, you can also manually select the drivers. TWR-K70F120M Quick Start Demo Lab Guide Page 13 of 15...
- Page 14 TWR-K70F120M Quick Start Demo Lab Guide Page 14 of 15...
- Page 15 For the Open Source BDM – Debug Port, use the driver at: C:\pemicro\kinetis_tower_toolkit\Drivers\osbdm\OSJTAG_Debug_Interface_libusb.inf For the PEMicro USB Serial Port (i1), use the driver at: C:\pemicro\kinetis_tower_toolkit\Drivers\osbdm\OSJTAG_Serial_Interface_windriver_version.inf TWR-K70F120M Quick Start Demo Lab Guide Page 15 of 15...
Need help?
Do you have a question about the TWR-K70F120M and is the answer not in the manual?
Questions and answers