
Related Manuals for Dräger X-plore 8000 Series


Summary of Contents for Dräger X-plore 8000 Series
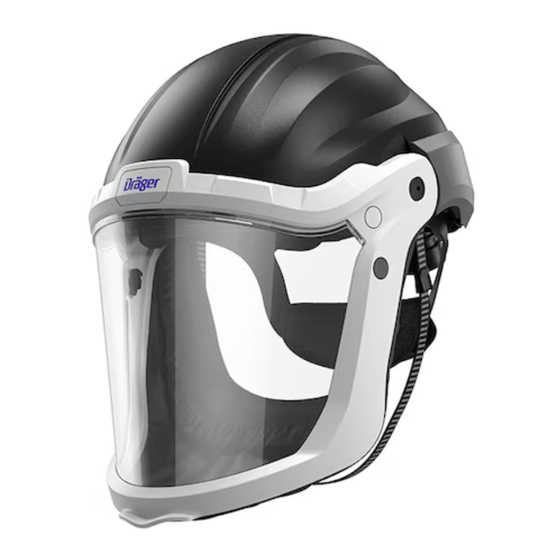
- Page 1 Instructions for use X-plore 8000 Face Shield X-plore 8000 Helmet PC visor HL1 More languages available for download at draeger.com/ifu de, enUS, fr, es, it, nl, da, pl...
- Page 2 Gebrauchsanweisung ........4 enUS Instructions for use......... 10 Notice d'utilisation .......... 16 Instrucciones de uso ........22 Istruzioni per l'uso .......... 28 Gebruiksaanwijzing ........34 Brugsanvisning..........40 Instrukcja obsługi ........... 46 X-plore 8000 Face Shield X-plore 8000 Helmet PC visor HL1...
-
Page 4: Produktspezifische Sicherheitshinweise
Sicherheitsbezogene Informationen – Diese Anstoßkappe ist dafür vorgesehen, die Energie Sicherheitsbezogene X-plore 8000 Face Shield X-plore 8000 Helmet PC visor HL1 eines Schlags aufzunehmen, indem die Informationen Anstoßkappenschale oder die Innenausstattung teilweise zerstört oder beschädigt wird. Diese Schäden müssen Allgemeine Sicherheitshinweise nicht unbedingt sichtbar sein. -
Page 5: Einschränkungen Des Verwendungszwecks
Beschreibung Beschreibung Die Atemanschlüsse schützen den Träger vor – schadstoffhaltiger Umgebungsluft, Produktübersicht – festen und flüssigen Partikeln, – Stößen. (siehe Ausklappseite Abbildungen A, B) Tragering-Baugruppe Einschränkungen des Schweißband Verwendungszwecks Tragering In Umgebungsatmosphären mit Sauerstoffmangel können die Polster Atemanschlüsse nur in Kombination mit einem Druckluftschlauchgerät verwendet werden, da sie keinen Gesichtsabschluss Sauerstoff liefern. -
Page 6: Symbolerklärung Und Typidentische Kennzeichnung
Gebrauch Für Informationen zu den jeweiligen Systemzulassungen c. Die hinteren Lagerzapfen auf gleicher Höhe in die siehe Gebrauchsanweisung der im Kapitel 3.3 genannten Langlöcher einrasten. Atemschutzsysteme. 3. Ggf. Transportfolie von der Sichtscheibe entfernen. Konformitätserklärungen: siehe www.draeger.com/product- 4.2.2 Vorbereitungen vor jedem Gebrauch certificates Symbolerklärung und typidentische WARNUNG... -
Page 7: Nach Dem Gebrauch
Wartung Nach dem Gebrauch 5.1.2 Maschinelle Reinigung Gesichtsmanschette nur manuell reinigen und WARNUNG desinfizieren. Für dieses Teil ist die maschinelle Reinigung Verletzungs- oder Lebensgefahr! und Desinfektion nicht empfohlen. Gefahr durch Sauerstoffmangel, CO -Vergiftung und Hohe Temperaturen bei der Reinigung und Desinfektion Eindringen von Schadstoffen aus der Umgebungsluft! beanspruchen die Materialien sehr. - Page 8 Transport Visierscheibe unten in den Schlitz drücken. Danach die 3. Schweißband und Polster vom alten Tragering lösen und andere Seite der Visierscheibe in den Schlitz drücken am neuen Tragering anbringen oder neues Schweißband (siehe Ausklappseite Abbildung E2, E3). und Polster anbringen (siehe „Polster wechseln“, Seite 8)(siehe „Schweißband wechseln“, Seite 8).
-
Page 9: Technische Daten
Entsorgung Entsorgung Die Lebensdauer des Atemanschlusses beträgt 3 Jahre, wenn er benutzt und gewartet wird, wie in dieser Gebrauchsanweisung beschrieben. Die Lebensdauer der Visierscheibe hängt von der Art der Beanspruchung ab. Extreme Einsatzbedingungen können die Lebensdauer verkürzen. Produkt gemäß den geltenden Vorschriften entsorgen. Technische Daten geeignet für Kopfumfang 51 cm bis 64 cm... -
Page 10: Product-Specific Safety Instructions
Safety information – Do not alter the bump cap so that parts not recommended Safety information X-plore 8000 Face Shield X-plore 8000 Helmet PC visor HL1 by Dräger can be added. General safety instructions – Only use paints, solvents, adhesives or self-adhesive labels that are specified in these instructions for use for –... -
Page 11: Feature Description
Description Feature description Approvals The following products belong to the Dräger X-plore 8000 The Dräger X-plore 8000 face shield is approved according series facepieces that are described in these instructions for use: Standard Performance level/Marking – Dräger X-plore 8000 face shield EN 812:2012 (head protec- –... -
Page 12: Preconditions For Use
4.2.3 Put facepiece on Preconditions for use WARNING Danger of injury or death! – Type and concentration of the contaminants must be Putting on the facepiece while the breathing air supply is not known. When checking the conditions of use, also pay correctly connected and switched on can result in injury or attention to whether additional protective clothing is death. -
Page 13: Mechanical Cleaning
Maintenance Maintenance 9. Mount face cuff. Maintenance work Cleaning and disinfecting For information on spare parts, see NOTICE https.://www.connect.draeger.com. Danger of material damage! Do not use solvents (e.g., acetone, alcohol) or cleaning agents with abrasive particles for cleaning and disinfecting. 5.2.1 Replacing the protective foil ►... -
Page 14: Technical Data
Transport 5.2.5 Replacing the sweatband 4. Fasten the support ring to the helmet shell using the two front fastening studs, and secure the fastening studs by 1. Open the hook-and-loop fasteners of the sweatband and rotating them 90°. Then press the two rear pivot bolts into remove the sweatband from the support ring. - Page 15 Technical data Visor fastening, visor frame fastening Chin strap Dimensions Dräger X-plore 8000 face 305 mm x 222 mm x 320 mm shield (H/W/D) Dräger X-plore 8000 helmet 325 mm x 222 mm x 340 mm with PC visor HL1 (H/W/D) Instructions for use X-plore 8000 Face Shield X-plore 8000 Helmet PC visor HL1...
-
Page 16: Consignes De Sécurité Spécifiques Au Produit
Informations relatives à la sécurité – Cette casquette anti-heurt est conçue pour absorber Informations relatives à la sécurité X-plore 8000 Face Shield X-plore 8000 Helmet PC visor HL1 l’énergie d’un coup en endommageant ou en détruisant partiellement sa calotte ou son équipement intérieur. Ces Consignes générales de sécurité... -
Page 17: Utilisation Conforme
Description Description Les pièces faciales protègent leur porteur de – l’air ambiant contaminé, Aperçu du produit – des particules solides et liquides, – des chocs. (cf. page dépliante, figures A et B) Ensemble coiffe Ratchet Limites du domaine d’utilisation Bande confort Dans les atmosphères ambiantes avec un manque Coiffe Ratchet d’oxygène, les pièces faciales peuvent uniquement être... - Page 18 Utilisation Travaux préparatoires relatifs à Toutes les pièces satisfont les exigences des directives suivantes : l'utilisation – (UE) 2016/425 4.2.1 Opérations préalables à la première – Regulation 2016/425 on personal protective equipment, utilisation as amended to apply in GB Vous trouverez des informations sur les homologations Les filtres peuvent uniquement être raccordés au système système correspondantes dans la notice d'utilisation des filtrant à...
-
Page 19: Pendant L'utilisation
Maintenance 5.1.1 Nettoyage manuel 6. Écarter la fermeture du masque avec les mains et rabattre l’écran facial. S’assurer que la fermeture du masque est complètement appliquée sur le visage et que les oreilles Informations sur les produits d’entretien et de désin- restent libres (cf. -
Page 20: Travaux De Maintenance
Maintenance Travaux de maintenance 5.2.5 Remplacer la bande confort 1. Ouvrir les attaches auto-agrippantes de la bande confort, Pour toute information concernant les pièces déta- puis retirer la bande confort de la coiffe Ratchet. chées, se reporter à 2. Installer une nouvelle bande confort sur la coiffe Ratchet https.://www.connect.draeger.com. -
Page 21: Caractéristiques Techniques
Transport 4. Fixer la coiffe Ratchet à la calotte du casque au moyen Film de protection des deux loquets de fixation avant, puis tourner ces Fermeture du masque derniers de 90° pour les verrouiller. Enfoncer ensuite les deux axes arrière dans les trous oblongs correspondants Fixation de l’écran facial, fixa- jusqu’à... - Page 22 Información relativa a la seguridad – Esta gorra antiimpactos está prevista para absorber la Información relativa a la seguridad X-plore 8000 Face Shield X-plore 8000 Helmet PC visor HL1 energía de un impacto en el que la carcasa de la gorra antiimpactos o las partes interiores resultan destruidas o Indicaciones generales de seguridad dañadas parcialmente.
- Page 23 Descripción Descripción Las conexiones respiratorias protegen al portador – del aire ambiental contaminado, Visión general del producto – de las partículas sólidas y líquidas, – de los impactos. (véase la página desplegable, figuras A, B) Componentes del aro de soporte Restricciones del uso previsto Banda de sudor En atmósferas ambientales con falta de oxígeno, las...
- Page 24 Preparativos para su uso Todas las piezas cumplen con los requisitos de la siguiente normativa: 4.2.1 Preparativos antes de la primera puesta en – (UE) 2016/425 funcionamiento – Regulation 2016/425 on personal protective equipment, as amended to apply in GB Los filtros se pueden conectar única y exclusivamente al Para obtener información sobre las correspondientes equipo motorizado de protección respiratoria filtrante y no...
-
Page 25: Mantenimiento
Mantenimiento 5.1.1 Limpieza manual 6. Utilice las manos para ensanchar el protector facial y pliegue el visor hacia abajo. Asegúrese de que el protector facial quede completamente a ras de la cara, Para obtener información sobre los detergentes y des- dejando las orejas libres (véase la página desplegable, infectantes adecuados y sus especificaciones, véase figura C2). -
Page 26: Trabajos De Mantenimiento
Mantenimiento Trabajos de mantenimiento 5.2.5 Cambiar la banda de sudor 1. Suelte los cierres adherentes de la banda de sudor y retire Consulte la información sobre los repuestos en la banda de sudor del aro de soporte. https.://www.connect.draeger.com. 2. Coloque la banda de sudor nueva en el aro de soporte y fíjela con los cierres adherentes de manera que éstos 5.2.1 Cambiar la lámina de protección queden bien apretados y libres de arrugas. -
Page 27: Características Técnicas
Transporte 3. Monte una suspensión nueva en la carcasa del casco. Material 4. Fije el aro de soporte a la carcasa del casco con los dos Carcasa de la gorra antiim- pestillos de fijación delanteros y bloquee los pestillos de pactos protector facial Dräger fijación girándolos 90°. - Page 28 Informazioni sulla sicurezza – Per ottenere una protezione adeguata, il berretto antiurto Informazioni sulla sicurezza X-plore 8000 Face Shield X-plore 8000 Helmet PC visor HL1 deve calzare adeguatamente o essere regolato in base alla circonferenza della testa dell'utilizzatore. Indicazioni di sicurezza generali –...
-
Page 29: Limitazioni Dell'utilizzo Previsto
Descrizione Descrizione Limitazioni dell'utilizzo previsto In atmosfere ambiente con carenza di ossigeno, i facciali Panoramica prodotto possono essere utilizzati soltanto in combinazione con un respiratore ad aria compressa con flessibile, poiché non (vedere pagina pieghevole, figure A, B) erogano ossigeno. In combinazione con un respiratore a filtro Insieme componenti anello di supporto assistito, i facciali non sono adatti all'uso in atmosfere ambiente con carenza di ossigeno. - Page 30 Dichiarazioni di conformità: vedere 3. Eventualmente, rimuovere la pellicola di protezione per il www.draeger.com/product-certificates trasporto dal visore. Spiegazione dei simboli e targhetta di 4.2.2 Preparazione prima di ogni utilizzo identificazione AVVERTENZA 3.6.1 Etichetta e imballaggio Visione limitata o funzione di protezione compromessa a causa di visori graffiati o danneggiati! Simbolo Spiegazione...
-
Page 31: Dopo L'utilizzo
Manutenzione 5.1.2 Pulizia a macchina Non sollevare la visiera durante l'utilizzo. Il facciale fornisce una protezione totale solo se la visiera è completamente abbassata. Pulire e disinfettare il manicotto per la faccia solo manualmente. Per questo componente si sconsigliano pulizia e disinfezione meccaniche. - Page 32 Trasporto 5.2.7 Sostituzione del manicotto per la faccia 4. Spingere nei tre incavi la parte superiore dello schermo della visiera, finché non se ne senta lo scatto (vedere 1. Staccare i due elastici dal gancio a "T" dell'anello di pagina pieghevole, figura E4). supporto (vedere pagina pieghevole, figura F3) ed 5.
-
Page 33: Dati Tecnici
Smaltimento Smaltimento La vita utile del facciale è di 3 anni, se utilizzato e sottoposto a manutenzione come descritto nelle presenti istruzioni per l'uso. La vita utile dello schermo della visiera dipende dal tipo di sollecitazioni subite. Condizioni di impiego estreme possono ridurre la vita utile. - Page 34 Veiligheidsrelevante informatie – De stootpet is speciaal ontworpen om de kracht van een Veiligheidsrelevante informatie X-plore 8000 Face Shield X-plore 8000 Helmet PC visor HL1 stoot te absorberen doordat de schaal of het binnenwerk van de stootpet deels vernietigd of beschadigd raakt. Algemene veiligheidsaanwijzingen Deze schade is niet altijd zichtbaar.
-
Page 35: Beoogd Gebruik
Beschrijving Beschrijving Beperkingen aan het beoogd gebruik In omgevingsatmosferen met zuurstofgebrek kunnen de Productoverzicht ademaansluitingen uitsluitend in combinatie met een luchtslangunit worden gebruikt, omdat ze geen zuurstof (zie uitvouwpagina, afbeeldingen A, B) aanvoeren. In combinatie met een aanblaasfilterunit zijn de Draagring-module ademaansluitingen niet geschikt voor gebruik in omgevingsatmosferen met zuurstofgebrek. - Page 36 Gebruik Betekenis van de markeringen en 4.2.2 Voorbereidingen vóór elk gebruik symbolen WAARSCHUWING 3.6.1 Typeplaatje en verpakking Beperkt zicht of beïnvloeding van de beschermende werking door bekraste of beschadigde vizieren! Symbool Verklaring ► Vervang bekraste of beschadigde vizieren. 1. Alle onderdelen van de ademaansluiting controleren op scheuren, vervormingen of andere beschadigingen en op Bestelnummer slijtage en correcte pasvorm.
-
Page 37: Reiniging En Desinfectie
Onderhoud Na het gebruik 1. Gelaatsmanchet demonteren. 2. De ademaansluiting in de reinigings- /ontsmettingsmachine plaatsen. WAARSCHUWING 3. Het standaard-maskerprogramma (sproeiproces) met de Gevaar van lichamelijk of dodelijk letsel! volgende parameters starten: Gevaar door zuurstofgebrek, CO -vergiftiging en Duur van de reinigingsfase: 5...20 min. binnendringen van schadelijke stoffen uit de omgevingslucht! Watertemperatuur: 55 °C ►... - Page 38 Transport 5.2.3 Vizierframes vervangen 3. De binnenste en buitenste rubberen band aan beide zijden van de “T”-haak vasthaken (zie uitvouwpagina 1. De vizierframebevestiging met een geschikt hulpmiddel uit afbeelding F3). de vizierschijf drukken (zie uitvouwpagina afbeelding G1). 2. De overeenkomstige onderdelen uit het vizierframe 5.2.8 Kinriem vervangen nemen (zie uitvouwpagina afbeelding G2).
-
Page 39: Technische Gegevens
Technische gegevens Technische gegevens geschikt voor hoofdomtrek 51 cm tot 64 cm Gezichtsveld 426 cm Omgevingscondities Gebruikstemperatuur -10 °C tot +55 °C Opslagtemperatuur -30 °C tot +50 °C Relatieve vochtigheid < 90 % Gewichten Dräger X-plore 8000 gelaats- 650 g scherm Dräger X-plore 8000 helm pc- 890 g... - Page 40 Sikkerhedsrelaterede oplysninger – For at kunne yde tilstrækkelig beskyttelse skal Sikkerhedsrelaterede oplysninger X-plore 8000 Face Shield X-plore 8000 Helmet PC visor HL1 stødhjelmen have korrekt pasform eller kunne indstilles til brugerens hovedstørrelse. Generelle sikkerhedshenvisninger – Hvis stødhjelmens originale dele ændres eller fjernes, –...
-
Page 41: Beskrivelse Af Funktionen
Beskrivelse Beskrivelse Anvendelsesbegrænsninger I omgivende atmosfærer med iltmangel kan Produktoversigt åndedrætstilslutningerne kun anvendes i kombination med en trykluftslangeenhed, da de ikke leverer noget oxygen. I (se udklapside figur A, B) kombination med en turboenhed egner Bæreringsmodul åndedrætstilslutningerne sig ikke til indsats i omgivende atmosfærer med iltmangel. -
Page 42: Symbolforklaring Og Typeidentisk Mærkning
Brug Symbolforklaring og typeidentisk 4.2.2 Forberedelser inden hver brug mærkning ADVARSEL 3.6.1 Typeskilt og emballage Begrænset udsyn eller påvirkning af beskyttelsesvirkningen på grund af ridsede eller Symbol Forklaring beskadigede maskeruder! ► Udskift ridsede eller beskadigede maskeruder. Batch 1. Kontrollér alle dele af ansigtsværnet for ridser, Bestillings-nr. - Page 43 Vedligeholdelse Efter brug 5.1.2 Maskinrengøring Ansigtsmanchetten må kun rengøres og desinficeres ADVARSEL manuelt. For denne del anbefales hverken maskinrengøring Fare for kvæstelser eller livsfare! eller desinfektion. Fare på grund af iltmangel, CO -forgiftning og indtrængning af Høje temperaturer ved rengøring og desinfektion belaster skadelige stoffer fra den omgivende luft! materialerne meget.
- Page 44 Transport 5.2.2 Udskiftning af visirruden 5.2.6 Udskiftning af bærering 1. Træk riglen op, og fjern visirfastgørelserne på begge sider 1. Frigør bæreringen hjelmskallen/stødhjelmskallen ved de af visiret (se udklapside figur D1, D2). Sørg for at holde 4 fastgørelsespunkter. styr på, hvilken rigel der hører til hvilken visirfastgørelse. Træk først bæreringen af de to bageste lejetapper.
-
Page 45: Tekniske Data
Opbevaring Opbevaring Mål Dräger X- 305 mm x 222 mm x 320 mm Opbevar ansigtsværnet fuldt monteret i den originale plore 8000 ansigtsskærm emballage. (h/b/d) Opbevar ansigtsværnet tørt og beskyttet mod snavs og Dräger X-plore 8000 hjelm 325 mm x 222 mm x 340 mm beskyttet mod direkte sollys og varme. - Page 46 Informacje dotyczące bezpieczeństwa – Ta osłona ochronna została zaprojektowana w celu Informacje dotyczące X-plore 8000 Face Shield X-plore 8000 Helmet PC visor HL1 pochłaniania energii uderzenia poprzez częściowe bezpieczeństwa zniszczenie lub uszkodzenie skorupy lub wyposażenia wewnętrznego osłony. Takie uszkodzenie niekoniecznie Ogólne wskazówki dotyczące musi być...
-
Page 47: Przegląd Produktu
Opis Opis Części twarzowe chronią użytkownika przed – zawierającym substancje szkodliwe powietrzem Przegląd produktu otoczenia, – cząstkami stałymi i ciekłymi, (patrz strona okładki, rysunki A, B) – uderzeniami. Zespół pierścienia nośnego Ograniczenia zakresu zastosowania Taśma potnikowa Pierścień nośny W atmosferach z niedoborem tlenu części twarzowe mogą być... - Page 48 Użytkowanie Przygotowania do użytkowania Wszystkie części spełniają wymagania następujących rozporządzeń: 4.2.1 Przygotowanie do pierwszego użycia – (EU) 2016/425 – Regulation 2016/425 on personal protective equipment, Filtry mogą być podłączane tylko do aparatu as amended to apply in GB filtrowentylacyjnego, a nie bezpośrednio do części twarzowych Dräger X-plore 8000.
-
Page 49: Czyszczenie I Dezynfekcja
Konserwacja 5.1.1 Czyszczenie ręczne 7. Tylko hełm z wizjerem PC X-plore 8000 HL1: Umieścić pasek podbródkowy i dopasować odpowiednio długość, aby hełm dobrze przylegał do głowy. Informacje dotyczące właściwych środków czyszczą- cych i dezynfekcyjnych oraz specyfikacje tych środków znajdują się w dokumencie 9100081, na stronie W trakcie użytkowania www.draeger.com/IFU. -
Page 50: Prace Konserwacyjne
Konserwacja Prace konserwacyjne 5.2.5 Wymiana taśmy potnikowej 1. Rozpiąć zapięcia na rzepy taśmy potnikowej i zdjąć taśmę Informacje na temat części zamiennych, patrz potnikową z pierścienia nośnego. https.://www.connect.draeger.com. 2. Założyć nową taśmę potnikową na pierścień nośny i zamocować za pomocą zapięcia na rzepy tak, aby były 5.2.1 Wymiana folii ochronnej one naprężone i niepomarszczone. -
Page 51: Dane Techniczne
Transport 4. Zamocować pierścień nośny dwoma ryglami do skorupy Szybka wizjera hełmu i zablokować je, obracając je o 90°. Potem Folia ochronna docisnąć obydwa tylne czopy łożyska do odpowiednich otworów podłużnych i zatrzasnąć czopy w sposób Zamknięcie twarzy słyszalny. Mocowanie wizjera, mocowa- nie ramki wizjera Transport Pasek podbródkowy... - Page 54 Manufacturer Dräger Safety AG & Co. KGaA Revalstraße 1 D-23560 Lübeck Germany +49 451 8 82-0 CCQS Certification Services Limited Involved in type approval and in quality control: Approved body: Block 1 Blanchardstown Corporate Park DEKRA Testing and Certification GmbH BSI Assurance UK Ltd.
Need help?
Do you have a question about the X-plore 8000 Series and is the answer not in the manual?
Questions and answers