Advertisement
Quick Links
Advertisement

Related Manuals for Sage Oracle


Summary of Contents for Sage Oracle
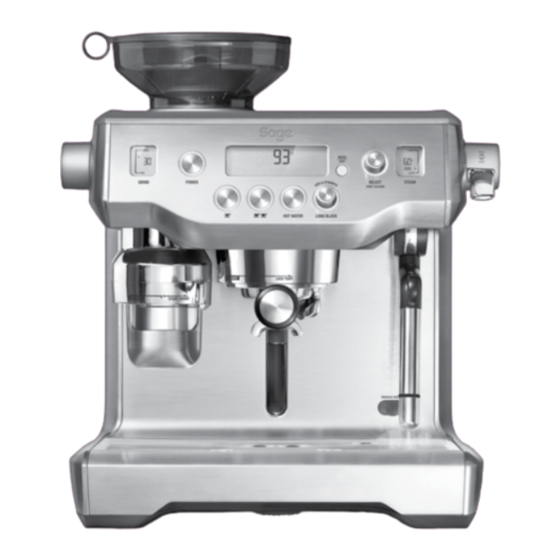
- Page 1 Oracle ® Instruction Booklet BES980...
-
Page 2: Table Of Contents
CONTENTS We recommend safety first Know your new appliance Features of your new appliance Operating your new appliance Coffee making tips & preparation Care & cleaning Troubleshooting Coffees to try... -
Page 3: We Recommend Safety First
WE RECOMMEND SAFETY FIRST At Sage we are very safety conscious. We design and ® manufacture appliances with your safety foremost in mind. We also ask that you exercise a degree of care when using any electrical appliance and adhere to the following precautions. - Page 4 WE RECOMMEND SAFETY FIRST • Remove any packaging • This appliance can be material and promotional used by children aged from labels or stickers before using 8 years and above if they have the product for the first time. been given supervision or instruction concerning use •...
- Page 5 30mA be installed entire appliance to the nearest in the electrical circuit authorised Sage Service supplying the appliance. Centre for examination, See your electrician for replacement or repair professional advice.
- Page 6 WE RECOMMEND SAFETY FIRST SPECIFIC INSTRUCTIONS • Do not use any other liquid apart from cold mains/town FOR BES980 THE ORACLE ® water. We do not recommend • This appliance is the use of highly filtered, recommended for household de-mineralised or distilled use only.
- Page 7 WE RECOMMEND SAFETY FIRST • Use caution when operating please contact your local machine as metal surfaces are council office. liable to get hot during use. SPECIFIC INSTRUCTIONS • Use caution when using the FOR WATER FILTER de-scale feature as hot steam •...
-
Page 8: Know Your New Appliance
KNOW YOUR NEW APPLIANCE Integrated conical burr grinder Heated cup warming tray With removable 280g bean hopper. HOT WATER button Top-fill 2.5L removable water tank Press to start and stop the flow of hot With integrated water filter and backlit water from the hot water outlet. - Page 9 KNOW YOUR NEW APPLIANCE...
- Page 10 KNOW YOUR NEW APPLIANCE ACCESSORIES Grind outlet brush & tamp Stainless steel milk jug removal magnet 2 cup filter basket Cleaning tool for steam wand tip 1 cup filter basket Allen key Water filter holder with filter Steam wand cleaning powder Cleaning disc Water hardness test strip Mini grinds bin...
-
Page 11: Features Of Your New Appliance
FEATURES OF YOUR NEW APPLIANCE HANDS FREE AUTOMATIC Regulated Extraction Pressure GRIND, DOSE & TAMP Over pressure valve (OPV) limits maximum pressure for optimal espresso flavour. Automatically grinds, doses and tamps the required amount of coffee, mess free. Low Pressure Pre-Infusion Gradually increases water pressure to gently GRIND SIZE DIAL expand grinds for an even extraction. -
Page 12: Operating Your New Appliance
PAGE HEADER..OPERATING YOUR NEW APPLIANCE BEFORE FIRST USE INSTALLING THE WATER FILTER • Remove the water filter and water filter Machine Preparation holder from the plastic bag. Remove and discard all labels and packaging • Soak the filter in cold water for 5 minutes. materials attached to your espresso machine. - Page 13 PAGE HEADER..OPERATING YOUR NEW APPLIANCE Setting Water Hardness • Remove the supplied water hardness test strip from the wrapper. • Dip the test strip into a sample of the water you have filled the tank with. Wait for one minute. The water hardness setting is indicated by the number of red squares displayed on the test...
- Page 14 OPERATING YOUR NEW APPLIANCE Flushing The Machine GRINDING OPERATION When the machine has reached Insert bean hopper into position on top of the STANDBY mode: machine. Turn knob to lock into place. Fill hopper with fresh beans. Press 2 CUP button to run water through the group head for 30 seconds.
- Page 15 PAGE HEADER..OPERATING YOUR NEW APPLIANCE SELECT YOUR FILTER BASKET ESPRESSO EXTRACTION Insert the correct Filter Basket into the Align portafilter handle with the INSERT Portafilter for the number of coffees or strength position on the group head. Lift to insert you are making.
- Page 16 PAGE HEADER..OPERATING YOUR NEW APPLIANCE The machine will stop after 2 CUP duration ADJUSTING MILK TEXTURE has been extracted and will return to Press the SELECT dial until the milk texture STANDBY mode. triangle flashes. Rotate dial towards 'CAPP' for more texture or 'LATTE' for less texture.
- Page 17 PAGE HEADER..OPERATING YOUR NEW APPLIANCE PRESET LONG BLACK There are 3 preset Long Black settings – small, MILK MUST medium and large. To use one of these settings: COVER THIS SEAL Insert the 2 Cup Filter Basket into the Porta-filter.
- Page 18 PAGE HEADER..OPERATING YOUR NEW APPLIANCE NOTE To override the setting during operation, You can conduct a manual Long Black press the LONG BLACK dial. Pressing the extraction each time, or program this LONG BLACK dial during the espresso as a custom setting. Once programmed, extraction will stop the flow of espresso your custom setting will appear after the and start the flow of hot water.
- Page 19 PAGE HEADER..OPERATING YOUR NEW APPLIANCE PROGRAMMABLE FUNCTIONS PROGRAMMING SHOT VOLUME/DURATION To enter program mode, press the MENU button. Rotate SELECT dial Fill the portafilter using the auto grind, dose to the desired function. & tamp function. Insert the portafilter into the group head.
- Page 20 PAGE HEADER..OPERATING YOUR NEW APPLIANCE SHOT TEMPERATURE SET CLOCK While 'SHOT TEMP' is displayed on the Setting the clock is optional. While 'SET LCD, press the SELECT dial. The current CLOCK' is displayed on the LCD, press the temperature will flash. Turn the SELECT dial SELECT dial.
- Page 21 PAGE HEADER..OPERATING YOUR NEW APPLIANCE While ' A UTO START' is displayed on the LCD, press the SELECT dial. Turn the SELECT dial to 'On' or 'Off' . Press SELECT dial to set. SELECT SELECT SELECT SELECT SELECT SELECT TEMP TEXTURE TEMP TEXTURE TEMP TEXTURE...
- Page 22 PAGE HEADER..OPERATING YOUR NEW APPLIANCE LONG BLACK ADJUST - PROGRAMMING CUSTOM SETTINGS There are 6 custom Long Black settings for you to program to suit your cup size and strength preferences. To program your custom setting: Fill the portafilter using the auto grind, dose &...
- Page 23 PAGE HEADER..OPERATING YOUR NEW APPLIANCE To start programming, press the Rotate the SELECT dial to the desired feature. SELECT dial. The LCD will show a Press SELECT dial to access feature settings. moving cup icon and espresso will Press the MENU button at any time to extract from the portafilter spouts.
- Page 24 PAGE HEADER..OPERATING YOUR NEW APPLIANCE Steam Temperature (StEA) Adjust the steam boiler temperature, which in turn controls steam pressure. Rotate SELECT dial to the desired temperature. The default is 130˚C. Press SELECT dial to set. Machine will beep once to confirm selection. 'Hrd3' will flash on screen.
- Page 25 PAGE HEADER..OPERATING YOUR NEW APPLIANCE Flow Measurement Method (VoL) Heating Select between volume based (FLo) or Indicates when the machine is heating up or if time based (SEc) method for espresso the temperature drops excessively during use. dose measurement. Rotate SELECT dial Lock Hopper to the desired method.
-
Page 26: Coffee Making Tips & Preparation
PAGE HEADER..COFFEE MAKING TIPS & PREPARATION PRE-HEATING The resulting espresso will be OVER EXTRACTED, dark in colour and bitter in Heating your cup or glass flavour. A warm cup will help maintain the coffee’s If the grind is too coarse the water will flow optimal temperature. - Page 27 COFFEE MAKING TIPS & PREPARATION • When the auto grind, dose & tamp function The flavour of your coffee will depend on many is complete, rotate the portafilter handle to factors, such as the type of coffee beans, degree the INSERT position and lower to remove. of roast, freshness, coarseness or fineness of the grind.
- Page 28 COFFEE MAKING TIPS & PREPARATION • Always start with fresh cold milk. • Tap the jug on the counter-top to collapse any bubbles. • Fill milk jug to below the spout position. At a minimum, there should be enough • Swirl the jug to polish and re-integrate milk to cover the steam wand seal.
- Page 29 COFFEE MAKING TIPS & PREPARATION • Wipe the wand and tip with a damp cloth. Lower steam wand to the down position and the wand will automatically purge. • Tap the jug on the counter-top to collapse any bubbles. • Swirl the jug to polish and re-integrate the texture.
-
Page 30: Care & Cleaning
CARE & CLEANING CLEANING CYCLE • CLEAN ME! will be displayed on the LCD to indicate when a cleaning cycle is required (after approx. 200 shots). The cleaning cycle cleans the shower screen and back-flushes the group head. • When the cleaning cycle has finished, remove the portafilter and ensure the tablet has completely dissolved. - Page 31 CARE & CLEANING CLEANING CONICAL BURRS Regular cleaning helps the burrs achieve consistent grinding results which is especially important when grinding for espresso. Unlock hopper Remove beans Replace & lock Run grinder until empty Unlock & remove hopper hopper Remove upper Clean upper Clean lower Remove tamping...
- Page 32 CARE & CLEANING CLEANING THE STEAM WAND • The steam wand can be left immersed in the milk jug filled with water when not in use to reduce the risk of blockages. IMPORTANT Steam Wand Cleaning Powder After every use, thoroughly wipe the steam wand and tip with a damp cloth Add 1 packet into an empty milk jug.
- Page 33 CARE & CLEANING CLEANING THE FILTER BASKET AND CLEANING THE DRIP TRAY PORTAFILTER & STORAGE TRAY • The filter basket and portafilter should be • The drip tray should be removed, emptied rinsed under hot water after each coffee and cleaned after each use or when the drip making session to remove all residual tray indicator is showing Empty Me! coffee oils.
- Page 34 CARE & CLEANING DESCALE (dESc) 2 – Empty Boilers Remove the grey silicone cover on the NOTE lower front panel marked DESCALE ACCESS. Even if you used the provided water filter, we recommend you to descale if there is scale build-up in the water tank. Only descale via the descale menu.
- Page 35 Press 1 Cup button and the LCD screen will tray may be hot. show countdown time (20 minutes). Empty water tank, remove water filter. Dissolve 1 sachet of Sage Descaler into ™ 1 litre of warm water. Pour solution into the water tank.
-
Page 36: Troubleshooting
& tamp function. • Unplug power cord from power outlet. There is an alert on the See page 24 for list of alerts. LCD eg. 'OVERHEAT If problem persists, please PLEASE WAIT', contact Sage Customer 'HEATING' etc. Service or go to sageappliances.com... - Page 37 Auto Start time have been programmed correctly. The LCD will display a clock icon when the Auto Start time is programmed. ERR error message • A major fault has occurred Contact Sage on LCD and machine cannot Customer Service or go to operate. sageappliances.com.
- Page 38 If problem persists, please contact Sage Customer Service or go to sageappliances.com Water does not flow from • Machine has not reached Allow time for the machine the group head operating temperature.
- Page 39 The machine is ‘On’ but Turn machine off. Wait for ceases to operate 60 minutes and turn machine back on. If problem persists, please contact Sage Customer Service or go to sageappliances.com Steam pouring out of Turn machine off. Wait for...
- Page 40 TROUBLESHOOTING PROBLEM POSSIBLE CAUSES WHAT TO DO Not enough milk texture • Steam wand is blocked. Refer to 'Cleaning the Steam Wand', page 32. Different brands and types of milk and milk alternatives will texture differently. You may need to adjust the texture level accordingly.
-
Page 41: Coffees To Try
COFFEES TO TRY CAPPUCCINO A single shot of espresso with textured milk and garnished with drinking chocolate. ESPRESSO Intense and aromatic, it is also known as a short black and is served in a small cup or glass. LATTÉ A latté consists of a single espresso with textured milk and approx. 10mm of foam. - Page 42 Sage Appliances GmbH Johannstraße 37, 40476 Düsseldorf, Deutschland Für den Kundendienst besuchen Sie bitte www.sageappliances.com BRG Appliances Limited Unit 3.2, Power Road Studios, 114 Power Road, London, W4 5PY Freephone (UK Landline): 0808 178 1650 Mobile Calls (National Rate): 0333 0142 970 www.sageappliances.com...
Need help?
Do you have a question about the Oracle and is the answer not in the manual?
Questions and answers