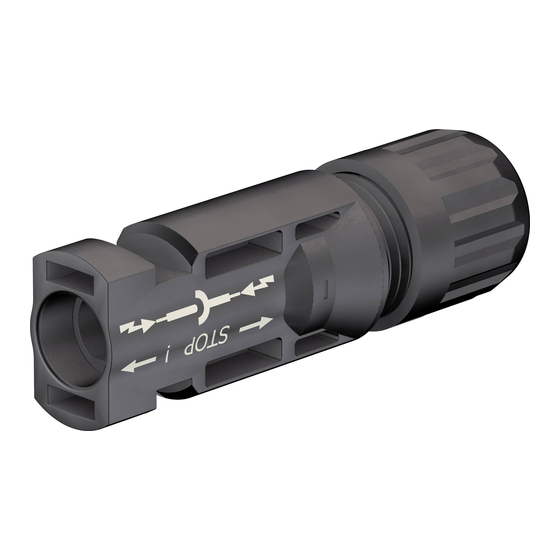
Staubli PV-KST4 UR Series Assembly Instructions Manual
Cable coupler
Hide thumbs
Also See for PV-KST4 UR Series:
- Assembly instructions manual (16 pages) ,
- Assembly instructions manual (16 pages) ,
- Assembly instructions manual (12 pages)
Table of Contents
Advertisement
Quick Links
MA000 (de_en)
MA231 (pt_en)
Montageanleitung
Instruções de montagem
Acoplamento fêmea PV-KST4/...-UR
Acoplamento macho PV-KBT4/...-UR
Sumário
Instruções de segurança �������������������������������������������������������������2
Ferramentas necessárias ............................................................ 3
Notas relativas ao armazenamento ............................................. 4
Orientação para a configuração do conector .............................. 5
Preparação do cabo ................................................................... 5
Cravar ........................................................................................ 7
Teste de montagem .................................................................... 9
Conectado e desconectado
- sem clip de segurança PV-SSH4 ............................................ 10
- com clip de segurança PV-SSH4 ........................................... 10
Notas sobre a instalação ...........................................................11
Datos técnicos.......................................................................... 12
Acoplamento fêmea/Female cable coupler
PV-KBT4/2.5...-UR
PV-KBT4/6...-UR
PV-KBT4/10...
PV-KBT4/5...-UR
PV-KBT4/8II-UR
na opção /Optional
PV-SSH4
clip de segurança / Safety lock clip
(veja / see www.staubli.com/electrical --> MA252)
Tampas seladoras/Sealing caps
PV-BVK4
32.0716
MA231 (pt_en)
MA000 (de_en)
Assembly instructions
Assembly instructions
PV male cable coupler PV-KST4/...-UR
PV female cable coupler PV-KBT4/...-UR
Content
Safety Instructions �����������������������������������������������������������������������2
Tools required ............................................................................. 3
Notes on storage ........................................................................ 4
Guideline for connector configuration .......................................... 5
Cable preparation ....................................................................... 5
Crimping ..................................................................................... 7
Assembly check ......................................................................... 9
- without safety lock clip PV-SSH4 ........................................... 10
- with safety lock clip PV-SSH4 ................................................ 10
Notes on installation ..................................................................11
Technical data .......................................................................... 12
Acoplamento macho/Male cable coupler
PV-KST4/2.5...-UR
PV-KST4/6...-UR
PV-KST4/10...
PV-KST4/5...-UR
PV-KST4/8II-UR
PV-SVK4
32.0717
1 / 12
Advertisement
Table of Contents

Summary of Contents for Staubli PV-KST4 UR Series
-
Page 1: Table Of Contents
Acoplamento macho/Male cable coupler PV-KBT4/2.5...-UR PV-KST4/2.5...-UR PV-KBT4/6...-UR PV-KST4/6...-UR PV-KBT4/10... PV-KST4/10... PV-KBT4/5...-UR PV-KST4/5...-UR PV-KBT4/8II-UR PV-KST4/8II-UR na opção /Optional PV-SSH4 clip de segurança / Safety lock clip (veja / see www.staubli.com/electrical --> MA252) Tampas seladoras/Sealing caps PV-BVK4 PV-SVK4 32.0716 32.0717 1 / 12... -
Page 2: Instruções De Segurança
Para obter mais informações, contacte a Stäubli. For more information, contact Stäubli • • www.staubli.com/electrical www.staubli.com/electrical Requisitos para o pessoal Requirements for personnel Apenas um eletricista ou uma pessoa com conhecimentos Only an electrician or electrically instructed person may assem- eletrotécnicos pode montar, instalar e ativar o sistema. -
Page 3: Ferramentas Necessárias
10 mm • • PV-KST4/10II Aviso: Note: Para informações sobre a matriz de cravação e o fixador, For crimping die and locator information, please see the ope- consulte as instruções de utilização MA251, rating instructions MA251, www.staubli.com/electrical www.staubli.com/electrical 3 / 12... -
Page 4: Notas Relativas Ao Armazenamento
Referência N°: 32.6080 Order No. 32.6080 Aviso: Note: Instruções de utilização MA705, Operating instructions MA705, www.staubli.com/electrical www.staubli.com/electrical Notas relativas ao armazenamento de conectores Notes on connectors and components storage e componentes A Stäubli recomenda o armazenamento dos componentes do Stäubli recommends to store connector components at a pref- conector a um intervalo de temperaturas preferencialmente erably constant temperature range between -30 °C and +60 °C... -
Page 5: Orientação Para A Configuração Do Conector
Used tinned copper conductors. Do not use uncoated Não utilize condutores não revestidos (sem isolamento*) ou (bare*) nor already oxidized conductors. All Staubli solar que apresentem oxidação. Todos os cabos solares Staubli cables have high-quality, tinned conductors. For safety rea- têm condutores estanhados de alta qualidade. - Page 6 Seleção da configuração de conector com utili- Selection of connector configuration when using zação de condutores certificados conforme UL. cables certified at UL Os cabos ligados aos conectores devem ser adequados para uti- Cables connected to the connectors shall be suitable for use in lização em sistemas fotovoltaicos e devem cumprir os requisitos photovoltaic systems and shall comply with the requirements of de ZKLA (cabos fotovoltaicos) ou TYLZ (USE-2)..
-
Page 7: Cravar
Cravação Crimping B-Crimp (ill. 11) (ill. 11) Para cravar contactos de cravação For crimping open crimp contacts abertos (B-Crimp) (B-Crimp) PV-KxT4/2.5...-UR; PV-KxT4/6...-UR PV-KxT4/2.5...-UR; PV-KxT4/6...-UR oder PV-KxT4/10... or PV-KxT4/10... Abra o grampo (K) e segure-o. Open clamp (K) and hold tight. •... - Page 8 (ill. 13) (ill. 13) B-Crimp Certifique-se de que o contacto está Make sure the contact is fully inserted completamente inserido no fixador into the locator before crimping. antes de realizar a cravação. O-Crimp (ill. 14) (ill. 14) Aperte o alicate com delicadeza até Press the pliers gently together until que as abas de cravação estejam the crimping flaps are properly located...
-
Page 9: Teste De Montagem
Teste de montagem Assembly check (ill. 17) (ill. 17) Introduza o contacto cravado no Insert the crimped contact into the isolamento do acoplamento macho ou insulator of the male or female coupler do acoplamento fêmea até ficar encai- until engaged. xado no lugar. -
Page 10: Sem Clip De Segurança Pv-Ssh4
Ligando e desligando o acopulamento de cabo Mating and disconnecting the cable coupler sem clip de segurança PV-SSH4 without safety lock clip PV-SSH4 Acoplamento Mating (ill. 20) (ill. 20) Acople o conector de cabo até ouvir um Mate the cable coupler until a „Click“ clique. -
Page 11: Notas Sobre A Instalação
Notas sobre a instalação Notes on installation Nota: Note: Se o conector se destinar a utilização em aplicações de CC If the connector is to be used in low-voltage DC applications de baixa tensão que não as de um conjunto fotovoltaico, con- other than those in a photovoltaic array, please consult the infor- sulte as informações fornecidas no Technical Description Report mation as provided in the Stäubli Technical Description Report. -
Page 12: Datos Técnicos
Engineering considerations: Application associated current ratings have to be verified in the products end-use and shall not exceed the maximum operating temperature. Fabricante/Manufacturer: Stäubli Electrical Connectors AG Stockbrunnenrain 8 4123 Allschwil/Switzerland Tel. +41 61 306 55 55 +41 61 306 55 56 mail ec.ch@staubli.com www.staubli.com/electrical 12 / 12...


Need help?
Do you have a question about the PV-KST4 UR Series and is the answer not in the manual?
Questions and answers