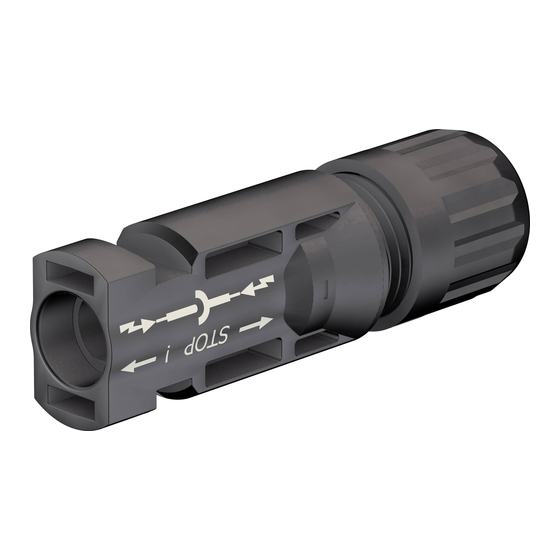
Staubli PV-KST4 UR Series Assembly Instructions Manual
Hide thumbs
Also See for PV-KST4 UR Series:
- Assembly instructions manual (16 pages) ,
- Assembly instructions manual (12 pages) ,
- Assembly instructions manual (12 pages)
Table of Contents
Advertisement
Quick Links
MA000 (de_en)
MA231 (es_en)
Instrucciones de montaje
Montageanleitung
Casquillo de acoplamiento macho
PV-KST4/...-UR
Casquillo de acoplamiento hembra
PV-KBT4/...-UR
Índice
Instrucciones de seguridad ����������������������������������������������������������2
Herramientas necesarias ............................................................ 3
Nota sobre almacenamiento ....................................................... 4
Pautas para la configuración del conector ................................... 5
Preparación del cable ................................................................. 5
Engarzado .................................................................................. 7
Comprobación del montaje ........................................................ 9
- sin clip de seguridad PV-SSH4 ............................................... 10
- con clip de seguridad PV-SSH4 ............................................. 10
Notas sobre la instalación ..........................................................11
Datos técnicos.......................................................................... 12
Casquillo de acoplamiento hembra/Female cable coupler
PV-KBT4/2.5...-UR
PV-KBT4/6...-UR
PV-KBT4/10...
PV-KBT4/5...-UR
PV-KBT4/8II-UR
en opción/Optional
PV-SSH4
Clip de seguridad/Safety lock clip
(mirar/see www.staubli.com/electrical --> MA252)
Tapones/Sealing caps
PV-BVK4
32.0716
MA231 (es_en)
MA000 (de_en)
Assembly instructions
Assembly instructions
PV male cable coupler PV-KST4/...-UR
PV female cable coupler PV-KBT4/...-UR
Content
Safety Instructions �����������������������������������������������������������������������2
Tools required ............................................................................. 3
Notes on storage ........................................................................ 4
Guideline for connector configuration .......................................... 5
Cable preparation ....................................................................... 5
Crimping ..................................................................................... 7
Assembly check ......................................................................... 9
- without safety lock clip PV-SSH4 ........................................... 10
- with safety lock clip PV-SSH4 ................................................ 10
Notes on installation ..................................................................11
Technical data .......................................................................... 12
Casquillo de acoplamiento macho/Male cable coupler
PV-KST4/2.5...-UR
PV-KST4/6...-UR
PV-KST4/10...
PV-KST4/5...-UR
PV-KST4/8II-UR
PV-SVK4
32.0717
1 / 12
Advertisement
Table of Contents

Summary of Contents for Staubli PV-KST4 UR Series
-
Page 1: Table Of Contents
Casquillo de acoplamiento hembra/Female cable coupler Casquillo de acoplamiento macho/Male cable coupler PV-KBT4/2.5...-UR PV-KST4/2.5...-UR PV-KBT4/6...-UR PV-KST4/6...-UR PV-KBT4/10... PV-KST4/10... PV-KBT4/5...-UR PV-KST4/5...-UR PV-KBT4/8II-UR PV-KST4/8II-UR en opción/Optional PV-SSH4 Clip de seguridad/Safety lock clip (mirar/see www.staubli.com/electrical --> MA252) Tapones/Sealing caps PV-BVK4 PV-SVK4 32.0716 32.0717 1 / 12... -
Page 2: Instrucciones De Seguridad
Para más información, póngase en contacto con Stäubli. For more information, contact Stäubli • • www.staubli.com/electrical www.staubli.com/electrical Requisitos para el personal Requirements for personnel Solo un electricista o una persona con formación en el campo Only an electrician or electrically instructed person may assem- puede montar, instalar y poner en marcha el sistema. -
Page 3: Pv-Kst4
• PV-KST4/10II Nota: Note: Para tener información sobre la ranura de engaste y el posi- For crimping die and locator information, please see the ope- cionador, consulte las instrucciones de empleo MA251, rating instructions MA251, www.staubli.com/electrical www.staubli.com/electrical 3 / 12... -
Page 4: Nota Sobre Almacenamiento
No. de código: 32.6080 Order No. 32.6080 Hinweis: Note: Bedienungsanleitung MA705, Operating instructions MA705, www.staubli.com/electrical www.staubli.com/electrical Notas sobre almacenamiento de conectores y Notes on connectors and components storage componentes Stäubli recomienda que almacene los componentes del conector Stäubli recommends to store connector components at a pref- preferiblemente a un rango de temperatura entre -30 °C y 60 °C,... -
Page 5: Pautas Para La Configuración Del Conector
Used tinned copper conductors. Do not use uncoated No use conductores sin recubrimiento (pelados*) o ya oxida- (bare*) nor already oxidized conductors. All Staubli solar dos. Todos los cables solares de Stäubli tienen conductores cables have high-quality, tinned conductors. For safety rea- estañados de alta calidad. - Page 6 Selección de configuraciones de conectores si se Selection of connector configuration when using utilizan cables con certificación UL cables certified at UL Los cables conectados a los conectores deben ser aptos para su Cables connected to the connectors shall be suitable for use in uso en sistemas fotovoltaicos y cumplir con los requisitos de la photovoltaic systems and shall comply with the requirements of norma ZKLA (cables fotovoltaicos) o TYLZ (USO-2).
-
Page 7: Engarzado
Engarce Crimping B-Crimp (ill. 11) (ill. 11) Para engastar contactos crimpados For crimping open crimp contacts abiertos (B-Crimp) (B-Crimp) PV-KxT4/2.5...-UR; PV-KxT4/6...-UR PV-KxT4/2.5...-UR; PV-KxT4/6...-UR oder PV-KxT4/10... or PV-KxT4/10... Abra la abrazadera (K) y manténgala Open clamp (K) and hold tight. • •... - Page 8 (ill. 13) (ill. 13) B-Crimp Compruebe que el contacto esté por Make sure the contact is fully inserted completo insertado en el posicionador into the locator before crimping. antes del crimpado. O-Crimp (ill. 14) (ill. 14) Presione los alicates suavemente Press the pliers gently together until hasta que las solapas de engaste estén the crimping flaps are properly located...
-
Page 9: Comprobación Del Montaje
Comprobación del montaje Assembly check (ill. 17) (ill. 17) Inserte el contacto engarzado en el Insert the crimped contact into the aislador del pin macho o hembra hasta insulator of the male or female coupler que se encaje haciendo un clic. until engaged. -
Page 10: Conexión Y Desconexión Sin Clip De Seguridad Pv-Ssh4
Conexión y desconexión sin clip de seguridad Mating and disconnecting the cable coupler PV-SSH4 without safety lock clip PV-SSH4 Conexión Mating (ill. 20) (ill. 20) Enchufe entre sí las piezas del pin del Mate the cable coupler until a „Click“ cable hasta que se encajen en su lugar can be heard. -
Page 11: Notas Sobre La Instalación
Notas sobre la instalación Notes on installation Nota: Note: si el conector va a usarse en aplicaciones con CC de voltaje If the connector is to be used in low-voltage DC applications bajo que no sean un conjunto fotovoltaico, consulte la informa- other than those in a photovoltaic array, please consult the infor- ción del Informe de descripción técnica de Stäubli. -
Page 12: Datos Técnicos
Application associated current ratings have to be verified in the products end-use and shall not exceed the maximum operating temperature. Fabricante/Manufacturer: Stäubli Electrical Connectors AG Stockbrunnenrain 8 4123 Allschwil/Switzerland Tel. +41 61 306 55 55 +41 61 306 55 56 mail ec.ch@staubli.com www.staubli.com/electrical 12 / 12...


Need help?
Do you have a question about the PV-KST4 UR Series and is the answer not in the manual?
Questions and answers