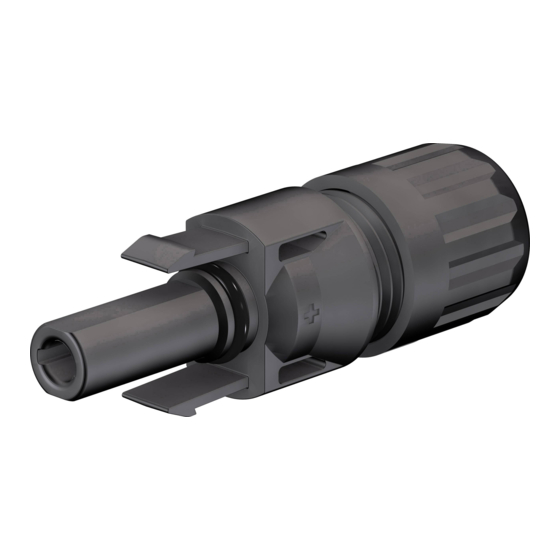
Staubli PV-KBT4 UR Series Assembly Instructions Manual
Pv female cable coupler
Hide thumbs
Also See for PV-KBT4 UR Series:
- Assembly instructions manual (16 pages) ,
- Assembly instructions manual (16 pages) ,
- Assembly instructions manual (12 pages)
Table of Contents
Advertisement
Quick Links
MA000 (de_en)
MA231 (fr_en)
Montageanleitung
Notice de montage
Raccord mâle PV-KST4/...-UR
Raccord femelle PV-KBT4/...-UR
Sommaire
Consignes de sécurité �����������������������������������������������������������������2
Outillage nécessaire .................................................................... 3
Remarques concernant le stockage .............................................4
Ligne directrice pour la configuration du connecteur ................... 5
Préparation du câble ................................................................... 5
Sertissage .................................................................................. 7
Test d'assemblage...................................................................... 9
- sans clip de sécurité PV-SSH4 ............................................... 10
- avec clip de sécurité PV-SSH4 ............................................... 10
Remarques sur l'installation ...................................................... 11
Données techniques ................................................................. 12
Raccord femelle / Female cable coupler
PV-KBT4/2.5...-UR
PV-KBT4/6...-UR
PV-KBT4/10...
PV-KBT4/5...-UR
PV-KBT4/8II-UR
En option / Optional
PV-SSH4
Clip de sécurité / Safety lock clip
(voir / see www.staubli.com/electrical --> MA252)
Bouchons de protection/Sealing caps
PV-BVK4
32.0716
MA231 (fr_en)
MA000 (de_en)
Assembly instructions
Assembly instructions
PV male cable coupler PV-KST4/...-UR
PV female cable coupler PV-KBT4/...-UR
Content
Safety Instructions �����������������������������������������������������������������������2
Tools required ............................................................................. 3
Notes on storage ........................................................................ 4
Guideline for connector configuration .......................................... 5
Cable preparation ....................................................................... 5
Crimping ..................................................................................... 7
Assembly check ......................................................................... 9
- without safety lock clip PV-SSH4 ........................................... 10
- with safety lock clip PV-SSH4 ................................................ 10
Notes on installation ..................................................................11
Technical data .......................................................................... 12
Raccord mâle / Male cable coupler
PV-KST4/2.5...-UR
PV-KST4/6...-UR
PV-KST4/10...
PV-KST4/5...-UR
PV-KST4/8II-UR
PV-SVK4
32.0717
1 / 12
Advertisement
Table of Contents

Subscribe to Our Youtube Channel
Summary of Contents for Staubli PV-KBT4 UR Series
-
Page 1: Table Of Contents
Raccord mâle / Male cable coupler PV-KBT4/2.5...-UR PV-KST4/2.5...-UR PV-KBT4/6...-UR PV-KST4/6...-UR PV-KBT4/10... PV-KST4/10... PV-KBT4/5...-UR PV-KST4/5...-UR PV-KBT4/8II-UR PV-KST4/8II-UR En option / Optional PV-SSH4 Clip de sécurité / Safety lock clip (voir / see www.staubli.com/electrical --> MA252) Bouchons de protection/Sealing caps PV-BVK4 PV-SVK4 32.0716 32.0717 1 / 12... -
Page 2: Consignes De Sécurité
Pour de plus amples informations, contacter Stäubli. For more information, contact Stäubli • • www.staubli.com/electrical www.staubli.com/electrical Exigences en matière de personnel Requirements for personnel Le montage, l’installation et la mise en service du système ne Only an electrician or electrically instructed person may assem- doivent être eff ectués que par un électricien ou une personne... -
Page 3: Outillage Nécessaire
• • PV-KST4/8II-UR PV-KBT4/10II, 10 mm • • PV-KST4/10II Note: Note: Informations pour positionneur et matrices de sertissage, voir For crimping die and locator information, please see the ope- notice d‘utilisation MA251, www.staubli.com/electrical rating instructions MA251, www.staubli.com/electrical 3 / 12... -
Page 4: Remarques Concernant Le Stockage
No. de Cde. 32.6080 Order No. 32.6080 Note: Note: Notice d‘utilisation MA705, Operating instructions MA705, www.staubli.com/electrical www.staubli.com/electrical Remarques concernant le stockage des con- Notes on connectors and components storage necteurs et des composants Stäubli recommande de stocker les composants du connecteur à... -
Page 5: Ligne Directrice Pour La Configuration Du Connecteur
Used tinned copper conductors. Do not use uncoated pas utiliser de conducteurs sans gaine (nu*) ni déjà oxydés. (bare*) nor already oxidized conductors. All Staubli solar Tous les câbles solaires de Stäubli sont dotés de conduc- cables have high-quality, tinned conductors. For safety rea- teurs étamés de haute qualité. - Page 6 Choix de la configuration de connecteurs en cas Selection of connector configuration when using d’utilisation de câbles certifiés UL cables certified at UL Les câbles raccordés aux connecteurs doivent être adaptés à une Cables connected to the connectors shall be suitable for use in utilisation dans des systèmes photovoltaïques et conformes aux photovoltaic systems and shall comply with the requirements of exigences de ZKLA (PV-Wire) ou TYLZ (USE-2).
-
Page 7: Sertissage
Sertissage Crimping B-Crimp (ill. 11 ) (ill. 11) Pour le sertissage de cosse à fût For crimping open crimp contacts ouvert (B-Crimp) (B-Crimp) PV-KT4/2.5...-UR; PV-KXT4/6...-UR PV-KxT4/2.5...-UR; PV-KxT4/6...-UR ou PV-KXT4/10... or PV-KxT4/10... Ouvrir l‘étrier (K) et le maintenir. Open clamp (K) and hold tight. •... - Page 8 (ill. 13) (ill. 13) B-Crimp Assurez-vous que le contact est entière- Make sure the contact is fully inserted ment introduit dans le positionneur into the locator before crimping. avant le sertissage. O-Crimp (ill. 14) (ill. 14) Serrer légèrement la pince pour que les Press the pliers gently together until languettes de sertissage se trouvent à...
-
Page 9: Test D'assemblage
Contrôle de l‘assemblage Assembly check (ill. 17) (ill. 17) Introduire le contact serti dans la partie Insert the crimped contact into the arrière de l’isolant jusqu’à l’enclenche- insulator of the male or female coupler ment. Vous entendrez un «clic» une fois until engaged. -
Page 10: Embrochage / Débrochage - Sans Clip De Sécurité Pv-Ssh4
Embrochage / Débrochage du connecteur sans clip Mating and disconnecting the cable coupler de sécurité PV-SSH4 without safety lock clip PV-SSH4 Embrochage Mating (ill. 20) (ill. 20) Embrocher le raccord jusqu’à ce qu’un Mate the cable coupler until a „Click“ « clic »... -
Page 11: Remarques Sur L'installation
Remarques sur l’installation Notes on installation Remarque: Note: si le connecteur doit être utilisé dans des applications CC If the connector is to be used in low-voltage DC applications basse tension autres qu’une installation photovoltaïque, veuillez other than those in a photovoltaic array, please consult the infor- consulter les informations fournies dans le Rapport de descrip- mation as provided in the Stäubli Technical Description Report. -
Page 12: Données Techniques
Engineering considerations: Application associated current ratings have to be verified in the products end-use and shall not exceed the maximum operating temperature. Fabricant/Manufacturer: Stäubli Electrical Connectors AG Stockbrunnenrain 8 4123 Allschwil/Switzerland Tel. +41 61 306 55 55 +41 61 306 55 56 mail ec.ch@staubli.com www.staubli.com/electrical 12 / 12...


Need help?
Do you have a question about the PV-KBT4 UR Series and is the answer not in the manual?
Questions and answers