
Related Manuals for SIP 01332


Summary of Contents for SIP 01332
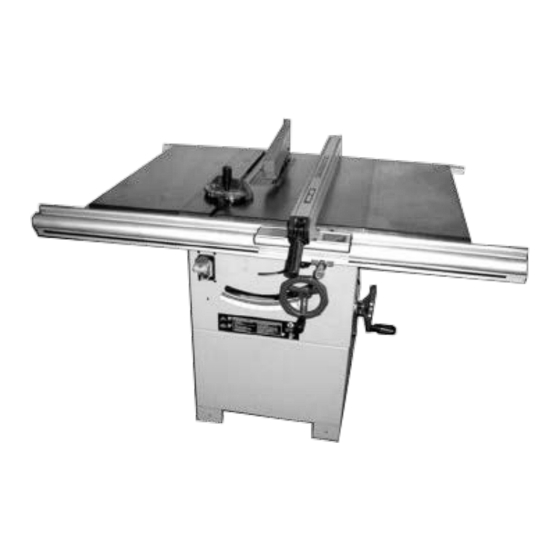
- Page 1 10〞Heavy Duty Table Saw 01332 Please read and fully understand the instructions in this manual before operation. Keep this manual safe for future reference.
-
Page 2: Table Of Contents
2. Please Read First Contents When using electric tools basic safety WARNING! precautions should always be followed to reduce the risk of fire, electric shock and personal injury including the following. Contents Please read first ● Read these instructions before attempting to operate Specification this product and save these Instructions. -
Page 3: Specification P2
3. Specification 3. Guard against electric shock Avoid body contact with earthed or grounded surfaces. (e.g. pipes, radiators, ranges, refrigerators). Rating 230V~50Hz, 2.2KW 4. Keep other persons away, Blade no-load speed 2800 Do not let persons, especially children, not involved in Blade tilt 0°~45°... - Page 4 Have defectives switches replaced by an authorized service center. 14. Maintain tools with care Do not use the tool if the switch does no turn it on and Keep cutting tools sharp and clean for better and off. safer performance. Follow instructions for lubricating and changing accessories.
-
Page 5: Symbols Used Throughout These Instructions P4
22. Have your tool repaired by a qualified person Push stick This electric tool complies with the relevant safety rules. Repairs should only be carried out by qualified persons using original spare parts, otherwise this may result in considerable danger to the user. 4.3 Symbols used throughout these instructions Danger! Indicates risk of personal injury or severe material... -
Page 6: Initial Operation P5
Height hand-wheel for setting the depth of cut If the rod is not square, loosen the knob, adjust the The depth of cut can be adjusted by turning the rod, and tighten the knob. hand-wheel Adjust the 0° stop screw until it rests against the stop pin. -
Page 7: Installing The Extension Table
Warning: Do not lift the saw until without help. The saw blade is too heavy to lift without help, customers should seek assistance from staff to lift this item. 8.2 Installing the extension table Take off the extension table from the major carton, put 8-M8x20 hex head screws with 8mm washer in holes, so the screw heads extend outward 10mm. -
Page 8: Installing The Rear Rail
3. Slide the slot on the front rail over bolts. Adjust Note: each bolt to fit the rail closely to the table. 4. Push the front rail against table and hand tighten Make sure there are no gaps between the rail and each hex nut. -
Page 9: Installing The Blade Guard P8
Adjust the rear and front rails to keep the rip fence Operation without a dust collector is only possible: 1mm above the table. - outdoors; Place the rip fence against the saw blade, check the - for short-term operation; red line of scale mount right lens with the scale “0” on (up to a maximum of 30 minutes) the front rail. -
Page 10: Sawing
Assume proper operating position; 5. Cut work-piece in a single pass. - at the front of the saw; 6. Switch machine off if no further cutting is to be done - in front of the saw; immediately afterwards. - to the left of the line of cut; - if working with two persons the second person 9.2 Mitre cuts should stand at a rear table extension. -
Page 11: Care And Maintenance
10. Care and maintenance Danger! Prior to all servicing: - Switch machine OFF. - Unplug power cable. - Wait until the saw has come to a complete stop. Check that all safety devices are operational against after each service. Replace defective parts, especially of safety devices, only with genuine replacement parts. -
Page 12: Cleaning The Saw
Danger! 10.3 Machine storage - Do not extent the arbor nut wrench. Danger! - Do not tighten arbor nut by tapping on the wrench. Store saw so that - After tightening the arbor nut do not forget remove - it can not be started by unauthorized persons the saw spindle lock bar! - nobody can get hurt. -
Page 13: Tips And Tricks
12. Repairs 11. Tips and Tricks Danger! Before cutting a work-piece to size make trial cuts with Repairs to electric tools must be carried out by pieces of scrap. qualified electricians only! Always place a work-piece on the saw table in such way Electric tools in need of repair can be sent to the service that it can not tilt or rock (e.g. - Page 14 Trouble Shooting Guide Problem Cause Solution Table saw does not start. Motor Cord is not plugged in. Plug in Motor Cord to volt electrical Circuit fuse is blown. outlet. Circuit breaker is tripped. Replace circuit fuse. Motor Cord or Switch is damaged. Reset circuit breaker.
-
Page 15: Transportation
14. Transportation 16. Instruction for thermo cutout in motor If you want to transport this machine to other district, you There is thermo cutout inside the motor, this device must take apart all the part that you have installed. If protect motor from being damaged in high temperature’s possible use original carton for shipping. -
Page 16: Diagrams And Parts Lists
17. Diagrams and parts lists DIAGRAM A... - Page 17 D E S C R I P T I O N Q T Y A-01 Base A-02 Left side panel for base A-03 Right side panel for base A-04 Flat washer 6 A-05 Cross recessed pan head screws M6 X 10 A-06 Graduated plate A-07...
- Page 19 D E S C R I P T I O N Q T Y B-0 1 Rear rail B-0 2 Square head bolt M8 X 25 B-0 3 Cross recessed countersunk head screws M5 X 6 B-0 4 Cover plate B-0 5 Work table B-0 6...
- Page 20 DIAGRAM C...
- Page 21 D E S C R I P T I O N Q T Y C-0 1 Locking handle for graduated disc C-0 2 Flat washer 8 C-0 3 Miter gauge C-0 4 Cross recessed pan head screw M5 X 10 C-0 5 Miter gauge indicator C-0 6...
- Page 23 DESCRIPTION DESCRIPTION D-01 Blade nut M16(left hand) D-39 HANDLE D-02 Outer blade washer D-40 Handle bolt D-03 Blade D-41 Cross recessed head screw M6x16 D-04 A-belt D-05 Pulley D-42 Flat washer 6 D-06 Key A-type D-43 Ball bracket D-07 Arbor shaft D-44 Thread rod ball D-08...
- Page 24 DESCRIPTION DESCRIPTION D-76 Large washer 8 D-85 Dust collecting cover D-77 Flower bolt D-86 Hexagon socket cap head screw M6x18 D-78 Cross recessed pan head screw M5x12 D-79 Point bracket D-87 Neck chain D-80 Point D-88 Hexagon head bolt M6x25 D-81 Flat washer 4 D-89...
- Page 26 D E S C R I P T I O N Q T Y E-01 Round head rivets with small head Φ3 x 7 E-02 Hexagon nut M8 E-03 Flat washer 8 E-04 Round head rivets with small head Φ3 x 13 E-05 Lock plate E-06...
-
Page 27: Feet Assembly For Stand Of 10" Table Saw
18. Feet assembly for stand of 10" table saw For the heavy duty table saw, you can order one set of optional mobile wheel kit to easily move it. In order to easily assembling the optional mobile wheel kit, you can assembly the feet in according to the below instruction drawing for your future convenience.
Need help?
Do you have a question about the 01332 and is the answer not in the manual?
Questions and answers