
Related Manuals for BRAVILOR BONAMAT SPRSO


Summary of Contents for BRAVILOR BONAMAT SPRSO
- Page 1 USER MANUAL Model-no: • SPRSO‑00x Original document by manufacturer version 1.3 | 2023-04-12...
- Page 2 All rights reserved. No part of this document may be copied and/or published by means of printing, photocopying, microfilming or by any other means whatsoever without the prior written consent of the manufacturer. This also applies to the included drawings and/or diagrams. The information in this document is based on data that was available at the time the design, the material characteristics and the operating methods were published, meaning that this document is subject to change.
-
Page 3: Table Of Contents
Table of contents 1. Parts and functions ............Parts . - Page 4 Machine ..............7.3.1 Milk unit .
-
Page 5: Parts And Functions
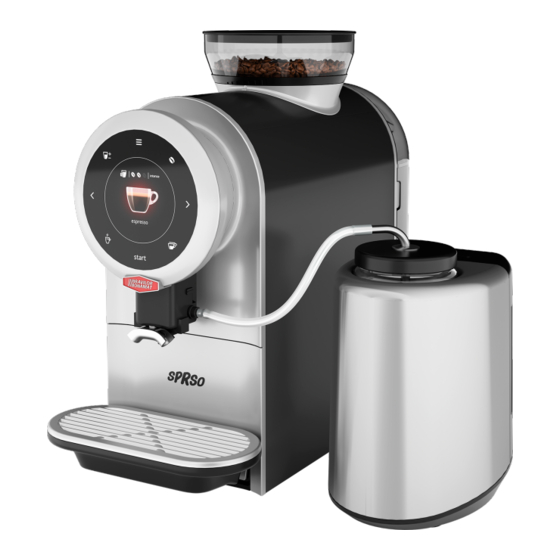
5b. Front plate 5c. Drip tray plate 5d. Drip tray 5e. Overflow drip tray 6. Side/service panel 7. Identification plate 8. CIRCO brewer Optional parts 1.2.1 Milk unit The Sprso is a bean-to-cup espresso machine. As standard the Sprso does not offer milk-based beverages such as cappuccino. However, you can connect a milk unit/cooler to the Sprso. If you connect a milk unit to the Sprso you can offer five additional beverages: caffè latte, espresso macchiato, cappuccino, latte macchiato and hot milk foam. How to install the milk unit to the Sprso is described in section “10.5 Installation a milk unit” on page 88. 1.2.2 Water filter The water tank of the Sprso can be fitted with a water filter. Water filters are purification filter systems that remove minerals which make water hard and cause scale. We recommend customers to use a water filter. A water filter improves the quality of your beverage and decreases lime scale therewith optimizing the performance of the Sprso. How to fit the water filter into the Sprso is described in section “10.3 Installation of a water filter” on page 85. -
Page 6: Controls
Controls There are 4 main buttons for the navigation of the Sprso (see below) and 4 buttons to personalize your beverage (see section “5. Your beverage” on page 10.) Menu button: • to enter the program menu (press and hold) (see section “7. Program menu” on page 19) • to cancel the preparation of a beverage ► The menu button can be used to enter a menu or to ‘go back’ 1.3a Navigation buttons: • to scroll through beverages, menu options, settings or change a value 1.3b ... -
Page 7: First Start
2. First start This document is applicable to the model number(s): • Sprso‑0xx Unpack the Sprso and inspect for damage 1. read the safety booklet 2. remove the foil from the screen 3. fill the water tank (backside) 4. fill the bean canister (on top) 5. insert the plug in the power socket (ensure it is earthed), to switch on the Sprso 6. follow the installation procedure shown on‑screen Accessories in the packaging: • safety booklet • milk connector • quick start guide • milk hose • cleaning tablets (CIRCO brewer) • cleaning tablets (milk connection) •... - Page 8 Start the installation procedure: • after a few seconds the language selection screen will appear 2a Select your language: • press < or > to scroll through the available languages • press start to confirm 2b Read the safety book! • press start to confirm or • press < to go back to change the language 2c ...
- Page 9 • press start to confirm ► It is important to know the correct hardness of the water where the Sprso is used (for setting the descaling signal). If necessary, ask the local water company for the hardness of the water or measure the hardness of the water yourself with the water hardness tester.
- Page 10 2j ► This screen only shows if you confirmed the previous screen with Yes. Fill the milk unit: • press start to confirm 2k The Sprso must be flushed: • put a big mug underneath the outlet or empty the drip tray after the installation procedure • press start to confirm. ► Maximal 250 ml hot water from outlet. 2l ...
- Page 11 2m The first installation procedure has completed. • empty the drip tray if you did not use a big mug to collect the flushing water The Sprso is ready for use. ► Only by selecting “7.3.11 Reset to factory settings” page 67, the first installation procedure can be restarted. 2n ...
-
Page 12: Start-Up
• after a few seconds the Sprso starts to flush ► Hot water (±15 ml) flushes from the outlet into the drip tray. ► The reminder ‘clean milk system daily’ is only visible if a milk unit is connected. 3b The Sprso is ready to use 3c ... -
Page 13: Standby
To activate the machine press the start button. ► See also section 7.3.4 on page 58 to allow the Sprso to automatically enter the standby mode. ► The function ‘flush prior to standby’ (4b) has been removed for: - machines from serial number 020002381679 onwards; - software updates starting from 04-2023. -
Page 14: Your Beverage
5.1 Preparing your beverage Press start and the Sprso prepares immediately the selected beverage. To cancel a selected beverage press ≡ The following indicators may appear on the screen during the brewing process: Indicators Meaning busy preparing your beverage CIRCO brewer still busy, next action is brewing your coffee cancelling your beverage empty waste bin (ME05), see section 9.1 replace water filter (ME09), see section 7.1.6 clean CIRCO brewer (ME08), see section 7.1.3 descale machine (ME11), see section 7.1.5 ► If you want to personalize the beverage select one of the icon buttons as shown in section 5.2. -
Page 15: Personalize Your Beverage
Personalize your beverage ► These settings are used in preparing this one beverage and are not saved. 5.2 Beverage size • press < or > to adjust the volume ► See section 10.2 on page 84 for the default volume settings S, M and L per beverage 5.2a ... -
Page 16: Adjusting The Tap Height
Single / double cup ► Two cups can only be selected for: - espresso - ristretto - crema coffee • press if you want 2 cups to be prepared simultaneously 5.2c Hot water (free flow function) • press and hold for your hot water 5.2d ... -
Page 17: Cleaning
CIRCO brewer the outside ► Never put parts of the Sprso in the dishwasher. ► Do not use any aggressive cleaning agents. ► Clean the milk unit according to the instruction supplied with the milk unit itself. 6.1.1 ... -
Page 18: Weekly Cleaning
6.2.1 6.2 Weekly cleaning Weekly clean the following parts manually: • beverage outlet • water tank • CIRCO brewer • the outside 6.2.1 Beverage outlet 1. remove the plug, by pulling it to the right ► If milk unit is present, remove the milk hose including the connector. 6.2.1a 2. press the ‘buttons’ on both sides 3. remove the outlet by pulling it downwards 6.2.1b 4. -
Page 19: Water Tank
6. return everything to its original position 6.2.1d 6.2.2 6.2.2 Water tank 1. empty the water tank 2. remove the water filter (if present) 3. clean the water tank with hot water and a non‑ abrasive brush 4. dry the outside of the water tank with a soft cloth 5. -
Page 20: Circo Brewer
6.2.3 6.2.3 CIRCO brewer In addition to the fixed cleaning program (see section 7.1.3 on page 25), you can also manually clean the CIRCO brewer as shown below. 1. open the service panel 6.2.3a 2. turn the lock counter clockwise 3. remove the CIRCO brewer 6.2.3b 4. clean the inside of the service compartment with a damp cloth 6.2.3c... - Page 21 ► It is not necessary to disassemble all the parts 5. clean the two CIRCO brewer halves, housing (nr.1) and head (nr.2), with warm water (± 60 °C) and a non - abrasive brush ► Not dishwasher proof 6.2.3d ► Check the attachment of the bracket. 6.2.3e 6. slide the housing over the shaft 6.2.3f 7.
-
Page 22: The Housing
8. push the head further over the shaft until it clicks into place 6.2.3h 9. close the service panel start flushing the machine, see 7.1.1 on page 21 6.2.3i 6.2.4 The housing 6.2.4 1. clean the outside of the Sprso with a damp cloth 2. dry everything with a soft cloth 6.2.4a... -
Page 23: Program Menu
7. Program menu Press and hold the menu button ≡ to open a program menu. • press < or > to scroll through the ‘program menus’ or • press start to confirm or • press ≡ to cancel ► When the program menu is selected but no button is pressed within 30 seconds, the Sprso returns to the ‘beverage selection screen’. -
Page 24: Maintenance
Maintenance The cleaning procedures and the descaling program can be started in the maintenance menu. If a water filter is installed, replaced or removed, it must be specified in the machine software, see section “7.1.6 Water filter” on page 35. The beverage counters and the error history can be read in this menu. 7.1.1 7.1.9 7.1.2 7.1.8 7.1.3 7.1.7 7.1.4 7.1.6 7.1.5... -
Page 25: Flush Coffee System
► Hot water (±15 ml) flushes from the outlet into the drip tray. ► The reminder ‘clean milk system daily’ is only visible if a milk unit is connected. ► The Sprso automatically returns to the ‘beverage selection screen’. 7.1.1b ... -
Page 26: Clean Milk System
7.1.2 Clean milk system This section is only visible when the milk unit is activated. ► The milk unit is not automatically detected it must be selected in the software, 7.3.1 on page 55. ► When this procedure is to be carried out depends on the number of milk-based beverages, but must be conducted at least once a day. - Page 27 Step 3 preparation cleaning solution: • dissolve one tablet completely in 250 ml lukewarm water (max. 35 °C). ► If the solution is too hot, steam will be generated during cleaning, making cleaning ineffective. • press > to go to the next screen 7.1.2c Step 4 information screen: • follow the instructions on the screen ► It is also advisable to clean the beverage outlet manually on a weekly basis, see section 6.2.1 on page 14.
- Page 28 Step 7 preparation rinsing: • empty the big mug • follow the instructions on the screen ► Use cold water, hot water produces too much steam which does not help rinsing. • press > to go to the next screen 7.1.2g Step 8 preparation rinsing: • follow the instructions on the screen •...
-
Page 29: Clean Coffee System
7.1.3 Clean coffee system This procedure cleans the CIRCO brewing unit and the coffee spout (incl. hoses). ► When this procedure is to be carried out depends on the number of coffee-based beverages. Necessities: • CIRCO brewer cleaner • full water tank (recommended: Cafiza E16 tablets) ® • measuring jug (500 ml) • time: ± 15 minutes The CIRCO brewer must be cleaned periodically: • press start to confirm or •... - Page 30 Step 3 preparation rinsing: • follow the instructions on the screen • press start to begin the cleaning process 7.1.3c Step 4 pre-rinse of the CIRCO brewer: • the screen blinks orange and black for a few seconds before the rinsing cycle begins • wait for the next screen ►...
- Page 31 Step 7 information screen: • follow the instructions on the screen ► It is also advisable to clean the CIRCO brewer manually on a weekly basis, see section 6.2.3 on page 16. 7.1.3g Step 8 preparation cleaning: • put the cleaning tablet in the CIRCO brewer • press > to go to the next screen 7.1.3h ...
- Page 32 Step 11 cleaning the CIRCO brewer in progress: • the screen blinks orange and black for a few seconds before the cleaning cycles begins • wait for the next screen, this may take about 10 minutes ► Hot water and steam (±250 ml) will come from the outlet! 7.1.3k Step 12 cleaning the CIRCO brewer: • follow the instructions on the screen ►...
-
Page 33: Flush Milk System
The screen blinks orange and black. • wait for the next screen 7.1.4a Flushing: • wait until the process is finished ► Hot water (30 ml) flushes from the outlet into the drip tray. ► The Sprso automatically returns to the ‘beverage selection screen’. 7.1.4b ... -
Page 34: Descale
• total time: ± 20 minutes descaling agent) ► The descaling process cannot be interrupted after the descaling agent is in the Sprso! ► Remove the water filter (if applicable) to ensure it won’t be damaged by the descaling agent. ► Disconnect the milk unit (if connected) to prevent taste transfer. - Page 35 Step 3 preparation: • make sure that all necessities are present • press > to go to the next screen 7.1.5c Step 4 preparation: • follow the instructions on the screen • press > to go to the next screen ► Recommended: 50 gr Renegite / 500 ml water ► If the volume is higher than the recommended (minimum) amount, more descaling solution will come out of the machine.
- Page 36 • follow the instructions on the screen • press start to begin the actual descale process 7.1.5h Step 9 descaling process: • wait for the next screen (± 11 minutes) ► Do not leave the Sprso unattended. ► Hot water with descaling solution comes from the outlet. 7.1.5i Step 10 descaling process: • follow the instructions on the screen •...
- Page 37 Step 11 refill water tank: • follow the instructions on the screen ► Use cold water. ► If the volume is higher than the recommended (minimum) amount, more rinse water will come out of the machine and rinsing will take longer. • press > to go to the next screen 7.1.5k ...
- Page 38 The descaling procedure is finished and the descaling counter is reset. • press start to confirm ► Reconnect the water filter when it was removed in “7.1.5f” and fill the water tank. ► Reconnect the fixed water connection if used and open the tap. 7.1.5o ...
-
Page 39: Water Filter
7.1.6 Water filter How to install a water filter is described in section “10.3 Installation of a water filter” on page 85. If a water filter is installed, replaced or removed this must be confirmed in the software so that the counter is updated. The Sprso can now indicate when it needs to be replaced. A water filter reduces limescale and impurities in the water, making descaling less frequent (see section “10.1 Water hardness and filter information” on page 84). Additionally, it ensures a consistent quality of the hot beverage in both taste and aroma. ► When replacing an internal water filter with an external filter, or vice versa, the first filter must first be uninstalled from the software (screen “7.1.6g”... - Page 40 7.1.6d Information screen: ► When installing an external water filter, the descaling indicator is automatically deactivated, therefore it is recommended to descale Sprso immediately after replacing the external filter. • after a few seconds the next screen will appear 7.1.6e The water filter is replaced, the procedure is finished and the counter is set to zero.
- Page 41 Remove the water filter: • press < or > to choose no/yes • press start to confirm ► selected YES: next screen is 7.1.6g ► selected NO: next screen is 7.1.6j 7.1.6g Remove the water filter: • press start to confirm 7.1.6h The water filter is removed, the procedure is finished and the counter is deactivated. 7.1.6i No changes were made, the procedure is finished. 7.1.6j ...
- Page 42 Install the water filter: • press < or > to choose no/yes • press start to confirm ► selected YES: next screen is 7.1.6l ► selected NO: next screen is 7.1.6j 7.1.6k Choose the type of filter: • press < or > to choose an intern or external water filter • press start to confirm 7.1.6l Install a water filter, see section “10.3 Installation of a water filter” on page 85: • press start to confirm ►...
- Page 43 The water filter is installed, the procedure is finished and the counter is activated. 7.1.6o ...
-
Page 44: Reposition Circo Brewer Axis
7.1.7 Reposition CIRCO brewer axis It is possible that the CIRCO brewer housing cannot be brought into the correct position because the CIRCO brewer axis has rotated. ► The CIRCO brewer axis shaft can be turned manually and must not be turned with tools. You can reposition the CIRCO brewer axis: • press start to confirm or • press < or > to scroll through the maintenance menu 7.1.7 • open the side panel as shown on the screen ►... - Page 45 ► The side panel must be closed, otherwise there is a risk of injury from rotating parts. • close the side panel as shown on the screen ► When the side panel is back in place, the next screen will appear.
- Page 46 • close the side panel as shown on the screen ► When the side panel is removed, the procedure is finished and screen 7.1.7 shown. 7.1.7g ...
-
Page 47: Counters
The Counters tell you how many beverages have been prepared. Self-created beverages (see section 7.2.1 on page 47) are also counted and added to the total machine counter, even when they are deleted. ► The total machine counter will count every beverage dosed by the Sprso. It will not be possible to see the history of these beverages. ► Hot water dosages are counted when the amount exceeds 20 ml. - Page 48 Total machine counter: • press < or > to scroll through the counters menu ► total machine counter = total of all beverages ever made (deleted customized beverages as in “7.2.1 Create your own favourite coffee” on page 47 are included) 7.1.8c Delete all day counters: • press start to confirm or • press < or > to scroll through the counters menu ►...
-
Page 49: Error History
7.1.9 Error history A total of 12 errors can be logged for technical support. When the log is full the first error will be overwritten. More information can be found in section “9. Warning and errors messages” on page 78. Error history: • press start to confirm or • press < or > to scroll through the maintenance menu 7.1.9 Error history list: • press < or > to scroll through the error history ► A total of 12 errors can be logged. When the log is full the first error will be overwritten. 7.1.9a ... -
Page 50: Beverages
Beverages Press the start button in the program menu to open the beverage menu. In the “Beverage menu” select one of the available options: • default beverages - adjust strength, intensity and volume • customized beverages - three beverages can be added based on the default beverages • beverage profiles - three complete set of standard beverages 7.2 7.2.1 7.2.3 7.2.2... -
Page 51: Create Your Own Favourite Coffee
7.2.1 Create your own favourite coffee You can add up to three beverages based on the default beverages. When a self-made beverage is created this will be saved with an identification (‘beverage name’ | 1, ‘beverage name’ | 2 and ‘beverage name’ | 3) and will be automatically added to the ‘beverage selection screen’. Create a self-made beverage: • press start to confirm or • press < or > to scroll through the beverage menu ► maximum custom beverages not reached: next screen is 7.2.1c 7.2.1 ... - Page 52 ► The intensive function will extend the brew time by 10%. 7.2.1d Set the volume: • press < or > to choose the volume • press start to confirm ► See section 10.2 on page 84 for the default volume settings S, M and L per beverage. 7.2.1e Save your self-made beverage. ► The Sprso automatically returns to screen 7.2.1. 7.2.1f ...
- Page 53 No changes were made, the procedure is finished. ► The Sprso automatically returns to screen 7.2.1. 7.2.1g ► To delete a self-made beverage see “7.2.2g” on page 52.
-
Page 54: Edit Default Beverage
7.2.2 Edit default beverage You can change the settings of the default beverages. The milk based beverages are always visible in this menu but cannot be edited, unless the milk unit is activated in “7.3.1 Milk unit” on page 55. Once a self-made beverage is created it appears here too (see 7.2.2f). The only difference with a default beverage is that a self-made beverage cannot be switched off (disabled), it must be deleted. Edit a default beverage: • press < or > to scroll through the beverage menu • choose a beverage to adjust •... - Page 55 7.2.2c Save your adjustments. ► The Sprso automatically returns to screen 7.2.2 7.2.2d No changes were made, the procedure is finished. ► The Sprso automatically returns to screen 7.2.2. 7.2.2e Once a self-made beverage is created it appears here too. It has the same status as the default beverages (the only difference is that a custom beverage must be deleted and cannot be disabled): • press < or > to choose a beverage •...
- Page 56 Delete a self-made beverage: • press < or > to choose no/yes • press start to confirm ► selected YES: next screen is 7.2.1 ► selected NO: next screen is 7.2.2b 7.2.2g ...
-
Page 57: Beverage Profiles
7.2.3 Beverage profiles The Sprso has 3 beverage profiles to choose from during installation. These profile offer the same beverages, though each profile has an unique combination of volume and strength of the beverages. The available beverage profiles are: Beverage profile Characteristics profile #1 small volumes / strong coffee profile #2 medium volumes / regular strengths profile #3 large volumes / regular strengths ► See also section “10.2 Volume per beverage (S / M / L)” on page 84 Select a profile for your beverages: • press start to confirm or • press < or > to scroll through the beverage menu 7.2.3 ... -
Page 58: Machine
Machine You can programme the following in the machine menu. 7.3.1 7.3.12 7.3.2 7.3.3 7.3.11 7.3.10 7.3.4 7.3.9 7.3.5 7.3.6 7.3.8 7.3.7... -
Page 59: Milk Unit
7.3.1 Milk unit A milk unit/cooler can be added to the Sprso. By activating the milk unit, the beverages with milk will be available and all related menus will become accessible. Messages concerning the cleaning and flushing become active. Milk unit: • press start to confirm or • press < or > to scroll through the machine menu 7.3.1 Did you connect a milk unit: • press < or > to choose no/yes • press start to confirm 7.3.1a Information screen: ► Only visible if a milk unit is activated in the software. • press > to go to the machine menu... -
Page 60: Brew Temperature
7.3.2 Brew temperature It is possible to adjust the default brew temperature. The temperature of all the beverages will be effected by this option. When a different altitude is selected (see section “7.3.3 Altitude” on page 57) the default brew temperature is automatically changed. Temperature setting Temperature -4°C (-7.2°F) relative to the default brew temperature medium default brew temperature high +2°C (+3.6°F) relative to the default brew temperature Brew temperature: • press start to confirm or • press < or > to scroll through the machine menu 7.3.2 Adjust the brew temperature: • press < or > to choose a setting and • press start to confirm 7.3.2a ... -
Page 61: Altitude
7.3.3 Altitude The setting of altitude where the Sprso is used (default: sea level) is necessary to determine the boiling point that depends on the local atmospheric pressure. The boiling point at sea level is around 100°C (212°F), while the boiling point at 2000 meter is slightly lower at 97°C (206.6°F). Altitude Temperature compensation 0 ‑ 1000 0 °C (32.0 °F) 1000 ‑ 2000 -3 °C (-5.4 °F) 2000 ‑ 3000 -6 °C (-10.8 °F) Altitude: • press start to confirm or • press < or > to scroll through the machine menu 7.3.3 Adjust the altitude setting: • press < or > to choose a setting and •... -
Page 62: Automatic Switch Off
7.3.4 Automatic switch off After a certain amount of time, the Sprso will automatically go into an energy-saving mode for lower power consumption, see also section “4. Standby” on page 9. Automatic switch off: disabled after 30 minutes after 1 hour after 2 hour after 4 hours Automatic switch off: • press start to confirm or • press < or > to scroll through the machine menu 7.3.4 Adjust the automatic switch off function: • press < or > to choose a setting and •... -
Page 63: Child Lock
7.3.5 Child lock Select this option to prevent dangerous situations due to unintended actions, e.g. unattended children pressing controls. By pressing both navigation buttons (< >) simultaneously for 5 seconds, the child lock is activated and the controls are automatically switched off. If a button is pressed while the child lock is activated, the screen turns on and a message appears, see 7.3.5b. To deactivate the child lock, press both navigation buttons (< >) simultaneously again for 5 seconds. Child lock: • press start to confirm or • press < or > scroll through the machine menu 7.3.5 Do you want to use the child lock: •... -
Page 64: Brightness Screen
7.3.6 Brightness screen The brightness of the screen can be adjusted in 5 steps and is immediately visible. Brightness screen: • press start to confirm or • press < or > to scroll through the machine menu 7.3.6 Adjust the brightness of the screen: • press < or > to choose a setting and • press start to confirm 7.3.6a ... -
Page 65: Sounds
7.3.7 Sounds Audio signals are used to give feedback. There are 3 different tones. The tone and volume of the sound cannot be adjusted. Tone When Kind of adjustment Start up, warning before flush, end of process or not adjustable when a next action is required Sound of messages on/off Sound of buttons on/off Sounds: • press start to confirm or • press < or > to scroll through the machine menu 7.3.7 Sounds of messages: • press < or > to choose sounds of messages or sounds of buttons •... - Page 66 Sound while pressing a button: • press < or > to choose sounds of buttons or sounds of messages • press start to confirm sounds of buttons 7.3.7c Set sound feedback from buttons on/off: • press < or > to choose no/yes • press start to confirm 7.3.7d ...
-
Page 67: Languages
7.3.8 Languages English is the default language. The available languages are: • English • Français • Ελληνικά • Español (US) • Norsk • Italiano • Magyar • Français (CA) • Polski • Español • Română • Português (BR) • Nederlands • Português • Čeština • Türkçe •... -
Page 68: Units
7.3.9 Units The units for volume and height can be changed. All variables of the Sprso are based on the International System of Units (SI), all others are calculated based on this. Units: • press start to confirm or • press < or > to scroll through the machine menu 7.3.9 Volume units: • press < or > to choose volume or height units • select volume units • press start to confirm 7.3.9a Change volume units: • press < or > to choose ml/l or fl.oz/gal • press start to confirm 7.3.9b ... - Page 69 Height units: • press < or > to choose height or volume units • select height units • press start to confirm 7.3.9c Change height units: • press < or > to choose metre or feet • press start to confirm 7.3.9d ...
-
Page 70: Water Hardness
7.3.10 Water hardness It is important to know the correct hardness of the water at the location where the Sprso is used for setting the descaling signal. Ask the local water company for the hardness of the water or measure the hardness of the water yourself with the water hardness tester (according to the corresponding instructions). Water hardness: • press start to confirm or • press < or > to scroll through the machine menu 7.3.10 Adjust the water hardness setting: • press < or > to choose a setting and • press start to confirm ► The water hardness is set to “average” (7-14 °dH) as standard, see section”10.1 Water hardness and filter... -
Page 71: Reset To Factory Settings
7.3.11 Reset to factory settings The adjusted settings can be reset to the default settings in 3 ways. Selected option Result Reset the All beverages will return to default except the beverages you created beverage settings in section 7.2.1 on page 47. Reset the Any settings you have changed in section are restored to the machine settings... - Page 72 • press < or > to scroll through the reset to factory settings menu or • press start to reset the machine settings 7.3.11b Reset to factory default: • press < or > to scroll through the reset to factory settings menu or • press start to reset all settings ► The Sprso starts with screen 2a on page 4 7.3.11c ...
-
Page 73: Machine And Software Information
7.3.12 Machine and software information The serial number and software versions can be checked, this is essential information for a service request. Serial numbers: • press start to confirm or • press < or > to scroll through the machine menu 7.3.12 Serial number machine: • press < or > to show the version numbers of the software ► The unique serial number of the machine is displayed here. 7.3.12a Software version number: • press < or > to show the serial number of the machine ►... -
Page 74: Online Help
Online help Online information can be approached via the QR code shown on the screen. Online information: • press start to confirm or • press < or > to scroll through the machine menu 7.4.1 Online manuals: • press < or > to scroll through the available QR codes • scan the QR code to download the latest online manual(s) from the web 7.4.1a Online animations: • press < or > to scroll through the available QR codes • scan the QR code to download the latest online animation(s) from the web 7.4.1b ... -
Page 75: Special Circumstances
8. Special circumstances CIRCO brewer partially mounted (Error 10015) After maintenance of the CIRCO brewer, it is possible that the CIRCO brewer housing cannot be brought into the correct position because the CIRCO brewer axis has rotated. Close the side/service panel, this activates the message (8.1a), then follow the on screen instructions to solve the problem. ► The CIRCO brewer axis cannot be turned manually nor with tools. Information screen: • press > to begin the reset 8.1a • open the side panel as shown on the screen ►... - Page 76 The CIRCO brewer axis needs to be repositioned: • press > to go to the next screen 8.1d • press < or > to choose the direction of rotation • press start to confirm 8.1e ► The side panel must be closed, otherwise there is a risk of injury from rotating parts.
- Page 77 • open the side panel as shown on the screen ► When the side panel is removed, the next screen will appear. 8.1h Can the CIRCO brewer be placed: • press < or > to choose no/yes • press start to confirm ► selected NO: next screen is 8.1e ► selected YES: go to the next screen 8.1i ...
-
Page 78: Circo Brewer Malfunction (Error 04104)
CIRCO brewer malfunction (Error 04104) CIRCO brewer is blocked or defect. When no movement is detected the error message is displayed, see 8.2a. ► The CIRCO brewer axis cannot be turned manually nor with tools. Information screen: • press > to begin the reset 8.2a • open the side panel as shown on the screen ► When the side panel is removed, the next screen will appear. - Page 79 Check if the complete CIRCO brewer can be placed: • press < or > to choose no/yes • press start to confirm ► selected YES: next screen is 8.2m ► selected NO: go to the next screen 8.2d • press < or > to choose the direction of rotation • press start to confirm 8.2e ►...
- Page 80 • open the side panel as shown on the screen ► When the side panel is removed, the next screen will appear. 8.2h Can the CIRCO brewer be placed: • press < or > to choose no/yes • press start to confirm ► selected NO: next screen is 8.2i ► selected YES: next screen is 8.2m 8.2i ...
- Page 81 Information screen: • press > to go to screen 8.2e 8.2l • close the side panel as shown on the screen ► When the side panel is back in place, the ‘beverage selection screen’ will appear. 8.2m CIRCO brewer reset has finished 8.2n ...
-
Page 82: Warning And Errors Messages
9.1 9. Warning and errors messages Warning messages Warning messages are used to inform the operator of a state which can prevent the Sprso from working correctly. In general warning messages are displayed after a beverage. ► The warning messages are displayed for 30 seconds. A message can be displayed again when any button (except menu button) is used. The menu will remain available. Example screen for warning messages 9.1a ... - Page 83 “XX” litres have passed ‘beverage selection through the water counter screen’. and is repeated after every 11 beverages) ME10 descale machine the counter for the • descale the Sprso as descaling is reached described in section “7.1.5 (the message is repeated Descale” on page 30) after every 9 beverages) ME11 not applicable ME12 CIRCO brewer...
-
Page 84: Error Messages
Depending on the error, it remains active or can be solved by itself and the error message disappears by itself. The error message is stored to the Error Log (see section “7.1.9 Error history” on page 45). A total of 12 errors can be logged by the Sprso for technical support. When the log is full the first error will be overwritten. ► The start button can be pressed to restart the Sprso. If the error messages returns after the appropriate action, please contact your dealer. - Page 85 Error Description Reset condition 02101 temperature sensor temperature sensor is • press start button, machine not connected not connected or reading will be restarted invalid » if the error persists, contact your dealer 02102 temperature sensor temperature sensor • press start button, machine reading reading invalid will be restarted » if the error persists, contact your dealer 02203 heating element...
-
Page 86: Other Problems
• pull the plug out of the socket, clean the the screen don’t work cleaned screen of the Sprso with a damp cloth and dry with a soft cloth internal malfunction • pull the plug out of the socket, wait at least 10 seconds, plug the plug back in »... - Page 87 Problem description Possible cause Check the following bad milk foam outlet not properly in • place the outlet in correct position, place see section 6.2.1 on page 14 outlet not cleaned • perform milk cleaning procedure, see section 7.1.2 on page 22 milk connector not • place the milk connector in correct properly in place position, see section 10.5 on page 88 internal malfunction •...
-
Page 88: Appendix
10.1 10. Appendix 10.1 Water hardness and filter information very soft average moderate hard soft °dH < 03 ‑ ‑ ‑ > 21 °fH < 05 ‑ ‑ ‑ > 38 °e / Clark < 04 ‑ ‑ ‑ > 26 ppm (mg/l) parts per <... -
Page 89: Installation Of A Water Filter
Please note ► If you use the Sprso normally the water filter lasts for a certain amount of time. This amount of time is mentioned in the manual of the water filter. If you do not use the Sprso whilst the water filter is installed this will decrease the lifespan of the water filter. -
Page 90: External Water Filter
“7.1.6 Water filter” on page 35. 10.3.1c 10.3.2 External water filter If an external water filter is chosen, it is recommended that this is installed/replaced by an installer. The corresponding documentation of the external water filter is leading. ► When installing an external water filter, the descaling indicator is automatically deactivated, therefore it is recommended to descale Sprso immediately after replacing the external filter. -
Page 91: Adjusting The Coffee Grinder
► Turn the upper part of the bean canister to adjust the grinding degree, just one click at a time and only if the grinder is grinding. If the coffee beverage flows too slowly or not at all, turn 560µ 330µ one click clockwise (coarser grind). For creamier coffee (finer grind), turn one click anticlockwise ► The Sprso needs to prepare a few cups of coffee before you notice the difference. 10.4b ... -
Page 92: Installation A Milk Unit
• latte macchiato • cappuccino • white coffee • espresso macchiato • hot milk foam ► Bravilor Bonamat recommends a milk cooler over a non-cooled milk carton. Cold milk (5°C) improves the taste of the milk-based beverages. • pull down the outlet 10.5a • remove the plug 10.5b ... - Page 93 Milk level 10.5e • go to “7.3.1 Milk unit” on page 55, to indicate that a milk unit is connected to the Sprso ► Do not leave the milk carton / cooler out of the refrigerator for a long period of time. The warmer the milk (5°C is perfect), the poorer the quality of foam produced.
-
Page 94: Installation A Fixed Water Connection
The Sprso is not equipped with a fixed water connection as standard. If a fixed water connection is connected, there are two things to bear in mind: Descaling procedure • additional steps added, see sticker on fixed water connection (water tank) Water filter • install an external water filter between the tap and the Sprso, a filter can no longer be placed inside the water tank • replace the water tank • attach the water connection hose to the water tank ► Always use the new food approved hose set that is supplied with the water tank. -
Page 95: Bin Full Message
10.7 Bin full message When the waste bin counter has reached its limit, the Sprso generates a message to empty it. When replacing the drip tray (with waste tray), screen 10.6b must be answered to update the counter. ► The message bin full comes standard after 20 doses, but for a quantity of more than 10gr it is after 10 times. ► If the counter is reset while the waste bin is not emptied, the waste bin will overflow with all its consequences. -
Page 96: Special Functions
10.8 10.8 Special functions By using a ‘secret key combination’ special features can be activated. Standby mode: • hold the ‘Start button’ for 5 seconds • necessary flushes will be done • the “goodbye” screen is turned off and only the start button is flashing slowly ► The standby mode is a function which can be enabled for energy saving. ► Press the start button to end the standby mode 10.8a Child lock on/off: • hold both ‘Navigation buttons’ for 5 seconds ►... - Page 98 © 2023-04-12 VHH...
Need help?
Do you have a question about the SPRSO and is the answer not in the manual?
Questions and answers