
Subscribe to Our Youtube Channel
Related Manuals for Thermo Scientific 2862


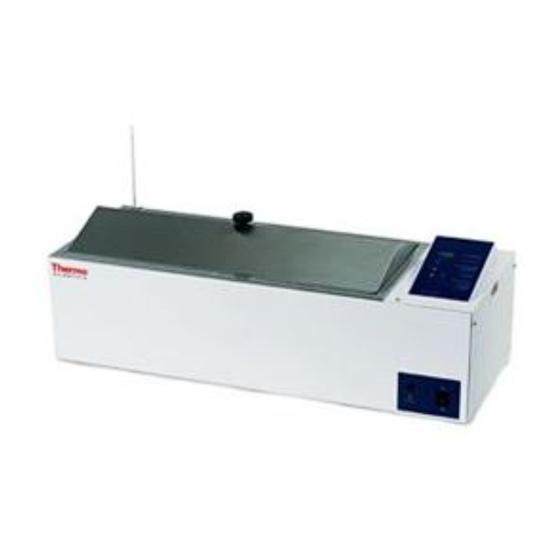
Summary of Contents for Thermo Scientific 2862
- Page 1 Model 2862/2863 (253) Coliform Incubator Bath Operating and Maintenance Manual 3177876 Rev. M Visit us online to register your warranty www.thermoscientific.com/warranty...
- Page 2 Modified drain assembly (connection to H2O regulator 4/05 New manual #, manufacture location (was 31600111) 3/03 Update performance specs, add chamber dimensions - pg 2 4/02 Add inlet screen info, correct wire color - pgs 5, 8, 27 Thermo Scientific Coliform Incubator Bath...
- Page 3 Thermo Fisher Scientific makes no representations or warranties with respect to this manual. In no event shall Thermo be held liable for any damages, direct or incidental, arising out of or related to the use of this manual. ©1999 Thermo Fisher Scientific. All rights reserved. Coliform Incubator Bath Thermo Scientific...
- Page 4 Always use the proper protective equipment (clothing, gloves, goggles, etc.) 4 Always dissipate extreme cold or heat and wear protective clothing. 4 Always follow good hygiene practices. 4 Each individual is responsible for his or her own safety. Thermo Scientific Coliform Incubator Bath...
- Page 5 We can also provide you with a quotation on our Extended Warranty for your Thermo Scientific products. Whatever Thermo Scientific products you need or use, we will be happy to discuss your applications. If you are experiencing technical problems, working together, we will help you locate the problem and, chances are, correct it yourself...over the telephone without a service...
-
Page 6: Table Of Contents
Warranty Information ........10-1 Thermo Scientific... -
Page 8: Introduction And Unpacking
The proportional integral temperature control coupled with agitation supplied by a centrifugal pump located in the control housing allows precise temperature control. Use of the gable cover provided is required to maintain optimal temperature sensitivity. Thermo Scientific Coliform Incubator Bath... -
Page 9: Performance Data
Height ....7.5 inches (19 cm.) Capacity (1.5" from top) ..9.1 gallons (34.5L.) Coliform Incubator Bath Thermo Scientific... -
Page 10: Unpacking And Damage
DO NOT — FOR ANY REASON — RETURN THIS UNIT WITHOUT FIRST OBTAINING AUTHORIZATION. In any correspondence to Thermo, supply the nameplate data, including catalog number and serial number. Thermo Scientific Coliform Incubator Bath... -
Page 12: Installation
2 Pollution Degree describes the amount of conductive pollution present in the operating environment. Pollution Degree 2 assumes that normally only non-conductive pollution such as dust occurs with the exception of occasional conductivity caused by condensation. Thermo Scientific Coliform Incubator Bath... - Page 13 Electrolysis can damage stainless steel if an object is allowed to rest directly on the surface, trapping moisture that becomes oxygen starved but is surrounded by water containing oxygen. The resulting electrolytic action will pit or erode the stainless steel. Coliform Incubator Bath Thermo Scientific...
-
Page 14: Water Level Regulator (Optional)
(coincide with water line mark) and tighten thumbscrew to hold water level regulator in place. Note Do not overtighten the thumbscrew. Thermo Scientific Coliform Incubator Bath... - Page 15 To Water Supply Water Level Regulator Vent Tube Bracket Reducing Bushing Bath Drain Elbow Connector Plastic Tubing Figure 2-1. Side View To Water Supply Gasket Thumbscrew Fitting Bath Pan Bath Body Figure 2-2. Cutaway Front View Coliform Incubator Bath Thermo Scientific...
-
Page 16: Inlet Screen Assembly (Optional)
SILICON HOSE WATERBATH PAN INLET NUT TUBE ADAPTER SCREEN ASSEMBLY (FINGER TIGHTEN ONLY) NOTE: INLET IS THE LOWER OF THE TWO PORTS DIRECTION OF WATER FLOW Figure 2-3. Inlet Screen Assembly Thermo Scientific Coliform Incubator Bath... -
Page 18: Explanation Of Controls
Hi-Limit protection will be acti- vated. Control Panel - The control panel is located on top of the bath and pro- vides primary temperature control. The control panel contains the fol- lowing features (See Figure 3-1). Thermo Scientific Coliform Incubator Bath... - Page 19 Keys ENTER Should Calibration Be Required: Place certified / traceable thermometer into holder. Enter Key Allow to stabilize. Press Calibrate button. Press to match readout to thermometer. Press ENTER calibration is complete. Figure 3-1. Controls Coliform Incubator Bath Thermo Scientific...
-
Page 20: Operation
To conserve energy, reduce evaporation, and increase temperature control accuracy, use the gable cover provided. Do not use aluminum foil as a cover, as it may cause corrosion due to an electrochemical reaction. Thermo Scientific Coliform Incubator Bath... -
Page 21: Start-Up
Lift gable cover by the knob only. Warning Explosion, implosion or the release of toxic or flammable gases rising from the material being heated is the sole responsibility of user. Coliform Incubator Bath Thermo Scientific... -
Page 22: Maintenance
- Lysol Mercuric Chloride -Phenol - Potassium Permanganate -Stannous Chloride - Potassium Thiocyanate -Tartaric Acid - Sodium Hypochlorite Caution Never use the following chemicals. -Aqua Regia - Ferric Chloride -Iodine - Sodium Azide - Sulfuric Acid Thermo Scientific Coliform Incubator Bath... - Page 23 Screen assembly option: If this option is installed, inspect daily and remove any debris from the screen. Periodic Safety Check: Test the operation of the Hi-Limit thermostat, as described in Section 2, every three months. Coliform Incubator Bath Thermo Scientific...
-
Page 24: Troubleshooting
Make sure the pins are NOT bent or broken. Boards that are fine otherwise, will not operate correctly if these pins have been abused, because they will not receive the necessary signals from other boards. Thermo Scientific Coliform Incubator Bath... - Page 25 9. Connect the display board ribbon connector to the CPU board J310 and repeat Steps 3 through 6. If the above voltages are not measured again, the CPU board has a bad component which is loading down the voltages. This board will have to be replaced. Coliform Incubator Bath Thermo Scientific...
-
Page 26: General Information
SUPPLY assembly #3176677. Locate the triac (Q2), the opto-isolater (U1), resistor (R4), test point #2 (TP2-COM). The first measurements will be DC voltage measurements, a DC scale of at least 10 volts should be selected. Thermo Scientific Coliform Incubator Bath... -
Page 27: Problems And Solutions
°C is listed in the table below. Compare the measured voltage to the temperatures listed to determine if the probe is working. Temp °C Volt Temp °C Volt 0.500V 1.400V 0.680V 1.580V 0.860V 1.760V 1.040V 1.940V 1.220V 2.218V Coliform Incubator Bath Thermo Scientific... - Page 28 Isolate the heater from any circuitry by disconnecting one of the heater leads. c. Using an ohmmeter, check the heater resistance. Appropriate heater resistance values are listed below: Model 2862 120V 10 ohms Model 2863 230V 40 ohms If the resistance reads 0 or infinity, then replace the heater.
- Page 29 Problem C: Unstable Temperature Control or Display 1. Use gable cover provided to improve temperature control. 2. If control is stable but not at desired temperature, then check temperature calibration. Re-adjust if necessary. 3. Check Temperature Probe, Problem A, Step 4. Coliform Incubator Bath Thermo Scientific...
- Page 30 4. If water is still not circulating, check for foreign matter in the pump inlet fitting. Thermo Scientific Coliform Incubator Bath...
-
Page 32: Parts Replacement Procedures
5. Remove rubber grommet from temperature sensor. 6. Carefully slide sensor through the control housing and remove. 7. Reverse above procedure to install new temperature sensor. 8. Recalibrate new temperature sensor. See Temperature Calibration in Section 8. Thermo Scientific Coliform Incubator Bath... - Page 33 4. Remove J201 from CPU board. Use extreme care when removing J301 so as not to bend connector pins. Remove board. 5. Reverse above procedure to install new board. When replacing CPU printed circuit board, reprogramming may be necessary. Follow closely the instructions provided with replacement circuit board. Coliform Incubator Bath Thermo Scientific...
- Page 34 After the unit stabilizes, match readout display to temperature on thermometer and press the top left switch. Calibration is now complete. **When replacing CPU printed circuit board reprogramming may be necessary. Follow closely the instructions provided with replacement circuit board. Thermo Scientific Coliform Incubator Bath...
-
Page 36: Temperature Calibration
Press ENTER to store the new high temperature calibration value. Note Pressing Offset at any time during the calibration process will return unit to normal operation mode and display will show actual bath termperature. Thermo Scientific Coliform Incubator Bath... -
Page 38: Spare Parts And Accessories
Spare Parts and Accessories Section 9 Model #2862 Model 2863 Description 120V 240V Bath Pan Kit 3167141 Diffuser Pan Assy 3164479 PCB Kit, PowerSupply 3166924 PCB Assembly, CPU 3167119 PCB Assembly, Display 3166679 Heater Kit 3167136 3167137 Voltage Connector 3176698... - Page 39 Section 9 Spare Parts and Accessories Accessory Parts List Description Model 2862/2863 Cover, Gable 3166208 Kit, Water Level Regulator 3166223 Sanitizer, Oakite 3166250 Test Tube Rack (Capacity 50 tubes) 3161601 Petri Dish Rack (Capacity 96 dishes) 3166183 Coliform Incubator Bath...
- Page 40 Section 9 Spare Parts and Accessories Thermo Scientific Coliform Incubator Bath...
- Page 41 Section 9 Spare Parts and Accessories Coliform Incubator Bath Thermo Scientific...
- Page 42 Section 9 Spare Parts and Accessories Thermo Scientific Coliform Incubator Bath...
- Page 43 Section 9 Spare Parts and Accessories Figure 9-3. Side View (with control cover removed and wiring excluded) Coliform Incubator Bath Thermo Scientific...
- Page 44 WITH FITTING HOSE CLAMP SILICONE HOSE PUMP OUTLET FLEX FITTING TEMP PROBE ASSEMBLY 1/8” HALF COUPLING THERMOSTAT BULB THERMOSTAT (PART OF THERMOSTAT) CLIP Figure 9-4. Front View (cutaway detail of temp probe and pump outlet) Thermo Scientific Coliform Incubator Bath...
- Page 45 Spare Parts and Accessories Pump Inlet Fitting Hose Clamp Bath Pan Pump Inlet Heater Lead Heater (part of wire harness) Nut (provided with heater O-ring Bath Body Figure 9-5. Front View (cutaway detail of pump inlet and heater) Coliform Incubator Bath Thermo Scientific...
- Page 46 AREA BETWEEN PAN AND BODY WALL -LIFT HEATER OUT OF PAN BODY BOTTOM COVER Figure 9-6. Heater Removal Detail BATH PAN BODY HEX NUT 'O' RING DRAIN PLUG DRAIN Figure 9-7. Cutaway View of Drain Thermo Scientific Coliform Incubator Bath...
- Page 47 Section 9 Spare Parts and Accessories Figure 9-8. CPU/PCB Assembly Configuration 9-10 Coliform Incubator Bath Thermo Scientific...
- Page 48 Section 9 Spare Parts and Accessories 12 13 14 15 Thermo Scientific Coliform Incubator Bath 9-11...
- Page 49 Section 9 Spare Parts and Accessories 12 13 14 15 9-12 Coliform Incubator Bath Thermo Scientific...
- Page 50 Section 9 Spare Parts and Accessories Thermo Scientific Coliform Incubator Bath 9-13...
- Page 51 Section 9 Spare Parts and Accessories 9-14 Coliform Incubator Bath Thermo Scientific...
-
Page 52: Warranty Information
Section 10 Warranty Information Thermo Scientific Coliform Incubator Bath 10-1... - Page 53 Section 10 Warranty Information 10-2 Coliform Incubator Bath Thermo Scientific...
- Page 54 Thermo Fisher Scientific 401 Millcreek Road Marietta, Ohio 45750 United States www.thermofisher.com...
Need help?
Do you have a question about the 2862 and is the answer not in the manual?
Questions and answers