Advertisement
Table of Contents
- 1 Table of Contents
- 2 Introduction
- 3 General Safety Considerations
- 4 Receiving and Inspection
- 5 Installation
- 6 Controls Overview
- 7 Quick Start Guide
- 8 Before Getting Started
- 9 Getting Started
- 10 Operation
- 11 Maintenance
- 12 Preventative Maintenance
- 13 Troubleshooting
- 14 Service
- 15 Parts List
- Download this manual
Advertisement
Table of Contents

Related Manuals for Thermo Scientific Thermo Fisher 3900 Series


Summary of Contents for Thermo Scientific Thermo Fisher 3900 Series
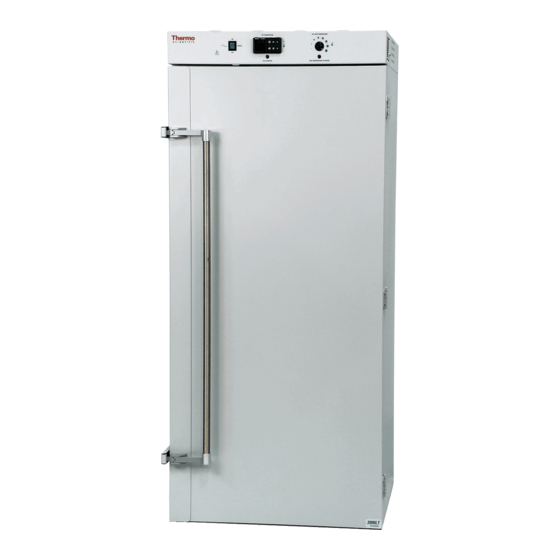
- Page 1 Thermo Fisher Model 3900 Series Bod/Fly Incubators Operating and Maintenance Manual 7003900 • January 2013...
- Page 2 Preface Models covered by this manual: Models 3900LT 3994LT 3990FL 3994FL 3915LT 3923LT 3915FL 3923FL The base model is TUV CUE listed as general purpose air incubators for professional, industrial or educational use where the preparation or testing of materials is done at approximately atmospheric pressure and no flammable, volatile or combustible materials are being heated.
- Page 3 Preface Important Read this instruction manual. Failure to read, understand and follow the instructions in this manual may result in damage to the unit, injury to operating personnel, and poor equipment performance. Caution All internal adjustments and maintenance must be performed by qualified service personnel. Material in this manual is for information purposes only.
- Page 4 Preface Your incubator is provided with a display of graphic symbols on the control panel and adjacent to the power inlet. They are designed to help identify the use and function of the adjustable components. Indicates that you should consult your operator’s manual for further instructions. Indique que l'opérateur doit consulter le manuel d'utilisation pour y trouver les instructions complémentaires.
- Page 5 Preface...
-
Page 6: Table Of Contents
Preface Table of Contents Section 1 Introduction ..................1-1 General Safety Considerations ............. 1-2 Receiving and Inspection ..............2-1 Section 2 Installation ....................-1 Section 3 Controls Overview ................4-1 Section 4 Quick Start Guide ................ .4-2 Before Getting Started ....................4-2 Event and Real Time Clock . -
Page 7: Introduction
Introduction Section 1 Thank you for choosing a general purpose incubator. These units are not intended for use at hazardous or household locations. Before you use the unit, read this entire manual carefully to understand how to install, operate, and maintain the unit in a safe manner. Your satisfaction with the unit will be maximized as you read about its safety and operational features. - Page 8 Section 1 Introduction (continued) General Safety Do not connect the unit to a power source of any other voltage or frequency beyond the range stated on the data plate at the rear of the Considerations (cont.) unit. Do not modify the power cord provided with the unit. If the plug does not fit an outlet, have a proper outlet installed by a qualified electrician.
-
Page 9: Receiving And Inspection
Receiving and Inspection Section 2 Your satisfaction and safety require a complete understanding of this unit. Read the instructions thoroughly and be sure all operators are given adequate training before attempting to put the unit in service. Note This equipment must be used only for its intended application; any alterations or modifications will void your warranty. -
Page 10: Installation
Installation Section 3 This equipment must be used only for its intended application; any alterations or modifications will void your warranty. Local city, county, or other ordinances may govern the use of this equipment. If you have any questions about local requirements, contact the appropriate local agency. The end user may perform installation. - Page 11 Section 3 Installation (continued) 3.4 Leveling: The unit must sit level and solidly. Turn the leveling feet counterclockwise to raise the level. If the unit must be moved, turn the leveling feet in all the way to prevent bending and damage. 3.5 Install Air Ducts The 3915LT, 3923LT, 3915FL, and 3923FL: Do not use Side Air Ducts.
-
Page 12: Controls Overview
Controls Overview Section 4 4.1 Power Switch: The main power I/O (on/off ) switch controls all power to the unit and must be in the I/on position before any systems are operational. 4.2 Main Temperature Control: This control is marked SET TEMPERATURE. -
Page 13: Quick Start Guide
Section 4 Controls Overview (continued) Quick Start Guide FLY (Diurnal light operation): The unit comes from the factory preprogrammed to run a 12 hour day and 12 hour night cycle using one temperature setpoint by pressing the EZ1 button. The setpoint from the factory is 20°C and the program is set to start the day cycle first at 8:00AM, and the night cycle at 8:00PM. -
Page 14: Getting Started
Section 4 Controls Overview (continued) Before Getting Started Terms (continued) A1 ..... .Analog 1 input menu CLoC . .Setting hour, minutes, seconds for run time dOW . - Page 15 Section 4 Controls Overview (continued) PROGRAMING THE DAY AND NIGHT CYCLE PROGRAMING THE DAY AND NIGHT CYCLES ARE DONE IN JUST 8 EASY STEPS. THE FIRST TWO STEPS ARE ENTERING THE REAL TIME IN HOURS AND MINUTES. THE NEXT THREE STEPS ARE ENTERING THE DAY CYCLE START TIME IN HOURS AND MINUTES AND THE SET POINT AT WHICH THE DAY CYCLE WILL RUN.
-
Page 16: Operation
Operation Section 5 The Peltier module and air circulating fan are used in conjunction with the temperature control circuit to achieve accurate temperature control. The thermostat sensor located in the air stream senses any temperature deviation from the control point. Heating or cooling is provided to maintain the desired temperature. - Page 17 Section 5 Operation (continued) 5.4 Calibrating the Main Temperature (continued) After the Offset Calibration Number is established, it can then be entered into the control. To enter the control, push and hold both UP and DOWN Arrow Buttons simultaneously for three (3) seconds or until A1 appears in the Upper Display and Oper appears in the Lower Display.
-
Page 18: Maintenance
Maintenance Section 6 Warning Prior to any maintenance or service on this unit, disconnect the power cord from power source. Before reattaching unit to its power source, be sure all volatile and flammable cleaners are evaporated and dry. Avertissement Avant d'effectuer toute maintenance ou entretien de cet appareil, débrancher le cordon secteur de la source d'alimentation. -
Page 19: Preventative Maintenance
Section 6 Maintenance (continued) 6.2.2. Disinfect the incubator, including all corners, using a suitable disinfectant. Shelves and shelf clips are autoclaveable. DO NOT USE spray disinfectants that might leak through openings and cracks and get on electrical components, or that may contain solvents, corrosives, or abrasives that will harm the painted coatings. -
Page 20: Troubleshooting
Troubleshooting Section 7 When troubleshooting, always make a visual inspection of the incubator interior and exterior cabinet to verify power cord is properly connected, there is no loose or disconnected wiring and all control console devices are firmly seated. Do not attempt to access the electrical compartment area unless you are properly trained to work in or around high voltage. - Page 21 Section 7 Troubleshooting (continued) TEMPERATURE Temperature too high 1/ controller set too high-see Operation section 2/ controller failed on – call Technical Services 1/ Over Temperature Limit Thermostat set too low – see Operation Section Temperature too low 2/ controller set too low – see Operation section 3/ unit not recovered from door opening 4/ unit not recovered from power failure or being turned 5/ controller failure –...
-
Page 22: Parts List
Parts List Section 8 Table 8-1. Parts List Description 3915LT / 3990LT 3923LT / 3994LT 3915FL / 3990FL 3923FL / 3994FL Peltier device 7010547 7010547 7010547 7010547 EMI filtered fused inlet 4200523 4200523 4200523 4200523 Cooling fans (2) 100-120V 2600546 2600546 Cooling fans (2) 220-240V 2600547... - Page 23 Section 8 Parts List (continued) Table 8-2. Specifications 3915FL100-120V 3915LT 100-120V 3990LT 100-120V 3990FL 110-120V 3923FL 220-240V 3923LT 220-240V 3994LT 220-240V 3994FL 220-240V 245 lbs. (111.1 kg) 405 lbs. (183.7 kg) Shipping Weight 245 lbs. (111.1 kg) 405 lbs. (183.7 kg) both units both units both units...
- Page 24 Section 8 Parts List (continued) DWG BY: RICHARD DATE:7-20-2012 NOTE: NO SCALE BENSON PART #9851405 REV: B TOLERANCE UNLESS OTHERWISE SPECIFIED ANGULAR MATERIAL: REFERENCE = + .063 3923LT + .1° = + .032 HOLE DIA 220V-240V .XXX = + .015 + .005 EMI FILTERED FUSED INLET...
- Page 25 Section 8 Parts List (continued) DWG BY: RICHARD DATE:7-20- NOTE: NO SCALE BENSON 2012 TOLERANCE UNLESS OTHERWISE SPECIFIED PART #9851404 REV: B ANGULAR MATERIAL: REFERENCE = + .063 3915LT + .1° = + .032 HOLE DIA 100V-120V .XXX = + .015 + .005 EMI FILTERED FUSED INLET...
- Page 26 Section 8 Parts List (continued) DWG BY: RICHARD DATE:8-16-2012 NOTE: NO SCALE BENSON TOLERANCE UNLESS OTHERWISE SPECIFIED PART #9851427 REV: B ANGULAR MATERIAL: REFERENCE = + .063 3915FL + .1° = + .032 HOLE DIA 100V-120V .XXX = + .015 + .005 EMI FILTERED FUSED INLET...
- Page 27 Section 8 Parts List (continued) DWG BY: RICHARD DATE:8-16- NOTE: NO SCALE BENSON 2012 TOLERANCE UNLESS OTHERWISE SPECIFIED PART #9851428 REV: B ANGULAR MATERIAL: REFERENCE = + .063 3923FL + .1° = + .032 HOLE DIA 220V- 240V .XXX = + .015 + .005 EMI FILTERED FUSED INLET...
- Page 28 Section 8 Parts List (continued) DWG BY: RICHARD DATE:4-5-2012 NOTE: NO SCALE BENSON PART #9851381 REV: B TOLERANCE UNLESS OTHERWISE SPECIFIED ANGULAR MATERIAL: REFERENCE = + .063 3990LT + .1° = + .032 HOLE DIA 100V-120V .XXX = + .015 + .005 EMI FILTERED FUSED INLET...
- Page 29 Section 8 Parts List (continued) DWG BY: RICHARD DATE:4-5-2012 NOTE: NO SCALE BENSON PART #9851382 REV: B TOLERANCE UNLESS OTHERWISE SPECIFIED ANGULAR MATERIAL: REFERENCE = + .063 3994LT + .1° = + .032 HOLE DIA 220V-240V .XXX = + .015 + .005 EMI FILTERED FUSED INLET...
- Page 30 Section 8 Parts List (continued) DWG BY: RICHARD DATE:8-16- NOTE: NO SCALE BENSON 2012 PART #9851425 REV: B TOLERANCE UNLESS OTHERWISE SPECIFIED ANGULAR MATERIAL: REFERENCE = + .063 3990FL + .1° = + .032 HOLE DIA 100V- 120V .XXX = + .015 + .005 EMI FILTERED FUSED INLET...
- Page 31 Section 8 Parts List (continued) DWG BY: RICHARD DATE:8-16- NOTE: NO SCALE BENSON 2012 PART #9851426 REV: B TOLERANCE UNLESS OTHERWISE SPECIFIED ANGULAR MATERIAL: REFERENCE = + .063 3994FL + .1° = + .032 HOLE DIA 220V-240V .XXX = + .015 + .005 EMI FILTERED FUSED INLET...
- Page 32 Thermo Fisher Scientific: 401 Millcreek Road Marietta, Ohio 45750 United States www.thermofisher.com...
Need help?
Do you have a question about the Thermo Fisher 3900 Series and is the answer not in the manual?
Questions and answers