Salicru EQUINOX EQX2 4002-T User Manual
Three-phase solar inverters connected to the grid
Hide thumbs
Also See for EQUINOX EQX2 4002-T:
- User manual (80 pages) ,
- User manual (92 pages) ,
- User manual (82 pages)
Table of Contents
Advertisement
Quick Links
Advertisement
Table of Contents
Troubleshooting

Related Manuals for Salicru EQUINOX EQX2 4002-T


Summary of Contents for Salicru EQUINOX EQX2 4002-T
- Page 1 USER MANUAL THREE-PHASE SOLAR INVERTERS CONNECTED TO THE GRID EQX2 4002-T, EQX2 5002-T, EQX2 6002-T, EQX2 8002-T, EQX2 10002-T, EQX2 12002-T, EQX2 15002-T, EQX2 17002-T, EQX2 20002-T, EQX2 25002-T, EQX2 33004-T, EQX2 40004-T, EQX2 50004-T, EQX2 100010-T...
- Page 2 SALICRU...
- Page 3 Indice General 5.6. GENERAL INSTALLATION DIAGRAM. 6. START-UP AND SHUTDOWN. 1. INTRODUCTION 7. SYSTEM OPERATION. 1.1. THANK-YOU LETTER 7.1. SYSTEM FIRMWARE UPDATE. 2. SAFETY INFORMATION 7.2. DESCRIPTION OF THE SCREENS. 2.1. USING THIS MANUAL 7.3. ON-LINE MONITORING OF THE INSTALLATION. 2.2.
- Page 4 Please do not hesitate to contact us for any further information or any questions you may have. Yours sincerely, SALICRU can cause serious The unit described in this manual • physical injury if handled incorrectly.
-
Page 5: Safety Information
2. SAFETY INFORMATION 2.2. NOTES ON SAFETY. Before installation, read this manual carefully and strictly follow its instructions. 2.1. USING THIS MANUAL Installers must receive professional training or obtain certificates of professional qualification related to electricity. This user manual applies to the units described on the cover •... -
Page 6: Explanation Of The Symbols
Danger of electric shock, live parts, risk of electric shock, do not touch. Tab. 3. Labelling symbols. 2.3.1.3. Packaging symbols. Handle with care. Indicator of the correct direction of the packaging. Earthing connection symbol, the inverter housing must be properly earthed. Stacked layers 6. SALICRU... -
Page 7: Quality Assurance
3. QUALITY ASSURANCE Electromagnetic compatibility: IEC/EN/UNE 61000-6-2:2005. Electromagnetic compatibility AND STANDARDS • (EMC). Part 6-2: Generic standards. Immunity in industrial environments. IEC/EN/UNE 61000-6-3:2007/A1:2011. Electromagnetic 3.1. MANAGEMENT STATEMENT • compatibility (EMC). Part 6-3: Generic standards. Emission standard for residential, commercial and light-industrial Our aim is to satisfy our customers. -
Page 8: Product Description
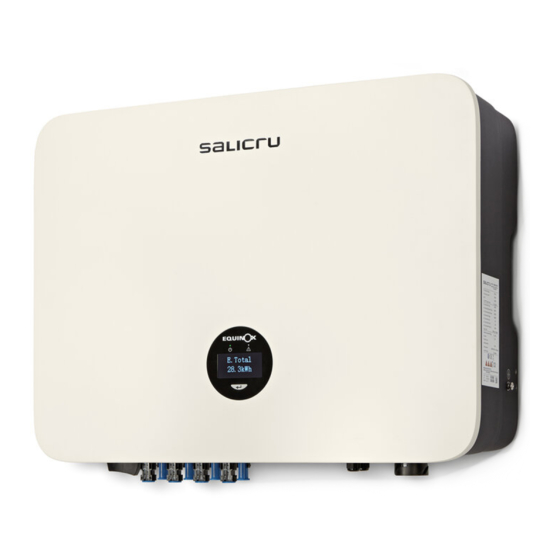
If it is necessary to stack a group of inverters, the height of • each stack should not exceed 6 levels. 4.2. DIAGRAMS 4.2.1. 2 MPPT units (EQX2 4002-T .. EQX2 25002-T). 550 mm. Nameplate 175 mm. Logo Display Fig. 2. Front view. Fig. 3. Side view. SALICRU... - Page 9 Rear rail Vent valve Fig. 4. Bottom view. Fig. 5. Rear view. 4.2.2. 4 MPPT units (EQX2 33004-T, EQX2 40004-T and EQX2 50004-T). 600 mm 270 mm Nameplate Logo Display Fig. 7. Side view. Fig.
- Page 10 4.2.3. 10 MPPT units (EQX2 100010-T). 975 mm Logo Display Fig. 10. Front view. Nameplate 290 mm Fig. 11. Side view. SALICRU...
- Page 11 Fig. 12. Bottom view. Rear Rear rail rail Rear Rear rail rail Fig. 13. Rear view. The connection terminals are located at the bottom of the unit, as shown in the following table: Item Terminal Note ...
- Page 12 The WiFi module connects to the router, but not to the server Check that the firewall is not blocking port 5743. Communication between inverter and server is normal. Communication is normal. Tab. 5. Synoptic chart elements and WiFi module. SALICRU...
-
Page 13: Packing List
4.4. PACKING LIST. The packaged inverter includes the following accessories. Check that all of the accessories supplied with the inverter are included when you receive the package. Refer to the packing list in Tab. 6. Fig. 16. Items included in the packaging. Item Description MPPTs... -
Page 14: Assembly Process
5.1.2. Recommended installation distances. Installation angle and spacing: Check that the inverter is installed on a vertical surface and that it keeps the following minimum safety distances with respect to other elements for optimal ventilation, as shown in Fig. 18: SALICRU... -
Page 15: Electric Connection
Do not use terminals of different manufacturers or of For 4 MPPT units: different types, other than those included in the accessory pack. SALICRU shall not be held liable for any Attention form of damage caused by the use of unauthorised terminals. - Page 16 2,5 - 4,0 Fig. 21. Earthing terminal connection. cable Tab. 8. Selecting the photovoltaic cable. Strip 7 mm of the insulation sleeve of the DC cable, as shown in Fig. 22: Cable cross-section 2.5-4 mm 7 mm Fig. 22. Wire end stripping. SALICRU...
- Page 17 Remove the connector from the accessory bag, as shown Use a multimeter to measure the DC input string in Fig. 23: voltage, check the polarity of the DC input cable, Warning and make sure that the voltage of each string is within the 600 V range.
- Page 18 SALICRU...
- Page 19 In the case of a unit that has two inputs for each MPPT, (17 to 100 kW units), connect identical strings to both inputs as indicated in the Fig. below: Solar Solar Solar Solar field A field B field C field D 4 MPPTs EQUINOX_2...
- Page 20 30 mA or more. EQX2 25002-T EQX2 33004-T The recommended AC cord and switch for the EQX2 series three- EQX2 40004-T phase inverter is shown in Tab. 9: EQX2 50004-T EQX2 100010-T Tab. 9. Circuit breaker gauge and cable cross-sections, by model. SALICRU...
- Page 21 Steps for connecting the AC connector. Connect the AC connector to the inverter's AC terminal; a click indicates that the connection is in place, as shown Remove the AC connector from the accessory bag. in Fig. 37: The fully disassembled AC connector is shown below: AC terminal head Threaded sleeve Cable gland...
-
Page 22: Description Of The Terminals
Port 2 3-pin connector 6 mm Screw cap Metal plate Sealing ring Fig. 41. Terminal connection process. Insert the cable into the port using the 3-pin connector and fasten it with a screwdriver. Fig. 39. Communication device connection (WiFi antenna). SALICRU... -
Page 23: General Installation Diagram
Insert the 3-pin connector into the inverter and screw the cover plate back on using a Phillips screwdriver, as shown in Fig. 42: Fig. 42. Connection of the 3-pin connector on the inverter. 5.6. GENERAL INSTALLATION DIAGRAM. Distribution network L1 L2 L3 N Connection point / Meter CGMP Inverter installation... -
Page 24: Startup And Shutdown
Disable the grid power supply. Without a grid, the unit will stop generating. Turn off the solar field supply. Activate the circuit breakers to cut off the photovoltaic power supply. Deactivate the inverter's switch/isolating switch and set it in the OFF position. SALICRU... -
Page 25: System Operation
7. SYSTEM OPERATION. Screen 10.2.1 Firmware version of the device. Continued 10.2.3. Screen 10.2.2 SSID. WiFi identification. Screen 10.2.3 FW version (II). 7.1. SYSTEM FIRMWARE UPDATE. Screen 10.3 Fault Info. If the WiFi dongle is not connected, go to Screen... Screen 10.4 RSSI. - Page 26 FW version SSID FW version (II) Screen 10.1 Screen 10.2 Screen 10.2.1 Screen 10.2.2 Screen 10.2.3 Fault into Screen 10.3 RSSI Screen 10.4 Rest. WiFi Screen 10.5 Upd. WiFi Screen 10.6 SALICRU...
- Page 27 EN50549 Vietnam IEC (50 Hz) Safety 217002 Screen 10.7 Screen 10.7.1 Screen 10.7.2 Screen 10.7.3 IEC (60 Hz) India Philippines Screen 10.7.4 Screen 10.7.5 Screen 10.7.6 Sri Lanka EN50549(Cz) EN50549(Tr) ...
- Page 28 (Fig. 45) and through the Configuration of the installation (plant) in the EQX-sun application (Fig. 46). If there are download problems, contact your distributor or SALICRU´s technical support. 7.3.1. Download and register the "EQX-sun" app. Download the EQX-sun app and install it on the smartphone or tablet of the end user of the EQUINOX solar inverter.
- Page 29 Enter the email address with which the plant was registered. A message with the sender “postmaster@kumo. salicru.com” and the subject “Equinox – Reset password” will be sent to that email address. The message will include a 6-digit “Token” code. Enter the code on the code verification screen and press submit.
- Page 30 While the inverter is off, the app will not receive generation or consumption data. 7.3.3.1. Electrical diagram of the installation. Make sure that the installation is as shown on the diagram in section 6.6. of page 19. SALICRU...
- Page 31 7.3.3.2. Configuring the installation on the app. The inverter must be powered through the solar field at all times throughout the entire process. Click on the plant that has been created to access its details: For the time being, only the power of the solar field that has been entered will be displayed because the measurement instruments are not yet con- nected;...
- Page 32 When the code is detected, the scanner will close and the serial number will be written automatically. Check that the serial number corresponds to the one on the label. Code: 6B2AB000027 531522B00012 SERIES: EQX2 3001-8002-HSX Fig. 47. Example of a barcode identification label. SALICRU...
- Page 33 Device connection. Once the dongle has been paired to the corresponding plant, you have to configure the WiFi network of the installation to which it has to connect to access the server and update the application data. Follow the steps shown in the application or in the annex If you do not have a camera or it does not detect the (section 11) of this manual.
- Page 34 Degree of autarchy: defines the inde- The update period is pendence of the installation from the 1 minute. grid, dividing the self-consumed en- ergy and the total energy demanded Plant location. by the consumer. Greater degree of autarchy= greater independence from the grid. SALICRU...
- Page 35 7.3.6. Individual plant screen. Each plant has three tabs at the top: “Real time”, “Historical” and “Info”. Information shown in the “Real Time” tab: This tab is divided into 4 sections: synoptic, generation, consumption and daily savings by generation. The synoptic chart offers a very visual approximation of the current state of the plant: the movement of the lines indi- cates the direction of energy flow, and its colour indicates whether it comes from the grid (red), from the panels (green),...
- Page 36 This tab shows the plant information with the values with which it was created. Any field can be modified by pressing the “properties” button [ ], to the right of the plant title and then, in the drop-down menu, by clicking the “Edit” button. When the retailer changes its electricity rates, the price per kWh must also be edited, for example. SALICRU...
-
Page 37: Troubleshooting Guide
Alternatively, restart the inverter. with the working voltage. simply fail. - If neutral and earth are connected - Check that there has been a grid fault. properly, contact SALICRU. Network Grid fault, AC - Check that the AC thermal-magnetic lost or not... -
Page 38: Troubleshooting
Please contact SALICRU for support regarding the maintenance though the installation Attention Read section "6.5.3. Installing the CT.". tasks. Otherwise, SALICRU shall not be held liable for any damage has load. caused. The red LED is flashing, The inverter only indicates that it does not detect but the inverter is working the WiFi antenna. -
Page 39: Technical Features
9. TECHNICAL FEATURES. 9.1. 2 MPPT UNITS. EQX2 EQX2 EQX2 EQX2 EQX2 EQX2 EQX2 EQX2 EQX2 EQX2 Model 4002-T 5002-T 6002-T 8002-T 10002-T 12002-T 15002-T 17002-T 20002-T 25002-T Input Star-up voltage (V) Max. DC voltage (V) 1100 Rated DC voltage (V) MPPT voltage margin (V) 160-1000 No. - Page 40 Total max. harmonic distortion < 3% @ Rated power < 0.5% In Efficiency Maximum 98,1% 98,8% European 97,5% 98,3% MPPT 99,9% Protection Against reverse DC polarity Built-in Insulation resistance Built-in DC switch Built-in Optional Overvoltage Built-in Excessively high temperature Built-in SALICRU...
- Page 41 Model EQX2 33004-T EQX2 40004-T EQX2 50004-T EQX2 100010-T Residual current Built-in Island Frequency shift, built-in AC short-circuit Built-in Overvoltage Built-in PID protection Optional General data Dimensions (D x W x H, mm.) 270 x 600 x 400 290 x 975 x 680 Weight (kg) Degree of protection IP65...
- Page 42 2.412GHz-2.484GHz routers. See Fig. 52. SSID_red_vecino_1 94:83:C4:03:1:A4 SSID_red_tienda_1 B3:F2:67:A5:21:A1 SSID_router_instalación C6:B4:C6:8:44:6 SSID_red_tienda_2 A6:BD:36:F8:C4:3 D3:FC:21:F8:35:1 SSID_red_vecino_3 SSID_red_tienda_3 43:87:05:C2:4:18 The * correspond to the last 8 digits of the inverter's S/N. Fig. 49. Interface system. Fig. 52. Selecting the WiFi network. SALICRU...
- Page 43 Next, a pop-up message will appear to remind you to enter the Once the setup is complete, the WiFi ON indicator on the WiFi password, click on "Accept". See Fig. 53. module will be activated. Fig. 53. Password reminder screen. Enter the password in the blank box and click on "Save".
- Page 44 : ..................................................................................................................................................................................................................................................................................................................................................................................................................................................................................................................................................................................................................................................................................................................................................................................................................................................................................................................................................................................................................................................................................................................................................................................................................................................................SALICRU...
- Page 45 : ..................................................................................................................................................................................................................................................................................................................................................................................................................................................................................................................................................................................................................................................................................................................................................................................................................................................................................................................................................................................................................................................................................................................................................................................................................................................................USER MANUAL EQX2 SOLAR INVERTERS CONNECTED TO THE GRID...
- Page 46 REF. EL229A01 REV. A CODE 401* Avda. de la Serra 100 08460 Palautordera BARCELONA (SPAIN) Tel. +34 93 848 24 00 sst@salicru.com SALICRU.COM Information about the technical support and service network (TSS), the sales network and the warranty is available on our website: www.salicru.com...
Need help?
Do you have a question about the EQUINOX EQX2 4002-T and is the answer not in the manual?
Questions and answers