Chapters
Table of Contents
Troubleshooting

Related Manuals for Salicru EQUINOX EQX2 4002-HT


Summary of Contents for Salicru EQUINOX EQX2 4002-HT
- Page 1 MANUAL DE USUARIO INVERSORES SOLARES HÍBRIDOS TRIFÁSICOS DE CONEXIÓN A RED EQX2 4002-HT, EQX2 5002-HT, EQX2 6002-HT, EQX2 8002-HT, EQX2 10002-HT, EQX2 12002-HT...
- Page 2 SALICRU...
-
Page 3: Table Of Contents
INDICE GENERAL 5.3.5. Conexión de la salida AC ON-GRID y AC BACK-UP. 5.4. INSTALACIÓN DEL DISPOSITIVO DE MONITORIZACIÓN. 5.4.1. Instalación mecánica. 1. INTRODUCCIÓN. 5.5. CONEXIÓN MEDIDOR Y CT. 1.1. CARTA DE AGRADECIMIENTO. 5.5.1. Pasos para la conexión de la alimentación del medidor 2. -
Page 4: Introducción
Quedamos a su entera disposición para toda información suple- mentaria o consultas que deseen realizarnos. Atentamente les saluda. SALICRU es capaz de causar importantes El equipo aquí descrito • daños físicos bajo una incorrecta manipulación. -
Page 5: Información Para La Seguridad
2. INFORMACIÓN PARA LA 2.2. NOTAS DE SEGURIDAD. SEGURIDAD. Antes de la instalación, leer con atención este manual y seguir estrictamente sus instrucciones. Los instaladores deben recibir capacitación profesional u ob- 2.1. UTILIZANDO ESTE MANUAL. tener certificados de calificación profesional relacionados con la electricidad. -
Page 6: Explicación De Los Símbolos
Tab. 3. Símbolos del etiquetaje. 2.3.1.3. Símbolos del embalaje. Manipular con cuidado. Indicador de la orientación correcta del embalaje. Símbolo de conexión a tierra, la carcasa del inversor debe estar correctamente conectada a tierra. Capas apiladas 6. SALICRU... -
Page 7: Aseguramiento De La Calidad Ynormativa
3. ASEGURAMIENTO DE LA Compatibilidad electromagnética: IEC/EN/UNE 61000-6-2:2005. Compatibilidad electromag- CALIDAD Y NORMATIVA. • nética (CEM). Parte 6-2: Normas genéricas. Inmunidad en en- tornos industriales. IEC/EN/UNE 61000-6-3:2007/A1:2011. Compatibilidad • 3.1. DECLARACIÓN DE LA DIRECCIÓN. electromagnética (CEM). Parte 6-3: Normas genéricas. Norma de emisión en entornos residenciales, comerciales y de indus- Nuestro objetivo es la satisfacción del cliente, por tanto esta tria ligera. -
Page 8: Descripción Del Producto
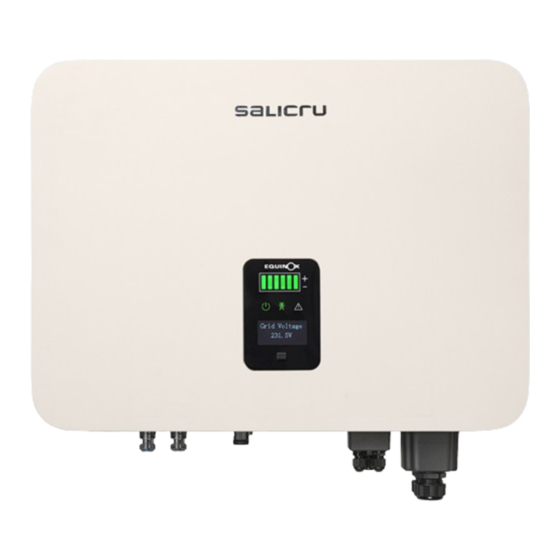
6 niveles. H Híbrido. No híbrido. Potencia redondeada en W + número MPPT. Nombre serie. 4.2. VISTAS. Placa de características 550 mm. 175 mm. Logo Display Fig. 2. Vista frontal. Fig. 3. Vista lateral. SALICRU... -
Page 9: Interface De Pantalla Y Módulo Wifi
Los terminales de conexión se encuentran en la parte inferior del equipo, tal como muestra la siguiente tabla: Ítem Terminal Nota Interruptor DC Conmutador On/Off Terminal entrada DC Conector PV Terminal entrada ... - Page 10 4.4. LISTA DE CONTENIDO. El embalaje del inversor incluye los siguientes accesorios. Com- pruebe que en su interior están los siguientes elementos. Consulte la Tab. 6 para ver la lista de contenido. Fig. 9. Elementos contenidos en el embalaje. SALICRU...
-
Page 11: Lista De Contenido
Ítem Descripción Cantidad Priorización Inversor Carga de baterías Alimentación de las cargas Soporte mural Excedentes PV Pernos de expansión Cubierta AC + tornillos fijación Batería Par de conectores PV MC4 (+ y -) Antena WiFi (opcional). Fig. 11. Prioridades de trabajo en Modo General. Medidor ESM1 90D24 EQX2 + transformador 3CT + 1 + 3 terminales... - Page 12 ¿Hay una No, las dos cargas se unen como si solo fuera priorización entre una, aún que, la Backup Load tiene límite tal y load y Backup Load? como se menciona en el FAQ2. Fig. 16. Diagrama función "PeakLoad2.1" SALICRU...
-
Page 13: Modo Off-Grid
4.5.2.2. Mod OFF-Grid. Preguntas Respuestas ¿Qué pasa si la La priorización general de alimentación de carga batería llega al se modifica. La batería se mantiene en standby SOC mínimo (DOD a la espera de potencia de paneles solares para máximo)? poder cargar, mientras, las cargas de consumo se alimentan de red. -
Page 14: Modo Económico
En este estado, el híbrido se comporta como un inversor sin baterías. Fig. 23. Modo UPS ON. Priorización Carga de baterías Alimentación de las cargas Excedentes PV Batería Fig. 24. Prioridades de trabajo en modo "UPS ON". SALICRU... - Page 15 4.5.4.2. Perfil descarga. 4.5.4.4. Perfil Carga PV + Grid. Fig. 29. Perfil Carga prioridad PV. Fig. 25. Modo Descarga. Priorización Priorización Carga de baterías Alimentación de las cargas Carga de baterías Alimentación de las cargas Excedentes PV Batería Fig. 30. Prioridades de trabajo en Perfil Carga prioridad PV. Fig.
-
Page 16: Faq Comunes
¿Por qué el led del botón de la La batería puede reconectarse si el inversor al perder red no genera. El perfil de descarga sigue batería SALICRU se mantiene está encendido y por lo tanto mantener el funcionando y alimenta las backup loads. -
Page 17: Comportamiento De Los Leds De La Batería
4.5.6. Comportamiento de los LEDs de la batería. Estado de los LEDs Estado de Descripción LED del LED del la batería estado botón Amarillo Verde Checking Verde Verde Cargando Batería cargando Verde Verde Descargando Batería descargando intermitente Apagado Apagado Apagada Batería apagada Batería apagándose. -
Page 18: Instalación
Verificar que el equipo se instala en una superficie vertical y que guarda las siguientes distancias de seguridad mínimas con respecto a otros elementos para una ventilación óptima, Fig. 34: Fig. 34. Distancias recomendadas de instalación. Dimensión Distancia (mm.) SALICRU... -
Page 19: Diagrama De Conexionado General
5.3.1. Diagrama de conexionado general. Este diagrama muestra la estructura y composición del cableado del inversor híbrido de la serie EQX2-HT, en relación con el pro- yecto real. La instalación y el cableado deben cumplir con los es- tándares locales. Medidor PIAs Fus. -
Page 20: Conexión A Tierra Externa
Fig. 39: fotovoltaico no exceda la tensión máxima especificada en la tabla de características técnicas del apartado "9. Carac- terísticas técnicas.". Intercalar las protecciones de DC pertinentes según la si- guiente Tab. 14: SALICRU... - Page 21 Conectar los cables al inversor según los siguientes esquemas de conexionado: un único Conexionado para instalaciones con campo solar (paneles en la misma orienta- ción y strings de igual longitud): Inversor Para asegurar una conexión óptima, usar una herramienta homologada para crimpar los terminales.
-
Page 22: Conexión Del Sistema De Baterías
Insertar el cable de DC pelado en el conector de la batería lo suficientemente profundo y cambiar el soporte de sujeción para asegurarse de que esté bien bloqueado con el cable pe- lado, como se muestra en la Fig. 47. Fig. 44. Conexión terminales entrada DC equipos con 2 MPPT. SALICRU... - Page 23 En el 1. Antes de realizar la conexión, asegurar que la po- caso particular del sistema de baterías de SALICRU, debe ir co- laridad del cable es correcta. nectado al puerto "Inverter com" del BMS, tal como se muestra Advertencia 2.
- Page 24 Tirar levemente del cable para verificar que está bien conec- tado. Conectar el conector AC ON-GRID al terminal AC ON-GRID del inversor, tal como se muestra en la siguiente Fig. 53. ON-GRID Fig. 53. Conexión AC ON-GRID. SALICRU...
- Page 25 5.3.5.3. Pasos para la conexión del conector AC En caso de tener que conectar la salida de BACK-UP, pasar al siguiente apartado. En caso contrario, colocar la carcasa en su BACK-UP. posición y fijarla mediante los 4 tornillos incluidos en el envol- torio.
- Page 26 Tab. 18. Protecciones AC. Conectar el otro extremo de la manguera a las protecciones de AC de las cargas críticas de BACK-UP. Fig. 56. Conexión AC BACK-UP. Fus. PIAs Back-up Inversor Fig. 57. Diagrama completo de las conexiones AC BACK-UP. SALICRU...
-
Page 27: Instalación Del Dispositivo De Monitorización
5.4. INSTALACIÓN DEL DISPOSITIVO DE 5.5. CONEXIÓN MEDIDOR Y CT. MONITORIZACIÓN. 5.5.1. Pasos para la conexión de la alimentación del medidor ESM1 90D24 EQX2. 5.4.1. Instalación mecánica. El medidor ESM1 90D24 EQX2 debe ser conectado en la acome- El inversor trifásico de la serie EQX2 admite comunicaciones WIFI tida de la instalación para que pueda leer la tensión de la misma. -
Page 28: Pasos Para La Conexión Del Ct Al Medidor Esm1 90D24
Abrir el CT. El transformador de corriente debe instalarse justo después del IGA. Pasar el cable de red en el sentido de la corriente según indica la flecha: de la instalación (P1) hacia la red eléctrica (P2). Cerrar el CT. SALICRU... -
Page 29: Diagrama Completo De Las Conexiones Del Medidor
5.5.4. Diagrama completo de las conexiones del medidor. IMPORTANTE: respectar el orden de las fases L1, L2, L3 Medidor PIAs Fus. Inversor Fig. 63. Diagrama completo de conexión. MANUAL DE USUARIO EQX2 INVERSORES SOLARES DE CONEXIÓN A RED... -
Page 30: Esquema General De Instalación
- Código de colores utilizado para representar la alimentación de DC de la instalación: ROJO para los cables positivos y NEGRO para los cables negativos. - Código de colores utilizado para representar las comunicaciones entre los equipos de la instalación: LILA. SALICRU... -
Page 31: Arranque Y Paro
Pulsar el botón de encendido/apagado durante 5 seg. (para Desactivar el interruptor/seccionador del inversor y dejarlo en los modelos de sistemas de baterías SALICRU). Para otros sis- posición OFF. Esperar 5' hasta que el inversor esté completa- temas compatibles, consultar el manual correspondiente. -
Page 32: Operación Del Sistema
Off-Grid DOD. Configuración del DOD de pro- Pantalla 9.7.6 Vietnam. tección Off-Grid. Pantalla 9.7.7 India. Pantalla 10.10 V Off-Grid. Tensión de salida en Off-Grid. Pantalla 9.7.8 Philippines. Pantalla 10.11 F Off-Grid. Frecuencia de salida en Off-Grid. Pantalla 9.7.9 Sri Lanka. SALICRU... -
Page 33: Configuración Relación De Transformación
7.4. GUÍA PARA CONFIGURAR EL INVERSOR Pantalla 10.12 T. Ini. Carga. Tiempo de inicio del perfil de carga del modo Económico. MEDIANTE LA APP BLUETOOTH. Pantalla 10.13 T. Fin. Carga. Tiempo de finalización del perfil de carga del modo Económico. Pantalla 10.14 Lim. - Page 34 En el desplegable Login role seleccionar la opción Owner e introducir la contraseña "123456" en el campo "Password" y hacer clic en Log In como se indica a continuación: Fig. 65. Pantalla de acceso a los ajustes del Hybrid. Seleccionar el modelo de la batería. SALICRU...
- Page 35 Seleccionar el código de seguridad de red. Vertido cero (Opcional) Si se quiere habilitar el vertido cero se debe activar el pa- Seleccionar el modo de trabajo deseado según el apartado rámetro Export Limit switch y poner a 0.0% el parámetro 4.5 y configurarlo.
- Page 36 PeakLoad Shifting (Opcional). Si se quiere habilitar el modo de picos de consumo se debe activar el parámetro Peakload Shifting y establecer una Grid capacity limita- potencia máxima con el parámetro tion (solo para el modo general). Protección DOD. SALICRU...
- Page 37 tection switch En todos los modos se debe configurar la protección y establecer el valor en los paráme- On-grid DOD Off-grid DOD, ambos típicamente aunque por defecto ya viene activada. Para ello activar la tros SOC on-grid protection switch opción (Solo para el entre el 90 y el 80%.
- Page 38 “Ident. Batería”. Hay dos tipos de fabri- “T. Ini. Carga”: Tiempo de inicio de la carga – cantes de baterías compatibles: “T. Fin Carga": Tiempo final de la carga – EQX_BATT: Salicru. – “Lim. P. Carga”: Potencia límite de la carga – Pylon_HV: PylonTech. –...
-
Page 39: Monitorización On-Line De La Instalación
(planta) en la aplicación EQX-sun (Fig. 67). Si existen problemas de descarga, comuníquese con su distribuidor Una vez completado el proceso de registro, acceder a la o con el soporte técnico de SALICRU. aplicación entrando las credenciales que se han definido pul- sando el botón “Login”. -
Page 40: Configuración De La Instalación (Planta) En La Aplicación Eqx-Sun
0,14721 €/kWh. Se tiene que introducir el precio al que la comercializadora compensa el kWh vertido a la red eléctrica. Por ejemplo, la comercializadora de este ejemplo lo compensa a 0,0537 €/kWh. Fig. 67. Creación de planta. SALICRU... -
Page 41: Monitorización
Una vez se hayan introducido todos los valores, pulsar el botón “Crear planta”. A continuación, la aplicación indicará que se ha creado la planta correctamente mediante un mensaje en la parte inferior y apare- cerá una nueva cabecera en el panel de “Mis plantas”: 7.6.3. - Page 42 Cuando se detecte el código, se cerrará el escáner y el número de serie aparecerá escrito automáticamente. Comprobar que el número de serie se corresponde con el de la etiqueta. Fig. 68. Ejemplo de etiqueta identificativa código de barras. SALICRU...
- Page 43 Conexión del dispositivo. Una vez vinculado el dongle a la planta correspondiente, se le tiene que configurar la red WiFi de la instalación a la que se tenga que conectar para acceder al servidor y actualizar los datos en la apli- cación.
- Page 44 1 minuto. la red eléctrica, dividiendo la energía autoconsumida y la energía total Ubicación de la planta. demanda por el consumidor. Mayor cuota autárquica = mayor independencia de la red eléctrica. SALICRU...
- Page 45 Cada planta tiene cuatro pestañas en la parte superior: “Tiempo El diagrama sinóptico ofrece una idea muy visual del estado real”, “Histórico”, “Alarmas” e “Info”. actual de la planta: el movimiento de las líneas indica la “Tiempo real”: Información que proporciona la pestaña dirección del flujo de la energía, y su color si procede de la red (rojo), de los paneles (verde), o de la batería (amarillo).
- Page 46 En la sección de “Ahorro económico” se grafican los valores aproximados de “Ahorro por generación” (importe que se obtiene multiplicando la generación por el precio del kWh consumido) y “Compensación simplificada” (importe que se obtiene multiplicando la generación vertida a red por el precio del kWh vertido) SALICRU...
- Page 47 En la sección de “Ahorro de Emisiones CO2” se grafican los valores de CO2 ahorrados por el hecho de hacer uso de la energía renovable solar. Éstos valores se miden en kg y son una aproximación del CO2 que se evita producir. En la sección de “Impacto medioambiental”...
-
Page 48: Guía De Problemas Y Soluciones
- Si el neutro y el tierra están bien Sin display Nada en el display de DC está subido. conectados, contactar con SALICRU. - Comprobar si la tensión de entrada Almacenamiento coincide con la de trabajo. interno anormal,... -
Page 49: Mantenimiento
Nunca reemplace arbitrariamente ningún componente interno. Atención Para cualquier soporte de mantenimiento, comuníquese con SALICRU. De lo contrario, SALICRU no se hace responsable de los daños causados. El mantenimiento del dispositivo de acuerdo con el manual nunca debe realizarse sin las herramientas adecuadas, el equipo de prueba o la última revisión del manual. -
Page 50: Características Técnicas
Máxima 98,1% 98,2% Europea 97,3% 97,4% MPPT 98,0% Protección Contra inversión de polaridad DC Integrada De resistencia de aislamiento Integrada Interruptor DC Integrado De sobretensiones Integrada De sobretemperatura Integrada De corriente residual Integrada De isla Desplazamiento de frecuencia, integrada SALICRU... - Page 51 Modelo EQX2 4002-HT EQX2 5002-HT EQX2 6002-HT EQX2 8002-HT EQX2 10002-HT EQX2 12002-HT De cortocircuito AC Integrada De sobretensión Integrada Datos generales Dimensiones (F. x An. x Al., mm.) 175 x 550 x 410 Peso (kg.) Grado de protección IP65 Autoconsumo nocturno (W) <...
-
Page 52: Anexo. Configuración Del Módulo Wifi
En el portátil o smartphone, buscar la WiFi por el nombre "WiFi-AP********" y seleccionar para conectar. Abrir el navegador (en el caso de que no se haya abierto auto- máticamente) y teclear la dirección 10.10.100.254. Se mostrará la siguiente pantalla. SALICRU... - Page 53 : ..................................................................................................................................................................................................................................................................................................................................................................................................................................................................................................................................................................................................................................................................................................................................................................................................................................................................................................................................................................................................................................................................................................................................................................................................................................................................MANUAL DE USUARIO EQX2 INVERSORES SOLARES DE CONEXIÓN A RED...
- Page 54 REF. EL239A00 REV. A CODE 401* Avda. de la Serra 100 08460 Palautordera BARCELONA Tel. +34 93 848 24 00 sst@salicru.com SALICRU.COM La red de servicio y soporte técnico (S.S.T.), la red comercial y la información sobre la garantía está disponible en nuestro sitio web: www.salicru.com...
- Page 55 USER MANUAL THREE-PHASE HYBRID SOLAR INVERTERS CONNECTED TO THE GRID EQX2 4002-HT, EQX2 5002-HT, EQX2 6002-HT, EQX2 8002-HT, EQX2 10002-HT, EQX2 12002-HT...
- Page 56 SALICRU...
- Page 57 CONTENTS 5.3.5. AC ON-GRID and AC BACK-UP output connection. 5.4. INSTALLATION OF THE MONITORING DEVICE. 5.4.1. Mechanical installation. 1. INTRODUCTION. 5.5. METER AND CT CONNECTION. 1.1. THANK-YOU LETTER. 5.5.1. Steps for connecting the power of the ESM1 90D24 EQX2 2. SAFETY INFORMATION. meter.
-
Page 58: Introduction
Please do not hesitate to contact us for any further information or any questions you may have. Yours sincerely, SALICRU can cause serious The unit described in this manual • physical injury if handled incorrectly. -
Page 59: Using This Manual
2.1. USING THIS MANUAL. Installers must receive professional training or obtain certificates of professional qualification related to electricity. During installation, do not open the front cover of the inverter. This user manual applies to the units described on the cover •... -
Page 60: Quality Assurance And Standards
Tab. 3. Labelling symbols. 2.3.1.3. Packaging symbols. Handle with care. Indicator of the correct direction of the packaging. Earthing connection symbol, the inverter housing must be properly earthed. Stacked layers 6. 3. QUALITY ASSURANCE AND STANDARDS. 3.1. MANAGEMENT STATEMENT. SALICRU... -
Page 61: Standards
Our aim is to satisfy our customers. Management has established standard for residential, commercial and light-industrial a Quality and Environmental Policy for such purposes. As a result, environments. a Quality and Environmental Management System will be Efficiency: implemented, which will ensure that we are compliant with the IEC/EN/UNE 61683:1999. -
Page 62: Function
TN-C, TN-CS and TT. When applied to a TT grid, the voltage from N to PE should be less than 30 V. For more details, refer to Fig. 1: 4.2. DIAGRAMS. Nameplate 550 mm. 175 mm. Logo Display Fig. 2. Front view. Fig. 3. Side view. SALICRU... -
Page 63: Screen Interface And Wifi Module
The connection terminals are located at the bottom of the unit, as shown in the following table: Item Terminal Note DC switch On/Off switch DC input terminal PV Connector Battery input Battery connector terminal ... -
Page 64: Packing List
Tab. 5. Synoptic chart elements and WiFi module. 4.4. PACKING LIST. The packaged inverter includes the following accessories. Check that the following elements are inside. Refer to the packing list in Tab. 6. Fig. 9. Items included in the packaging. SALICRU... -
Page 65: Work Modes
Item Description Quantity Prioritisation Inverter Battery charge Supplying the loads Wall mounting bracket PV surpluses Expansion bolts AC cover + fixing screws Battery Pair of PV MC4 connectors (+ and -) Mains WiFi antenna (optional). Fig. 11. Work priorities in General mode. ESM1 90D24 EQX2 meter + 3CT transformer + 1 + 3 terminals... - Page 66 The maximum generation power is PAC. maximum generation power? Is there No, the two loads are joined as if they were just a prioritisation one, even though the Back-up Load has a limit, between load and as mentioned in FAQ2. Back-up Load? Fig. 16. "PeakLoad2.1" function diagram SALICRU...
-
Page 67: Off-Grid Mode
4.5.2.2. OFF-Grid mode. Questions Answers What happens if The overall load power prioritisation is changed. the battery reaches The battery remains on standby waiting for the the minimum SOC solar panel power in order to charge, while the (maximum DOD)? consumption loads are supplied from the grid. -
Page 68: Economy Mode
24 hours, the default state is standby. In this state, the hy- Fig. 23. UPS ON mode. brid behaves like an inverter without batteries. Prioritisation Battery charge Supplying the loads PV surpluses Battery Fig. 24. Work priorities in "UPS ON" mode. SALICRU... - Page 69 4.5.4.2. Discharge profile. 4.5.4.4. PV + Grid Charge profile. Fig. 29. PV priority charge profile. Fig. 25. Discharge mode. Prioritisation Prioritisation Battery charge Supplying the loads Battery charge Supplying the loads Mains Mains PV surpluses Battery Fig. 30. Work priorities in PV priority Charge profile. Fig.
-
Page 70: Common Faqs
First of all, you can only use the back-up load. grid is lost? The charge profiles stop supplying the back-up load Why does the SALICRU The battery can be reconnected if the with solar panel surpluses, but they do continue to battery button LED remain on inverter is on and thus the LED remains on. -
Page 71: Behaviour Of The Battery Leds
4.5.6. Behaviour of the battery LEDs. LED status Battery Description status Status LED Button LED Yellow Green Checking Green Green Charging Battery charging Flashing Green Discharging Battery discharging green Battery off Quick Battery turning off. Occurs when flashing Turning off the battery button is pressed for green 5 seconds... -
Page 72: Location
Do not use terminals of different manufacturers or of different types, other than those included in the acces- Fig. 33. Recommended locations for the inverter. sory pack. SALICRU shall not be held liable for any form Attention of damage caused by the use of unauthorised terminals. -
Page 73: External Earthing Connection
standards. Meter PIAs Fus. PIAs Back-up Fus. Inverter Legend abbreviations: – Power control switch. – Main circuit breaker. – Differential switch. – Magnetic Circuit Breaker. Fus. – Fuses. – Surge Protection Device. – Small circuit breaker. – Photovoltaic panels. Batt. – Batteries. –... -
Page 74: Solar Field Connection
Insert the relevant DC circuit breakers, according to the metal terminal and press the terminal with professional following Tab. 14. crimping pliers (pull the cable to check that the terminal is well connected to the cable), as shown in Fig. 39. SALICRU... - Page 75 Connect the cables to the inverter as shown in the following connection diagrams: a single Connection for installations with solar field (panels in the same direction and strings of equal length): Inverter To ensure an optimal connec- tion, use an approved tool to crimp the terminals.
-
Page 76: Battery System Connection
Insert the stripped DC cable far enough into the battery connector and change the retaining bracket to make sure it is locked tightly to the stripped cable, as shown in Fig. 47. Fig. 44. Connecting the DC input terminals of units with 2 MPPTs. SALICRU... -
Page 77: Ac On-Grid And Ac Back-Up Output Connection
Fig. 48. Locking the connector. communications port on the battery system. In the case of the SALICRU battery system, it must be connected to the 1. Before carrying out the connection, make sure "Inverter com" port of the BMS, as shown in the figure below. - Page 78 Pull slightly on the cable to check that it is properly connected. Connect the AC ON-GRID connector to the AC ON-GRID terminal on the inverter, as shown in Fig. 53 below. ON-GRID Fig. 53. AC ON-GRID connection. SALICRU...
- Page 79 5.3.5.3. Steps for connecting the AC BACK-UP If you need to connect the BACK-UP output, go to the next section. Otherwise, place the housing in its position and connector. secure it using the 4 screws included in the package. Remove the housing (item number 4) from its packaging (if not Insert the relevant AC circuit breakers in between, as shown done in the previous On-Grid step).
- Page 80 Tab. 18. AC circuit breakers. Connect the other end of the bundle to the AC circuit breakers Fig. 56. AC BACK-UP connection. for the critical BACK-UP loads. Fus. PIAs Back-up Inverter Fig. 57. Complete diagram of the AC BACK-UP connections. SALICRU...
-
Page 81: Installation Of The Monitoring Device
5.4. INSTALLATION OF THE MONITORING 5.5. METER AND CT CONNECTION. DEVICE. 5.5.1. Steps for connecting the power of the ESM1 90D24 EQX2 meter. 5.4.1. Mechanical installation. The ESM1 90D24 EQX2 meter must be connected to the installa- The three-phase inverter of the EQX2 series supports WiFi and tion's connection so that it can read its voltage. -
Page 82: Steps For Connecting The Ct To The Esm1 90D24 Eqx2
Fig. 62. Connecting the cable to the RJ45-2 port. Open the CT. The current transformer must be installed right after the IGA. Pass the network cable in the direction of the current, (P1) as shown with the arrow: of the installation to the grid (P2). Close the CT. SALICRU... -
Page 83: Complete Diagram Of The Meter Connections
5.5.4. Complete diagram of the meter connections. IMPORTANT: respect the order of phases L1, L2, L3 Meter PIAs Fus. Inverter Fig. 63. Complete connection diagram. USER MANUAL EQX2 SOLAR INVERTERS CONNECTED TO THE GRID... -
Page 84: General Installation Diagram
- Colour code used to represent the earth cable: YELLOW-GREEN. - Colour code used to represent the DC power of the installation: RED for the positive cables and BLACK for the negative cables. - Colour code used to represent communications between the installation's units: PURPLE. SALICRU... -
Page 85: Start-Up And Shutdown
Electric arc hazard. Do not open any DC isolating switch if If there are batteries, press the on/off button for 5 seconds the unit is under load. until the LED flashes and goes off (for SALICRU battery start the inverter: system models). -
Page 86: Description Of The Screens
Off-Grid battery. Screen 9.7.7 India. Screen 9.7.8 Philippines. Screen 10.9 Off-Grid DOD. Configuration of the Off-Grid Screen 9.7.9 Sri Lanka. protection DOD. Screen 10.10 Off-Grid V. Output voltage in Off-Grid. Screen 10.11 Off-Grid F. Output frequency in Off-Grid. SALICRU... -
Page 87: Transformation Ratio Configuration
7.4. GUIDE TO CONFIGURE THE INVERTER Screen 10.12 Charging Start T. Start time for the Economy mode charge profile. USING THE BLUETOOTH APP. Screen 10.13 Charging End T. End time for the Economy mode charge profile. Screen 10.14 Charge P. Lim. Battery charge power limit for To configure the inverter via the display, see the next Economy mode. - Page 88 Access Hybrid Inverter Settings from the Settings section. In the Login role drop-down, select the Owner option and enter the password "123456" in the "Password" field and click on Log In as indicated below: Fig. 65. Hybrid settings access screen. Select the battery model. SALICRU...
- Page 89 Select the grid security code. Zero injection (optional) In order to enable zero injection, you must enable the Select the required work mode according to section 4.5 Export Limit switch parameter and set the Feed in grid and configure it. setting parameter to 0.0% (only for General mode and Economy mode).
- Page 90 It is recommended that all profiles cover 24 hours. PeakLoad Shifting (Optional). In order to enable the peak consumption mode, you must enable the Peakload Shifting parameter and set a max- Grid capacity limitation imum power with the param- eter (only for General mode). SALICRU...
- Page 91 SOC off-grid protection DOD protection. and Economy mode) and the switch On-grid DOD option and set the in the In all modes, protection must be configured, even Off-grid DOD parameters, both typically between 90 and though it is already enabled by default. To do so, enable the 80%.
-
Page 92: Guide To Configure The Inverter Using
Ident.” parameter. There are two types of compatible “Charging Start T.": Start time for charging – battery manufacturers: “Charging End T.": End time for charging – EQX_BATT: Salicru. – “Charging P. Lim.”: Charging power limit – Pylon_HV: PylonTech. – Access the “Advanced Config.” menu and configure the ˆ... -
Page 93: On-Line Monitoring Of The Installation
Enter the email address with which the plant was registered. A message with the sender “postmaster@kumo.salicru.com” and the subject “Equinox – Reset password” will be sent to that email address. -
Page 94: Configuration Of The Installation (Plant) In The Eqx-Sun App
0.14721 €/kWh. The price at which the retailer compensates for the kWh discharged into the grid must be entered. For example, the retailer in this example compensates it at a price of 0.0537 €/kWh. Fig. 67. Creating the plant. SALICRU... -
Page 95: Monitoring
Once all the values have been entered, press the "Create plant" button. Next, the app will indicate that the plant has been successfully created by means of a message at the bottom and a new header will appear in the "My plants" panel: 7.6.3. - Page 96 When the code is detected, the scanner will close and the serial number will be written automatically. Check that the serial number corresponds to the one on the label. Fig. 68. Example of a barcode identification label. SALICRU...
- Page 97 Device connection. Once the dongle has been paired to the corresponding plant, you have to configure the WiFi network of the installation to which it has to connect to access the server and update the application data. Follow the steps shown in the application or in the annex If you do not have a ...
- Page 98 Degree of autarchy: defines the date. The update independence of the installation period is 1 minute. from the grid, dividing the self-con- sumed energy and the total energy Plant location. demanded by the consumer. Greater degree of autarchy = greater independence from the grid. SALICRU...
- Page 99 “Real time”, “Historical”, Each plant has four tabs at the top: “Alarms” and “Info”. The synoptic chart offers a very visual approximation of the “Real Time” Information shown in the tab: current state of the plant: the movement of the lines indi- cates the direction of energy flow, and its colour indicates This tab is divided into 5 sections: Synoptic, Generation, whether it comes from the grid (red), from the panels (green),...
- Page 100 The “Economic savings” section shows charts with the approximate values of “Savings per generation” (amount obtained by multiplying the generation by the price of kWh consumed) and “Simplified compensation” (amount obtained by multiplying the generation injected into the multiplied by the price of kWh injected). SALICRU...
-
Page 101: Troubleshooting Guide
In the "CO2 Emission Savings" section, the CO2 values saved by using solar renewable energy are shown graphi- cally. These values are measured in kg and are an approxi- mation of the reduced amount of CO2 produced. The savings in terms of CO2 emissions and their equivalence in number of trees planted can be seen in the "Environmental impact"... -
Page 102: Error Messages
- If neutral and earth are connected properly, contact SALICRU. - Check that the safety regulation setting is correct. Error in the internal - Restart the inverter; wait a few seconds Overvoltage or - Check the grid voltage. -
Page 103: Maintenance
Never replace internal components at random. Attention Please contact SALICRU for support regarding the maintenance tasks. Otherwise, SALICRU shall not be held liable for any damage caused. Perform the maintenance tasks on the unit as described in the manual and always using the corresponding tools, test equipment, or the latest version of the manual. - Page 104 Maximum Efficiency 98,1% 98,2% European 97,3% 97,4% MPPT 98,0% Protection Against reverse DC polarity Built-in Insulation resistance Built-in DC switch Built-in Overvoltage Built-in Excessively high temperature Built-in Residual current Built-in Island Frequency shift, built-in AC short-circuit Built-in Overvoltage Built-in SALICRU...
-
Page 105: Annex. Wifi Module Setup
Model EQX2 4002-HT EQX2 5002-HT EQX2 6002-HT EQX2 8002-HT EQX2 10002-HT EQX2 12002-HT General data Dimensions (D x W x H, mm.) 175 x 550 x 410 Weight (kg) Degree of protection IP65 Night self-consumption (W) < 1 Topology Transformerless Operating temperature (ºC) -30 to 60 Relative humidity... - Page 106 Using the Scan button, select the WiFi network you want to connect to from the available networks. The WiFi module can only connect to 2.4 GHz networks. In the PASSWORD field, you must enter the password of the SALICRU...
- Page 107 : ..................................................................................................................................................................................................................................................................................................................................................................................................................................................................................................................................................................................................................................................................................................................................................................................................................................................................................................................................................................................................................................................................................................................................................................................................................................................................USER MANUAL EQX2 SOLAR INVERTERS CONNECTED TO THE GRID...
- Page 108 REF. EL222B01 REV. B CODE 401* Avda. de la Serra 100 08460 Palautordera BARCELONA Tel. +34 93 848 24 00 sst@salicru.com SALICRU.COM Information about the technical support and ser- vice network (TSS), the sales network and the warranty is available on our website: www.salicru.com...
Need help?
Do you have a question about the EQUINOX EQX2 4002-HT and is the answer not in the manual?
Questions and answers