Clearaudio Innovation User Manual
Hide thumbs
Also See for Innovation:
- User manual (28 pages) ,
- User manual (24 pages) ,
- User manual (18 pages)
Advertisement
Quick Links
I nnovation
User manual
Pic. similar
© clearaudio
electronic GmbH, 2022-11
I nnovation
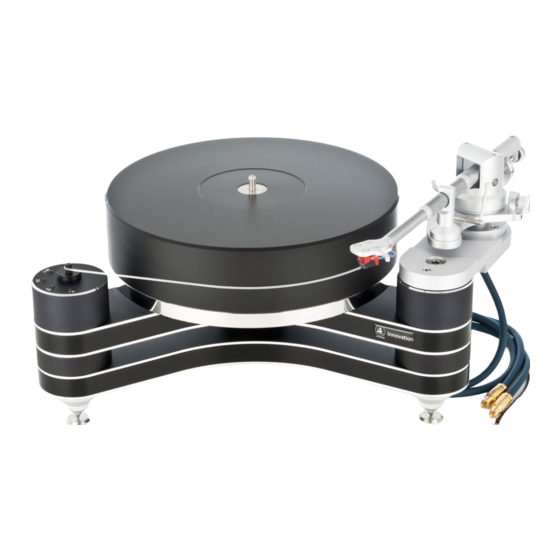
Picture: Package w ith
Clearaudio tonearm „TT3"
and Clearaudio cartridge
„Titanium V2 ".
I nnovation Wood
Picture: Package w ith
Clearaudio tonearm
„Universal" and Clearaudio
cartridge „da Vinci V2 ".
Made in Germany
Advertisement

Related Manuals for Clearaudio Innovation


Summary of Contents for Clearaudio Innovation
- Page 1 I nnovation User manual I nnovation Picture: Package w ith Clearaudio tonearm „TT3“ and Clearaudio cartridge „Titanium V2 “. I nnovation Wood Picture: Package w ith Clearaudio tonearm „Universal“ and Clearaudio cartridge „da Vinci V2 “. Pic. similar © clearaudio...
- Page 2 Please read this instruction manual carefully, to avoid any damages or loss of warranty. This manual will help you for an easy setup and guarantees the highest pleasure for a long time. Clearaudio I nnovation We wish you a lot of musical enjoyments with your new turntable.
- Page 3 5. Maintenance Never use agressive cleaning detergent. Clearaudio Do not use dry cloths for cleaning as this generates static electricity. Suitable cleaning and care products from are available from www.analogshop.de or from specialist retailers. The bearing of the turntable platter can be lubricated every 2 years with the oil provided.
- Page 4 9. Disposal Do not dispose this product together with other waste. WEEE Reg. No.: DE26004446 10. CE Marking This electronic product corresponds to the applicable guidelines for obtaining the CE mark. © clearaudio Page 4 electronic GmbH, 2022-11...
-
Page 5: Table Of Contents
User manual Contents 1. Packing overview ............. 6 2. List of components ............7 - 8 3. I nstallation and setup ............9 - 14 4. Fine adjustment of the motor .......... 15 5. Troubleshooting ............... 16 - 17 6. Technical data ..............18 Warranty information ............ -
Page 6: Packing Overview
Tonearm Stainless steel-sub- platter; Delrin or Acrylic platter; power supply; upper bearing part and – cap optional: Cartridge Pic. 1: Packing overview © clearaudio Page 6 electronic GmbH, 2022-11... -
Page 7: List Of Components
Please keep this original packing, if you need to ship the turntable. Below you find the part list of the Clearaudio I nnovation turntable: Pic. 7b: Clearaudio Magnify Pic. - Page 8 MC cartridge da Vinci bearing part) 16 b Clearaudio MC cartridge Talismann Clearaudio Smart Stylus Gauge Clearaudio Stroboscope Testrecord Level gauge for the turntable alignment (Art. No. AC038) to adjust the exact speed 1 pcs. flat belt Optional in package:...
-
Page 9: I Nstallation And Setup
User manual 3. I nstallation and set up I nnovation The setup of the turntable is easy as the turntable chassis is pre-assembled and has been tested at the factory. Please use the white gloves enclosed in order to avoid scratches or unwanted fingerprints (platter). I nnovation turntable requires a space for setup of at least 18.90 inch x 19.29 inch. - Page 10 Remove the protective security tape from the bearing housing. Place two drops of the synthetic bearing oil on the ceramic bearing shaft. (also available at www.analogshop.de, Art. No. AC068) Pic. 6: Oiling the bearing shaft © clearaudio Page 10 electronic GmbH, 2022-11...
- Page 11 User manual Take the stainless steel platter with both hands carefully out of the box. Remove the lamination of the scale ring on the lower side of the turntable. Please remove the lamination extreme carefully and avoid any soiling and scratches. Push the delivered bearing part carefully through the hole in the stainless steel sub-platter and mount the bearing part with the sub-platter by using the mounting clip.
- Page 12 Pic. 11: Setup Delrin platter and bearing cap You will find suitable adjustment equipment under www.clearaudio.de or www.analogshop.de. 10.) To install the tonearm, please follow the user manual of the manufacturer. © clearaudio Page 12 electronic GmbH, 2022-11...
- Page 13 User manual 11.) To mount and adjust a cartridge, please follow the user manual of the manufacturer. Clearaudio I nnovation I f you purchased your turntable as a package with tonearm and cartridge, you will find a Smart Level Gauge...
- Page 14 After the initial setup we recommend to let the turntable spin for at least 15 to 30 minutes. This ensures a smoother break in. Pic. 14: Connection power supply and motor © clearaudio Page 14 electronic GmbH, 2022-11...
-
Page 15: Fine Adjustment Of The Motor
Testrecord Stroboscope Testrecord on the platter. Follow hereby the instruction of the user manual. Clearaudio Speed Light To check the speed with highest accuracy please use the (Art. No. AC039, www.analogshop.de). On the front side of your turntable there are three setting trimmers (see Pic. 15). -
Page 16: Troubleshooting
The pre/ amp does not have Check the settings of your phono stage. enough gain. Pre/ amp is mismatched. Swap the plugs of the turntable that are connected to the left and right outputs. © clearaudio Page 16 electronic GmbH, 2022-11... - Page 17 User manual Clearaudio I s the record or the stylus dirty Clean the record / or the cartridge. offers many helpful accessories for care and or damaged? cleaning. I n the event of damage, we recommend an assessment by a specialist and, if necessary, Needle bounces an exchange.
-
Page 18: Technical Data
5 years* Clearaudio * Provided that the warranty card is correctly completed and returned to , or your product is registered online at https:/ / clearaudio.de/ en/ service/ registration.php, within 14 days of purchase. © clearaudio Page 18 electronic GmbH, 2022-11... -
Page 19: Warranty Information
Clearaudio , or register your product online at https:/ / clearaudio.de/ en/ service/ registration.php, within 14 days of purchase. Otherwise only the legal warranty of 2 years can be considered. - Page 20 Clearaudio I MPORTANTE Cuando solicite el servicio otorgado por la garantia el usuario tiene la responsabilidad de demonstrar cuándo efectuó la compra. En este caso, su recibo de compra será la prueba apropiada. © clearaudio Page 20 electronic GmbH, 2022-11...
-
Page 21: Stroboscope Testrecord User Manual
User manual Stroboscope Testrecord Clearaudio Stroboscope Testrecord satisfies the highest demands for an exact speed adjustment for turntables. Dramatic sound improvements can be reached only with exact calibrated speeds. - Optimal adjustment for turntables - To adjust the exact speed, please choose the side for 50 / 60 Hz, or the other side for the use with the speed light first. - Page 22 Here you also have the possibility to choose between two different speeds. With the outside scale you can detect the speed of 33 Hz and with the inside scale you can detect Clearaudio Stroboscope Testrecord the speed of 45 Hz. Again, the big advantage of the is, that...
- Page 23 User manual Made in Germany Page 23...
- Page 24 Technical specifications are subject to change or improvement without prior notice. Product availability is as long as astock lasts. Copies and reprints of this document, including extracts, require written consent from Clearaudio Electronic GmbH, Germany. 2022 © clearaudio electronic GmbH, 2022-11...
Need help?
Do you have a question about the Innovation and is the answer not in the manual?
Questions and answers