Clearaudio Innovation Wood User Manual
Hide thumbs
Also See for Innovation Wood:
- User manual (19 pages) ,
- User manual (16 pages) ,
- User manual (20 pages)
Advertisement
Quick Links
Download this manual
See also:
User Manual
Innovation
Innovation
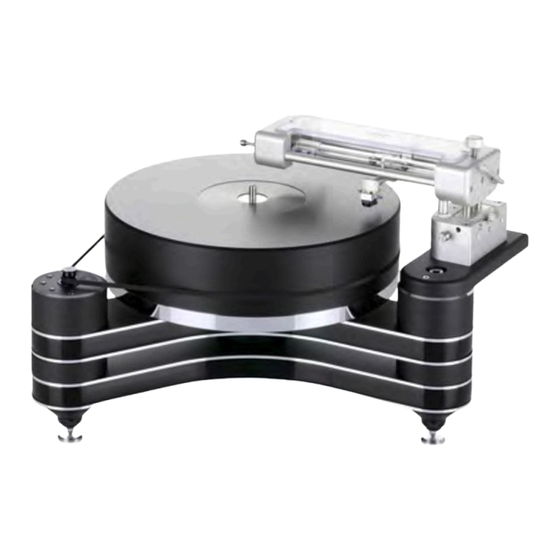
Picture: Package with
Clearaudio tonearm „TT3"
and Clearaudio cartridge
„Titanium V2 ".
Spardorfer Str. 150 • D-91054 Erlangen • Tel. +49 9131 40300100 • FAX + 49 9131 40300119
Clearaudio electronic
www.clearaudio.de • www.analogshop.de • info@clearaudio.de
© Clearaudio electronic GmbH 2016
Innovation Wood
Picture: Package with
Clearaudio tonearm
„Universal" and Clearaudio
cartridge „da Vinci V2 ".
®
GmbH
User manual
Made in Germany
Version: 2.5_13.10.2016_E
Advertisement

Related Manuals for Clearaudio Innovation Wood


Summary of Contents for Clearaudio Innovation Wood
- Page 1 „da Vinci V2 “. Made in Germany Clearaudio electronic ® GmbH Spardorfer Str. 150 • D-91054 Erlangen • Tel. +49 9131 40300100 • FAX + 49 9131 40300119 www.clearaudio.de • www.analogshop.de • info@clearaudio.de © Clearaudio electronic GmbH 2016 Version: 2.5_13.10.2016_E...
- Page 2 EQUIPMENT MAINS WORKING SETTING Your Clearaudio product has been prepared to comply with the household power and safety requirements that exist in your area. This product can be connected to 230 V or 110 V AC (50 Hz and 60 Hz).
-
Page 3: Table Of Contents
2. List of components 5 - 6 3. Installation and setup 7 - 12 4. Fine adjustment of the motor 5. Service and special instruction 6. Technical data Warranty information Stroboscope Testrecord user manual 17 -18 © Clearaudio electronic GmbH 2016 Page 3... -
Page 4: Packing Overview
Tonearm Stainless steel-sub- platter; Delrin or Acrylic platter; power supply; upper bearing part and – cap optional: Cartridge Pic. 1: Packing overview Page 4 © Clearaudio electronic GmbH 2016... -
Page 5: List Of Components
Innovation User manual 2. List of components Innovation Clearaudio has developed a special and secure packing for your turntable that ensures a safe transportation. Please keep this original packing, if you need to ship the turntable. Innovation Below you find the part list of the Clearaudio turntable: Pic. - Page 6 Cartridge alignment gauge No illustration: Unify Universal tonearm (optional) 4 pcs. hex wrench; sizes: #1,5; # Not shown: warranty card, Clearaudio Quality 2,5; #3; #7 Card, Sales return paper Screw driver Not shown: User Manual IMPORTANT NOTICE: Please double check the tightness of all bolts, hardware, and mounting pods, as temperature fluctuations during transit may have caused the hardware to become loose.
-
Page 7: Installation And Setup
Please use the white gloves enclosed in order to avoid scratches or unwanted fingerprints (platter). Innovation turntable requires a space for setup of at least 18.90 inch x 19.29 inch. 19.29 inch / 490 mm 18.90 inch / 480 mm Pic. 3: Required set - up space © Clearaudio electronic GmbH 2016 Page 7... - Page 8 Remove the protective security tape from the bearing housing. Place two drops of the synthetic bearing oil on the ceramic bearing shaft. (also available at www.analogshop.de, Art. No. AC068) Pic. 6: Oiling the bearing shaft Page 8 © Clearaudio electronic GmbH 2016...
- Page 9 Make sure with gentle pressure that the platter is applying on the complete surface of the bearing. Avoid major side forces to avoid any damages to the ceramic bearing! Pic. 9: Setup stainless steel platter with upper bearing part Page 9 © Clearaudio electronic GmbH 2016...
- Page 10 Pic. 11: Setup Delrin platter and bearing cap You will find suitable adjustment equipment under www.clearaudio.de or www.analogshop.de. 10.) To install the tonearm, please follow the user manual of the manufacturer. Page 10 © Clearaudio electronic GmbH 2016...
- Page 11 Innovation User manual 11.) To mount and adjust a cartridge, please follow the user manual of the manufacturer. If you purchased your Clearaudio Innovation turntable as a package with tonearm and cartridge, you will Smart Level Gauge find a in your accessory, which will help you to adjust the Tracking Force of the...
- Page 12 33 1/3 rpm is reached. After the initial setup we recommend to let the turntable spin for at least 15 to 30 minutes. This ensures a smoother break in. Pic. 14: Connection power supply and motor Page 12 © Clearaudio electronic GmbH 2016...
-
Page 13: Fine Adjustment Of The Motor
Clean the sensor and the scale ring with a little isopropyl alcohol and a cotton bud. Be careful and avoid any scratches on the sensor or the scale ring! If the motor has further more speed variations please contact your nearest authorized Clearaudio dealer or directly the Clearaudio factory (address on page 14). -
Page 14: Service And Special Instruction
Only if the product is returned in its original packing Clearaudio can provide the warranty. 5.3 Service In case of any necessary, service for all Clearaudio products should be done by authorized personal only. Innovation In case of any repair, the Clearaudio turntable needs to be send to your nearest authorized Clearaudio distributor, dealer or directly to the Clearaudio factory. -
Page 15: Technical Data
Warranty: 5 years* (see page 16) * Only if the warranty card is filled out correctly and sent back to Clearaudio within 14 days. Clearaudio electronic is not responsible for typographical errors in descriptions. Technical specifications subject to change or improvement without prior notice. Availability as long as stock lasts. Copies and imprints- also only in extracts –... -
Page 16: Warranty Information
RETAIN YOUR PURCHASE RECEIPT Your purchase receipt is your permanent record of a valuable purchase. It should be kept in a safe place to be referred to as necessary for insurance purposes or when corresponding with clearaudio. IMPORTANT When seeking warranty service, it is the responsibility of the consumer to establish proof and date of purchase. Your purchase receipt or invoice is adequate for such proof. -
Page 17: Stroboscope Testrecord User Manual
33.3 Hz, 45 Hz and 78 Hz (starting from the outer diameter). Stroboscope Testrecord Please place the on your turntable platter and start the engine of your turntable. The big advantage of the Clearaudio Stroboscope Testrecord Stroboscope Testrecord is, that you can place your cartridge onto the , while measuring the speed, as there are grooves provided on the disc. - Page 18 With the outside scale you can detect the speed of 33 Hz and with the inside scale you can detect the Stroboscope Testrecord speed of 45 Hz. Again, the big advantage of the Clearaudio is, that you can place Stroboscope Testrecord...
Need help?
Do you have a question about the Innovation Wood and is the answer not in the manual?
Questions and answers