Table of Contents
Advertisement
Quick Links
Advertisement
Table of Contents

Related Manuals for Brady M610


Summary of Contents for Brady M610
- Page 1 User Manual...
- Page 2 Copyright and Trademarks Disclaimer This manual is proprietary to Brady Worldwide, Inc. (hereafter “Brady”), and may be revised from time to time without notice. Brady disclaims any understanding to provide you with such revisions, if any. This manual is copyrighted with all rights reserved. No portion of this manual may be copied or reproduced by any means without the prior written consent of Brady.
- Page 3 OR CONSEQUENTIAL DAMAGES OF ANY KIND ARISING IN CONNECTION WITH THE USE, OR INABILITY TO USE, BRADY’S PRODUCTS. Safety and Environment Please read and understand this manual before using the M610 Label Printer for the first time. This manual describes all of the main functions of the printer. Precautions Before using the M610 Label Printer please note the following precautions: •...
- Page 4 To register your printer go to: • bradycorp.com/register Return If for any reason you need to return the product, please contact Brady Technical Support for return information. Document Conventions When using this document, it is important that you understand the conventions used throughout the manual.
-
Page 5: Table Of Contents
Connecting the Printer .................... 12 Bluetooth ......................12 USB ........................13 Loading Supplies..................... 14 Ribbon .........................14 Removing ....................14 Loading ......................14 Loading Labels ....................15 Loading ......................15 Unloading ....................16 Loading Bulk Label Supply ................17 B-593 Raised Panel Labels ................18 Accessories......................18 M610 Label Printer User Manual... - Page 6 Frame ........................39 Reverse .......................41 Vertical Text ......................41 Multiple Vertical Lines of Text ..............42 Errors with Vertical Text ................42 Symbols........................42 Graphics ........................43 Import Graphics ....................43 Add a Graphic .....................43 Date and Time ......................44 M610 Label Printer User Manual...
- Page 7 Saving a File .......................66 Opening a File ......................69 Deleting a File ......................69 Using Files from an External Source ..............70 Importing a File ....................70 Exporting a File ....................70 7 • Maintenance ................72 Upgrading Firmware....................72 M610 Label Printer User Manual...
- Page 8 D • Licensing .................. 100 QR Code Generator Library .................. 100 RapidJSON ......................100 E • Regulatory Compliance ............103 Agency Compliance and Approvals ..............103 Wireless Regulatory Information ................. 106 Hong Kong ......................108 viii M610 Label Printer User Manual...
-
Page 9: Introduction
13.0" L x 4.3" W x 4.2" H 330 x 110 x 107 mm Weight (with battery pack) 3.10 lb. 1.41 kg Note: The table below refers to the M610 Label Printer printer only. Consumable performance may vary. Environmental Operation Storage Temperature (Printer) 0°... -
Page 10: Proximity Range For Bluetooth
System Specifications Proximity Range for Bluetooth The M610 Label Printer printer should be within 65 ft (19.8 m) of the device to pick up the Bluetooth signal. Note: Bluetooth is an optional feature that your site may not have chosen. -
Page 11: Setup
Guide, and Windows driver Save the Packaging Save the packaging surrounding your M610 Label Printer in case you have to ship the printer and accessories back to the supplier. CAUTION! Never ship the M610 printer without first removing the rechargeable battery pack from the printer. -
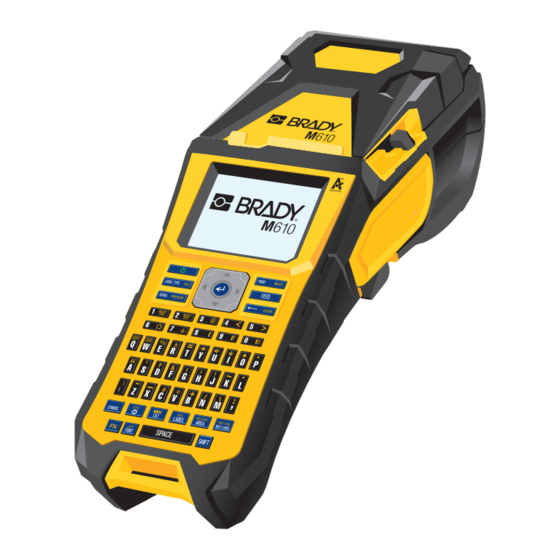
Page 12: Printer Components
Power button Magnet attachment screw holes AC adapter port Tripod attachment screw hole USB port (computer connection) 13 Battery door latch USB host port (USB drive) Battery door (battery well) Cutter lever Serial number Ribbon M610 Label Printer User Manual... -
Page 13: Power
(-40° C). • Do not disassemble, mistreat, or attempt to replace components in the printer. • Do not use any AC adapter other than that specifically for use with the M610 Label Printer. • Do not incinerate the printer. Keep the printer away from heat sources. -
Page 14: Battery
• Store your battery pack only in a cool, dry place. • Keep the battery pack out of the reach of children. • At the end of battery life, replace your old battery only with the Brady M610 Label Printer battery pack. -
Page 15: Installing The Battery
When using the AC adapter, power is constant so there is no drain on the battery. In this case, auto shutdown will not activate. To set the inactive time, see “Printer Configuration” on page M610 Label Printer User Manual... -
Page 16: Printer Settings
4. Press ENTER to accept the choice. Keyboards Your keyboard configuration depends on the region where you do business. The following are the four configurations currently supported on the M610 printer. See “Keyboards” on page 88 for layout. Keyboard Type... -
Page 17: Date And Time
About: Displays the installed Firmware and Label Library versions as well as the Bluetooth • module. 5. Navigate to OK and press ENTER. 6. Press ENTER to dismiss the menu or use the navigation keys to go to the next setting to configure. M610 Label Printer User Manual... -
Page 18: Print History
4. For information on how to use the screen, see “Settings Screens” on page Typeface: Select the style of lettering. The font types (Brady Fixed Width and Brady Alpine • give you the option of displaying a zero with or without a slash (Ø or 0) through it. In addition, Chinese, Japanese, and Korean fonts are available. -
Page 19: Software For Creating Labels
(Refer to your local Brady website for other Brady software. Be aware that older Brady labeling software may not automatically detect the printer and that the information in this manual is based on the software listed below.) -
Page 20: Connecting The Printer
Computer Mobile Device Bluetooth This capability is only available on select M610 printer models. Look for the Bluetooth symbol on your printer to know if this feature is supported. To connect the printer to a mobile device via Bluetooth: First, on the printer: 1. -
Page 21: Usb
Connect USB cable from this port to the computer Note: If you are not using Brady Workstation software, you need to install the printer driver. See the Driver Installation Guide PDF file on the USB drive that came with the printer. -
Page 22: Loading Supplies
Brady labels and ribbons come equipped with smart-cell technology that enables the printer to recognize the type of label and ribbon installed and automatically set many label formatting details. Only use labels and ribbons that have the Brady Authentic logo Ribbon The M610 printer comes with the ribbon installed. -
Page 23: Loading Labels
Setup Loading Supplies Loading Labels For optimum performance, use authentic Brady labels. Labels can be loaded with the power on or off. Before inserting labels, be sure to remove the protective tape covering the leading end of the labels. Loading 1. -
Page 24: Unloading
5. If you do not want to load any more label supply, close the printer cover by pressing down until it catches. M610 Label Printer User Manual... -
Page 25: Loading Bulk Label Supply
Setup Loading Supplies Loading Bulk Label Supply 1. Remove the M610 Label Printer label core and the 2. On the bulk label supply box, push tabs B and C in, label feed ramp from the box. then pull the perforated flap down and tear off. -
Page 26: B-593 Raised Panel Labels
3. Turn the power on. 4. Press FEED. 5. Leave roll door open during printing. Accessories The following accessories are available for the M610 Label Printer printer and can be purchased separately from your distributor. • Battery (Rechargeable) (M-NIMH-BATTERY) •... -
Page 27: General Operation
How to Print. “Printing” on page 28 • Preview before printing. “Preview” on page 28 • Print multiple copies of a label. “Multiple Print” on page 28 • Access recently used files. “History” on page 30 M610 Label Printer User Manual... -
Page 28: Screen Components
10. Caps lock. This symbol is visible when the caps lock is on. 11. Battery charge remaining. The gauge turns red when only 10% of the charge remains. If the printer has the Bluetooth option and it is enabled the symbol will appear in the status bar. M610 Label Printer User Manual... -
Page 29: Menus
For more information see “Using the Keyboard” on page To close a menu without making changes: • Press the Backspace key. You may have to press backspace more than once to exit out of all menus. M610 Label Printer User Manual... -
Page 30: Settings Screens
To cancel a function, exit a menu or a dialog box without making changes, press the backspace key. When pressing backspace in the middle of a function, you are walked out of the function a screen at a time. You may have to press backspace several times to completely exit the function. M610 Label Printer User Manual... -
Page 31: Using The Keyboard
(such as Azerty or Cyrillic), some of the keys may vary. PRINT MULTI FILE LABEL TYPE FEED SERIAL PREVIEW CLEAR INSERT INSERT TIME DATE AREA PREV AREA PREV LABEL GRAPHICS SETUP NEXT LABEL LIST NEXT AREA LABEL SYMBOL CAPS SPACE SHIFT FONT M610 Label Printer User Manual... - Page 32 NEXT AREA (Refer to “Go to Label or Area” on page Move to Previous In a multi-area label, moves to the previous PREV AREA Area area from the current area. NEXT AREA M610 Label Printer User Manual...
- Page 33 “Formatting Text” on FONT page 33.) Caps Lock Acts as a toggle to lock text into uppercase as CAPS data is entered. Press once to turn Caps Lock FONT on; press again to turn Caps Lock off. M610 Label Printer User Manual...
- Page 34 • Places the next typed character in subscript Subscript format, displaying slightly below the line of text. • Will place multiple characters in subscript if the characters are highlighted first. (Refer to “Existing Text” on page 35 for information on highlighting characters.) M610 Label Printer User Manual...
-
Page 35: Creating A Simple Text Label
ENTER key. 3. Press the ENTER key on the keyboard to start another line of text. 4. If you wish to insert, delete, or format text, see “Editing Text” on page 32 “Formatting Text” on page M610 Label Printer User Manual... -
Page 36: Printing
Multiple print lets you print multiple copies of a label or print a range of labels rather than all of the labels in the file. To use the multiple print options: 1. Press FN + MULTI. The Multiple Print screen displays. M610 Label Printer User Manual... - Page 37 On screen As printed Separator: To separate different labels on continuous label supply, add a separator by • selecting it from the drop down list. Line Separator Tic Separator 3. Navigate to OK and press ENTER. M610 Label Printer User Manual...
-
Page 38: History
If the file you want to reprint is incompatible with the currently installed label supply, a message displays indicating such. 4. To correct, install the label supply indicated in the error message. 5. Clear the message, then press PRINT. M610 Label Printer User Manual... -
Page 39: Editing Labels On The Printer
Adding sequential data. See “Serialization (Sequential Data)” on page • Adding lists. “List (Importing Data)” on page For information about creating labels for specific applications, such as pipemarkers or safety labels, “Label Types” on page M610 Label Printer User Manual... -
Page 40: Editing Text
Clears all data on the label, but leaves the formatting in place (example: font size, number of areas, etcetera). Clear All Removes all labels created. You are returned to one single label in General Mode, with all default settings reapplied. M610 Label Printer User Manual... -
Page 41: Default Formatting
3. Navigate through the Size menu to select the desired font size. • Custom: To manually enter a size, select Custom. The minimum/maximum range is shown below the type-in field. If you exceed these values an error will display. M610 Label Printer User Manual... -
Page 42: Font Attributes
For expanded or condensed text, change the percentage to 100% to return to normal. When applying the attribute to text as it is being typed, the attribute stays on until it is turned off or until you move to a new area or label. M610 Label Printer User Manual... -
Page 43: Existing Text
3. Hold SHIFT while moving the cursor with the navigation keys across the characters that will display in super- or subscript. This highlights the characters. 4. Press FN + SUP (on the Q key) for superscript or FN + SUB (on the W key) for subscript. M610 Label Printer User Manual... -
Page 44: Labels And Areas
“Units of Measure” on page 8 for more information. To change the length of the label: 1. Press the LABEL key. 2. Select Length, then Fixed. Note: Length is not available if you are using a pre-sized label supply. M610 Label Printer User Manual... -
Page 45: Go To Label Or Area
Use the right and left arrows to access the next area in the sequence. If there are not multiple areas on a label or multiple labels in a file, the arrows are grayed out. Area 2 of 3 Label 3 of 5 M610 Label Printer User Manual... -
Page 46: Delete Label Or Area
“Go to Label or Area” on page 2. Open the label or area menu: press LABEL, or FN + AREA. 3. Choose H. Justify or V. Justify. 4. Choose the horizontal or vertical justification desired. M610 Label Printer User Manual... -
Page 47: Rotation
1. Navigate to the label or area where you want to place a frame. See “Go to Label or Area” on page 2. Open the label or area menu: press LABEL or FN + AREA. M610 Label Printer User Manual... - Page 48 Note: Frames do not display edge to edge, but may appear slightly offset from the very edge of the label. To remove the Frame: 1. Navigate to the label or area that contains the frame. 2. Open the label or area menu: press LABEL or FN + AREA. 3. Choose Frame then None. M610 Label Printer User Manual...
-
Page 49: Reverse
1. Navigate to the label or area displaying data as vertical text. 2. Open the label or area menu: press LABEL, or FN + AREA. 3. Navigate to Vertical then choose Off. The text realigns according to predefined formats. M610 Label Printer User Manual... -
Page 50: Multiple Vertical Lines Of Text
The editor then displays the text in its original format, without applying the vertical text option. Symbols The M610 Label Printer printer contains hundreds of symbols that can be used for a variety of applications. The symbol categories available are: Arrows... -
Page 51: Graphics
2. Press FN and GRAPHICS to view the graphics saved to the printer. The graphics grid displays the most recently used graphic first. 3. Select the desired graphic and press ENTER. Note: The graphic displays at the same size as the font. M610 Label Printer User Manual... -
Page 52: Date And Time
“Preview” on page 28). International Character Sets The M610 Label Printer printer contains hundreds of internationally recognized characters, complete with diacritical marks. To add an international character to your label: 1. Position the cursor at the point where you want the international character to be placed. -
Page 53: Barcode Settings
Before entering a barcode, determine the barcode symbology and attributes to use. Not all attributes are applicable to all barcode symbology types so they will either be grayed out or not shown. Note: Additional barcode types are supported in Brady Workstation software and the Brady Express Labels app. -
Page 54: Add A Barcode
To edit barcode data: 1. Position the cursor on the barcode. The barcode mode automatically turns on. 2. Edit the barcode text. The barcode mode automatically turns off when you move past the last character of the barcode. M610 Label Printer User Manual... -
Page 55: Serialization (Sequential Data)
Start Value reaches its maximum value (9, Z), the character immediately to the left is incremented, and the right character cycles back to its minimum value (0, A) Example: Start Value:A1 End Value:D4 Increment:1 Produces:A1…A9, B0…B9, C0…C9, D0...D4 M610 Label Printer User Manual... -
Page 56: Advanced, Independent Example
“To add multiple sequences, displayed at different locations on the label:” on page 5. Select the Add Seq 2 box. 6. Under Sequence #2, enter the Start Value, End Value, and Increment. M610 Label Printer User Manual... -
Page 57: Edit A Sequence
Note: If using multiple serialization at different positions on the label, be sure Add Seq 2 option box is checked. 3. When ready, navigate to OK and press ENTER. To delete a sequence: In the editor, with the cursor to the right of the value in a sequence, press the BACKSPACE key. M610 Label Printer User Manual... -
Page 58: List (Importing Data)
The data source must be a .csv file created in a spreadsheet or database program on a computer and imported to the M610 Label Printer printer using a USB drive. You can also create the .csv file directly on the printer. If you have created the .csv file on a computer, you must import the file to the printer before you can use the List function. -
Page 59: Working With Rows Of Data
Select Next to move forward or Prev to move backward through the rows of data. To insert a row between two rows of data: 1. Select any field in the row below the row that will be inserted. 2. Select Insert. M610 Label Printer User Manual... -
Page 60: Merging Files
If you have four fields in the data source but only two areas defined on the label, the first two fields merge on to the label. The other fields are ignored. M610 Label Printer User Manual... -
Page 61: Advanced Merge
3. Select Internal or External to indicate where the data source file is stored. 4. Select the data source file. 5. Enter field and record information as in “Setting up the Data Source” on page M610 Label Printer User Manual... - Page 62 To edit data already in the data source: 1. Select the field to edit, then make the corrections according to normal editing procedures. (See “Editing Text” on page 32.) 2. When finished, save the data. M610 Label Printer User Manual...
-
Page 63: Label Types
Depending on the application chosen, a sub-menu or dialog box displays to collect information for automatically formatting the specific label type. The name of the specific label type being used is displayed on the screen just above the image of the label. M610 Label Printer User Manual... -
Page 64: General
The data is repeated down the wire marker label as many times as the length of the label allows given the font size used. The smaller the font size, the more the data is repeated. M610 Label Printer User Manual... -
Page 65: Flags
Flag Cable Flag Length Diameter Length (wraps around cable) 5. In the Cable Diameter field, enter the diameter of the wire or cable to which the flag will be applied. M610 Label Printer User Manual... - Page 66 Use the NEXT AREA and FN + PREV AREA keys to navigate between areas. See “Go to Label or Area” on page 9. Press FN + PREVIEW to view the labels before printing. M610 Label Printer User Manual...
-
Page 67: Terminal Block, Patch Panel, 66-Block
7. From the Separator drop-down menu, select None, Line, or Tic to mark the division between labels. Line Separator, Vertical Orientation Tic Separator, Horizontal Orientation 8. From the Orientation drop-down menu, select either Vertical or Horizontal. 9. When finished, navigate to OK and press ENTER. M610 Label Printer User Manual... -
Page 68: Face Plate
6. When No Feed is selected, additional information can be added to the label after printing. Press the PRINT key to keep printing the same information, otherwise enter new text and press PRINT again. Press the FEED key to cut the label. M610 Label Printer User Manual... -
Page 69: 110-Block, Bix Block
The label height uses a dedicated Bix Block part height of 0.625 inch (15.9 mm). The length of a Bix Block label is 6.2 inches (157.5 mm) with a total strip length of 6.6 inches (167.6 mm). M610 Label Printer User Manual... - Page 70 • If None is selected, the areas are blank and you can independently enter data in each area of the strip. • Horizontal increments one number per area, based on the start value. M610 Label Printer User Manual...
-
Page 71: Vial
2. Select Vial, then select the vial size. The vial size determines the size of the label unless you select Auto, in which case the label size automatically adjusts to the contents. 3. Enter the data to display on the vial label. M610 Label Printer User Manual... -
Page 72: Desistrip
Continuous label supply should be used for this label type. To create a DesiStrip label: 1. Press LABEL TYPE. 2. Select DesiStrip. 3. Enter the length of an individual strip. 4. Navigate to OK and press ENTER. 5. Enter the data on the label. M610 Label Printer User Manual... -
Page 73: Breaker Box
The number of labels in the upper right portion of the screen. Use the NEXT LABEL and FN + PREV LABEL keys to move to the different labels. 12. Press FN + PREVIEW to view the labels before printing. M610 Label Printer User Manual... -
Page 74: File Management
External files are labels stored on some external device, such as a USB drive. File Naming Standards To create a file on the M610 Label Printer printer, the file must be given a name. Names can be up to 20 characters long and can consist of letters, numbers, but not spaces. - Page 75 With <New Folder> highlighted in the text entry box, press ENTER. b. Type a name for the folder and navigate to OK and press ENTER. c. Select Previous Folder at the top of the screen. Save file Previous folder Previous folder M610 Label Printer User Manual...
- Page 76 FN + CLEAR. This clears the data from the editor so you can work on a different label, but does not delete the saved file. For more about the operation of the CLEAR key see “Deleting Text” on page M610 Label Printer User Manual...
-
Page 77: Opening A File
7. Select Yes to accept the deletion. IMPORTANT! A deleted file is no longer available for use. Note: Folders are deleted the same way as files, only the folders must be empty in order to delete. M610 Label Printer User Manual... -
Page 78: Using Files From An External Source
Using Files from an External Source You can use labels, csv lists, or bmp graphics created on a computer or a different M610 Label Printer and stored on a USB drive. Labels can be imported from a USB drive to the printer or you can open the label file directly from the USB drive. - Page 79 6. On the Select Destination screen, navigate to the destination folder where you want to store the exported file on the external device. 7. Enter the name for the file to export, then press ENTER. M610 Label Printer User Manual...
-
Page 80: Maintenance
3. Find the most recent M610 Label Printer firmware upgrade. 4. Download and run the .msi file. 5. After the installation is complete, open the Start menu on the computer and go to Brady Corp/M610 Firmware Upgrade Utility. 6. Follow the instructions on the screen. -
Page 81: Updating Printer Label Library Values
Update these values periodically to make sure the printer has data for any new label supplies. Also, update if you have ordered a custom label supply from Brady and it came with new values. You do not need to know your current database version. The printer displays a confirmation message showing the version numbers during the import process. -
Page 82: Cleaning The Printer
3. Remove excess Isopropyl alcohol with a dry, soft (non-scratching) cloth. Cleaning Internal Components Use a Brady Cleaning Kit PCK-5, disposable cleaning card (purchased separately) to safely and effectively remove all dirt, ribbon ink residue, adhesive, and other contaminants from the thermal print head, platen roller, and paper path. -
Page 83: Replacing The Cutter Cover
1. Grasp the cover from the top with the cut-out portion facing the display screen (away from the label supply well). 2. Pull the black flap forward, then insert tight up against the black flap with the metal tabs fitting over the outside of the cutter housing. 3. Press into place. M610 Label Printer User Manual... - Page 84 1. From inside the label supply well, slip your finger under the right side of the blade cover and gently pull up to unhook the blade cover. 2. Either replace the blade or clean it using a pre-moistened swab from the Brady Cleaning Kit PCK-6.
-
Page 85: Replacing The Printer Cover
2. Gently squeeze the other side of the cover enough so its locking tab can slip into the other locking groove of the printer. 3. Push down to snap the cover into place. Cover locking tab (raised tab) Printer locking groove (indention) M610 Label Printer User Manual... -
Page 86: Recycling The Label And Ribbon Cartridge
1. Using your thumbnail, press the clear plastic locking tab down. While holding the tab down, insert the blade of the screwdriver above the smart cell and slide downward. The smart cell easily slides out for removal. Insert screwdriver here Press here M610 Label Printer User Manual... -
Page 87: Dismantling The Cartridge
2. Grip the core just behind the black end cap (containing the smart cell). 3. With your thumb, apply pressure to the back of the black end cap to separate the cap from the label supply cartridge core. Apply pressure here Grip here M610 Label Printer User Manual... - Page 88 4. From the back side of the black end cap, press the blade of the screwdriver against the locking tabs, applying outward pressure. This will release the smart cell. 5. Slide the cardboard core off of the plastic cartridge core. M610 Label Printer User Manual...
-
Page 89: Recycling Components
Label Supply Cardboard Core Cardboard #20 C PAP Label Supply End Cap (Black) #5 PP Label Cartridge Core (Gray) #5 PP Ribbon Washer (Cork) Cork/Nitrile #51 FOR Ribbon Spring Stainless Steel #40 FE Ribbon Cap (Yellow) #9 ABS M610 Label Printer User Manual... -
Page 90: Troubleshooting
8 Troubleshooting Use the following table to troubleshoot and diagnose possible performance problems with your printer. If the corrective action suggested does not work, contact Brady’s Technical Support Group. See “Technical Support and Registration” on page Label Types & Label Supply Some label types require specific label supplies. -
Page 91: Error Messages
0.2 inch to the maximum of 40 inches. “Label and ribbon color are Ribbon color and label color are Replace ribbon or label supply. identical” the same. Printing will not be “Loading Supplies” on visible. page M610 Label Printer User Manual... - Page 92 See “Loading Supplies” on page If the ribbon is slack, remove the ribbon and rotate the take-up spool end clockwise. See “Loading” on page M610 Label Printer User Manual...
-
Page 93: Hardware
Check your local Brady website for ribbon and label supply compatibility. “Ribbon or cartridge is Switch locking lever to LOCKED Confirm that the locking lever is unlocked”... -
Page 94: Labels
14. If the problem persists, install a new ribbon. Faint print on labels Ribbon not advancing properly. Remove the ribbon and rotate the take-up spool end clockwise. “Loading” on page If the problem persists, install a new ribbon. M610 Label Printer User Manual... -
Page 95: Power On And Off (Printer Not Working)
Setup, Config menu. (See “Printer Configuration” on page • Attach the AC adapter to Printer not responding Battery is dead. provide power to the printer and charge the battery. • Install a new battery. M610 Label Printer User Manual... -
Page 96: A Keyboards
A Keyboards QWERTY M610 Label Printer User Manual... -
Page 97: Qwertz
Keyboards QWERTZ M610 Label Printer User Manual... -
Page 98: Azerty
Keyboards AZERTY M610 Label Printer User Manual... -
Page 99: Cyrillic
Keyboards Cyrillic M610 Label Printer User Manual... -
Page 100: B Using Ime For Asian Text
"learns" the characters and moves them up the list of character options. 6. Use the arrows to see more characters. Highlight the character that you want to place on the label and press ENTER. M610 Label Printer User Manual... -
Page 101: C Symbols
C Symbols Symbols are available for use on any label, regardless of the Label Type in use. See “Symbols” on page 42 for information on applying symbols to labels. Arrows DataComm M610 Label Printer User Manual... - Page 102 Symbols Electrical Exit M610 Label Printer User Manual...
- Page 103 Symbols Fire First Aid CLP/GHS Greek M610 Label Printer User Manual...
- Page 104 Symbols Home Electrical HSID Laboratory M610 Label Printer User Manual...
- Page 105 Symbols Mandatory Miscellaneous Packaging M610 Label Printer User Manual...
- Page 106 Symbols Prohibition Public Info Safety M610 Label Printer User Manual...
- Page 107 Symbols Warning WHMIS M610 Label Printer User Manual...
-
Page 108: D Licensing
A copy of the MIT License is included in this file. Other dependencies and licenses: Open Source Software Licensed Under the BSD License: -------------------------------------------------------------------- The msinttypes r29 Copyright © 2006-2013 Alexander Chemeris All rights reserved. M610 Label Printer User Manual... - Page 109 AUTHORS OR COPYRIGHT HOLDERS BE LIABLE FOR ANY CLAIM, DAMAGES OR OTHER LIABILITY, WHETHER IN AN ACTION OF CONTRACT, TORT OR OTHERWISE, ARISING FROM, OUT OF OR IN CONNECTION WITH THE SOFTWARE OR THE USE OR OTHER DEALINGS IN THE SOFTWARE. M610 Label Printer User Manual...
- Page 110 AUTHORS OR COPYRIGHT HOLDERS BE LIABLE FOR ANY CLAIM, DAMAGES OR OTHER LIABILITY, WHETHER IN AN ACTION OF CONTRACT, TORT OR OTHERWISE, ARISING FROM, OUT OF OR IN CONNECTION WITH THE SOFTWARE OR THE USE OR OTHER DEALINGS IN THE SOFTWARE. M610 Label Printer User Manual...
-
Page 111: E Regulatory Compliance
IFT notice: La operación de este equipo está sujeta a las siguientes dos condiciones: (1) es posible que este equipo o dispositivo no cause interferencia perjudicial y (2) este equipo o dispositivo debe aceptar cualquier interferencia, incluyendo la que pueda causar su operación no deseada. M610 Label Printer User Manual... - Page 112 5. Dispose of in accordance with local regulations. Turkey Turkish Ministry of Environment and Forestry (Directive on the Restriction of the use of certain hazardous substances in electrical and electronic equipment). Türkiye Cumhuriyeti: EEE Yönetmeliğine Uygundur M610 Label Printer User Manual...
- Page 113 Taiwan Restricted Substances Containment Status (RoHS Declaration) related to this product is available at www.BradyID.com/M610compliance. Importer: 香港商貝迪香港有限公司 臺北市中山區南京東路 3 段 101 號 4 樓 BRADY CORPORATION HONG KONG LIMITED 4th Floor, No. 101, Section 3, Nanjing East Road, Zhongshan District, Taipei City M610 Label Printer User Manual...
-
Page 114: Wireless Regulatory Information
(1) This device may not cause harmful interference and, (2) this device must accept any interference received, including interference that may cause undesired operation. RF exposure guidelines / Important note: This equipment complies with FCC SAR exemption limits set forth for an uncontrolled environment and properly used as instructed. M610 Label Printer User Manual... - Page 115 Frequency band(s) in which the radio equipment operates; 2.402 to 2.480GHz b. Maximum radio-frequency power transmitted in the frequency band(s) in which the radio equipment operates; < +20dBm EIRP (100mW) Japan MIC \ TELEC: 005-102490 当該機器には電波法に基づく、技術基準適合証明等を受けた特定無線設備を装着し ている。 M610 Label Printer User Manual...
-
Page 116: Hong Kong
Regulatory Compliance Wireless Regulatory Information Hong Kong HK0022200146 Indonesia 87572/SDPPI/2023 87141/SDPPI/2022 South Africa TA-2022/2856 M610 Label Printer User Manual...
Need help?
Do you have a question about the M610 and is the answer not in the manual?
Questions and answers