Table of Contents
Advertisement
Quick Links
Advertisement
Table of Contents

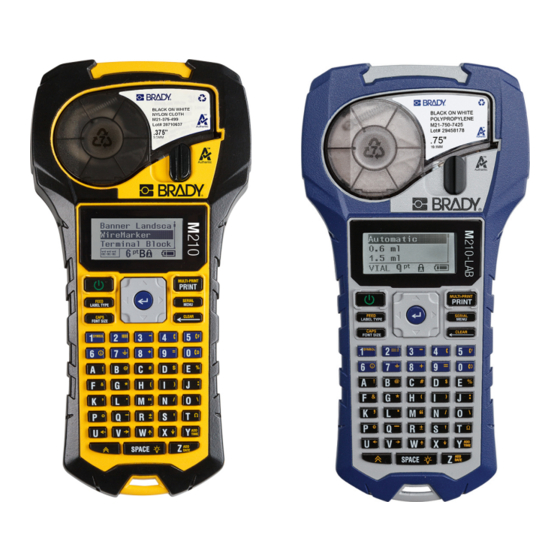
Related Manuals for Brady M210


Summary of Contents for Brady M210
- Page 1 USER MANUAL...
- Page 2 BRADY. While every precaution has been taken in the preparation of this document, BRADY assumes no liability to any party for any loss or damage caused by errors or omissions or by statements resulting from negligence, accident, or any other cause.
- Page 3 Our products are sold with the understanding that the buyer will test them in actual use and determine for him or herself their adaptability to his/her intended uses. BRADY warrants to the buyer that its products are free from defects in material and workmanship, but limits its obligations under this warranty to replacement of the product shown to BRADY’s satisfaction to have been defective at the time...
- Page 4 Asia Pacific: brady.co.uk/landing-pages/global-landing-page Registration Information To register your printer go to: • bradycorp.com/register Repair and Return If for any reason you need to return the product for repair, please contact Brady Technical Support for repair and replacement information. M210/M210-LAB User Manual...
-
Page 5: Table Of Contents
Printer Defaults ....................22 Language .....................22 Initial Language Setup .................23 Set Clock ......................23 Units ........................27 Cut Mode ......................28 Set Zero Style .....................29 Backlight Time ....................30 Cartridge ......................30 About ........................31 2 • Getting Started Entering Text......................32 Editing Text ......................32 M210/M210-LAB User Manual... - Page 6 Fixed Length ......................53 Custom Length ......................54 Vial ..........................55 WireMarker Label Type (M210) ................56 Terminal Block, Patch Panel (M210) ..............58 Panel Residential (M210)..................61 Flags (M210) ......................63 Breaker Box (M210) ....................65 6 • Troubleshooting...
- Page 7 Miscellaneous (Russian only) ................77 Greek......................... 78 Lab ..........................79 B • Supported ASCII Characters Barcodes ........................80 Code 39 ......................80 Code 128 ......................80 Datamatrix and QR Codes ..................80 C • Regulatory Compliance Agency Compliance and Approvals ..............81 M210/M210-LAB User Manual...
-
Page 8: Introduction
1 Introduction The M210/M210 LAB Label Printer is a rugged, highly mobile printer designed to print on a variety of continuous and pre-sized materials. With label widths from .25" to .75", this labeler meets the demands of rigorous job sites printing up to 100 labels per day. Key features include: •... -
Page 9: Unpack Your Printer
Power Source Kit; AC Adapter and Lithium Ion Battery (M210-PWRKIT) Accessories can be purchased separately or potentially as part of a kit. A variety of kits are available in different areas. Please visit your local Brady website to determine what kits are available in your country/region. -
Page 10: System Specifications
Dimensions 243.84 x 63.5 x 124.46 mm 9.6" x 2.5" x 4.9" Weight (with battery pack) 0.75 kg 1.66 lbs Note: The table below refers to the M210/M210-LAB Label Printer only. Consumable performance may vary. Environmental Operation Storage Temperature* (Printer) 4°... -
Page 11: External View
Navigation pad with ENTER key Cartridge eject button Set language and unit defaults Battery compartment Print key Finger tabs on battery compartment cover Note: There are NO PC connection ports on the printer, therefore it CANNOT be connected to a PC. M210/M210-LAB User Manual... -
Page 12: Power Source
Do not attempt to use batteries other than those recommended in this manual. WARNING! The M210 battery pack needs to be charged before use. ALWAYS use the correct charger and refer to the manual included with the pack. Do not disassemble or mistreat the battery pack. - Page 13 Wipe the cell or battery terminals with a clean dry cloth if they become dirty. After extended periods of storage, it may be necessary to charge the battery pack to obtain maximum performance. Retain the original product literature for future reference. M210/M210-LAB User Manual...
-
Page 14: Loading Aa Alkaline Batteries
AA batteries down on the battery door, then swing the or Ultimate Lithium AA compartment door, battery compartment door batteries). snapping it into place. up and out. (The door will come off.) Door Hinge Finger Tabs M210/M210-LAB User Manual... -
Page 15: Loading The Lithium Ion Battery Pack
Loading the Lithium Ion Battery Pack When using an M210-BATTERY Lithium Ion battery pack, please consult the instructions enclosed with the battery pack for the charging procedure. On the back of the printer, With the battery label Re-insert the battery door... -
Page 16: Remove Lithium Battery
This releases the out. (The door will come top of the battery from the off.) contacts. Bottom Contact Slot Finger Tab M210/M210-LAB User Manual... -
Page 17: Ac Power Adapter
AC Power Adapter The printer can be powered by an AC/DC power adapter. The AC/DC power adapter can also be used to recharge the M210-BATTERY battery pack outside of the printer. WARNING! Use only the 9V DC, Brady AC/DC adapters, shown below, for supplying power to the M210/M210-LAB Label Printers. -
Page 18: Charging The Lithium Ion Battery Pack
The lithium ion battery pack accessory cannot be charged in the printer. The battery pack must be removed from the printer and charged using the M210-AC AC adapter. To use the printer while charging the battery, insert 6 AA alkaline batteries in the battery compartment. -
Page 19: Media Cartridge
The M21 media and ribbon supplies are combined in a plastic cartridge for easy one-step loading and have been optimized for the M210/M210-LAB Label Printers. Cartridges are offered as continuous tapes between 0.25" - 0.75" (6.35mm - 19.1mm) or as pre-sized labels in multiple material types. -
Page 20: Changing The Label Cartridge
Store the cartridge in a cool, dry place. Note: The cartridge bay contains parts and assemblies that may be susceptible to damage by Electrostatic Discharge (ESD). When loading or unloading a cartridge, care must be taken so that devices are not damaged. M210/M210-LAB User Manual... -
Page 21: Recycling The Label Cartridge
These various components must then be recycled in the correct recycling bins. Materials • 1/4-inch blade flathead screwdriver • Safety Glasses • Safety Gloves CAUTION! ALWAYS wear Personal Protective Equipment when dismantling a cartridge. M210/M210-LAB User Manual... -
Page 22: Power On
Whenever the printer is powered on, the system performs an initialization process. Part of this process is recognizing the media installed. While it is possible to power on the printer without installing media, you must insert a media cartridge in order to continue. M210/M210-LAB User Manual... -
Page 23: Editing Screen
Status Information A status bar displays permanently at the bottom of the screen and contains the following: Text lines Caps lock (on) Label type Function key indicator (in use) Font size Battery life indicator Bold font (on) M210/M210-LAB User Manual... -
Page 24: Keypad
• Removes characters one at a time, moving to the left. Backspace Key • Backs out of menu options and functions, one screen at a time. Note: Depending on how deep you are into menus and functions, you may have to press Backspace multiple times. M210/M210-LAB User Manual... - Page 25 Function Description Caps Lock Key Acts as a toggle to lock text into uppercase as data is entered. Clear Key Clears data from the screen. Decimal Point Adds a decimal point or period. M210/M210-LAB User Manual...
-
Page 26: Function Keys
Accesses characters specific to some international alphabets with diacritical and accent marks incorporated into the characters. Add Date Key Inserts the current date, as set on the printer. Add Time Key Inserts the current time, as set on the printer. M210/M210-LAB User Manual... -
Page 27: Menus
To exit a menu without selecting it: 4. Press Backspace The various key functions and menu items are discussed in further detail in the Formatting section of this manual, starting on page M210/M210-LAB User Manual... -
Page 28: Data Fields
3. Use navigation keys to move off the field after entering data. 4. To accept data entered, press Enter Cancel a Menu or Data Field To cancel a menu or data field, without accepting changes: Press Backspace M210/M210-LAB User Manual... -
Page 29: Printer Defaults
Dutch Hungarian Turkish Portuguese Norwegian Croation Italian Polish M210-Lab Languages English - Default Dutch French Portuguese Spanish Italian German M210 Russian Languages Russian - Default English Note: Greek language characters are found under the International menu function. M210/M210-LAB User Manual... -
Page 30: Initial Language Setup
4. Using navigation keys, choose the desired language, then press Enter. Set Clock The following settings can be found under the Set Clock menu function. Set the Date and Time options upon initial start-up of the printer. M210/M210-LAB User Manual... - Page 31 4 digits for the year (e.g., YY = 22, YYYY = 2022). To set the date: 1. Press MENU. 2. Navigate to Set Clock, then press Enter 3. Navigate to Date Format, then press Enter. 4. Select the desired format, then press Enter. M210/M210-LAB User Manual...
- Page 32 5. Enter the date from the keyboard OR use the left/right navigation key to decrease or increase the date, one month, day, or year at a time. (The left navigation key decreases the number, the right navigation key increases the number.) 6. When finished setting the date, press Enter. M210/M210-LAB User Manual...
- Page 33 The date and time format you have chosen only displays when the date or time function is used. You can enter any date or time, in any format, from the keyboard. Entered data is not affected by the internal clock. M210/M210-LAB User Manual...
-
Page 34: Units
(as found under Label Type), the range of measurements will automatically configure to the units selected in the Menu function. To set the default units: 1. Press MENU. 2. Navigate to Units, then press Enter 3. Navigate to the desired units of measure, then press Enter. M210/M210-LAB User Manual... -
Page 35: Cut Mode
To set the Cut Mode: 1. Press MENU. 2. Navigate to Cut Mode, then press Enter 3. Navigate to the desired cut mode, then press Enter. M210/M210-LAB User Manual... -
Page 36: Set Zero Style
( ), as on a computer. To set the Zero Style default: 1. Press MENU. 2. Navigate to Set Zero Style, then press Enter 3. Navigate to the desired zero style, then press Enter. M210/M210-LAB User Manual... -
Page 37: Backlight Time
3. Navigate to the desired backlight options, then press Enter. Cartridge The Cartridge function provides a visual indicator of the amount of supply left in the cartridge. 1. Press MENU. 2. Navigate to Cartridge, then press Enter M210/M210-LAB User Manual... -
Page 38: About
About About identifies the printer type and the version of firmware installed. 1. Press MENU. 2. Navigate to About <printer name>, then press Enter M210/M210-LAB User Manual... -
Page 39: Getting Started
The error message “Cannot Fit” displays to indicate that the width of the label cannot accommodate any more text. To correct the error, delete some of the text, add another line of text, or decrease the font size. M210/M210-LAB User Manual... -
Page 40: Deleting Text
If a function does not operate under current conditions, an error or information message displays indicating the problem and/or offers situational advice. Read the message carefully and follow the instructions. (A list of error messages can be found in the Troubleshooting section of this manual, starting on page 67.) M210/M210-LAB User Manual... -
Page 41: Font Size
Font Size Note: This printer provides a single typeface – the Brady Fixed Width Condensed typeface – that has different sizes and weights. Font size can be applied before or after data is entered, regardless of where the cursor is positioned. -
Page 42: Printing A Label
2. In the Copies: field, enter a numeric value for the number of copies desired OR use left/right navigation keys to decrease or increase the number of copies. 3. When ready, press Enter 4. Either press the cutter levers between labels or press the print button to print the next label without cutting. M210/M210-LAB User Manual... -
Page 43: Formatting
• M210 = 194 symbols • M210 with Cyrillic keyboard = 218 symbols • M210-LAB = 131 symbols To add a symbol to the label: 1. Position the cursor at the point where you want the symbol to display. -
Page 44: Remove A Symbol
The symbol displays with the same font size that is currently in use. Remove a Symbol The symbol is the same as any other character. To remove a symbol: 1. Position the cursor to the right of the symbol. 2. Press Backspace M210/M210-LAB User Manual... -
Page 45: International Character Set
To add a character from the International Character Set: 1. Position the cursor where you want the international character to display. Press International key Press MENU . Navigate to International, then press Enter 2. Navigate to the desired international character, then press Enter. M210/M210-LAB User Manual... -
Page 46: Date And Time
1. Place the cursor at the position on the label where you want to stamp the date or time. 2. Press MENU. 3. Navigate to Timestamp, then press Enter 4. Navigate to Insert Time or Insert Date, then press Enter. M210/M210-LAB User Manual... -
Page 47: Barcode
The barcode displays on the screen as a rectangle around the barcode data. To exit out of the barcode data: 5. Press the right navigation key to move off the barcode. Entering barcode data Cursor moved off the barcode data (cursor inside barcode) M210/M210-LAB User Manual... -
Page 48: Datamatrix And Qr Codes
Barcode creation is only available for select ASCII characters, as shown in Appendix B on page The M210/M210-LAB Label Printer supports Datamatrix and QR Codes in two different sizes, with 0.59 inches (15 mm) being the minimum supported diameter that a Brady scanner can read. - Page 49 5. Press the right navigation key to move off the barcode (outside of the box) and stop adding data to the code. Editing either type of code is the same steps as editing a barcode as shown on page M210/M210-LAB User Manual...
-
Page 50: Serialization
Sequencing progresses only until the End Value is reached, it cannot go over the End Value. When the Increment Value is larger than 1, it may produce a sequence that does not print the End Value. Simple serialization 2: Example: Start Value: Increment: End Value: Produces: 1, 3, 5, 7, 9 M210/M210-LAB User Manual... -
Page 51: Using Letters In Serialization
11, which is higher than the end value of 10. Note: The M210 Label Printer can only process simple serializations, as in the above two examples. It can also process serializations using single or multiple letters. -
Page 52: Add Serialization
(the cursor does not have to be in the serialized data set): 1. Press SERIAL The Serial dialog box displays with the current values listed. 2. Navigate to the value fields to change and enter the new value. 3. When finished, press Enter M210/M210-LAB User Manual... -
Page 53: File Management
M210 Label Printer are designated and separated by the position number (1 - 12) so same names are allowed. Save a File You can save a file internally on the M210. The saved file retains the label data and data attributes. This file is available for reuse whenever needed. To save labels as a file: 1. -
Page 54: Replace (Overwrite) A File
A message displays requesting confirmation on replacing the previous file. To overwrite the previous file: 5. Navigate to Yes, then press Enter. 6. In the File Name? field, enter a name for the file, then press Enter . M210/M210-LAB User Manual... -
Page 55: Open A File
Only one file can be displayed on the screen at a time. When opening a saved file, if the Editing screen contains data, the opened file overwrites that data. If the previous data on the screen was not saved, that data is lost. M210/M210-LAB User Manual... -
Page 56: Delete A File
Note: If you enter ‘No’, you will be returned to the list of saved files. You can select another file to delete OR press [BACKSPACE] to move out of the File>Delete menus and return to the Editing screen. When a file is deleted, it is removed from the system and is no longer available for use. M210/M210-LAB User Manual... -
Page 57: Label Types
5 Label Types Label types provide templates that guide and control the layout for label formats and may require specific media. The label types available are: M210 and M210-Russian The M210-LAB Label Printer Label Printer • Banner Portrait The printer is intended for •... -
Page 58: Banner Portrait Label Type
When you are using a specific label type, clearing the data removes the data you entered but the specific label type parameters remain. To exit out of the specific label type and return to the general editing mode of the M210/M210-LAB Label Printer, select the Banner Portrait label type. 1. Press LABEL TYPE. -
Page 59: Banner Landscape Label Type
50 characters per line. Horizontal text is the only option available for use with pre-sized labels. 4. On the Editing screen, enter the text string. Banner Landscape label type - text on screen Banner Landscape label type - text printed out M210/M210-LAB User Manual... -
Page 60: Fixed Length
“Cannot Fit” displays and you are returned to the label. To correct the error, you can delete text (see page 33), change the font size (see page 34), or select a larger fixed length label size by performing the above three steps. M210/M210-LAB User Manual... -
Page 61: Custom Length
“Cannot Fit” displays and you are returned to the label. To correct the error, you can delete text (see page 33), change the font size (see page 34), or select a longer custom length label size. M210/M210-LAB User Manual... -
Page 62: Vial
4. Select the way you want the data to print on the label - landscape (horizontal) or portrait (vertical), then press Enter. Landscape (horizontal on printed label) Portrait (vertical on printed label) 5. Enter the data to display on the vial label. M210/M210-LAB User Manual... -
Page 63: Wiremarker Label Type (M210)
WireMarker Label Type (M210) The WireMarker label type is designed to repeat entered data down the length of the label. The data repeats as many times as possible, considering the font size and the wire size selected. WireMarker label type - text on screen WireMarker label type - printed text All media, except Permasleeve, support WireMarker label types. - Page 64 WireMarker label type - multiple lines as WireMarker label type - multiple lines as displayed on screen displayed on print out M210/M210-LAB User Manual...
-
Page 65: Terminal Block, Patch Panel (M210)
Terminal Block, Patch Panel (M210) Terminal Block and Patch Panel label types are designed to be used with any media, except SelfLam or Permasleeve. If SelfLam or Permasleeve is installed, these label types are not available. To use Terminal Block or Patch Panel: 1. - Page 66 However, all labels in the serial sequence will print out. Likewise, if you delete the start value on the editing screen, the entire serialization sequence will be deleted. To delete the serialization sequence: 12. Press Backspace A confirmation message displays. To delete the entire sequence: 13. Press Enter. M210/M210-LAB User Manual...
- Page 67 15. Use the up and down navigation keys to navigate to the first numbered data field and enter the identifying information for that terminal. 16. When on a terminal number, use the left or right navigation key to toggle to another terminal number. M210/M210-LAB User Manual...
-
Page 68: Panel Residential (M210)
Panel Residential (M210) Allows you to create labels for residential breaker box panel/door using pre-defined or user-defined terms. Labels print portrait if more than one line is used. For the best fit on a standard residential breaker box use font size 9 on 0.25 inch (6.35mm) width media. - Page 69 10. After the last label has been previewed/changed, press Enter to add additional labels or Backspace to return to the last panel. 11. Press PRINT. Exit Panel Residential without creating labels by pressing the Backspace twice. The options you already selected will be available the next time you enter the feature. M210/M210-LAB User Manual...
-
Page 70: Flags (M210)
9.99 inches (253.7 mm). By entering the diameter of the wire or cable, the system automatically calculates an additional length of label to allow complete wrap of the wire/cable with additional label material left for the flag. M210/M210-LAB User Manual... - Page 71 8. On the area number, use the left/right navigation keys to toggle between Area 01 and Area 02. 9. When on the desired area, use the down navigation key to move to the line number in that area and enter the text to display in that area of the flag. M210/M210-LAB User Manual...
-
Page 72: Breaker Box (M210)
Breaker Box (M210) Breakers are usually arranged in two columns or along one row, depending on geographic regions. The breaker positions are numbered left-to-right or top-to-bottom, depending on label orientation. This numbering system is universal across various competing manufacturers of breaker panels. - Page 73 11. Navigate to the first numbered data field and enter the identifying information for that breaker. 12. Repeat Steps 7 through 10 for each breaker. Breaker box editing screens Printout of breaker box, with partition turned on (6 breakers, 1 and 2 poles) (notice space between breakers based on number of poles) M210/M210-LAB User Manual...
-
Page 74: Troubleshooting
6 Troubleshooting Use the following table to troubleshoot and diagnose possible performance problems with your M210/M210-LAB Label Printer. If the corrective action suggested does not work, contact Brady’s Technical Support Group (see page 67). Problem Cause Corrective Action Hardware Keyboard works intermittently or... - Page 75 • Use tweezers or a needle-nose pliers to clear label jam. WARNING The print head is susceptible to damage. Using metal objects to remove jams can scratch, dent, or crack the print head. Use every precaution when clearing a jam. M210/M210-LAB User Manual...
- Page 76 LCD reverts to previous label Battery is low. If using batteries, replace with 6 new text. AA batteries. OR, if using the lithium ion battery, remove the battery from the printer and recharge using the AC adapter. M210/M210-LAB User Manual...
- Page 77 • Reprint the label(s). Printing from PC The M210/M210-LAB printer To obtain a Brady printer that can be CANNOT be connected to a PC, connected to a PC, contact Brady therefore you cannot print PC customer service at label files on the printer.
- Page 78 (or the next label under the print head. residual burn line) to appear on the tape. Rotate spool clockwise to advance ribbon M210/M210-LAB User Manual...
- Page 79 Clean the platen roller. (See page 75 for cleaning information.) Error - “No / Invalid Cartridge” No cartridge or non-Brady brand Verify that Brady media cartridge cartridge installed. installed. Damaged circuit board on • Replace label/media roll.
- Page 80 This position is fixed and cannot be changed. Cannot add checksum character The printer does not allow No action required. in barcode. checksum characters to be used. M210/M210-LAB User Manual...
- Page 81 Problem Cause Corrective Action Menu does not display all label The M210/M210-LAB only Insert the proper label material types. displays the label types that will (cartridge) for the labels you want to work with the installed label produce. material (cartridge). Fewer label...
-
Page 82: Cleaning The Printer
3. Blow debris off of the sensor using a can of compressed air or a lint-free swab. 4. Using a lint-free swab moistened with isopropyl alcohol (or a swab from the Brady PCK-6 Cleaning Kit), gently swab the print head. -
Page 83: A Symbols
Symbols for all enabled applications are available for use on any label, regardless of the application/label type in use. See page 36 for information on how to apply symbols to your labels. Assorted Warning Electrical (M210 and Russian only) Home Electrical (M210 and Russian only) Arrows DataComm (M210 and Russian only) M210/M210-LAB User Manual... -
Page 84: Miscellaneous
Miscellaneous ¿ ¡ < > £ € Miscellaneous (Russian only) % & " M210/M210-LAB User Manual... -
Page 85: Greek
Greek Note: Available Greek symbols will depend on version of printer. M210/M210-LAB User Manual... -
Page 86: Lab
If a symbol cannot print in 6 pt font the “Cannot Fit” error message will display. Change font size to 9 pt. Some symbols will display as in the editor. M210/M210-LAB User Manual... -
Page 87: B Supported Ascii Characters
B Supported ASCII Characters Barcodes When creating barcodes reference the tables below for supported characters. Code 39 (space) Code 128 (space) " & < > Datamatrix and QR Codes (space) " & < > M210/M210-LAB User Manual... -
Page 88: C Regulatory Compliance
Connect the equipment into an outlet on a circuit different from that to which the receiver is connected. • Consult BRADY Technical Support for help. Changes or modifications not expressly approved by the party responsible for compliance could void the user’s authority to operate the equipment. - Page 89 4. Remove the battery from the board and dispose of in accordance with local regulations. Turkey Turkish Ministry of Environment and Forestry (Directive on the Restriction of the use of certain hazardous substances in electrical and electronic equipment). Türkiye Cumhuriyeti: EEE Yönetmeliğine Uygundur M210/M210-LAB User Manual...
- Page 90 Mexico Energy Statement: Consumo de energia en operacion: 3.35 Wh (Energy consumption in operation mode) Consumo de energia en modo de espera: 0.1 Wh (Energy consumption in standby mode) M210/M210-LAB User Manual...
Need help?
Do you have a question about the M210 and is the answer not in the manual?
Questions and answers
What is the A lock symbol
The "A" lock symbol on the Brady M210 indicates that the label cassette is authentic and compatible with the printer. It helps users identify genuine Brady materials for proper functionality.
This answer is automatically generated
@Lamar The A with the lock means, all caps is activated