Advertisement
Table of Contents
Please note: Headlights must be opened before proceeding with installation. This process
can be completed by heating and prying the lens from the housing. We recommend viewing
example videos online to understand the process however, professional installation is strongly
recommended. Please contact Diode Dynamics if you need assistance locating an installer.
1. Once the headlight is opened, mount the halo/strip using beading wire or JB Weld. Be sure
to mount it in a location away from any light source to avoid heat damage.
2. Next, route the wires through any shroud or bezel to the back of the headlight, sealing any
holes that you may create.
3. Connect the halo/strip connector to the driver and then connect the driver to the pigtail.
See diagram below. Next, tap the bare wires on the pigtail to 12V power and ground. This will
dictate when the panels turn on. See the wire function in the table below.
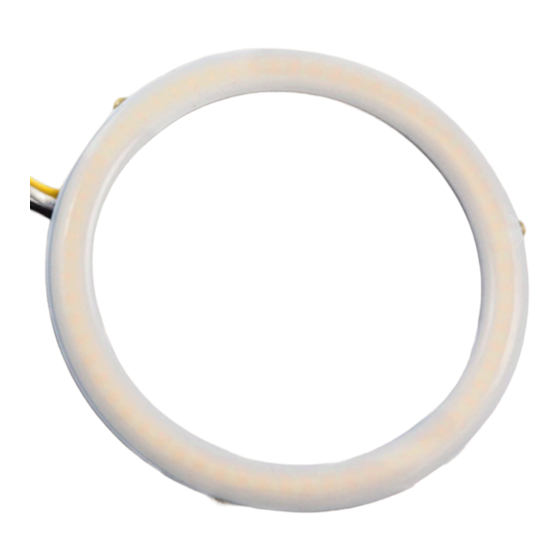
HD Halo
IMPORTANT:
DO NOT plug the LED panel directly into pigtail without the driver. The
LEDs must be plugged into the driver first to control the power.
4. Mount driver and tuck all wires. Driver should be mounted outside of headlight for
serviceability, in a location away from the engine block to avoid excessive heat buildup.
5. Test thoroughly, reseal headlight and reinstall onto vehicle.
HD Halo/Strip Installation Guide
D
D
HALO
Thank you for your purchase of the new HD LED Halos
or Strips! With this product, you will be able to customize
your vehicle to match your unique style!
DRIVER
TM
DD WIRE
FUNCTION
WHITE
Low Power, 50% Brightness
BLACK
Ground
YELLOW
Turn Signal
RED
High Power, 100% Brightness
3 YEAR
WARRANTY
Advertisement
Table of Contents

Related Manuals for Diode Dynamics HD Halo


Summary of Contents for Diode Dynamics HD Halo
- Page 1 Please contact Diode Dynamics if you need assistance locating an installer. 1. Once the headlight is opened, mount the halo/strip using beading wire or JB Weld. Be sure to mount it in a location away from any light source to avoid heat damage.
- Page 2 Check out the collection of accessory lighting we offer.
Need help?
Do you have a question about the HD Halo and is the answer not in the manual?
Questions and answers