Epson Stylus Photo RX500 User Manual
C11c544001
Hide thumbs
Also See for Stylus Photo RX500:
- Basic operation manual (99 pages) ,
- User manual (20 pages) ,
- Owner's manual (15 pages)
Table of Contents
Advertisement
Advertisement
Table of Contents

Subscribe to Our Youtube Channel
Related Manuals for Epson Stylus Photo RX500


Summary of Contents for Epson Stylus Photo RX500
- Page 1 Epson Stylus Photo RX500 ® User’s Guide...
-
Page 2: Responsible Use Of Copyrighted Materials
(excluding the U.S.) failure to strictly comply with Seiko Epson Corporation’s operating and maintenance instructions. Seiko Epson Corporation shall not be liable for any damages or problems arising from the use of any options or any consumable products other than those designated as Original Epson Products or Epson Approved Products by Seiko Epson Corporation. -
Page 3: Table Of Contents
Contents Welcome! ..........7 What Your RX500 Can Do . - Page 4 Using Epson Smart Panel ........58...
- Page 5 Epson Support ........
- Page 6 ENERGY STAR Compliance ......130 Epson America, Inc. Limited Warranty ......131 Index .
-
Page 7: Welcome
(Your digital camera must also support DPOF.) Includes software that lets you scan and edit text, or scan a photo and attach it to an e-mail. You can also upload photographs, free of charge, to Epson’s photo-sharing web site. -
Page 8: What Your Rx500 Can Do
Copy: Use the RX500 as a copy machine to create duplicates of black and white or color documents. See page 19. Copy: Use Epson Smart Panel™ Copy Center to create copies. See page 28. Print: See page 36 (Windows ®... - Page 9 RX500 and connect it to your computer. See page 85. Scan and restore color: Restore color and fix other flaws using Epson Scan. See page 68. Print and restore color: Restore color when scanning and printing with the Reprint Photos option.
-
Page 10: About Your Documentation
About Your Documentation To set up your RX500 and install its software, see the Start Here sheet. For easy instructions on how to copy a 4 × 6-inch photo or print images from your digital camera’s memory card, see the How to Copy and Print guide. This book contains system requirements, important safety information, your warranty, and instructions on: Loading paper... -
Page 11: About Your Software
About Your Software Your Epson CD-ROM includes all the software you need to scan, copy, or print from your computer. See the Start Here sheet for installation instructions. Your printer driver documents look. You can’t print from your computer without it. - Page 12 Welcome!
-
Page 13: Loading Paper
Loading Paper Follow the guidelines below to load single sheets in the RX500. For a list of Epson papers and ordering information, see the inside back cover of this manual. Loading Single Sheets 1. Open the output tray. Output tray 2. - Page 14 3. Pinch the sides of the left edge guide together as you slide the guide all the way to the left. 4. Insert your paper against the right edge of the sheet feeder, behind the tab. Note: Don’t place the paper in front of the feeder guard. 5.
- Page 15 Don’t load paper above the arrow on the left edge guide. Load letterhead or preprinted paper top edge first. Don’t load paper above the arrow on the left edge guide. To load Epson ink jet papers, follow the guidelines below. Check the paper package for additional instructions. Paper type...
- Page 16 Paper type Epson Matte Paper Heavyweight ™ PremierArt Matte Scrapbook Photo Paper for Epson Epson Photo Paper Epson All-Purpose Glossy Photo Paper Epson Glossy Photo Paper Epson Premium Glossy Photo Paper Epson Premium Semigloss Photo Paper Epson Semigloss Scrapbook Photo Paper...
-
Page 17: Loading Envelopes
Loading Envelopes 1. Open the output tray. 2. Flip the feeder guard forward. Feeder guard 3. Load up to 10 envelopes at a time against the right edge of the sheet feeder, beneath the tab. Always load envelopes short edge first, with the flap edge to the left and the printable side up. - Page 18 4. Press the sides of the left edge guide together and slide it against the envelopes (but not too tightly). Note: For best results, press each envelope flat before loading, or load one envelope at a time. Avoid envelopes that are too thin; they may curl during printing. Select the following settings when printing on envelopes: as the Type (Windows) or Media Type (Macintosh) setting Plain paper...
-
Page 19: Copying
Copying Follow the instructions in this chapter to use your RX500 as a photocopier, or to copy with a computer using the Epson Smart Panel software. “Copying Without a Computer” below “Copying With a Computer” on page 28 Copying Without a Computer 1. - Page 20 3. Close the scanner lid. Note: To copy a thick document such as a book, you can remove the scanner lid. Open the scanner lid completely. Then disconnect the cord from the TPU connector and pull the lid straight up. Turn on the RX500 and gently press down the original to keep it flat on the scanner glass as you scan.
- Page 21 6. Pinch the sides of the left edge guide together as you slide the guide all the way to the left. 7. Insert your paper against the right edge of the sheet feeder, behind the tab. Note: Don’t place the paper in front of the feeder guard. 8.
- Page 22 Text Number of copies When you’ve loaded Plain paper Epson Premium Bright White Paper Epson Photo Quality Ink Jet Paper Epson Photo Quality Ink Jet Cards Epson Iron-on Transfer Paper Epson Photo Quality Self Adhesive Sheets Epson Glossy Photo Paper...
- Page 23 14. Press the bottom left button to choose print quality. Choose this quality setting Draft Text Photo Best 15. Press the top right button to set the size of your printed copy. Choose this setting Actual Auto Fit Page Letter 4 ×...
-
Page 24: Changing The Copy Layout
To cancel a copy job in progress, press the y the LCD screen and your page is ejected. Changing the Copy Layout The RX500 offers you several layouts for copying. 1. Press the Menu Note: This menu is only available in Copy mode. If you don’t see Copy Menu on the screen, press the Copy button, then press the Menu button. - Page 25 Wallet Photo Prints nine wallet-size copies of the photo on the page * BorderFree is only available on selected Epson photo papers. ** If you notice reduced print quality at the bottom of your copy, use the standard setting. Copying Without a Computer...
-
Page 26: Making Copies Lighter Or Darker
Making Copies Lighter or Darker 1. Press the Menu 2. Press the bottom left button (next to Press until you see Copy Density 3. Press the button. You see this screen: 4. Press the l Select your copy, or the r darken it. -
Page 27: Adjusting The Copy Size Manually
Adjusting the Copy Size Manually You can manually adjust the size of your copies from 25% to 400%: 1. Press the button to access the Copy Menu. Menu 2. Press the bottom left button (next to Zoom Press until you see Optional Zoom 3. -
Page 28: Copying With A Computer
Copying With a Computer Follow these steps to use Epson Smart Panel to copy with your computer. Note: Some features, such as PhotoEnhance from the computer. 1. Press the P 2. Open the scanner lid. 3. Place your photo or document face down on the glass, in the upper left corner. - Page 29 Note: To copy a thick document such as a book, you can remove the scanner lid. Open the scanner lid completely. Then disconnect the cord from the TPU connector and pull the lid straight up. Turn on the RX500 and gently press down the original to keep it flat on the scanner glass as you scan.
- Page 30 Panel. Note: You can also open Smart Panel in Windows by selecting Start > All Programs or Programs > EPSON Smart Panel > EPSON Smart Panel. On Macintosh, you can open Smart Panel from the Applications folder. Copying icon on your desktop to open Smart...
- Page 31 12. Click the Smart Panel Note: The screens may appear slightly different on Macintosh systems. 13. Adjust any of the following copy settings: : Choose Source Type content of your original. Reduce/Enlarge and your copy, or click enlarge your copy by a specific amount. Lighten/Darken Number of Copies copies.
- Page 32 16. Click the Image Adjust Copying button to check your input and output devices: EPSON Stylus Photo RX500 to change the displayed print settings (such as a different button to enhance your image or add effects: Click here as the input and output...
- Page 33 17. Adjust any of the following settings: Enable or disable Automatic Document Enhancement. (This feature automatically enhances the color and appearance of your copies.) Note: Disabling the Automatic Document Enhancement feature may cause a gray or light colored background to appear on your copies. Add a sepia, blue, or black filter.
- Page 34 Copying...
-
Page 35: Printing From A Computer
Whenever you print, make sure you do the following: Use the right paper. For the best-looking photos, most vivid colors, and greatest detail, always use genuine Epson papers and ink. Choose the right printer settings Your printer automatically adjusts for each type of paper. That’s why printer settings are important. -
Page 36: Printing In Windows
After you create a document in a software program, follow these steps to print it using the basic printer settings: 1. From the File menu, click 2. Make sure EPSON Stylus Photo RX500 3. Click the Preferences (If you see a... - Page 37 4. Select the following in the Printing Preferences or Properties window: Select your paper type Select your paper size Select your document or image orientation 5. Select from these Quality Options: for rough drafts with reduced print quality Draft for text-only documents and higher text quality Text for documents with text and graphics at higher quality Text &...
-
Page 38: Selecting Default Settings
During printing, this window appears and shows the progress of your print job. You can use the buttons to cancel, pause, or resume printing. You can also see how much ink you have left. Selecting Default Settings Your printer settings apply only to the program you’re currently using. If you want, you can change the Windows default printer settings for all your programs. -
Page 39: Customizing Windows Print Settings
Customizing Windows Print Settings You can use advanced settings for color matching, printing at the highest resolution available, or selecting a variety of special effects and layouts. 1. Click the Advanced Properties window. If you see a warning message, click 2. - Page 40 3. Once you’ve finished selecting advanced settings, you can: Click to save your settings, return to the Print window, and print. Click the Basic Click the Page Layout options. 4. Select the following page layout settings as necessary: Flip or rotate your image Select resizing options here;...
-
Page 41: Printing Photos In Windows
You can print your photos with no margins, extending the image all the way to the edges of the page. Although borderless printing is a bit slower (especially near the edges), you get beautiful snapshots or enlargements, without trimming. Paper name Epson Premium Glossy Photo Paper Epson Matte Paper Heavyweight... - Page 42 You see the following window: Select to print without borders 3. Select Photo 4. Select one of the following paper types: Premium Glossy Photo Paper Matte Paper-Heavyweight Glossy Photo Paper Premium Semigloss Photo Paper Premium Luster Photo Paper 5. Click the Borderless Note: If you need to adjust the amount of image expansion necessary for borderless...
-
Page 43: Printing On A Macintosh
Printing on a Macintosh After you create a document in a software program, follow the steps in one of these sections to print it using basic print settings: For Macintosh OS X, see the next section. For Macintosh OS 8.6 to 9.x, see page 47. Printing With OS X If you’re using an OS X-compatible printing application, follow the steps below to print your document. - Page 44 5. Select from the File menu. You see a window like this: Print 6. Make sure Stylus Photo RX500 sure you select the same printer you chose in the Page Setup window. 7. Choose Print Settings Printing From a Computer is selected in the Printer list.
- Page 45 8. Select the following print settings as necessary: : Select the paper type for the paper you’ve loaded. See Media Type page 54 for guidelines. : Select Color Color (for black text documents). Black : Select this option to have the printer software automatically Automatic select the best settings for your paper type.
- Page 46 You see a screen like this: 13. Monitor the progress of your print job or do one of the following: Select the print job in the Status list, then click Select the print job, then click Select a print job marked “Hold” and click If multiple print jobs are listed, select a print job, then click the Priority arrow as necessary to reorder the jobs.
-
Page 47: Printing With Os 8.6 To 9.X
Printing With OS 8.6 to 9.x Before you begin, make sure you’ve installed your software and selected the icon in the Chooser, as described on your Start Here sheet. SP RX500 Series 1. From the File menu, select Select your paper size 2. - Page 48 (for color documents and black and white Color (for black text documents). Black : Select this Mode option to have the printer software : Use the slider to choose higher quality or faster printing. to preview your print job. Preview EPSON Monitor IV...
-
Page 49: Customizing Macintosh Print Settings
Customizing Macintosh Print Settings You can use advanced settings to print at the highest available resolution, or adjust the print speed and layout. Follow the instructions in these sections: “Customizing OS X Print Settings” below “Customizing OS 8.6 to 9.x Print Settings” on page 50 Customizing OS X Print Settings 1. -
Page 50: Customizing Os 8.6 To 9.X Print Settings
Customizing OS 8.6 to 9.x Print Settings 1. Open the printer settings window, click button that appears. 2. Select these advanced settings as necessary: Select color management settings here Click here to select Photo RPM (5760 × 1440 dpi) for the best print quality on selected paper types Select various... -
Page 51: Printing Photos On A Macintosh
You can print your photos with no margins, extending the image all the way to the edges of the page. Although borderless printing is a bit slower (especially near the edges), you get beautiful snapshots or enlargements, without trimming. Paper name Epson Premium Glossy Photo Paper Epson Matte Paper Heavyweight... -
Page 52: Printing Photos With Os X
Printing Photos With OS X 1. Start your application and open your photo file. 2. From the File menu, select 3. Select Stylus Photo RX500 (Sheet Feeder - Borderless) for list. 4. Choose your Paper Size Note: When printing borderless photos, select one of the supported paper sizes listed on page 51;... -
Page 53: Printing Photos With Os 8.6 To 9.X
10. Select one of the following paper types as the Media Type setting: Premium Glossy Photo Paper Matte Paper-Heavyweight Glossy Photo Paper Premium Semigloss Photo Paper Premium Luster Photo Paper 11. Click Print Printing Photos With OS 8.6 to 9.x 1. -
Page 54: Selecting Your Paper Type
Epson Photo Quality Ink Jet Cards Epson Photo Quality Self Adhesive Sheets Epson Matte Paper Heavyweight Epson Double-Sided Matte Paper PremierArt Matte Scrapbook Photo Paper for EPSON Epson Photo Paper Epson Glossy Photo Paper Epson All-Purpose Glossy Photo Paper Epson Glossy Photo Greeting Cards... - Page 55 For this paper Epson Premium Semigloss Photo Paper EPSON ColorLife Photo Paper EPSON Semigloss Scrapbook Photo Paper EPSON Ink Jet Transparencies EPSON Photo Stickers Select this setting Premium Semigloss Photo Paper ColorLife Photo Paper Ink Jet Transparencies Selecting Your Paper Type...
- Page 56 Printing From a Computer...
-
Page 57: Scanning To A Computer
If you would like to create digital files from printed documents, photos, or film and work with them on your computer, follow the instructions in this chapter: “Using Epson Smart Panel” on the next page “Scanning to a File” on page 60 “Scanning From a Program”... -
Page 58: Using Epson Smart Panel
Using Epson Smart Panel Epson Smart Panel is an easy, step-by-step interface that lets you scan your photo or document, then launch a variety of programs on your computer to handle the scanned file. 1. To start Smart Panel, double-click the your desktop. - Page 59 Scans a photo or document and attaches it to an e-mail so that you can send it right away. Scans a photo and uploads it to Epson’s photo-sharing web site. ® button in Smart Panel...
-
Page 60: Scanning To A File
Scanning to a File Follow these steps to scan directly to a file on your computer: 1. Open the scanner lid. 2. Place your photo or document face down on the glass in the upper left corner. Move your document about 0.1 inch from the top and side edge so your entire document is scanned. - Page 61 5. Type a name for your file in the Prefix box. Note: If you don’t change the name, Epson Scan assigns the name imgxxx, where xxx is a three-digit number in a sequence (for example, img001, img002, etc.) Whether you change the name or not, all of the image files saved to your computer using Epson Scan are assigned consecutive numbers.
- Page 62 7. Click Epson Scan starts and scans your file to the location specified. The default location for your scanned images is: Windows XP and 2000: C:\Documents and Settings\epson\My Documents Windows Me and 98: C:\My Documents Macintosh OS X: Users:Home:Pictures (“Home” can be any name you’ve given your computer.)
-
Page 63: Scanning From A Program
Note: Epson Scan starts in the mode you used last, but you can change the mode at any time. Tip: You can restore color in your old photos. See page 68 for details. - Page 64 3. Close the scanner lid. 4. Start your application. 5. Open the File menu and choose Stylus Photo RX500 6. Epson Scan starts previewing your image in Full Auto Mode. To switch modes, click the Click Pause 7. Select Home Mode advanced scan settings) from the Mode menu at the top of the screen.
- Page 65 To change back to Full Auto Mode, select Full Auto Mode from the Mode pull-down menu at the top of the screen. 8. If you don’t see an automatic preview of your scan to the right of the EPSON Scan window, click the After a moment, your image appears in the Preview window.
- Page 66 10. Choose Document Type the type of image you’re scanning and the way you want to print or view it. (Click on the Epson Scan screen for detailed information about all the Help available settings.) Note: The Document Type you select determines the other options that appear in the Epson Scan window.
-
Page 67: Adjusting The Scan Area (Marquee)
Adjusting the Scan Area (Marquee) Once you create a marquee on your preview image, you can use it to crop the area you want to scan. You can create a marquee on each preview image, if you’re scanning more than one at a time. To move the entire marquee, click and hold your mouse button inside the outlined area and drag the marquee to where you want it. -
Page 68: Restoring Color To Old Photographs
Restoring Color to Old Photographs You can use Epson Scan to restore color to faded photographs and open them in an application or save them to a file on your computer. If you want to restore and print one of your old photos, the easiest way is to use the Reprint Photos feature in Smart Panel (see page 73). - Page 69 4. Open the output tray. 5. Flip the feeder guard forward. Feeder guard 6. Pinch the sides of the left edge guide together as you slide the guide all the way to the left. 7. Insert your paper against the right edge of the sheet feeder, behind the tab. Note: Don’t place the paper in front of the feeder guard.
-
Page 70: Restoring And Saving Photos To Your Computer
1. Do one of the following: Windows: Select EPSON Scan Macintosh: Double-click Scanning to a Computer Start > All Programs in the EPSON Scan Always load paper short edge first Programs > EPSON Scan > folder. Applications... - Page 71 2. Epson Scan starts previewing your image in Full Auto Mode. To switch modes, click the Pause Click Pause 3. Select Professional Mode Epson Scan previews your image and displays the Professional mode window. button at the bottom of the screen.
- Page 72 4. If you don’t see an automatic preview of your scan to the right of the Epson Scan window, click the After a moment, your image appears in the Preview window: Click the Auto Detect icon Note: If you placed more than one photo on the scanner glass, you see multiple images in the Preview window.
-
Page 73: Restoring And Printing Photos
1. Double-click the Smart Panel. 2. Click the Reprint Photos icon. You see this screen: 3. Make sure the EPSON Stylus Photo RX500 and printer. If it isn’t, click the the scanners or printers installed on your computer. Select from the list. -
Page 74: Scanning Slides And Film
Note: You can scan 35 mm color film or slides in Full Auto Mode, Home Mode, or Professional Mode using EPSON Scan. To scan black and white negative film, use Home Mode or Professional Mode. 1. Open the scanner lid and slide out the reflective mat. Set the mat aside so you can reinstall it for scanning reflective documents later. - Page 75 2. Remove the film holder from its storage place. (Remember to replace the film holder when you’re done using it.) 3. If you’re scanning slides, go to step 5. If you’re scanning film, remove the cover from the film strip holder and slide your film strip in with the duller (emulsion) side facing up.
- Page 76 4. Position the film holder so that the film strip faces the center of the scanner glass. The positioning posts on the film holder fit in two small holes near the scanner lid, as shown. Then go to step 6. 5.
- Page 77 “This side toward screen. ” Place that side face down in the film holder. 7. Close the scanner lid. 8. Do one of the following: Start EPSON Scan from your computer. In Windows, select Programs Programs > EPSON Scan > EPSON Scan Macintosh, double-click Start your TWAIN-compliant application.
- Page 78 9. If you see the screen below, you’ll need to change the scanning mode. Click the Pause Select Home Mode menu at the top of the screen. Click Pause 10. Home Mode: For Document Type, choose slides. Choose Color Negative Film scanning film.
-
Page 79: Scanning Using The Rx500 Buttons
You can use the buttons on the RX500 to scan an image to your computer or to send an e-mail with a scanned image attached. Note: Both Epson Scan and Epson Smart Panel must be installed on your computer to scan to your computer or to attach to an e-mail. Scanning to Your Computer 1. - Page 80 8. When you see the File Save Settings window, type a name for your file in the Prefix box, select a file format in the Type box, and click Epson Scan starts and scans your image to the location you specified. Scanning to a Computer button on the RX500 to switch to scan mode.
-
Page 81: Scanning To E-Mail
RX500 to switch to scan mode. You see this Scan LCD screen: Press this button until you see To E-Mail 6. Press the top left button to select EPSON Smart Panel icon on Orient the photo as shown 1.To Photo Card . Then press the... - Page 82 View Images and Set Options window. Note: If you’ve switched to Home or Professional mode in Epson Scan, previewing and scanning is not automatic. Click Preview, then click Scan. 8. Select any settings you want to change, then click The scanned image is transferred to your e-mail program and attached to a new e-mail message.
-
Page 83: Using Memory Cards
Using Memory Cards This section tells you what kinds of memory cards you can use with your RX500, and how to view and print photos on them and scan photos to them. See these sections: “Compatible Memory Cards” below “Inserting and Removing Cards” on page 84 “Copying Photos to Your Computer”... -
Page 84: Inserting And Removing Cards
Inserting and Removing Cards 1. Make sure the RX500 is turned on. 2. If you will be printing from or scanning to the memory card, disconnect the RX500 from your computer or turn off your computer. If you want to copy images between the card and your computer, leave the computer connected. -
Page 85: Copying Photos To Your Computer
The memory card light flashes, then turns green. Memory card light Caution: Do not insert more than one card into a shared memory card slot. After the RX500 reads the card, you see this message on the LCD screen if it finds any images: 5. -
Page 86: Windows And Os 8.6 To 9.X
Startup CardMonitor , and click action 5. When you see this message, click 6. The Epson PhotoStarter setup assistant opens. Follow the instructions on the screen to change any settings from the defaults and complete the setup steps. If you don’t change any settings, PhotoStarter automatically copies the images on your memory card to your hard drive and opens PhotoImpression. -
Page 87: Macintosh Os X
The default location for your images is Settings\epson\My Documents\Photos folder on your desktop for all other Windows systems and Macintosh OS 8.6 to 9.x. Each time you insert a card in the RX500, PhotoStarter copies your images to the same location, and PhotoImpression or the application you chose in the setup process opens. - Page 88 Note: It won’t be possible to insert the card fully; this is normal. 9. The Epson PhotoStarter setup assistant opens. Follow the instructions on the screen to change any settings from the defaults and complete the setup steps. If you don’t change any settings in the setup assistant, PhotoStarter automatically copies the images on your memory card to the on your desktop and opens PhotoImpression.
-
Page 89: Printing From A Memory Card
Printing From a Memory Card The RX500 lets you print photos directly from your digital camera’s memory card—you don’t even have to connect it to a computer. Follow the instructions in this section to: Print an index form so that you can see thumbnail images of all the photos on your card;... - Page 90 3. Pinch the sides of the left edge guide together as you slide the guide all the way to the left. 4. Insert several sheets of plain, letter-size paper against the right edge of the sheet feeder, behind the tab. (If there are more than 36 images on the card, you need multiple sheets to print the index.) Note: Don’t place the paper in front of the feeder guard.
- Page 91 7. Disconnect the RX500 from your computer or turn your computer off. Otherwise, photos on your card will be automatically copied to your computer if you’ve set up your RX500 as an external card reader (see page 85). 8. Open the memory card cover: 9.
-
Page 92: Selecting Photos To Print
Remember to load the paper short edge first and printable (whiter or brighter) side up. Using Memory Cards Available paper types Epson Premium Glossy Photo Paper Epson Premium Semigloss Photo Paper Epson Photo Paper Epson Glossy Photo Paper Epson Matte Paper Heavyweight... - Page 93 4. Make sure Scan Index doesn’t appear, press the on the LCD screen until you see 5. Place the index form face down in the upper left corner of the scanner glass, about 0.1 inch from the edges. Move the form about 0.1 inch from the edges 6.
-
Page 94: Printing With Dpof
4. Press the top left button next to the LCD screen to select , or of Images Press until you see One image, Range of images, or All images 5. If you want to print one image or a range of images, follow the instructions on the LCD screen and use the number keypad to select the images you want to print. - Page 95 Note: It won’t be possible to insert the card fully; this is normal. The memory card light flashes, then turns green. Memory card light Caution: Do not insert more than one card into a shared memory card slot. After the RX500 reads the card, you see this message on the LCD screen if it finds any images: 3.
-
Page 96: Choosing Print Settings
For this paper Plain paper Epson Premium Bright White Paper Epson Photo Quality Ink Jet Paper Epson Photo Quality Ink Jet Cards Epson Photo Quality Self-Adhesive Sheets Epson Photo Paper Epson Glossy Photo Paper... -
Page 97: Paper Size
For this paper Epson Matte Paper Heavyweight Epson Double-Sided Matte Paper Premier Art Matte Scrapbook Paper for EPSON Epson ColorLife Photo Paper Paper Size Use this button to select the size of paper you’ve loaded. Choose one of these sizes: . - Page 98 Layout Use this button to select one of these layout settings: Setting Results B-Free Prints without margins so that the image covers the whole page. 1-up Prints one or more photos per page. For example, 8-up prints up to 2-up 8 photos per page.
-
Page 99: Color Effect
Resolution 1. Press the button. You see this Menu screen: 2. Press . Then press the bottom left button (next to Resolution from these settings: Setting Best Photo Color Effect 1. Press the button, then press the Menu bottom left button (next to until you see Color Effect 2. - Page 100 2. Press . Then press the bottom left button to choose from these settings: Setting None P.I.M. Exif Auto Photo Fine Enhance Resolution If you are printing low-resolution images, or images that contain digital noise, use this setting. 1. Press the Menu bottom left button (next to until you see...
- Page 101 Brightness 1. Press the button, then press the Menu bottom left button (next to until you see Brightness 2. Press . Then press the bottom left button to choose from these settings: Setting Standard Brighter Brightest Darkest Darker Contrast 1. Press the button, then press the Menu bottom left button (next to...
- Page 102 Sharpness 1. Press the Menu bottom left button (next to until you see Sharpness 2. Press . Then press the bottom left button to choose from these settings: Setting Standard Sharper Sharpest Softest Softer Saturation 1. Press the Menu bottom left button (next to until you see Saturation 2.
- Page 103 Date 1. Press the button, then press the Menu bottom left button (next to until you see on the screen. Date 2. Press . Then press the bottom left button to choose from these settings: Setting None yyyy.mm.dd mm.dd.yyyy dd.mm.yyyy Time 1.
-
Page 104: Print Information
Print Information By turning this function on, you can print information about each of your digital images, such as exposure time, shutter speed, F number, and ISO rate. You can only print this information if your images comply with the Exif standard. 1. -
Page 105: Scanning A Photo To A Memory Card
Hi Speed This setting allows you to perform bidirectional printing for greater speed. 1. Press the button, then press the Menu bottom left button (next to until you see Hi Speed 2. Press . Then press the bottom left button to choose from these settings: Setting Scanning a Photo to a Memory Card Follow these steps to scan an image to a memory card and save it in JPEG format:... - Page 106 The memory card light flashes, then turns green. Memory card light Caution: Do not insert more than one card into a shared memory card slot. Note: If the card is not properly formatted, you see a message on the LCD screen. Press the button indicated on the screen to format the card.
- Page 107 9. Use the buttons next to the LCD screen to select the following options: for the document type Graphic for the image quality Photo for the scan area; if the Auto edges of the photo are light in color, select Max.
- Page 108 Using Memory Cards...
-
Page 109: Maintaining The Rx500
Maintaining the RX500 If you notice a decline in print quality, follow the instructions in this chapter to check and clean the print head. You’ll also find instructions on checking ink levels and replacing ink cartridges, aligning the print head, and transporting the RX500. See these sections: “Cleaning the Print Head”... - Page 110 3. Press the top left button (next to ) until you see this on the LCD levels screen: 4. Press the x Color Cleaning takes about 30 seconds, during which the LCD screen. Caution: Never turn off the RX500 while Head Cleaning appears on the LCD screen, unless it hasn’t moved or made noise for more than 5 minutes.
-
Page 111: Replacing Ink Cartridges
Replacing Ink Cartridges To check ink levels, follow these steps: 1. Press the button to enter setup mode. Setup 2. If necessary, press the upper left button next to the LCD screen until is displayed, then press the x Levels You see the amount of ink available in each cartridge: (Yellow), (Black),... - Page 112 In Canada, please call (800) 463-7766 for dealer referral. Caution: To ensure good results, use genuine Epson ink cartridges and do not refill them. Other products may cause damage to your RX500 not covered by Epson’s warranty. You can’t print if an ink cartridge is empty. Leave the empty cartridge installed in the RX500 until you have a replacement.
- Page 113 3. Wait for the ink cartridge holder to move to the replacement position on the far right, then open its cover by pulling it back up and toward you. Caution: Never attempt to open the cartridge holder’s cover while the print head is moving. Wait until the cartridges have moved to the replacement position.
- Page 114 6. Insert the new cartridge into the holder. Press down firmly until it clicks into place. If you need to replace other ink cartridges, repeat steps 4 through 6 before continuing with step 7. 7. Close the cartridge cover. (It should click into place.) Caution: If you find it difficult to close the cover, make sure all the cartridges are firmly seated.
-
Page 115: Aligning The Print Head
. Click the Setup Print dialog box. Then click the icon on the Windows taskbar and click EPSON Printer Utility in the Printer List and click button. button in the printer settings or page setup Print Head Alignment Aligning the Print Head... - Page 116 4. Follow the on-screen instructions to print the black vertical alignment pattern. Your printout should something look like this: 5. Examine the printout and choose the best square in each of the four sets. (The best square should have no visible bands, or the least visible bands.) Maintaining the RX500...
- Page 117 6. In the on-screen window, select the number for each of these squares in the corresponding pull-down menu. Note: This procedure shows OS X screens. Screens for other operating systems will look similar. 7. If the best square in each set is number 5, click and follow the on-screen instructions to print a new black Realignment vertical alignment pattern.
-
Page 118: Transporting The Rx500
Transporting the RX500 If you move your RX500 some distance, you need to prepare it for transportation in its original box or one of a similar size. Caution: To avoid damage, always leave the ink cartridges installed when transporting the RX500. - Page 119 8. Remove the orange print head holder from its storage area and install it as shown to prevent the print head from moving during transport. If you can’t find the orange print head holder, tape the print head to the case. Caution: Be sure to remove the print head holder or the tape after installing the RX500 in its new location.
- Page 120 Maintaining the RX500...
-
Page 121: Solving Problems
Solving Problems If you have a problem with the RX500, check the messages on the LCD screen, run a nozzle check (see page 109), or see “Problems and Solutions” below. For problems with scanning or printing from your computer, or with uninstalling the software, double-click the SP RX500 Reference Guide icon on your computer desktop. -
Page 122: Paper Feeding Problems
Make sure to select the copy layout you want. See page 24 for instructions. If you select Auto Fit Page edges, the original size may not be recognized. Select Enlarge setting (see page 23) and use the size of your copy (see page 27). Paper Feeding Problems If paper doesn’t feed, remove it from the sheet feeder. -
Page 123: Where To Get Help
The ink cartridges may be old or low on ink; see page 111 for instructions on replacing an ink cartridge. Where To Get Help If you need help with the RX500 or Epson Scan software, see “Epson Support” below. If you need help with any other software included with the printer, see page 124. -
Page 124: Other Software Technical Support
Proof of purchase and date of purchase Computer configuration Description of the problem You can purchase ink cartridges, paper, manuals, and accessories from the Epson Store at (800) 873-7766, or visit www.epsonstore.com (U.S. sales only). In Canada, please call (800) 463-7766 for dealer referral. -
Page 125: Requirements And Notices
Requirements and Notices Windows System Requirements To use your RX500 and its software, your system should have: ® Microsoft Windows compatible PC with Pentium Microsoft Windows 98 SE, Windows Me, Windows 2000, or Windows XP 128MB RAM (256MB or more of RAM recommended) VGA monitor or better with at least 256 colors At least 200MB of free hard disk space (300MB or more recommended) CD-ROM or DVD drive for installing the software... -
Page 126: Important Safety Instructions
Important Safety Instructions Before using your RX500, read and follow these safety instructions: Be sure to follow all warnings and instructions marked on the RX500. Use only the type of power source indicated on the RX500 label. Connect all equipment to properly grounded power outlets. Avoid using outlets on the same circuit as air control systems or other high-load devices that regularly switch on and off. -
Page 127: Ink Cartridge Safety Instructions
Before transporting the RX500, make sure the print head is capped in the far right position and secured by the orange print head holder or tape, and the scanner is secured by the transportation lock. When storing or transporting the RX500, do not tilt it, stand it on its side, or turn it upside down. -
Page 128: Lcd Panel Safety Instructions
Don’t dismantle cartridges or refill them; you could damage the print head. Don’t touch the green IC chip on the cartridge. This may affect normal operation and printing. If you remove an ink cartridge for later use, protect the ink supply area from dirt and store it in the same environment as the RX500. -
Page 129: Legal Notices
Legal Notices FCC Compliance Statement This equipment has been tested and found to comply with the limits for a Class B digital device, pursuant to Part 15 of the FCC Rules. These limits are designed to provide reasonable protection against harmful interference in a residential installation. This equipment generates, uses, and can radiate radio frequency energy and, if not installed and used in accordance with the instructions, may cause harmful interference to radio or television reception. -
Page 130: Declaration Of Conformity
Requirements and Notices Epson Multifunction printer C171A ® Partner, Epson has determined that this... -
Page 131: Epson America, Inc. Limited Warranty
If your product is being repaired, Epson will direct you to send your product to Epson or its authorized service center, where the product will be fixed and sent back to you. You are responsible for packing the product and for all costs to and from the Epson authorized service center. - Page 132 Epson Authorized Servicer. If a claimed defect cannot be identified or reproduced, you will be held responsible for the costs incurred.
-
Page 133: Index
Documentation, description DPOF images, printing Editing scanned text E-mail, scanning files to , 45, 50 Envelopes , 58 EPSON Scan, starting Exif Print Fax, scanning to FCC statement Film holder , 85 to 88 Film, scanning Fit to Frame setting... - Page 134 Index forms , 89 to 93 Ink cartridge ordering , 111 to 112 replacing , 111 to 114 safety instructions Ink Jet Transparencies, loading Iron-On Transfer Paper, loading Layout settings copy , 24 to 25 print , 40, 45, 98 Macintosh automatic photo copying color management settings...
- Page 135 Paper copy settings , 22 feed problems , 122 for borderless printing loading , 13 to 16 memory card settings , 96 to 97 ordering , 124 settings in printer driver Photo RPM , 39, 49, 50 Photo Stickers, loading , 16 Photos printing...
- Page 136 Warranty , 131 to 132 Windows automatic photo copying controlling printing default settings , 38 page layout settings photo printing , 41 to 42 print quality , 37 system requirements Index , 86 to 87 , 38 , 40 , 125...
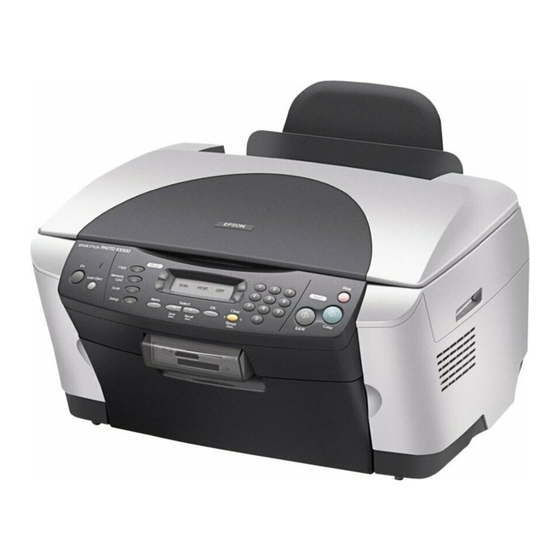
- Page 137 Epson Stylus Photo RX500 Parts Left edge guide Document mat Transportation lock USB cable (not included) Paper support Scanner lid On button LCD screen Scanner glass Control panel Output tray Scanner section Feeder guard Memory card slot cover Ink cartridges...
- Page 138 How To Order Epson Ink and Paper To order Epson ink cartridges and paper, contact your dealer or call the Epson Store at (800) 873-7766, or visit www.epsonstore.com (U.S. sales only). In Canada, please call (800) 463-7766 for dealer referral.
Need help?
Do you have a question about the Stylus Photo RX500 and is the answer not in the manual?
Questions and answers