CARDIOSTRONG CST-MEP Assembly And Operating Instructions Manual
Mini elliptical trainer
For more information, please visit cardiostrong.com, sport-tiedje.com

Subscribe to Our Youtube Channel
Related Manuals for CARDIOSTRONG CST-MEP


Summary of Contents for CARDIOSTRONG CST-MEP
- Page 1 Assembly and Operating Instructions max. 120 kg ~ 15 Min. 9 kg L 51 | B 41 | H 29 CSTMEP.01.01 Art. No. CST-MEP Mini Elliptical Trainer...
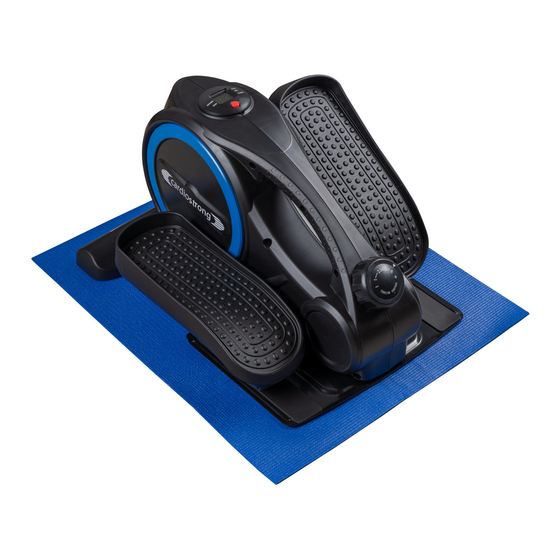
- Page 2 Mini Trainer...
-
Page 3: Table Of Contents
Content GENERAL INFORMATION Technical Data Personal Safety Set-Up Place ASSEMBLY General Instructions Scope of Delivery Assembly Battery Replacement OPERATING INSTRUCTIONS Console Display Button Functions Start/Stop Traning TROUBLESHOOTING, CARE AND MAINTENANCE General Instructions Faults and Fault Diagnosis Maintenance and Inspection Calendar DISPOSAL ORDERING SPARE PARTS Serial Number and Model Name... - Page 4 Mini Trainer...
- Page 5 Train at home no matter what the weather or time of the day. cardiostrong fitness equipment offers training programmes and a variety of equipment for all training levels and all training goals. Further information can be found at www.sport-tiedje.com or www.cardiostrong.de.
- Page 6 ABOUT THIS MANUAL Please carefully read the entire manual before installation and first use. The manual will help you to quickly set up the system and explains how to safely use it. Make sure that all persons exercising with the equipment (especially children and persons with physical, sensory, mental or motor disabilities) are informed about this manual and its contents in advance.
-
Page 7: General Information
GENERAL INFORMATION Technical Data Article weight (gross, incl. packaging): 11 kg/ 24.2 LBS Article weight (net, without packaging): 9.3 kg/ 20.5LBS Packaging dimensions (L x W x H): 56.5 cm x 46 cm x 37 cm Set-up dimensions (L x W x H): 51 cm x 40.5 cm x 29 cm Maximum user weight: 120 kg... -
Page 8: Personal Safety
Personal Safety DANGER ⚠ Before you start using the equipment, you should consult your physician that this type of exercise is suitable for you from a health perspective. Particularly affected are persons who: have a hereditary disposition to high blood pressure or heart disease, are over the age of 45, smoke, have high cholesterol values, are overweight and/or have not exercised regularly in the past year. -
Page 9: Set-Up Place
Set-Up Place WARNING ⚠ Do not place the equipment in main corridors or escape routes. ⚠ CAUTION Choose a location in which to place the equipment such that there is enough free space/ clearance to the front, the rear and to the sides of the equipment. The training room should be well ventilated during training and not be exposed to any draughts. -
Page 10: Assembly
ASSEMBLY General Instructions ⚠ DANGER Do not leave any tools, packaging materials such as foils or small parts lying around, as otherwise there is a danger of suffocation for children. Keep children away from the equipment during assembly. ⚠ WARNING Pay attention to the instructions attached to the equipment in order to reduce the risk of injuries. -
Page 11: Assembly
Assembly Before assembly, take a close look at the individual assembly steps shown and carry out the assembly in the order given. NOTICE First loosely screw all parts together and check that they fit properly. Tighten the screws using the tool only when you are instructed to do so. If you have difficulty recognising the graphics, we recommend that you open and/or download the PDF instructions stored in the webshop on your end device (e.g. -
Page 12: Battery Replacement
Step 3: Insertion of the Battery into the LCD Display NOTICE The LCD display is powered by one AAA1.5V battery. ࣑ ATTENTION Make sure not to damage the signal cable while pulling up the LCD display. Slowly pull up the LCD display (24) from the top of the main frame (6). Turn the LCD Display (24) to insert the battery into the battery compartment. -
Page 13: Operating Instructions
OPERATING INSTRUCTIONS NOTICE Familiarise yourself with all the functions and setting options of the device before starting training. Have the proper use of this product explained to you by a specialist. Console Display Display changes between TIME, CALORIE and REPS/MIN every 4 SCAN seconds Display of workout time while exercising... -
Page 14: Button Functions
Button Functions Press button shortly: the display will turn on/the final value will be displayed in sequence. Press and hold the button for 4 seconds: all function values are reset to zero. Start/Stop Traning When you start pedaling: the display automatically starts calculation of the values. When you stop pedaling 4 seconds: calculation stops. -
Page 15: Faults And Fault Diagnosis
Faults and Fault Diagnosis The equipment undergoes regular quality controls during production. Nevertheless, faults or malfunctions may occur. Frequently, individual parts are responsible for these disturbances, an exchange is usually sufficient. Please refer to the following overview for the most common errors and how to correct them. -
Page 16: Ordering Spare Parts
The serial number of your equipment is unique. It's located on a white sticker. Enter the serial number in the appropriate field. Serial number: Brand / Category: cardiostrong / Elliptical cross trainer Model Name: Mini Elliptical Trainer Article Number: CST-MEP... -
Page 17: Parts List
Parts List Name Qty. Name Qty. Crank arm assembly (R) shell (R) Crank arm assembly (L) Plastic plug PU wheel LCD Display Magnet arm Resistance Knob Flying wheel set Driving belt Main frame EVA Mat Crank axle fixing plate Square sensor Pulley wheel set Hex nut M5 Spindle for PU wheel... -
Page 18: Exploded Drawing
Exploded Drawing WARRANTY Warranty period The warranty periods, shown on our web shop, begin on delivery of the fitness equipment. The respective warranty periods for your equipment can be found on its product website. Mini Trainer... -
Page 19: Contact
CONTACT TECHNIK TEKNIK OG SERVICE TECHNIQUE & SERVICE �� �� �� +49 4621 4210-900 80 90 16 50 +33 (0) 172 770033 +49 4621 4210-945 +49 4621 4210-933 �� +49 4621 4210-698 �� �� info@fitshop.dk service-france@fitshop.fr �� technik@sport-tiedje.de �� �� Åbningstider kan findes på... - Page 20 LIVE FITNESS WEBSHOP AND SOCIAL MEDIA Sport-Tiedje is Europe’s largest specialist store www.sport-tiedje.co.uk for home fitness equipment with currently over www.sport-tiedje.de/blog 70 stores and one of the world’s most renowned online mail order companies for fitness equipment. Private customers order via the 25 www.facebook.com/SportTiedje web shops in the respective national language or have their desired equpiment assembled on...
- Page 21 Notes...
- Page 22 Notes Mini Trainer...
- Page 24 Mini Elliptical Trainer...
Need help?
Do you have a question about the CST-MEP and is the answer not in the manual?
Questions and answers