Tunstall Lifeline Vi Installation And Programming Manual
Hide thumbs
Also See for Lifeline Vi:
- Installation and programming manual (68 pages) ,
- How to install manual (12 pages) ,
- User manual (6 pages)
Table of Contents
Advertisement
Advertisement
Table of Contents

Related Manuals for Tunstall Lifeline Vi


Summary of Contents for Tunstall Lifeline Vi
- Page 1 Lifeline Vi/Vi+ Installation and Programming Guide D5307013B Version 9.9...
-
Page 2: Table Of Contents
D5707018A Installation and Programming Guide V2.4 Contents Installation Guide ....................4 What’s in the box ......................4 Your home unit ........................ 5 For your safety - Installation advice ................6 Quick start guide ......................7 Table stand / Wall bracket (optional) ................9 Fitting the Table Stand (D5702904) ................ - Page 3 Voice announcer function (Lifeline Vi+ only) ..............48 Alarm control by time (Lifeline Vi+ only) ............... 49 Times when voice announcer messages are played (Lifeline Vi+ only) ......49 Critical visits (Lifeline Vi+ only) ..................50 Auto Answer (Lifeline Vi+ only) ..................50 Keyless entry (Lifeline Vi+ only)...................
-
Page 4: Installation Guide
D5707018A Installation and Programming Guide V2.4 Installation Guide What’s in the box When you open the box for the first time, please ensure you have all of the following: Home unit Personal radio trigger MyAmie Personal radio trigger wearing options Neckcord Wrist strap Leads and adaptors... -
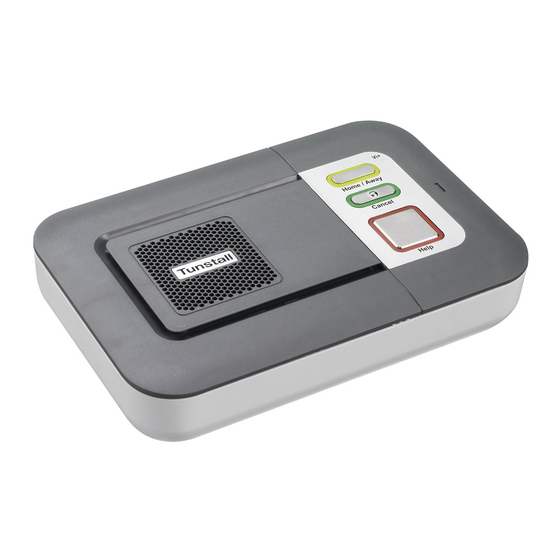
Page 5: Your Home Unit
D5707018A Installation and Programming Guide V2.4 Your home unit Page 5 of 68... -
Page 6: For Your Safety - Installation Advice
D5707018A Installation and Programming Guide V2.4 For your safety - Installation advice IMPORTANT: Connect the home unit to the first telephone point in the house with all other extensions wired into the unit to ensure proper operation even when another telephone is in use or off hook (see below for more detailed instructions). -
Page 7: Quick Start Guide
D5707018A Installation and Programming Guide V2.4 Quick start guide IMPORTANT: In order to function the home unit must be programmed correctly to a monitoring centre or personal recipient (please see programming section). Step 1 - Connecting the leads and adaptors Please follow the steps below to plug the leads correctly into the home unit. - Page 8 Then hold the Lifeline Vi in a horizontal position and use the two wall mount markers (see diagram below) to accurately mark the wall. Drill 2 holes 40 mm apart, firmly attach screws (not supplied) leaving the screw heads protruding the surface and then locate the wall mounting points on the back of home unit with the screws.
-
Page 9: Fitting The Table Stand (D5702904)
D5707018A Installation and Programming Guide V2.4 Table stand / Wall bracket (optional) An optional table stand and wall bracket are available for the Lifeline Vi/Vi+,see part numbers below. Fitting the Table Stand (D5702904) This allows the buttons and speaker to be angled towards the user. This also covers the where cables connect to the unit, this can help when the cables may get unplugged. -
Page 10: Fitting The Wall Bracket (D5702902)
D5707018A Installation and Programming Guide V2.4 Fitting the wall bracket (D5702902) The Lifeline Vi/Vi+ can be wall mounted using the optional bracket, this conceals the cables where they connect to the unit. UK/EU/USA Page 10 of 68... -
Page 11: Using The Home Unit
D5707018A Installation and Programming Guide V2.4 Using the home unit Making an alarm call Press the red button on the personal radio trigger or the red alarm button on the home unit. The home unit will announce ‘Do not worry your alarm telephone is dialling for assistance’. -
Page 12: Status Warnings
D5707018A Installation and Programming Guide V2.4 Status warnings Telephone line monitoring If the telephone line is faulty or becomes disconnected, the home unit will announce ‘WARNING – the telephone line is disconnected’ after 1 minute and the green LED flashes. This warning will be repeated every 30 seconds until the telephone line becomes available again. -
Page 13: The Lights On The Home Unit Indicate
D5707018A Installation and Programming Guide V2.4 The lights on the home unit indicate The lights on the home unit provide indications of its status based on the below. Alarm Button (Red) Home Unit Status Red alarm button on Normal mode Red alarm button flashing Normal mode running on battery (1 every 4 seconds) -
Page 14: Programming A Telecare Sensor To The Home Unit
D5707018A Installation and Programming Guide V2.4 Programming a telecare sensor to the home unit Telecare sensors with plug and play functionality can be programmed to the home unit using the following steps: Step 1 – Press and hold down the green cancel button until it bleeps (approx. -
Page 15: Cleaning The Home Unit
D5707018A Installation and Programming Guide V2.4 Cleaning the home unit Dust the home unit with a soft cloth which can be moistened with a gentle detergent if required. Ensure that no moisture goes through the speaker grill. Removing the speaker cover It is possible to remove/replace the speaker cover if it becomes damaged or the speaker holes become clogged with dirt. -
Page 16: Programming Guide
D5707018A Installation and Programming Guide V2.4 Programming guide Programming of the home unit and its functions can be achieved using four different methods: PC Connect programming tool – full programming can be achieved using a • TAPIT programming tool linked to the home unit and a laptop running PC Connect software. - Page 17 None None Configuration Time Windows Full None None None * Auto Presence is not supported in the UK ** Programming home units using manual entry should only be done when advised by Tunstall. ***Vi+ features only Page 17 of 68...
-
Page 18: How To Program Via Pc Connect Programming Software
Connect+ home units. Therefore some new features will not have programming screens. PNC3/4 Remote programming of the Lifeline Vi/Vi+ is not supported from PNC3 or 4. How to program using a series telephone Step 1 – Connect a telephone directly to the socket on the home unit labelled Step 2 –... -
Page 19: Frequently Used Series Telephone Codes
Once the time has been set the time can be checked by using the quick code 3020 (Lifeline Vi+ only). The unit will then announce the date and time. During the first 30 minutes of installation the Lifeline Vi+ will also announce the date and time when an incoming telephone call is received (requires CLI on the telephone line). - Page 20 D5707018A Installation and Programming Guide V2.4 Telephone numbers The series telephone keypad supports the programming of 10 alarm numbers. By default, telephone numbers 1-4 are set to call control centres (CC) and telephone numbers 5-10 are set to a Personal Recipient (PR) destination. To change the destination from CC to PR or normal telephone (POTS) see the next section.
Need help?
Do you have a question about the Lifeline Vi and is the answer not in the manual?
Questions and answers