Advertisement
Quick Links
Advertisement

Related Manuals for VDO Cyclecomputing R5GPS


Summary of Contents for VDO Cyclecomputing R5GPS
- Page 1 VIDEOS & FURTHER INFORMATION vdocyclecomputer.com GPS BIKE COMPUTER SHORT MANUAL...
- Page 2 Vous trouverez la version complète sous le lien suivant : goto.vdocyclecomputer.com/ La presente guida è una versione ridotta. r5gps/service La guida completa è disponibile al seguente link: Este manual es sólo una guía rápida. El manual detallado está a tu disposición en este enlace: Dit is een beknopte handleiding.
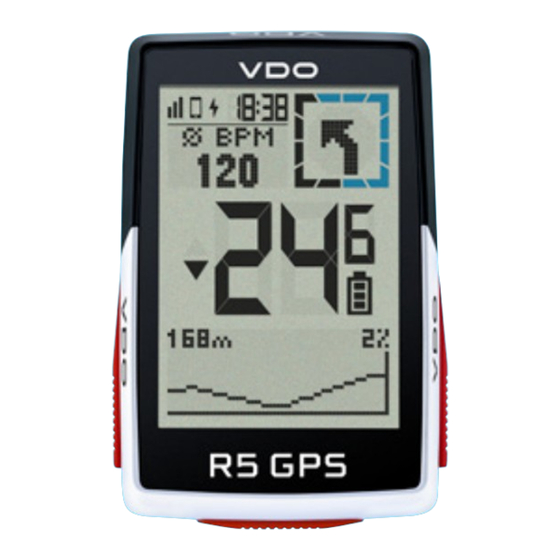
- Page 3 Contents R5 GPS R5 GPS FULL SET...
-
Page 4: Installation
Installation 0,5 Nm Ø 31,8 mm Ø 35 mm... - Page 5 HEART RATE SENSOR HEART RATE SENSOR BATTERY CHANGE...
- Page 6 Installation : Watch the video tutorial for SPEED / CADENCE SENSOR FIRST START more information, follow this link: goto.vdocyclecomputer.com/ r5gps/service Remove sticker. Blue light flashes. Aufkleber entfernen. Die blaue Leuchte blinkt. Retirez l‘autocollant. Le voyant bleu clignote. TIPP: Das Video-Tutorial bietet weitere Informationen.
- Page 7 SPEED SENSOR CADENCE SENSOR The SPEED sensor can be mounted on the bicycle hub of both wheels. Der SPEED-Sensor kann an der Fahrradnabe beider Laufräder Le capteur de VITESSE peut être monté sur le moyeu montiert werden. des deux roues. Il sensore SPEED può...
-
Page 8: Button Functions
Button functions START/STOP/MENU button – Start training – Stop training – Confirm input – One menu level down – Switch on the device (press for 3s) Press and hold the button: – Open and close menu PLUS button – One page forward –... - Page 9 START/STOP/MENÜ Taste Taste -Taste – Training starten – Eine Seite weiter – Eine Seite zurück – Training stoppen – Wert erhöhen – Wert verringern – Eingabe bestätigen Langer Tastendruck: – Eine Menüebene tiefer – Gerät einschalten (3s drücken) – Trainingswerte speichern und Langer Tastendruck: zurücksetzen –...
- Page 10 2: Tecla „ “ 3: Tecla „ “ Tecla START/STOP/MENÚ – Iniciar entrenamiento – Avanzar una página – Retroceder una página – Parar entrenamiento – Aumentar el valor – Reducir el valor – Confirmar datos – Ir al nivel de menú inferior Mantener tecla pulsada: –...
- Page 11 START/STOP/MENU-knop 2: PLUS-knop 3: MIN-knop – Training starten – Een pagina verder – Een pagina terug – Training stoppen – Waarde verhogen – Waarde verlagen – Invoer bevestigen – Een menuniveau dieper Langer op de knop drukken: – Apparaat inschakelen (3 s indrukken) –...
-
Page 12: First Start
First start Scan Code with the SIGMA RIDE App Press START Button for 5s to Wake-Up. Choose YES to pair a Smartphone, choose NO to manually set the device. Download SIGMA RIDE App and follow App SIGMA RIDE App instructions to configure your device. Scan Code with the SIGMA RIDE App The app offers you many functions for setting up OR set device and user settings manually. - Page 13 Die START-Taste zur Aktivierung für 5 s gedrückt halten. Maintenez la touche START enfoncée pendant 5 s pour l‘allumer. Für die Kopplung mit einem Smartphone JA wählen, für die manuelle Geräte- Sélectionnez OUI pour la connexion avec un Smartphone et NON pour le einstellung NEIN.
- Page 14 Training SIGMA RIDE App Press START button for 3s to start the device. Don‘t move and search for clear sky location for fast GPS fix. Wait for „GPS OK“. Press START button to start the training session. Press START button to stop the training session. Hold „+“...
- Page 15 Zum Starten des Geräts die START-Taste für 3 s gedrückt halten. Maintenez la touche START enfoncée pendant 3 s pour démarrer Um das GPS-Signal rasch zu lokalisieren, nach einem Standort unter l‘appareil. Pour localiser rapidement le signal GPS, cherchez un endroit freiem Himmel suchen und diesen nicht mehr verändern.
-
Page 16: Menu Overview
Menu overview MAIN MENU Hold START button, when training is NOT started. You have access to the main menu with all the functions of the R5 GPS. SHORT CUT MENU Hold START button, when training is active or in auto pause. You can edit the most important settings during training. - Page 17 HAUPTMENÜ MENU PRINCIPAL Die START-Taste gedrückt halten, während NOCH KEIN Training Maintenez la touche START enfoncée lorsqu‘AUCUN entraînement n‘a ENCORE été démarré. gestartet wurde. Sie haben Zugriff auf das Hauptmenü mit allen Vous accédez au menu principal avec toutes Funktionen des R5 GPS. les fonctions du R5 GPS.
- Page 18 Settings Example Choose Settings in main menu to set the device. You can edit Device settings and Totals. Choose a setting you want to edit and press START button to set. Press „-“ button to decrease a value or to toggle through options. Press „+“...
- Page 19 Zum Einrichten des Geräts im Hauptmenü „Einstellungen“ wählen. Sélectionnez “Réglages” dans le menu principal pour configurer Hier können Geräteeinstellungen und Gesamtwerte bearbeitet werden. l‘appareil. Les paramètres de l‘appareil et les valeurs totales peuvent Sélectionnez le réglage à modifier et appuyer sur START Die zu ändernde Einstellung auswählen und zur Festlegung die être édités ici.
-
Page 20: Sensor Connection
Sensor connection Choose SETTINGS > CONNECT to edit connections. Choose SENSORS to pair new sensors or manage paired sensors. Choose „SEARCH NEW“ to add new sensors. Make sure that sensors are switched on! Select Sensor with + or - and press START to pair sensor. Repeat, if you want to pair more sensors. : Some sensors are available in Bluetooth and ANT+ at the same time. - Page 21 Im HAUPTMENÜ > EINSTELLUNGEN können die Verbindungen Les connexions peuvent être éditées dans RÉGLAGES > unter VERBINDEN bearbeitet werden. SENSOREN wählen, um neue CONNECTER. Sélectionnez CAPTEURS pour connecter de nouveaux Sensoren zu koppeln oder gekoppelte Sensoren zu verwalten.3. Mit NEU capteurs ou gérer les capteurs connectés.
- Page 22 E-Bike connection Check QR Code for compatible E-BIKEs goto.vdocyclecomputer.com/ r5gps/service Choose E-Bike to pair a new E-Bike or manage paired Bike. Make sure that E-Bike is switched on! Press START button to pair E-Bike.
- Page 23 „E-Bike“ wählen, um ein neues E-Bike zu koppeln oder Sélectionnez “E-Bike” pour connecter un nouvel E-Bike ou gekoppelte Bikes zu verwalten. Das E-Bike muss dafür gérer les E-Bikes connectés. Pour cela l‘E-Bike doit être allumé! Zur Kopplung des E-Bikes START drücken. Appuyez sur START pour connecter l‘E-Bike.
- Page 24 SIGMA RIDE App Set Device and Training Views : Check for Firmware Updates regularly. Firmware Update To access the changelog, follow this link: Analyze your training Share your data goto.vdocyclecomputer.com/ and many more... r5gps/service...
- Page 25 PORADA: Regularnie sprawdzaj dostępność aktualizacji goto.vdocyclecomputer.com/r5gps/service oprogramowania firmware. Historię zmian znajdziesz pod adresem: goto.vdocyclecomputer.com/r5gps/service Nastavení zařízení a tréninkových obrazovek Aktualizace firmware Analýza tréninku Sdílení dat a další možnosti ... TIP: Pravidelně prováděj aktualizaci firmware. Historii změn firmwaru najdeš pod odkazem: goto.vdocyclecomputer.com/r5gps/service...
- Page 26 Charging and data transfer PC USE 5V max. 1000mA AC/DC USB-C Open USB Cover. Charge with 5V max. 1000mA. Insert USB-C cable. Connect to PC for data transfer. Check that the cable and port are dry! IMPORTANT : Please ensure that the USB cover is always closed before starting a training session.
- Page 27 USB-Abdeckung öffnen. USB-C-Kabel einstecken. Retirez le cache du port USB. Connectez le câble USB-C. Kabel und Anschluss müssen dabei trocken sein! Bei 5 V und max. Le câble et le port doivent être secs ! Chargez avec une puissance 1000 mA aufladen. Für die Datenübertragung an einen de 5 V et max.
-
Page 28: Technical Information
Bluetooth 2.4 GHz @ 1 dBm nominal Operation frequency GPS 1575.42 MHz (receiver only) GLONASS 1602 MHz (receiver only) Transmission power <4 dBm Water and Dust rating IPX7 ! You can find the CE declaration at: ce.vdocyclecomputer.com/r5gps You can find the UKCA declaration at: ce.vdocyclecomputer.com/r5gps... - Page 29 La déclaration CE peut être consultée ici : ce.vdocyclecomputer.com/r5gps ce.vdocyclecomputer.com/r5gps La dichiarazione CE è consultabile qui: Encontrarás la declaración de conformidad CE en: ce.vdocyclecomputer.com/r5gps ce.vdocyclecomputer.com/r5gps Je kunt de CE-verklaring hier inzien: Deklarację CE znajdziesz tutaj: ce.vdocyclecomputer.com/r5gps ce.vdocyclecomputer.com/r5gps CE prohlášení najdeš pod následujícím odkazem: ce.vdocyclecomputer.com/r5gps...
- Page 30 Notes...
- Page 31 Notes...
- Page 32 SIGMA-ELEKTRO GmbH Dr.-Julius-Leber-Straße 15 67433 Neustadt/Weinstraße, Germany kundenservice@sigmasport.com vdocyclecomputing.com...
Need help?
Do you have a question about the R5GPS and is the answer not in the manual?
Questions and answers
Comment connecter le capteur de fréquence cardiaque ? Je l’ai appai
To connect the heart rate sensor to the VDO Cyclecomputing R5GPS:
1. Go to the main menu and select SETTINGS > CONNECT.
2. Select SENSORS to manage or add sensors.
3. Choose SEARCH NEW to find new sensors.
4. Make sure the heart rate sensor is turned on.
5. Select the sensor using “+” or “–”.
6. Press START to connect the sensor.
Tip: The sensor may support both Bluetooth and ANT+. It is recommended to use ANT+ for connection.
This answer is automatically generated