
Related Manuals for VDO Cyclecomputing HC12.6


Summary of Contents for VDO Cyclecomputing HC12.6
- Page 1 CYCLECOMPUTING INSTRUCTION MANUAL BEDIENUNGSANLEITUNG MANUEL D´INSTALLATION ET D´UTILISATION MANUALE D´INSTALLAZIONE E FUNZIONAMENTO INSTALACION Y OPERACIÓN MANUAL HANDLEIDING HC12.6...
- Page 2 screw...
- Page 3 1-5 mm...
- Page 4 LOCK UNLOCK...
- Page 5 OPEN CLOSE...
- Page 7 IMPORTANT Rubber washer CLOSE OPEN...
- Page 8 Press AC-Button to Begin or install battery (P6) automatic • • • • • • • • • • • • • • • • • • • • • • • • • • • • Press MODE 2 for next Press MODE 2 for next Press MODE 2 for next press MODE 1 to select...
- Page 9 WS in mm / inch...
- Page 10 ETRTO WS in mm KMH WS in inch MPH 47-305 16x1,75 1272 50,1 47-406 20x1,75 1590 62,6 34-540 24x1 3/8 1948 76,7 47-507 24x1,75 1907 75,1 23-571 26x1 1973 77,7 40-559 26x1,5 2026 79,8 44-559 26x1,6 2051 80,7 47-559 26x1,75 2070 81,5 50-559...
- Page 11 SET Metric System SET WS 1 Start at TRIP DIST Press MODE 1 Press MODE 2 Press MODE 2 to select Press MODE 1 for 3 sec. to set WS1 to increase between KMH and MPH • • • • • • • •...
- Page 12 Press MODE 2 to Press MODE 1 Press MODE 1 MODE 2 to switch between 3sec.to start to set the hours increase the hours 24h or 12h Press MODE 1 Press MODE 2 Press MODE 1 to increase the 3 sec. to end to set the minutes minutes...
- Page 13 • • • • • • • Press MODE 1 Press MODE 2 Press MODE 1 Press MODE1 3 sec. to end 3sec.to start to increase to switch after you set the navigator Reset • • • • • • • Important Press MODE 2 to reset...
- Page 14 Set ODOMETER Press MODE 1 Press MODE 2 Press MODE 1 Press MODE1 3sec.to start to increase to switch 3 sec. to end after you set the odometer • • • • • • •...
- Page 15 BIKE CHECK Press any button The service icon will remain flashing. Then the service interval BIKE CHECK disappears Another 50 km/35 mi. icon will also disappear...
- Page 17 Set limits High-limit Press MODE1 Press MODE 2 Press MODE1 to increase 3sec. to set Low Limit Low-limit Press MODE1 Press MODE 2 to end to decrease...
- Page 18 Press PULS Press MODE1+ Press MODE1+ MODE2 to stop MODE2 to start again...
- Page 19 OWNER'S MANUAL - VDO HC 12.6 Index 12.6 Preface Mounting Entering time / clock 1.1 Handlebar holder The NAVIGATOR 1.2 Speed transmitter (sensor) 4.4.1 Presetting the NAVIGATOR 1.3 Spoke magnet 4.4.2 Resetting the NAVIGATOR to zero 1.4 Twist-Click mounting of computer Presetting the odometer onto handlebarholder Service interval indicator...
- Page 20 Preface Thank you very much for buying a VDO HC 12.6 bicycle computer featuring heart rate / pulse functions. The more familiar you get with this model, the more enjoyable your trips are going to be. 12.6 Hence, our urgent request: Please read thoroughly all the information provided in this manual.
- Page 21 1.4 Twist-Click mounting of computer on to holder 1.4 Twist-Click mounting of computer on to holder 1.4 Twist-Click mounting of computer on to holder 1.4 Twist-Click mounting of computer on to holder 1.4 Twist-Click mounting of computer on to holder 1.4 Twist-Click mounting of computer on to holder 1.4 Twist-Click mounting of computer on to holder 1.4 Twist-Click mounting of computer on to holder...
- Page 22 2.1 Interrogating information With the MODE1 key you call up following information: TRIP DIST/ RIDE TIME/ AVG SPEED/ MAX SPEED TRIP DIST trip counter for your individual trip, counting to 999.99 KM or M 12.6 RIDE TIME trip timer featuring automatic start/stop function up to 19:59:59 h AVG SPEED average speed, accurate to two decimal points MAX SPEED...
- Page 23 2.2 Calling up set-up modes The MODE 1 key calls up any set-up mode Calling up the set-up modes requires a 3 sec pressing of the MODE 1 key. 12.6 Set-up modes can be entered from various information displays: You want to set up: Display Information needed Wheelsize 1 or Wheelsize 2 TRIP DIST...
- Page 24 2.4 Resetting of information modes to zero By pressing MODE 2 for 5 sec. any of the following information is simultaneously reset to zero 2.4.1. Cycling Information 12.6 Get any of these informations in display TRIP DIST--RIDE TIME--AVG SPEED--MAX SPEED Press MODE 2 for 5 sec.
- Page 25 After installing the battery or pressing the AC-button your VDO HC 12.6 automatically requests a display language to be selected. After installing the battery, your VDO HC 12.6 first greets you in English (by default) displaying "ENJOY YOUR HC12.6" The VDO HC12.6 will then automatically request you to select your display language.
- Page 26 4.2 Selecting the wheelsize Your computer VDO HC 12.6 indicates your wheel size as WS (Wheelsize) = wheel circumference. Your VDO HC 12.6 is able to process two different wheelsizes for two different bikes (i.e. road bike and mountainbike) The following default values are preset 12.6 Wheelsize 1 WS1 = 2155 mm wheel circumference Wheelsize 2 WS2 = 2000 mm wheel circumference...
- Page 27 4.2.3 Entering the precise wheelsize Step 1: By pressing MODE 1 call TRIP DIST in your display. Step 2: Press MODE 1 for 3 sec. In the upper part of the display you see "WS1" and "KMH" or "MPH" flashing. The lower part of the display alternately shows "ENTER MTRIC SYSTM"...
- Page 28 4.4 The NAVIGATOR The NAVIGATOR is a second, individual trip distance counter that can be: • manually reset to zero • preset to a certain value, the trip distance is then counted from this value. 12.6 The NAVIGATOR is very helpful following road book instructions or tour suggestions of bike magazines. For example, your road book tour wants you "to go straight for a mile and then make a right turn, then go on for half a mile and make a sharp left turn".
- Page 29 4.5 Presetting the odometer After a battery change, you can re-enter previous odometer values (for both bikes) into your VDO HC 12.6. Step 1: With MODE 2 call "ODO1 METER" or "ODO2 METER" into display, depending which one of these values you want to re-enter. 12.6 Step 2: Press MODE 1 for 3 sec.
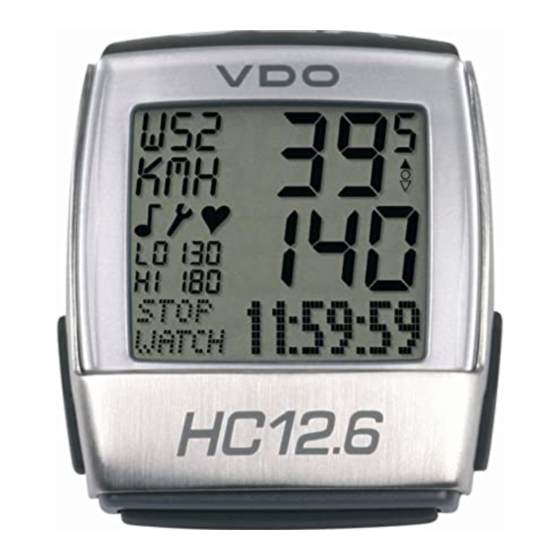
- Page 30 7. Pulse information of your VDO HC 12.6 Your VDO HC 12.6 permanentely displays following pulse / heart rate information: • Actual pulse / heart rate • Lower limit LO 12.6 • Upper limit HI • Heart icon to indicate receiption of signals •...
- Page 31 9. Setting of pulse limits With your VDO HC 12.6 you determine upper and lower limits for your pulse / heart rate to define your training zone. During initial setup or when the AC-button at the rear of the housing has been pressed, following values apply by default: 12.6 •...
- Page 32 10. The stopwatch 10.1 Stopwatch (automatic) With your VDO HC 12.6 running (not in Sleep-Mode), the receiver for pulse signals is activated as well. As soon as the chest belt (sender) starts transmitting 12.6 pulse signals, the STOPWATCH will start automatically. The STOPWATCH may also be manually started and stopped.
- Page 33 12. Display of training times within preset target range training zones. With your VDO HC 12.6 you determine your upper and lower pulse limits Limits setup see paragraph 9. 12.6 Training times within preset target range training zones are only registered if •...
- Page 34 14. Troubleshooting This chart outlines possible malfunctions, their causes and removal. 12.6 malfunctions most likely cause removal solutions irregular LCD readout (i.e. after battery change) computer software is not running smoothly press AC-button at the rear of computer head to reset no speed display check for proper distance between sensor readjust sensor and magnet...
- Page 35 15. Warranty We warrant VDO HC 12.6 (chestbelt, sensor, computer head and handlebar holder) to the original purchaser for five years from date of purchase against defects in material and workmanship. This does not cover the batteries, cables and defects resulting from normal wear and tear, improper care, accidents, abuse or alteration. 12.6 Please take care to retain your receipt of purchase.
- Page 36 16. Technical data dimensions computer width 42 x ht 52 x depth 14mm weight 40(g) chestbelt weight 80(g) 12.6 handlebar holder weight 30(g) batteries computer 3V, type 2032 chestbelt 3V, type 2032 radio frequency chestbelt 5,2 Khz (POLAR-compatibel) chest belt (transmitter) range 0.75 m operating temperature range LCD-display -15 C to +80 C...
Need help?
Do you have a question about the HC12.6 and is the answer not in the manual?
Questions and answers