Table of Contents
Advertisement
Quick Links
Advertisement
Table of Contents

Related Manuals for Comica BoomX-U QUA


Summary of Contents for Comica BoomX-U QUA
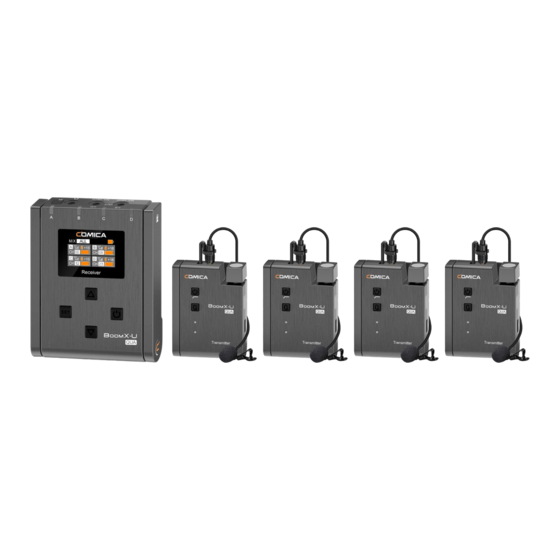
- Page 1 4-group Multi-functional Mini UHF Wireless Microphone User Manual...
-
Page 3: Main Features
Foreword Thanks for purchasing COMICA BoomX-U QUA Wireless Microphone To ensure bring you a good using experience, please read this manual book carefully before using and correctly install and operate Main Features . 4-group UHF Wireless Microphone, Broadcast Level . Internal and External Two Input Modes . -
Page 4: Packing List
Packing List Main Parts: Transmitter (TX) Receiver (RX) - Page 5 Accessories: ① 3.5mm Mic Audio Input Cable ② Wind Mu ③ 3.5mm TRS-XLR Audio Cable ④ 3.5mm TRS-TRS Audio Cable ⑤ 3.5mm TRS-TRRS Audio Cable ⑥ 3 in 1 Charging Cable ⑦ Cold-shoe Quick Release Plate ⑧ Carry Case ⑨ User Manual ⑩...
-
Page 6: Transmitter(Tx)
Components and Instruction Transmitter(TX): ⑤ ⑥ 1. Power/Low Cut Filter Button ⑦ 2. Muting Button 3. Power/Low Cut Filter Indicator Light 4. Audio Status Indicator Light 5. External Mic Locking Buckle ① 6. 3.5mm TRS Port of External Mic ⑪ ⑧... -
Page 7: Receiver(Rx)
⑧ ⑨ ⑩ Receiver(RX): ⑪ ① 1. Group B Antenna ⑫ ② 2. Group A/B/C/D Working Status Indicator 3. Display Screen ③ 4. Menu Function Button+ 5. Function Setting Button ④ 6. Power/Menu Back Button ⑤ 7. Menu Function Button- ⑥... - Page 8 Screen Display and Function Introduction Transmitter (TX) Function Introduction: 1. Power/Low Cut Filter Button Long press for On/O ; Short press for Low Cut Filter 2. Muting Button Long press to switch between normal recording and mute 3. Power /Low Cut Filter Indicator Light The blue light stays on when it is turned on;...
- Page 9 6. Internal Mic Point the built-in microphone at the sound source to record 7. 3.5mm TRS Port of External Mic Insert 3.5mm TRS microphone input cable and use the external lavalier microphone to record. At this time, the internal microphone of the device is turned o 8.
-
Page 10: Screen Display
Receiver (RX) Screen Display: None Non-mixing Mode (Four independent audio tracks output) Mixing Mode (Four groups mixed into one audio track output) Signal Strength Transmitter Battery Status Receiver Battery Status Group Volume CH 12 CH 8 Channel Audio Dynamic Bar CH 5 CH 12... -
Page 11: Function Introduction
Function Introduction: 1. Power/Menu Back Button Long press for On/O ; Short press to back to the previous menu 2. Function Setting Button Short press to enter the menu/confirm setting 3. Menu Function Button+/- Adjust the upper and lower menus 4. - Page 12 6. 3.5mm TRS Audio Output Port In the mixing mode, both ports can output one audio track mixed by four groups In the non-mixing mode, A/B output port outputs two independent audio tracks (A and B), C/D output port outputs two independent audio tracks (C and D) 7.
- Page 13 Installation and Usage Pairing Method: Choose manual/automatic pairing according to personal needs A. Manual Pairing Enter "Channel", select the corresponding channel according to personal needs; Enter “Sync”, keep the IR sensor of the transmitter and receiver closely aligned, and then synchronize one by one to successfully pair Menu Menu Menu...
-
Page 14: Installation Method
Installation Method: Transmitter (TX) Choose internal/external mic according to personal needs External Mic Internal Mic 1.For better concealment during use, it is recommended that the belt clip is fixed on the outside for use 2.When the external microphone is working, the internal microphone will be automatically turned o 3.Rotate the antenna to 180°... - Page 15 Receiver (RX) A. Mixing Output 1. Work with Camera/Camcorder/Recorder Connect the receiver with camera/camcorder/recorder through the 3.5mm TRS-TRS/3.5mm TRS-XLR audio cable; Choose whether to monitor according to personal needs...
- Page 16 2. Work with Smartphone/Computer Connect the receiver with smartphone/computer through the 3.5mm TRS-TRRS audio cable; Choose whether to monitor according to personal needs(Please purchase related audio cables/audio adapter cables by yourself) Adapter...
- Page 17 B. Non-mixing Output 1. Dual-group Output: work with camera/camcorder/recorder/computer Connect the receiver with camera/camcorder/recorder/computer through related audio cables/audio adapter cables; Choose whether to monitor according to personal needs(Please purchase related audio cables/audio adapter cables by yourself) In dual-group mode, outputs two audio tracks with A/B as a group or C/D as a group...
- Page 18 2. Four-group Output: work with recorder Connect the receiver with recorder through the 3.5mm TRS-TRS/3.5mm TRS-XLR audio cable; Choose whether to monitor according to personal needs In four-group mode, outputs A/B/C/D four audio tracks...
-
Page 19: Specifications
Specifications Transmitter(TX) Receiver(RX) Antenna PCB Antenna Antenna PCB Antenna Polar Pattern Omnidirectional Receiving Sensitivity -90dBm Frequency Response 80Hz ~ 20kHz Signal/Noise 75dB Sound Pressure Level 100dB Equivalent Noise 19dBA Signal/Noise 75dB Sound Delay <20ms Equivalent Noise 19dBA External Mic Input Interface 3.5mm TRS ×... - Page 20 Parameters Transmitter(TX) Channel Number 24 x 4 Carrier Frequency of Group A 568.125MHz~573.875MHz Carrier Frequency of Group B 580.125MHz~585.875MHz Carrier Frequency of Group C 574.125MHz~579.875MHz Carrier Frequency of Group D 586.125MHz~591.875MHz Transmitting Power 15dBm Receiver(RX) Channel Number 24 x 4 Carrier Frequency of Group A 568.125MHz~573.875MHz Carrier Frequency of Group B...
Need help?
Do you have a question about the BoomX-U QUA and is the answer not in the manual?
Questions and answers