Advertisement
Advertisement
Table of Contents

Related Manuals for Comica VM40


Summary of Contents for Comica VM40
- Page 1 Super Cardioid Dual-Channel Wireless Shotgun Microphone User Manual...
-
Page 3: Main Features
Foreword Thanks for purchasing COMICA VM40 Super Cardioid Dual-Channel Wireless Shotgun Microphone Main Features · Dual-channel Wireless Shotgun Mic, 14mm Gold-plating Capsule · 48kHz/32-bit Float Recording, Wired/Wireless Dual Modes · 32G On-board Recording for 40-hour Audio Storage · Exclusive Comica Audio APP for More Functions ·... - Page 4 Notice When it needs to be used for a long time, it can be connected to the external power to realize charging while using. AC/DC power is not supported to avoid noise problem In wireless mode, for a better recording e ect, please adjust the gain of the transmitter first. After the transmitter is adjusted to the maximum gain level, then adjust the gain of the receiver accordingly The device is a high-precision instrument.
-
Page 5: Packing List
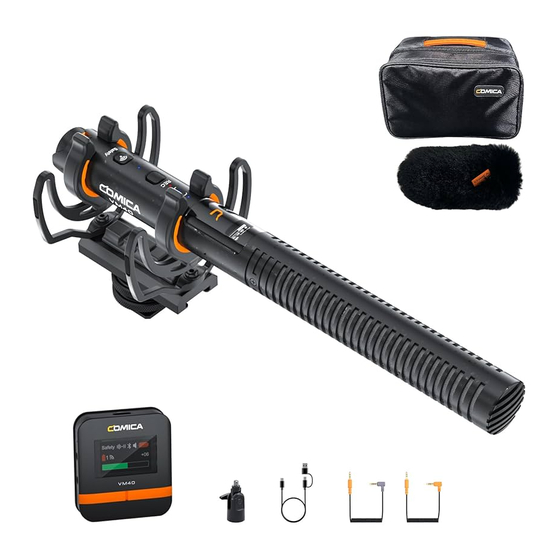
Packing List One-channel Version Main Parts: Shotgun Microphone(Transmitter) *1 Receiver*1 Accessories: 2 in 1 Charging 3.5mm TRS-TRS 3.5mm TRRS-TRRS Shock Mount*1 3/8 Male to 5/8 Female 5/8 Male to 3/8 & Output Cable*1 Audio Output Cable*1 Audio Output Cable*1 Stand Adapter*1 Female Screw*1 超心型双通道无线枪式麦克风... - Page 6 Dual-channel Version Main Parts: Shotgun Microphone(Transmitter) *2 Receiver*1 Accessories: 2 in 1 Charging 3.5mm TRS-TRS 3.5mm TRRS-TRRS 3 in 1 Charging Shock Mount*2 3/8 Male to 5/8 Female & Output Cable*1 Audio Output Cable*1 Audio Output Cable*1 Cable*1 Stand Adapter*2 超心型双通道无线枪式麦克风...
- Page 7 Components and Instruction Microphone(Transmitter) ③ ⑤ ⑦ ① ② ④ ⑥ ⑧ ⑨ ⑩ ⑪...
- Page 8 1. Mic Capsule 2. Low-cut Indicator: Lights up blue when low-cut is turned on 3. High-frequency Boost Indicator: Lights up blue when high-frequency boost is turned on 4. On-board Recording Indicator: Lights up red when on-board recording is turned on 5.
-
Page 9: Copy Mode
Screen Display Instruction Wireless Mode O Pairing... Nor:Normal Mode Sft: Safety Mode Paired Battery Power On-board Recording Time Copy Mode Audio Dynamic Bar (Recording Mode) (Copy Mode) - Page 10 2 in a cycle; long press to turn on/o the on-board recording of channel 1 and channel 2 in sync 8. Belt Clip Long-press the CH1 button and CH2 button in sync to reset the Bluetooth. After resetting, the microphone can be connected to a new phone by Comica Audio App...
- Page 11 1. When the receiver outputs audio through the USB port, it is monitored by the phone speaker by default. Users can switch between phone speaker monitoring and receiver headphone monitoring through the Comica Audio App. For detailed instructions, kindly refer to the App operation guide at the manual's end 2.
-
Page 12: Installation And Usage
Installation and Usage Wired Mode 3.5mm Analog Output Connect the shotgun microphone to the camera/smartphone/computer through the 3.5mm audio cables, or connect to the camcorder/recorder through the 3.5mm TRS-XLR audio cable 1. TRRS-TRRS audio cable for cameras/smartphones/computers, TRS-TRS audio cable for some cameras not compatible with TRRS-TRRS audio cable, TRS-XLR audio cable for recorders/camcorders(Please prepare by yourself) 2. - Page 13 USB Digital Output Connect the shotgun microphone to the smartphone or computer through the 2 in 1 charging & output cable and related OTG audio adapter/cable(if needed) Adapter Adapter Cable Magnetic Ring 1. It’s recommended to insert the USB end with the magnetic ring into the microphone and connect the other end to the smartphone/computer 2.
- Page 14 Wireless Mode Paired (The transmitter and receiver are paired by default at the factory) If the wireless connection is abnormal, short-press the pairing holes of the transmitter and receiver with the pin to re-pair...
- Page 15 Usage Microphone(Transmitter) Use with arm stands, boom poles, and tripods...
- Page 16 Receiver 3.5mm Analog Output Connect the receiver to the camera/smartphone/computer through the 3.5mm audio cable, or connect to the camcorder/recorder through the 3.5mm TRS-XLR audio cable; Monitoring according to individual needs TRRS-TRRS audio cable for cameras/smartphones/computers, TRS-TRS audio cable for some cameras not compatible with TRRS-TRRS audio cable, TRS-XLR audio cable for recorders/camcorders(Please prepare by yourself)
- Page 17 USB Digital Output Connect the receiver to the smartphone/computer through the 2 in 1 charging & output cable and related OTG audio adapter/cable(if needed) Magnetic Ring Adapter Adapter Cable 1. It's recommended to insert the USB end with the magnetic ring into the receiver and connect the other end to the smartphone/computer 2.
-
Page 18: App Operation
App Operation 1. Search and download the "Comica Audio" App in your mobile app store Comica Audio 2. Turn on the Bluetooth of your mobile phone 3. Open the App to search and pair device VM40 Devices Devices Click to add device... -
Page 19: Firmware Upgrade
Enter the copy mode when the mic is turned o (long-press the function button and mode button in sync), then connect the mic to the computer via a USB data cable, copy the firmware upgrade package to the VM40 TX---UPDATA folder, disconnect the USB data cable and restart the mic to upgrade automatically... -
Page 20: Technical Specifications
Technical Specifications Wireless Type 2.4GHz Transmitting Power +10dBm Receiving Sensitivity -96dBm Antenna Ceramic Antenna Sound Delay <20ms Polar Pattern Super Cardioid Frequency Response 20Hz ~ 20kHz Low-cut -3dB @ 100Hz High-frequency Boost +3dB @ 10kHz Output Impedance Sensitivity -38dB ~ -18dB re 1V/Pa(12mv ~ 125mv @ 94dB SPL) ±2dB @ 1kHz 75dB SPL(A-weighted,as per IEC651) Equivalent Noise 19dB SPL(A-weighted,as per IEC651) - Page 23 超心型双通道无线枪式麦克风 用户使用手册...
- Page 25 前 言 感谢您购买科唛COMICA VM40超心型双通道无线枪式麦克风 主要功能 · 超心型双通道无线枪麦,14mm镀金咪头 · 支持自动识别开关机,3.5mmTRS/TRRS智能感测输出 · 48kHz/32-bit浮点录音,有线无线双模式 · OLED显示屏,可视化增益及M/S模式 · 32G内存板载录音,高达40小时内录存储 · 长续航,有线/无线模式分别高达32小时/10 小时 · 搭配科唛官方APP使用,一站式便捷操控 · 无线传输距离高达200米,稳定低延迟(空旷环境) · 一键降噪/低切/高频提升,支持安全音轨及实时监听 · 全新升级减震支架及防风设备,稳固耐用 · 数字/模拟双输出模式,广泛兼容相机/手机/电脑 注意事项 当长时间使用时,可连接移动电源进行边充边用;不建议使用AC/DC电源供电,否则易产生噪音 无线模式下,为获得更好的录音效果,建议优先调节发射器增益,发射器增益调至最大后可再根据个人 需求调节接收器增益 本产品属于高精密仪器类产品,请避免使用时掉落、碰撞或重击 请勿将本设备放置在热源或干扰源附近使用,如散热器、烤箱 如拾音距离较近或于户外使用时,请套上麦克风防风毛,防止声音爆裂或降低风噪 不要在雨中或潮湿的环境中使用该设备,否则会有短路的危险 RX天线位置 TX天线位置 尽量保持面对面,避免背对的情况,否则容易产生断点 使用时避免遮挡发射器和接收器的天线位置,否则会影响无线距离...
- Page 26 包装清单 一拖一版本: 主 体: 麦克风(发射器)*1 接收器 *1 配 件: 充电&输出 3.5mm TRS-TRS 3.5mm TRRS-TRRS 5/8英寸转3/8 减震支架*1 挑杆转接头*1 二合一线 *1 音频线 *1 音频线 *1 英寸转接螺丝*1 超心型双通道无线枪式麦克风 用户使用手册 3/8英寸转1/4 防风棉*1 防风毛*1 卡针*1 收纳包*1 说明书*1 保修卡*1 英寸转接螺丝*1...
- Page 27 一拖二版本: 主 体: 麦克风(发射器)*2 接收器 *1 配 件: 充电&输出 3.5mm TRS-TRS 3.5mm TRRS-TRRS 一分三 减震支架*2 挑杆转接头*2 二合一线 *1 音频线 *1 音频线 *1 充电线 *1 超心型双通道无线枪式麦克风 用户使用手册 5/8英寸转3/8 3/8英寸转1/4 防风棉*2 防风毛*2 卡针*1 收纳包*1 说明书*1 保修卡*1 英寸转接螺丝*2 英寸转接螺丝*2...
- Page 28 部件介绍及说明 麦克风(发射器) ③ ⑤ ⑦ ① ② ④ ⑥ ⑧ 1. 拾音头 ⑨ ⑩ ⑪ 2. 低切指示灯:开启低切时亮蓝灯 3. 高频提升指示灯:开启高频提升时亮蓝灯 4. 内录指示灯:开启内录时亮红灯 5. 功能按键:短按开启/关闭低切/高频提升;长按开启/关闭内录 6. 工作指示灯:有线模式下长亮绿灯;无线模式下未配对时闪烁蓝灯,配对后长亮蓝灯 7. 模式按键:连接音频线输出时,长按开启/关闭无线模式;未连接音频线输出时,长按开机进入无线模式/关机;单击 开启/关闭安全音轨模式 关机状态下,同时长按功能按键与模式按键,麦克风进入拷贝模式,通过充电&输出二合一线连接电脑即可拷贝 内录音频 8. 增益调节旋钮:旋转调节增益 9. 3.5mm输出接口:自动识别TRS/TRRS插头输出模拟音频,连接/断开设备时自动开/关机 10. 配对孔:无线连接出现异常时,使用卡针插入短按即可重新配对 11. USB-C接口:连接USB设备自动开机并输出数字音频;连接电源进行充电;连接设备拷贝内录音频...
- Page 29 屏显说明 无线未开启 配对中... Nor 正常模式 Sft 安全音轨模式 已配对 电量 内录时长 Copy Mode 音频动态条 (录音模式) (拷贝模式)
- Page 30 接收器 ① ② ③ ④ ⑧ ⑤ ⑥ ⑦ 1. USB-C输出/充电接口:连接USB设备输出数字音频;连接电源进行充电 2. 配对孔:无线连接出现异常时,使用卡针插入短按即可重新配对 3. 3.5mm输出接口:自动识别TRS/TRRS插头输出模拟音频 4. 3.5mm监听接口:插入3.5mm TRS/TRRS耳机进行监听 5. CH1增益/降噪按键:一拖一时短按降低麦克风增益;一拖二时短按循环增加和降低通道1增益;长按同时循环调节 通道1和通道2的降噪(开启1档降噪——开启2档降噪——关闭降噪) 6. 电源/模式按键:长按开机/关机;短按切换单声道/立体声/安全音轨模式 7. CH2增益/内录按键:一拖一时短按增加麦克风增益;一拖二时短按循环增加和降低通道2增益;长按同时开启/关闭 通道1和通道2的内录 8. 背夹 同时长按 CH1键和 CH2键可复位蓝牙,重新连接上新手机的 APP...
- Page 31 屏显说明 降噪关闭 Mono:单声道 Stereo:立体声 蓝牙已配对时显示 手机扬声器监听时显示 一档降噪 Safety:安全音轨 二档降噪 蓝牙未配对时不显示 接收器耳机监听时不显示 Safety 接收器电量 发射器电量 增益等级 静音开启时显示 音频动态条 1.接收器通过USB接口输出音频时,默认通过手机扬声器监听,可通过App切换手机扬声器监听/接收器耳机 监听,具体参照说明书底部App操作指南 2.一拖一时显示一个通道音频动态条, 一拖二时显示两个通道音频动态条 3.静音功能可通过App开启/关闭...
- Page 32 安装与使用方法 有线模式 3.5mm模拟输出 通过3.5mm音频连接线连接麦克风和相机/手机/电脑,或通过3.5mmTRS-XLR音频连接线连接摄影机/录音机 1. TRRS-TRRS音频线通用于相机/手机/电脑,TRS-TRS音频线适用于部分无法兼容TRRS-TRRS音频线的相 机,TRS-XLR音频线(请自行购买)适用于录音机和摄影机 2.使用非降压TRS-XLR音频线时请勿开启录音机/摄影机48V幻象供电,枪麦须手动开关机;使用降压 TRS-XLR音频线时可开启48V幻象供电,枪麦可自动开关机...
- Page 33 USB数字输出 通过充电&输出二合一线和相关OTG音频转接线/转接头(如需)连接麦克风和手机/电脑 转接头 转接线 磁环 1. 为了更好的使用体验,建议将带磁环的一端插入麦克风,另一端口连接手机/电脑 2. 搭配Lightning接口设备使用时,请自行购买支持OTG功能的USB-Lightning转接线/转接头...
- Page 34 无线模式 配对(出厂时发射器与接收器默认配对) 若无线连接出现异常时,使用卡针分别插入短按发射器和接收器的配对孔即可重新配对...
- Page 35 使 用 麦克风(发射器) 可搭配悬臂支架,挑杆,三脚架等使用...
- Page 36 接收器 3.5mm 模拟输出 通过3.5mm音频连接线连接接收器和相机/手机/电脑,或通过3.5mmTRS-XLR音频连接线连接摄影机/录音机;可根据个 人需求选择是否进行监听 TRRS-TRRS音频线通用于相机/手机/电脑,TRS-TRS音频线适用于部分无法兼容TRRS-TRRS音频线的相机, TRS-XLR音频线(请自行购买)适用于录音机和摄影机...
- Page 37 USB数字输出 通过充电&输出二合一线和相关OTG音频转接线/转接头(如需)连接接收器和手机/电脑 磁环 转接头 转接线 1.为了更好的使用体验,建议带磁环的一端插入麦克风,另一端口连接手机/电脑 2.搭配Lightning接口设备使用时,请自行购买支持OTG功能的USB-Lightning转接线/转接头...
- Page 38 APP操作 1. 在手机应用商店搜索下载“Comica Audio”APP; Comica Audio 2. 开启手机蓝牙; 3. 打开APP,搜索添加设备:VM40; 设备 设备 点击添加设备 1H16 VM40 4. 通过APP可对接收器和发射器进行设置和操作 VM40 设置 0002 接收器 1H16 设备标识 VM40 增益 1 -18 2 -16 输出模式 安全音轨 输出模式 安全音轨 降噪 关闭 手机扬声器监听 开启 发射器 7H48 接收器增益...
- Page 39 固件升级 在科唛官网下载VM40固件升级包至电脑; 枪麦升级 在关机状态下进入拷贝模式(同时长按功能按键与模式按键),再通过USB数据线连接电脑,将固件升级包拷贝至VM40 TX---UPDATA文件夹,断开USB数据线后重启即可自动升级 接收器升级 在关机状态下进入拷贝模式(先按住CH1键或CH2键,再长按电源键),再通过USB数据线连接电脑,将固件升级包拷贝至 VM40 RX---UPDATA文件夹,断开USB数据线后重启即可自动升级 蓝牙连接部分升级 打开Comica Audio APP连接麦克风后,进入设备主页,点击右上角设置图标---通用---固件升级...
- Page 40 技术规格 2.4GHz 无线类型 +10dBm 发射功率 -96dBm 接收灵敏度 天线类型 陶瓷天线 <20ms 无线延迟 麦克风指向性 超心型 20Hz ~ 20kHz 频率范围 -3dB @ 100Hz 低切 +3dB @ 10kHz 高频提升 输出阻抗 -38dB ~ -18dB re 1V/Pa(12mv ~ 125mv @ 94dB SPL) ±2dB @ 1kHz 灵敏度范围 75dB SPL(A-weighted,as per IEC651) 信噪比...
Need help?
Do you have a question about the VM40 and is the answer not in the manual?
Questions and answers