Muse M-1250 BT - Bluetooth Speaker With PLL Radio Manual
- User manual (2 pages) ,
- User manual
Advertisement
- 1 UNPACK YOUR UNIT
- 2 INSTALLATION
- 3 LOCATION AND DESCRIPTION OF CONTROLS
- 4 POWER SOURCE
- 5 GENERAL OPERATION
- 6 PLAY RADIO
- 7 USB OR SD/SDHC/MMC PLAYBACK
- 8 LISTENING TO AUXILIARY SOURCE
- 9 USB CHARGER-A Power USB Port
- 10 BLUETOOTH PAIRING & LINKING OPERATION
- 11 TROUBLESHOOTING GUIDE
- 12 SPECIFICATIONS
- 13 SAFETY INSTRUCTION
- 14 Documents / Resources
Please read the instruction carefully before operating the unit.
UNPACK YOUR UNIT
When you unpack your new unit, make sure that you have removed all the accessories and information papers:
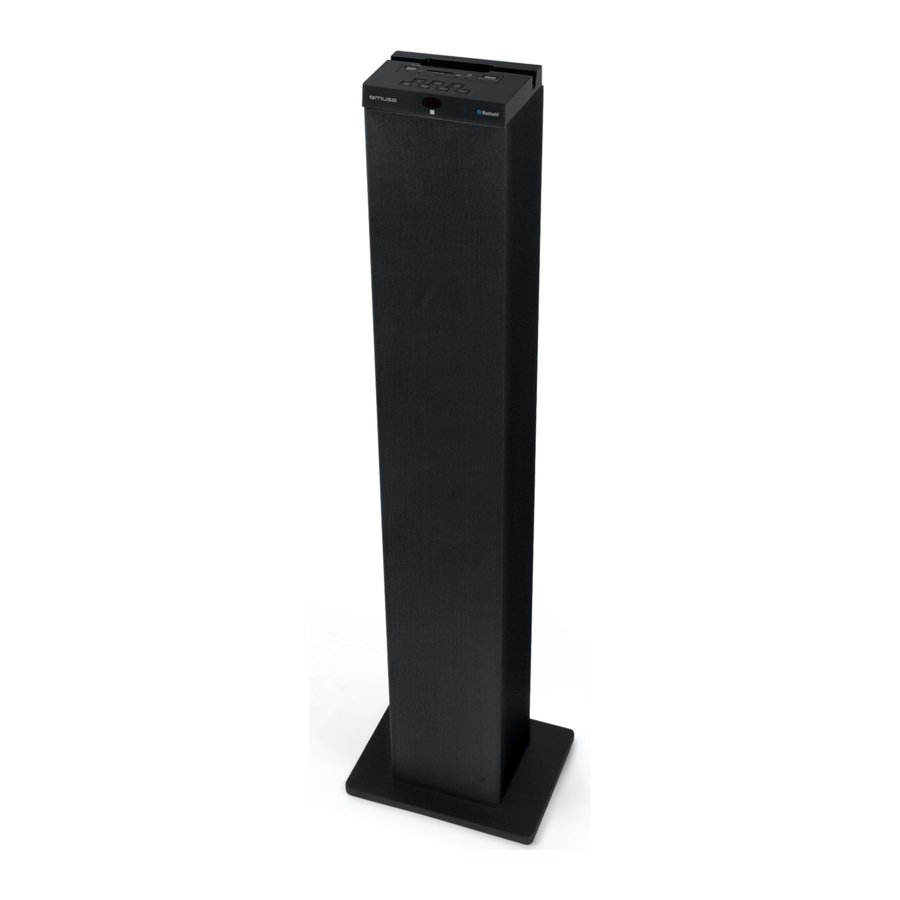
- Speaker tower
- User manual
- Remote Control
- 1 piece of Stereo audio connection cable with 3.5 stereo plug
- 2 pieces of Assembly screws / washers
INSTALLATION

- Remote Sensor
- Tweeters
- Loud Speakers
- Woofer
- Speaker Net
- Base
- Screws
Assembled the wooden base to the main body by the supplied screws and washers as the Fig.1 above. The speaker net can take out and reassemble as Fig.2 above.
LOCATION AND DESCRIPTION OF CONTROLS
MAIN UNIT

- USB MP3 port
- SD card slot
- AUX input jack
- USB CHARGE
- MODE indicators
![]() /
/ ![]() Play/Pause/FM Scan Button
Play/Pause/FM Scan Button- VOL+ Button
- VOL- Button
- MODE button
![]() / TUNE+ Button
/ TUNE+ Button![]() / TUNE- Button
/ TUNE- Button![]() Standby Button
Standby Button- Antenna
 Play/Pause/FM Scan Button
REMOTE CONTROL

R1.  STANDBY Button
R2.  (TUNE -) Button
R3. VOL (Volume)+/- Buttons
R4. MODE Button
R5.  (MUTE) Button
R6.  (TUNE+) Button
R7.  (Play/Pause) Button
R8. STOP Button
R9. FM SCAN Button
R10. EQ Button
R11. Numeric Buttons
The remote control operates on 1pc "CR2025" lithium battery (included). To power up the remote control, remove the insulation tab from the back of unit.

When you press the number keys (0~9), the unit takes some seconds to react.
Replacing battery for the remote control

- Push and slide out the battery trap.
- Replace the battery by a new CR2025 button cell with the polarity "+" face up.
- Replace the cover.
Notes on batteries
- Never recharge the batteries, apply heat to them or take them apart.
- Battery shall not be exposed to excessive heat such as sunshine, fire or the like.
- Do not throw the batteries in fire!
- Attention should be drawn to the environmental aspects of battery disposal.
- If the remote control is not going to be used for a long time, remove the battery to avoid damage caused by battery leakage corrosion.
- Please respect the environment. Before throwing any batteries away, consult your distributor who may be able to take them back for specific recycling.

Danger of explosion if battery is incorrectly replaced. Replace only with the same or equivalent type.

Do not ingest the battery, Chemical Burn Hazard.
(The remote control supplied with) This product contains a coin/ button cell battery. If the coin/ button cell battery is swallowed, it can cause severe internal burns in just 2 hours and can lead to death.
Keep new and used batteries away from children.
If the battery compartment does not close securely, stop using the product and keep it away from children.
If you think batteries might have been swallowed or placed inside any part of the body, seek immediate medical attention.
POWER SOURCE
Insert the AC plug into a conveniently located AC outlet having AC 230V ~ 50Hz.
This unit has a long AC cord that can easily be tripped on or pulled on, causing injury. Please make sure it is arranged so it will not drape over a tabletop, etc. where it can be pulled on by children or tripped over accidentally.
Note: In a concern of saving energy, when playback has reached to the end or listening volume is set at a very low level and no control is operated on the device for a period of 2 hours, the unit will automatically switch to Standby mode.
GENERAL OPERATION
- Press
![]() button to turn on or turn off the unit.
button to turn on or turn off the unit. - Press the MODE button repeatedly to select the playback source as desired. The MODE indicators will light green accordingly.
Note: If no USB device or CARD was inserted, USB or CARD mode cannot be selected by MODE button. - Press the VOL(Volume)+/- Buttons to adjust volume level.
- Press the EQ button to set EQ (equalizers) mode as desired.
- Press the
![]() Button on the remote control to turn off the sound. Press it again to turn it back.
Button on the remote control to turn off the sound. Press it again to turn it back. - If the unit is not used for a long period of time, pull out the plug to turn off the unit completely.
PLAY RADIO
Press the button to turn on the unit.
- Press MODE button repeatedly until the FM Indicator turns on.
- Select the radio station using buttons "
![]() " and "
" and "![]() ". Or, Press the FM SCAN Button on the remote control. The unit will start to search all available FM stations then stored into the memory automatically.
". Or, Press the FM SCAN Button on the remote control. The unit will start to search all available FM stations then stored into the memory automatically. - After finished FM SCAN, press numeric buttons then wait for approx 3 seconds, you can select 1-20 preset stations. eg: pressing "1", means preset station 1. pressing "2" + "0" means preset station 20. Or press to cycle through and listen to the preset stations.
To enhance radio reception ability
FM: Fully unwind the antenna wire. Extend the antenna wire and place it in the position that sounds best.
USB OR SD/SDHC/MMC PLAYBACK
You can connect a USB flash drive (not included) to the USB port or a SD/SDHC/MMC card (not included) to the memory expansion card slot on the unit to play MP3 files.
- Press
![]() button to turn on the unit. Press the MODE Button repeatedly until the USB indicator or SD indicator turns on. Wait for a few seconds, the unit will play the music files automatically.
button to turn on the unit. Press the MODE Button repeatedly until the USB indicator or SD indicator turns on. Wait for a few seconds, the unit will play the music files automatically.
Note: USB or SD card sources will be automatically selected when inserted in. - Press
![]() to suspend momentarily the playing track. Press
to suspend momentarily the playing track. Press ![]() again to resume playing.
again to resume playing. - Press
![]() button to skip forward to next track and
button to skip forward to next track and ![]() to skip backward to previous track. Press and hold
to skip backward to previous track. Press and hold ![]() or
or ![]() to search quickly within a track.
to search quickly within a track. - Using numeric buttons to your desired track. eg: pressing "1", means track 1. pressing "2"+"0"+"9 means track 209.
Note:
- The unit is compatible with the following Memory Device (Source): USB flash drive, SD, SDHC, MMC.
- Supporting format: MP3 (32kbps-320kbps)
- The total number of MP3 files on the Memory Device should not exceed 999.
- If you can not easily insert the memory card, you may have inserted it incorrectly. Try to turn over the card and then insert again.
- For playing files on USB flash drive or SD/SDHC/MMC card, you should plug in the USB flash drive or SD/SDHC/MMC card when the unit is in standby mode. Turn ON the unit and use MODE button to select USB or SD/SDHC/MMC card mode.
- There are many USB devices in the market. We cannot guarantee to support all different models. Please try another USB device if your device is not supported.
- Some SD/SDHC/MMC card may be incompatible.
LISTENING TO AUXILIARY SOURCE
- Connect your auxiliary source (e.g. iPod / iPad / MP3 player) to the AUX jack (3.5mm ).
- Press the
![]() button to turn on the unit. Press the MODE Button repeatedly until the AUX indicator turns on.
button to turn on the unit. Press the MODE Button repeatedly until the AUX indicator turns on. - Start playback from your auxiliary source.
- Adjust the volume to desired level.
- To stop playback, disconnect your auxiliary source from the AUX jack.
USB CHARGER-A Power USB Port
- Connect your device to USB cable (not included) and plug the standard USB plug into the USB charging port on the top of the unit.
- Power on the unit as previous procedures.
- When finished, disconnect the USB cable from the unit.
NOTES:
- The maximum output from the USB charging port is DC
![]() 5V,2.1A. You can charge any rechargeable USB devices charging current less than it, such as iPod, iPhone, iPad, MP3 Player...etc.
5V,2.1A. You can charge any rechargeable USB devices charging current less than it, such as iPod, iPhone, iPad, MP3 Player...etc. - Charging function is not available in Standby mode.
- Some devices may be incompatible.
 5V,2.1A. You can charge any rechargeable USB devices charging current less than it, such as iPod, iPhone, iPad, MP3 Player...etc.
BLUETOOTH PAIRING & LINKING OPERATION
- Turn off the Bluetooth functionality of other devices that were paired with your unit.
- Press the
![]() button to turn on the unit.
button to turn on the unit. - Press MODE button to select Bluetooth mode, The Bluetooth indicator will turn on. Your unit will be in pairing mode with two beep tone voice.
- Turn on Bluetooth functionality on your Bluetooth device. Typically, Bluetooth controls are found on the device's tools or settings menu (see your user manual). Turn on Bluetooth connectivity and make your device "discoverable".
- Clean out the paring list on your Bluetooth device.
- Choose "add a new Bluetooth device" or "setup Bluetooth device" on your device. It will start to search. Once "M-1250BT" shows on your device, select it. If your device prompts you for a pass code, please enter 0000. If the pairing attempt fails or times out, please start pairing procedure again (see steps 2-6).
- After your device and the "M-1250BT" have connected each other, a tone voice can be heard.
Play MUSIC from Bluetooth devices
Make sure the Bluetooth connection between the unit and the device is active.
- Press
![]() to suspend momentarily the playing track. Press
to suspend momentarily the playing track. Press ![]() again to resume playing.
again to resume playing. - Press
![]() button to skip forward to next track and
button to skip forward to next track and ![]() to skip backward to previous track.
to skip backward to previous track.
Note: and buttons may not work with some of the players in your Bluetooth source.
TROUBLESHOOTING GUIDE
| Symptom | Cause | Solution |
No power | AC plug not plugged into wall outlet. | Plug it to the wall outlet properly. |
| The unit is in Standby mode. | Press the button to turn on the unit. | |
No sound | Volume in minimum. | Adjust volume to a desired level. |
| The connected device is not in playback mode. | Play the music in the connected device. | |
| Sound output of the connected device weak. (AUX IN & BLUETOOTH mode) | Adjust volume of connected device. | |
Sound distortion | Volume level too high. | Reduce the volume level by press the VOL- button. |
| Volume level of the connected device too high. (AUX IN & BLUETOOTH mode) | Reduce the volume level of the connected device. | |
Bluetooth reception failure | Not in the Bluetooth mode. | Try to do connection again. |
- Do not block any ventilation openings. Install in accordance with the manufacturer's instructions.
- Do not install near any heat sources such as radiators, heat registers, stoves, or other apparatus (including amplifiers) that produce heat.
- Do not defeat the safety purpose of the polarized or grounding type plug. A polarized plug has two blades with one wider than the other, a grounding type plug has two blades and a third grounding prong, the wide blade or the prong are provided for your safety. If the provided plug does not fit into your outlet, consult an electrician for replacement of the obsolete outlet.
- Protect the power cord from being walked on or pinched particularly at plugs, convenience receptacles, and the point where they exit from the apparatus.
- Only use attachments / accessories specified by the manufacturer.
- Use only with the cart, stand, tripod, bracket, or table specified by the manufacturer, or sold with the apparatus. When a cart is used, use caution when moving the cart / apparatus combination to avoid injury from tip-over.
![]()
- Unplug this apparatus during lightning storms or when unused for long periods of time.
- An outside antenna system should not be located in the vicinity of overhead power lines or other electric light or power circuits, or where it can fall into such power lines or circuits. When installing an outside antenna system, extreme care should be taken to keep from touching such power lines or circuits as contact with them might be fatal.
- Do not overload wall outlets and extension cords as this can result in a risk or fire or electric shock.
- When replacement parts are required, be sure the service technician uses replacement parts specified by the manufacturer or those that have the same characteristics as the original part. Unauthorized substitutions may result in fire or electric shock or other hazards.

SPECIFICATIONS
Power source: AC 230V ~ 50Hz
Radio Coverage: FM 87.5 -108.0 MHz
Bluetooth working distance: Up to 10 meters measured in open space. (Wall and structures may affect range of device)
Bluetooth: 2.402-2.48GHz
RF Output Power: 2 dBm
Remote working distance: Up to 5 meters, +/- 30 degree.
SAFETY INSTRUCTION

ATTENTION: To reduce the risk of electric shock, do not remove the cover or back. There are no user serviceable parts inside the unit. Refer all servicing to qualified personnel.
 The lightning flash with arrowhead symbol within the triangle is a warning sign alerting the user of "dangerous voltage" inside the unit.
 The exclamation point within the triangle is a warning sign alerting the user of important instructions accompanying the product.
TO PREVENT FIRE OR SHOCK HAZARD, DO NOT EXPOSE THIS APPLIANCE TO RAIN OR MOISTURE.

If at any time in the future you should need to dispose of this product please note that Waste electrical products should not be disposed of with household waste. Please recycle where facilities exist. Check with your Local Authority or retailer for recycling advice.(Waste Electrical and Electronic Equipment Directive)
The Bluetooth® word mark and logos are registered trademarks owned by Bluetooth SIG, Inc. and any use of such marks by New One S.A.S is under license. Other trademarks and trade names are those of their respective owners.
Hereby, NEW ONE S.A.S, declares that this MUSE M-1250 BT is in compliance with the essential requirements and other relevant provisions of Directive 1999/5/EC. The declaration of conformity may be consulted at http://www.muse-europe.com/conformity/M-1250BT.pdf
NEW ONE S.A.S
10, Rue de la Mission, 25480 Ecole Valentin, France


Documents / ResourcesDownload manual
Here you can download full pdf version of manual, it may contain additional safety instructions, warranty information, FCC rules, etc.
Download Muse M-1250 BT - Bluetooth Speaker With PLL Radio Manual
Advertisement


Need help?
Do you have a question about the M-1250 BT and is the answer not in the manual?
Questions and answers