Advertisement
- 1 LOCATION AND DESCRIPTION OF CONTROLS
- 2 ACCESSORIES
- 3 POWER SUPPLY
- 4 AUDIO CONTROLS
- 5 SETTING THE TIME
- 6 SLEEP FUNCTION
- 7 TIMER SETTING
- 8 RADIO
- 9 USB OR SD/ MMC CARD PLAYBACK
- 10 CONNECTING WITH EXTERNAL DEVICES
- 11 BLUETOOTH OPERATION
- 12 WALL MOUNTING INSTRUCTION
- 13 TROUBLE SHOOTING GUIDE
- 14 TECHNICAL SPECIFICATIONS
- 15 Documents / Resources
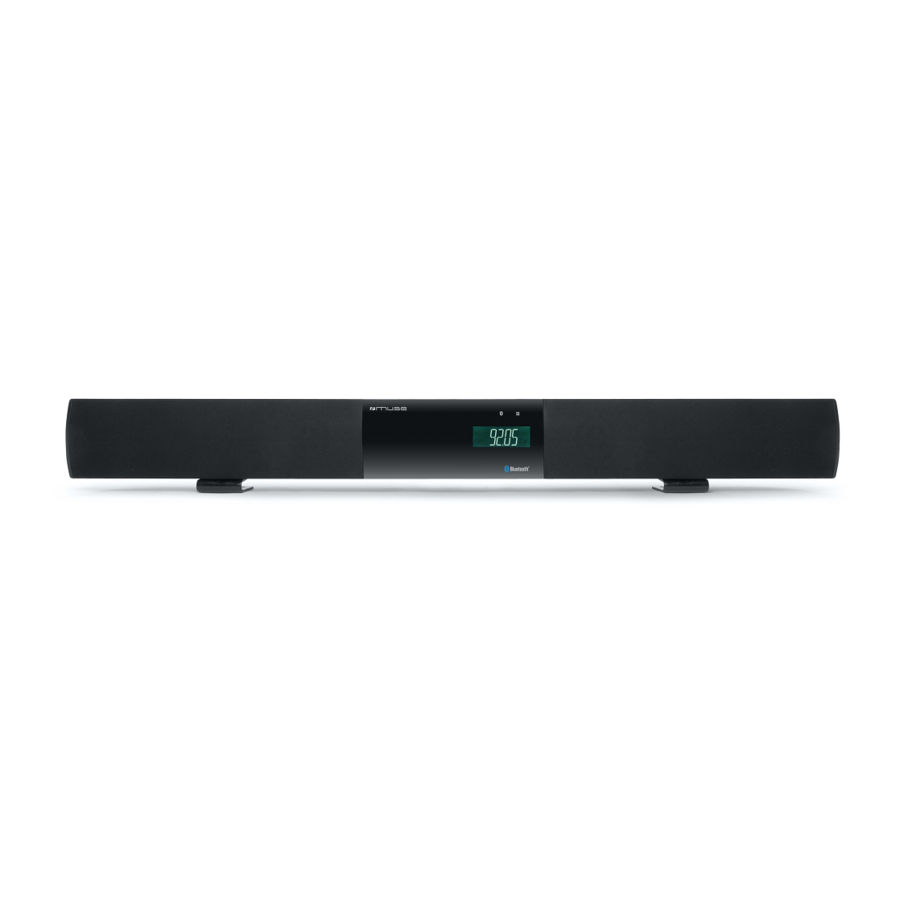
LOCATION AND DESCRIPTION OF CONTROLS
MAIN UNIT


- VOL - button
- VOL + button
![]() Standby button
Standby button- MODE button
- PAIR /
![]() button
button - SD/MMC card slot
- USB port
- LCD display
![]() Bluetooth indicator
Bluetooth indicator![]() Remote sensor
Remote sensor- Hanging holes
- FM wire antenna
- AC power cord
- OPTICAL IN jack
- AUX IN jacks
- LINE IN jack
- Speakers
 Bluetooth indicator
 Remote sensor
REMOTE CONTROL

R1. MODE button
R2. SLEEP button
R3. MUTE button
R4.  Standby button
R5. TIMER button
R6. CLOCK button
R7. TUNE /  button
R8. TUNE /  button
R9. Number (0-9) buttons
R10. MEM (Memory) button
R11. PAIR / button
R12. EQ button
R13. VOICE button
R14. MUSIC button
R15. MOVIE button
R16. BASS +/- buttons
R17. TREBLE +/- buttons
R18. CH +/- (Channel) buttons
R19. VOL +/- (Volume) buttons
The remote control operates on 1pc "CR2025" lithium battery (included). To power up the remote control, remove the insulation tab from the back of unit.

REPLACING BATTERY FOR THE REMOTE CONTROL
- Push the button toward right.
- Pull the battery loader out.
- Insert one "CR2025" size battery with the positive side (+) facing up.
- Replace the cover.


Before throwing any batteries away, consult your distributor who may be able to take them back for specific recycling.
NOTES:
- Never recharge the batteries, apply heat to them or take them apart.
- In order to avoid leakage, always remove the batteries when unit will not be used for a long period of time.
- If the remote control is not going to be used for a long time, remove the battery to avoid damage caused by battery leakage corrosion.

Danger of explosion if battery is incorrectly replaced. Replace only with the same or equivalent type.
ACCESSORIES
Remote control x1
3.5mm LINE IN cable x1
AUX IN RCA cable x1
Wall mounting kit x1
POWER SUPPLY
This set operates on AC 100-240V~ 50/60Hz.
Connect the power cord to a convenient AC wall outlet.
NOTE: If there is no audio signal input to the unit within 60 minutes, the unit will switch to standby mode automatically (except in FM mode).
AUDIO CONTROLS
- Press
![]() button to turn on the unit.
button to turn on the unit. - Press MODE button repeatedly to select the playback source as desired:
LINE—AUX—USB—CARD—OPT in—BT—FM.
VOLUME
Press VOL+/- to adjust the sound to comfortable level. The volume level will be displayed for a few seconds.
MUTE
To cut off the sound from the speakers temporarily, press MUTE button on remote control. Press MUTE button again to cancel Mute mode and restore the sound from the speakers.
EQ
Press EQ button on remote control to toggle among the different sound effects (FLAT / CLASSIC /ROCK /POP / JAZZ). The selection will show on display for a few seconds.
TREBLE, BASS
Press TREBLE+/- buttons or BASS+/- buttons on remote control to adjust treble effect or bass effect.
VOICE, MUSIC, MOVIE
Press VOICE, MUSIC or MOVIE buttons on remote control to switch among voice, music and movie audio modes for getting high sound quality. The audio modes can reveal the characters and details of the sound of the voice, music and movie.
SETTING THE TIME
- In standby mode, press and hold CLOCK until the clock hour flashes on display.
- Press
![]() to set hour and then press CLOCK to shift to the minute digits.
to set hour and then press CLOCK to shift to the minute digits. - Press
![]() to set the minute. Press CLOCK again to save setting.
to set the minute. Press CLOCK again to save setting. - To check the clock time at any time, press CLOCK once.
 to set hour and then press CLOCK to shift to the minute digits.
SLEEP FUNCTION
In sleep mode, the unit will turn off automatically after a specified time.
You can select duration in minutes before the unit turns off automatically.
- Press SLEEP button on remote control repeatedly to select 90-80-70-60-50-4030-20-10-05-03-00. Release SLEEP button. "
![]() " icon remains on display.
" icon remains on display.
 " icon remains on display.
Notes:
- Sleep time can only be set when the unit is turned ON.
- The sleep function is cancelled when "00" is selected, and " " icon disappears.
- Press SLEEP button to check the remaining sleep time.
- If you want to switch off the unit before sleep time ends, press
![]() button.
button.
TIMER SETTING
- In standby mode, press and hold TIMER until the clock hour and "T" flash on display.
- Press
![]() to set hour and then press TIMER to shift to the minute digits.
to set hour and then press TIMER to shift to the minute digits. - Press
![]() to set the minute. Press TIMER again to save setting. "T" icon remains on display.
to set the minute. Press TIMER again to save setting. "T" icon remains on display. - When Timer time is reached, the radio will be turned on automatically from last FM station with progressive sound. To stop the timer, press
![]() button.
button. - The timer function can be deactivated or activated by short pressing TIMER button in standby mode.
RADIO
Listening to the radio
- Press
![]() button to turn on the unit.
button to turn on the unit. - Press MODE button to select radio(FM) mode.
- Press
![]() to tune to a desired radio station.
to tune to a desired radio station.
Note: For a better reception in FM, extend the antenna.
Presetting radio stations
The unit can store up to 10 FM stations in its memory.
- Tune to a desired station.
- Press MEM button on remote control. "P01" flashes on display.
- Press CH-/+ on remote control to select a desired preset location. Press MEM again to save the radio station as the selected preset station.
- Repeat above steps to preset a maximum of 10 stations.
USB OR SD/ MMC CARD PLAYBACK
You can connect a USB flash drive (not included) to the USB port or a SD/MMC card (not included) to the memory expansion card slot on the unit to play MP3 files.
- Plug the USB flash drive into the USB port on the unit. Plug the memory card into the memory expansion card slot. Press
![]() button to turn on the unit. Press MODE button to select USB mode or CARD mode. Playback will start automatically.
button to turn on the unit. Press MODE button to select USB mode or CARD mode. Playback will start automatically. - Press
![]() button to suspend momentarily the playing track. Press
button to suspend momentarily the playing track. Press ![]() again to resume playback.
again to resume playback. - Press
![]() button to skip forward to next track and press
button to skip forward to next track and press ![]() to skip backward to previous track. Press and hold
to skip backward to previous track. Press and hold ![]() or
or![]() to search quickly within a track.
to search quickly within a track.
 button to suspend momentarily the playing track. Press
  button to skip forward to next track and press
  to skip backward to previous track. Press and hold
 Note:
- Supporting format: MP3 (32kbps~320kbps)
- The total number of MP3 files on the Memory Device should not exceed 9999.
- If you can not easily insert the memory card, you may have inserted it incorrectly. Try to turn over the card and then insert again.
- There are many USB devices in the market. We cannot guarantee to support all different models. Please try another USB device if your device is not supported.
- Some SD/MMC card may be incompatible.
CONNECTING WITH EXTERNAL DEVICES
To 3.5mm LINE IN jack
Connect your audio source (e.g mp3 player) to the LINE IN jack on unit with the supplied LINE IN cable.
To AUX IN RCA jacks
Connect your audio source (e.g. DVD player) to the AUX IN R/L jacks on unit with the supplied AUX IN RCA cable.
To OPTICAL IN jack
Connect your audio source to the OPTICAL IN jack on unit with a digital optical audio cable (not supplied).
- Press
![]() button to turn on the unit.
button to turn on the unit. - Press MODE button to select the desired mode: LINE, AUX or OPT IN.
- Start playback from your audio source.
- Adjust the volume to desired level.
- To stop playback, disconnect your audio source from this unit.
BLUETOOTH OPERATION
This Bluetooth speaker M-1800 SBT supports Bluetooth audio function. You can play the audio file in your Bluetooth audio source device (e.g. mobile phone) via M-1800 SBT.
- Press MODE button to select Bluetooth mode. "BT" is displayed. The Bluetooth indicator keeps rapid blinking while the unit is pairing.
- Turn on the Bluetooth function of your Bluetooth audio source device (e.g. mobile phone). Select the item of searching the Bluetooth device and enter it. Your Bluetooth audio source device (e.g. mobile phone) starts to search for Bluetooth devices within range (10 meters). Select this Bluetooth speaker "M-1800 SBT" and confirm it, then you are asked to input a 4-digit password that is 0000. Enter the password and confirm it. (If you have made Bluetooth connectivity before, a list of the previous search results is displayed. Select "M-1800 SBT" and confirm.) The Bluetooth indicator remains on when pairing is successful.
- During playback, press
![]() button to pause playback, press again to resume.
button to pause playback, press again to resume. - During playback, press
![]() or
or ![]() to skip tracks.
to skip tracks. - Turn off the Bluetooth function of your Bluetooth audio source device to do disconnection.
RECONNECT TO THE BLUETOOTH AUDIO SOURCE DEVICE
If your Bluetooth audio source device has already been paired with M-1800 SBT but accidentally disconnected, long press PAIR/ button to do connection again.
Observe the Bluetooth indicator to know the pairing status.
| Bluetooth indicator | Pairing status |
| Slow blinking | Not in pairing mode. Long press PAIR/ button to enter pairing mode. |
| Rapid blinking | In pairing mode. |
| Remains on | Pairing succeeds. |
WALL MOUNTING INSTRUCTION
Select the desired location for wall mounting after carefully reviewing the diagram below.

TROUBLE SHOOTING GUIDE
| Symptom | Cause | Solution |
No power | AC plug is not plugged into wall outlet. | Plug it to the wall outlet properly. |
No sound | Volume is in minimum. | Adjust volume to a desired level. |
| The connected device is not in playback mode. | Play the music in the connected device. | |
| Sound output of the connected device is weak. | Adjust volume of connected device. | |
Sound distortion | Volume level is too high. | Reduce the volume level by pressing VOL- button. |
| Volume level of the connected device is too high. | Reduce the volume level of the connected device. | |
Bluetooth reception failure | Not in the Bluetooth mode. | Try to connection again. |
TECHNICAL SPECIFICATIONS
Power supply: AC 100-240V ~ 50/60Hz, 50W
Radio: FM 87.5-108MHz

Documents / ResourcesDownload manual
Here you can download full pdf version of manual, it may contain additional safety instructions, warranty information, FCC rules, etc.
Advertisement


Need help?
Do you have a question about the M-1800 SBT and is the answer not in the manual?
Questions and answers