Table of Contents
Advertisement
Quick Links
Advertisement
Table of Contents

Subscribe to Our Youtube Channel
Related Manuals for Bartscher 900004


Summary of Contents for Bartscher 900004
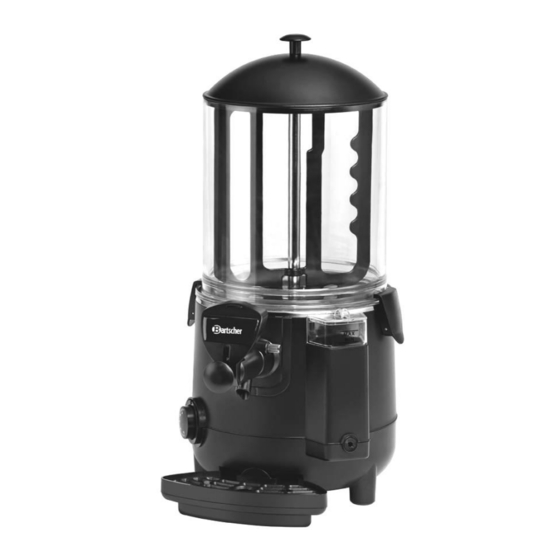
- Page 1 9,5L - 5L 900004 - 900011...
- Page 2 Bartscher GmbH Phone: +49 5258 971-0 Franz-Kleine-Str. 28 Fax: +49 5258 971-120 Technical Support Hotline: +49 5258 971-197 D-33154 Salzkotten Germany www.bartscher.com Version: 1.0 Date of preparation: 2022-11-10...
-
Page 3: Table Of Contents
6.2.4 Bowl Cleaning .................. 23 6.2.5 Drain Tap Disassembly ..............24 6.2.6 Cleaning and Disinfecting of Components ........25 6.2.7 Components Assembly ..............26 6.2.8 Cleaning and Disinfecting of Internal Components......28 6.2.9 Drip Tray Cleaning ................29 900004 1 / 34... - Page 4 6.2.10 Tank Lid Cleaning ................29 6.2.11 Water Tank Emptying / Cleaning / Descaling ........30 Maintenance ..................32 Possible Malfunctions .................. 32 Disposal ....................... 34 2 / 34 900004...
-
Page 5: Safety
You must strictly follow the instructions, to prevent accidents, personal injuries and property damages. DANGER! The signal word DANGER warns against hazards that lead to severe injuries or death if the hazards are not avoided. 900004 3 / 34... -
Page 6: Safety Instructions
Any repairs or housing opening may be carried out by professionals and relevant workshops only. • Do not transport the appliance, holding it by the power cord. • Do not allow the power cord to come into contact with heat sources or sharp edges. 4 / 34 900004... - Page 7 It is prohibited to sprinkle hot surfaces with cold water or flammable liquids. Health hazard due to germs! • The tank must be regularly emptied and disinfected to eliminate the possibility of accumulation of harmful and dangerous germs. Supervised Usage only 900004 5 / 34...
- Page 8 • The appliance may only be used clean. • Use only original spare parts. Never attempt to repair the appliance on your own. • Do not attempt to modify nor alter the appliance. 6 / 34 900004...
-
Page 9: Intended Use
The appliance may only be used to perform tasks described in this instruction manual. The following is an unintended use: – heating up unsuitable liquids, – storing and heating up flammable, harmful, and quickly evaporating liquids or materials, etc. 900004 7 / 34... -
Page 10: General Information
Declaration of Conformity The appliance meets the currently applicable standards and guidelines of the European Union. We confirm the above in the EC Declaration of Conformity. We may provide relevant Declaration of Conformity upon request. 8 / 34 900004... -
Page 11: Transport, Packaging And Storage
– in a location protected against mechanical shocks. In the case of extended storage (over three months), make sure you check the condition of the packaging and the parts regularly. If needed, replace the packaging with a new one. 900004 9 / 34... -
Page 12: Technical Data
Technical Data Technical Data Technical Specifications Name: Chocolate dispenser 9,5L 900004 Art. No.: Material: plastic, stainless steel Stirrer material: plastic Stirrer blade material: stainless steel Volume, in l: Max. glass/cup height, in cm: Temperature range, min.–max., in °C: 0 - 85... - Page 13 Technical Data Version / Characteristics 900004 / 900011 • Designed for heating up and maintaining temperature of hot chocolate and cocoa. • Temperature control: stepless, up to max. 85˚C • Overheating protection • Drip tray: integrated • Control: electronic | knob •...
-
Page 14: List Of Components Of The Appliance
9. Water tank drain screw 10. Feet (5 pcs) 11. Tank 12. Drain tap 13. ON/OFF switch with power 14. Temperature controller indicator light 15. Drip tray grate 16. Drip tray with filling level sensor 17. Cleaning brush 12 / 34 900004... -
Page 15: Functions Of The Appliance
4. Use an appropriate tool to undo the safety screw (A) (Fig. 2). Fig. 2 5. Use an appropriate tool to press the reset button (Fig. 3). 6. Then, start the appliance as usual. Fig. 3 900004 13 / 34... -
Page 16: Installation And Operation
Maintain clearance of at least 20 cm from the edge of installation surface. • To provide for access to control elements, maintain clearance of at least 25 cm at sides and from the top. • Ambient temperature should be in the range of 10–32°C. 14 / 34 900004... -
Page 17: Operation
To switch the appliance on, perform the following steps: 1. Make sure the ON/OFF switch is off. 2. Remove the water tank cover. TIP! To provide for correct operation of the appliance, fill the water tank with filtered water only. Fig. 4 900004 15 / 34... - Page 18 8. Press the ON/OFF switch to start the appliance. The ON/OFF switch indicator light will light The stirrer blade moves and stirs beverage in the tank. The indicator light goes off when the Fig. 7 appliance is switched off with the ON/OFF switch. 16 / 34 900004...
- Page 19 TIP! If a beverage is particularly dense and clogs the outlet opening, clean it by moving the rod back and forth. Hold the appliance while doing that. Fig. 10 900004 17 / 34...
-
Page 20: Cleaning And Maintenance
Both the material, and the shape of metal and plastic components, as well as rubber elements used on them facilitate cleaning of the appliance, but they do not prevent growth of bacteria and mould in the case of incorrect cleaning. 18 / 34 900004... -
Page 21: Emptying The Tank
3. Rotate the temperature controller to 50°C. 4. Start the appliance for at least 15–20 minutes, for all the product residues to be removed from the tank walls. Fig. 11 5. Re-empty the tank by operating the drain tap lever. 900004 19 / 34... -
Page 22: Tank Disassembly
To disassemble the tank correctly, proceed the following way: Fig. 12 Fig. 13 1. Remove the lid from the tank. 2. Pull the stirrer blade straight upwards, until its lug rests on the top section of the stirrer. 20 / 34 900004... - Page 23 (A) upwards, and use the rest of your fingers to grab the external edge of the tank (B). Carefully remove the tank from the holder in the base. 900004 21 / 34...
-
Page 24: Drain Tap Removal
Fig. 21 1. Pull the drain tap lever completely. 2. Use one hand to hold the pressed tab that holds the drain tap and, at the same time, pull the drain tap with the other hand. 22 / 34 900004... -
Page 25: Bowl Cleaning
4. Install the drain tap on the appliance. 5. Pour a little water into the bowl. 6. Let water flow through the drain tap to remove all residues of a product from the tube connecting the tank with the drain tap. Fig. 24 900004 23 / 34... -
Page 26: Drain Tap Disassembly
3. Remove the knob (E) by rotating it 4. Remove the rod (G) and the spring counter-clockwise while holding the (H) from the drain tap housing (the rod. pin/gasket assembly (I) slides out together with the rod). 24 / 34 900004... -
Page 27: Cleaning And Disinfecting Of Components
– to disinfect, submerge the cleaned and rinsed components in this solution and leave them in the solution for approximately 30 minutes; – rinse in fresh water; – clean the tank lid (section 6.2.10); – place the components on clean surface and dry them thoroughly. 900004 25 / 34... -
Page 28: Components Assembly
NOT arranged evenly along the entire edge of the tank. 3. Wet the gasket with water. 4. Then insert the tank and press it downwards. TIP! Do not use fat nor vaseline! Fig. 33 26 / 34 900004... - Page 29 7. Fix the tank with clamps at the 8. Place the stirrer in its holder. base of the appliance. 9. Place the stirrer blade in its holder; proceed in a reverse order, as described in section 6.2.2. Fig. 38 900004 27 / 34...
-
Page 30: Cleaning And Disinfecting Of Internal Components
– fill the tank with disinfection solution; – leave for 30 minutes so that the solution starts acting; – empty the tank; – to end with, rinse the tank and the bowl thoroughly to remove the residues of the disinfecting agent. 28 / 34 900004... -
Page 31: Drip Tray Cleaning
1. Remove the tank lid. 2. Clean it with a damp cloth or a soft sponge, soaked with disinfecting agent. 3. Rinse thoroughly with fresh water. 4. Before re-inserting it on the tank, dry the lid thoroughly. Fig. 42 900004 29 / 34... -
Page 32: 6.2.11 Water Tank Emptying / Cleaning / Descaling
5. Hold a collection tank (B) with the volume of 3 litres underneath the water tank with the drain screw (C). Fig. 44 30 / 34 900004... - Page 33 4. Pour the solution into the water tank and leave it for as long as indicated on a packaging. 5. Empty the water tank (section 6.2.11). 6. Thoroughly rinse the water tank by filling it repeatedly with fresh water and draining it (section 6.2.11). 900004 31 / 34...
-
Page 34: Maintenance
Connect the plug correctly Stirrer is not correctly Remove the stirrer and install settled it observing indication in section 6.2.6 Motor issue Contact the service company ON/OFF switch in OFF Set the ON/OFF switch to ON position position 32 / 34 900004... - Page 35 Beverage is Incorrectly installed tank Empty the tank, remove and coming from the re-install it observing bottom of the indications in section 6.2.7 appliance Damaged gasket in the Contact the service company bottom of the tank 900004 33 / 34...
-
Page 36: Disposal
You must not dispose of electric appliances with household waste. Disconnect the appliance from the power supply and remove power cord from the appliance. Electrical appliances should be returned to designated collection points. 34 / 34 900004...
Need help?
Do you have a question about the 900004 and is the answer not in the manual?
Questions and answers