
Related Manuals for DeDietrich IX 245-130


Summary of Contents for DeDietrich IX 245-130
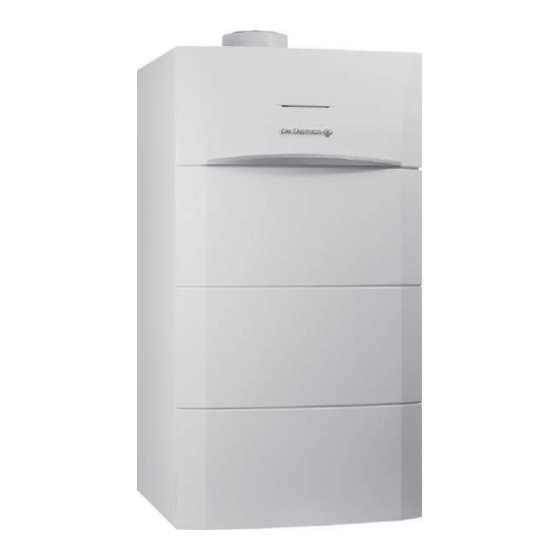
- Page 1 PROJECT Installation, User and Service Manual Floor-standing condensing gas boiler IX 245–130 IX 245–150 IX 245–200 IX 245–250 S U S T A I N A B L E C O M F O R T ®...
-
Page 2: Table Of Contents
Contents Contents Safety ................... . 6 General safety instructions . - Page 3 Contents One boiler + one direct circuit + one domestic hot water tank ......... . . 46 6.1.1 Hydraulic connection .
- Page 4 Contents Starting up the boiler ................81 Stopping the boiler .
- Page 5 Contents 16 Disposal and recycling ................156 17 Warranty .
-
Page 6: Safety
1 Safety Safety General safety instructions For the installer and end user: Danger This appliance can be used by children aged from 8 years and above and persons with reduced physical, sensory or mental capabilities or lack of experience and knowledge if they have been given supervision or instruction concerning use of the appliance in a safe way and understand the hazards involved. - Page 7 1 Safety Danger If you smell gas: 1. Do not use a naked flame, do not smoke, do not operate electrical contacts or switches (doorbell, light, motor, lift, etc.). 2. Shut off the gas supply. 3. Open the windows. 4. Locate the probable leak and seal it immediately.
-
Page 8: Recommendations
1 Safety Recommendations Danger For safety reasons, we recommend fitting smoke and CO detectors and alarms at suitable places in your home. Caution The boiler must always be connected to the protective earthing. Earthing must comply with the prevailing installation standards. Earth the appliance before making any electrical connections. -
Page 9: Liabilities
1 Safety Caution The frost protection function only protects the boiler, not the heating system. Caution The frost protection function does not work if the boiler is powered off. Caution The appliance should be switched to Summer or Frost Protection mode rather than be switched off in order to guarantee the following functions: Avoidance of pumps blocking Frost Protection... -
Page 10: Installer's Liability
1 Safety Failure to abide by the instructions on installing and maintaining the appliance. Failure to abide by the instructions on using the appliance. Faulty or insufficient maintenance of the appliance. 1.3.2 Installer's liability The installer is responsible for the installation and initial commissioning of the appliance. -
Page 11: Symbols Used
2 Symbols used Symbols used Symbols used in the manual This manual uses various danger levels to draw attention to special instructions. We do this to improve user safety, to prevent problems and to guarantee correct operation of the appliance. Danger Risk of dangerous situations that may result in serious personal injury. -
Page 12: Technical Specifications
3 Technical specifications Technical specifications Homologations 3.1.1 Directives This product has been manufactured and put into circulation in accordance with the requirements and standards of the following European Directives: Gas Appliances Regulation (EU) (2016/426) Pressure Equipment Directive 2014/68/EU Electromagnetic Compatibility Directive (2014/30/EU). Low Voltage Directive (2014/35/EU). -
Page 13: Technical Data
3 Technical specifications CE number 0085CP0089 NOx class Class 6 Gas and pressures Natural gas (G20) - 20 mbar Natural gas (G25) - 25 mbar Natural gas (G27) - 20 mbar Propane (G31) - 37/50 mbar Tab.2 Type of flue gas connection Boiler model Type of flue gas connection IX 245–130... - Page 14 3 Technical specifications Unit IX 245–130 IX 245–150 IX 245–200 IX 245–250 Maximum operating pressure (PMS) MPa (bar) 0.6 (6) 0.6 (6) 0.6 (6) 0.6 (6) Maximum water temperature °C Maximum operating temperature °C Tab.5 Data on the gases and combustion gases For gas flow rates at 15°C and Boiler speed Unit...
-
Page 15: Other Technical Parameters
3 Technical specifications 3.2.1 Other technical parameters Tab.8 Technical parameters for boiler space heaters Product name IX 245–130 IX 245–150 IX 245–200 IX 245–250 Condensing boiler Low-temperature boiler B1 boiler Cogeneration space heater Combination heater Prated Rated heat output Useful heat output at rated heat output 121.5 140.0 186.0... -
Page 16: Dimensions And Connections
3 Technical specifications Dimensions and connections 3.3.1 IX 245–130 and IX 245–150 Fig.2 78.5 98.5 MW-4000315-1 31.5 38.5 305.5 98.5 1 Flue gas outlet (110/160 mm) 4 Heating circuit return (G1"1/2) 2 Heating circuit flow (G1"1/2) 5 Condensate discharge (diameter 32 mm) 3 Gas inlet (G1") 6 Drain (1/2”) 3.3.2... -
Page 17: Electrical Diagram
3 Technical specifications Electrical diagram 3.4.1 IX 245–130 and IX 245–150 Fig.4 BR BR BR G/Y BL BL MW-5000718-3 Earth POP rivet P Boiler pump modulation (PWM) 1 Flow temperature sensor A Power supply 230 V 50 Hz 2 Return temperature sensor B Power supply auxiliary circuit 1 3 Hydraulic pressure sensor C Power supply auxiliary circuit 2... -
Page 18: 245-200 And Ix 245-250
3 Technical specifications 3.4.2 IX 245–200 and IX 245–250 Fig.5 MW-4000294-2 Earth POP rivet P Boiler pump modulation (PWM) 1 Flow temperature sensor A Power supply 230 V 50 Hz 2 Return temperature sensor B Power supply auxiliary circuit 1 3 Hydraulic pressure sensor C Power supply auxiliary circuit 2 4 Flue gas sensor... -
Page 19: Description Of The Product
4 Description of the product Description of the product General description IX floor-standing condensing gas boilers have the following characteristics: Low pollutant emissions High efficiency heating Electronic control panel Flue gas discharge by a forced flue or chimney type connection. Flue gas discharge by a forced flue, chimney or bi-flow type connection. -
Page 20: Low-Loss Header (Accessory)
4 Description of the product 4.2.3 Low-loss header (accessory) Fig.6 1 Low-loss header kit Low-loss headers are available for all boiler outputs. The low-loss header is a component which enables the primary circuit and secondary circuit to have a hydraulic system independent from the boiler installation. -
Page 21: Plate Heat Exchanger (Accessories)
4 Description of the product 4.2.4 Plate heat exchanger (accessories) Fig.8 The main advantage of the plate heat exchanger is that it hydraulically isolates the primary and secondary circuits. It also enables the boiler body to be protected from any contamination found in the secondary heating circuit water. -
Page 22: System In Cascade
4 Description of the product 4.2.5 System in cascade Fig.10 MW-5000719-3 The boiler is ideally suited for a cascade system configuration. Use a boiler/cascade connection kit to connect boilers in cascade. 4.2.6 Settings and safety devices Important The settings and safety devices are only operational if the boiler is powered up. -
Page 23: Main Components
4 Description of the product Device Description Frost protection device When the flow temperature is lower than 5 °C, the burner starts up and runs until the flow temperature reaches 15 °C. This device runs under the following conditions: The boiler is switched on The gas supply is working The pressure in the system is higher than 0.5 bar (0.05 MPa) Anti-blocking of the pump... -
Page 24: 245-200 And Ix 245-250
4 Description of the product 4.3.2 IX 245–200 and IX 245–250 Fig.12 MW-5000721-3 1 Control panel 10 Gas valve 2 Flue gas connection 11 Ionisation probe 3 Flue gas measuring point 12 Burner 4 Controller PCB 13 Ignition electrode 5 Mounting point for a maximum of two AVS 75 14 Flame inspection window modules. -
Page 25: Main Burner Components
4 Description of the product 4.3.3 Main burner components Fig.13 Burner for IX 245–130 and IX 245– 1 Burner door 2 Safety thermostat on the combustion chamber door 3 Burner 4 Flame inspection window 5 Ignition electrode 6 Air/gas inlet pipe 7 Gas valve 8 Ionisation probe 9 Fan... -
Page 26: Description Of The Symbols
4 Description of the product 4.4.2 Description of the symbols Fig.16 1 Date: day, month, year 2 Day of the week 3 Boiler / heating circuit pressure 4 Clock: hours and minutes 9 10 11 12 13 14 15 16 17 18 19 20 21 22 23 24 5 Operating period indicators in Comfort/Eco mode over 24 hours: Top line: Heating mode Bottom line: Domestic hot water mode... -
Page 27: Standard Delivery
4 Description of the product Standard delivery The IX boiler comes in a package that includes: A floor-standing gas boiler An installation, user and maintenance manual A data plate. Accessories & options A detailed list of accessories and options can be found in our catalogue. 7702684 - v04 - 05092019... -
Page 28: Before Installation
5 Before installation Before installation Installation regulations Warning The boiler must be installed by a qualified installer in accordance with local and national regulations. Installation requirements 5.2.1 Water treatment In many cases, the boiler and the heating system can be filled with mains water, without treating the water. -
Page 29: Electrical Power Supply
5 Before installation The boilers are preset to run on G20 gas (gas H) and can be adapted to run with the following gases: G25 (gas L), G27 (gas Lw), G31 (gas P), Important To use a different type of gas, contact an approved assistance service. -
Page 30: Choice Of The Location
5 Before installation Fig.18 Pressure drops for IX 245–150 1 Q flow rate (litres/hour) 2 H pressure in millibar (mbar) 3 Operating water flow rate at nominal heat output = 4310 litres/hour 1600 where ∆T = 30 °C 1400 4 Operating water flow rate at nominal heat output = 6460 litres/hour 1200 where ∆T = 20 °C 1000... -
Page 31: Ventilation
5 Before installation Caution Do not store, even temporarily, explosive or easily combustible materials in the boiler room or near the boiler. Caution Use plugs for the intake of air and discharge of combustion gases observing the prevailing regulations and directives. Caution Connect the condensate discharge to the waste water near the boiler. -
Page 32: Overall Space Needed For The Boiler
5 Before installation Ventilation to be provided for the boilers Fig.21 MW-3000011-04 5.3.2 Overall space needed for the boiler To ensure adequate access to the appliance and facilitate maintenance, allow sufficient space around the boiler, according to the information provided. Important Keep the boiler accessible at all times. -
Page 33: Data Plate
5 Before installation Fig.23 MW-4000217-04 Tab.18 IX 245–130 IX 245–150 IX 245–200 IX 245–250 1100 1100 1100 1100 1000 1000 1000 1000 F with low-loss header F with plate heat ex 1140 1140 1140 1140 changer kit F with cascade kit 1020 1020 1070... - Page 34 5 Before installation On a façade of the area to be heated, on the north if possible. Half way up the wall of the area to be heated. Under the influence of changes in the weather. Protected from direct sunlight. Easy to access.
-
Page 35: Transport And Unpacking
5 Before installation Transport and unpacking 5.4.1 IX 245–130 and IX 245–150 Transport Fig.27 Caution Have at least two people standing by. >20° Handle the appliance with gloves. Transport the pallet carrying the appliance using a pallet truck, a forklift truck or a 4-wheel removals cart. - Page 36 5 Before installation Fig.29 2. Remove the front panel by pulling firmly on the slots provided. MW-2000776-2 Fig.30 3. Lift and tilt the control panel. MW-2000777-1 Fig.31 4. Disconnect the earth wire. MW-2000778-1 Fig.32 5. Pull and lift the top panel. MW-2000779-1 7702684 - v04 - 05092019...
- Page 37 5 Before installation Fig.33 6. Screw the lifting rings into the locations provided. Tightening torque: 23 N.m. Important The rings are supplied with the boiler. 7. Remove the screws attaching the boiler to the pallet. MW-2000780-1 Fig.34 8. Use carrying bars or slings (not provided) to move the boiler. Sling attachment angle β...
-
Page 38: 245-200 And Ix 245-250
5 Before installation 5.4.2 IX 245–200 and IX 245–250 Transport Fig.36 Caution Have at least two people standing by. >20° Handle the appliance with gloves. Transport the pallet carrying the appliance using a pallet truck, a forklift truck or a 4-wheel removals cart. Do not use the top cover of the appliance for transport lifting. - Page 39 5 Before installation Fig.38 3. Remove the front panel by pulling firmly on the slots provided. MW-2000766-2 Fig.39 4. Remove the 2 unloading rails by unscrewing the 4 screws. MW-2000767-2 Fig.40 5. Rotate the 2 rails by 180°. 180° MW-2000768-1 7702684 - v04 - 05092019...
- Page 40 5 Before installation Fig.41 MW-2000769-2 6. Fit the 2 rails on the edge of the pallet. Caution Ensure there is sufficient space to move the boiler. Fig.42 7. Remove the four screws attaching the boiler to the pallet. MW-2000770-2 7702684 - v04 - 05092019...
- Page 41 5 Before installation Fig.43 8. Slide the boiler onto the unloading rails. IX 245–200 212 kg >200 kg IX 245–250 232 kg Caution Moving the boiler is a job for two people. MW-2000771-2 Fig.44 9. Close the boiler. Adjustment range for the feet: 20 mm 10.
- Page 42 5 Before installation Unpacking & initial preparation with slings Fig.45 1. Remove the cardboard and the polystyrene packing. 2. Remove the protective plastic. MW-2000765-2 Fig.46 3. Remove the front panel by pulling firmly on the slots provided. MW-2000766-2 7702684 - v04 - 05092019...
- Page 43 5 Before installation Fig.47 4. Lift and tilt the control panel. MW-4000295-1 Fig.48 5. Disconnect the earth wire. MW-4000296-1 Fig.49 6. Pull and lift the top panel. MW-4000297-1 7702684 - v04 - 05092019...
- Page 44 5 Before installation Fig.50 7. Screw the lifting rings into the locations provided. Tightening torque: 23 N.m. Important The rings are supplied with the boiler. 8. Remove the screws attaching the boiler to the pallet. MW-4000298-1 Fig.51 9. Use slings (not provided) to move the boiler. Sling attachment angle β...
- Page 45 5 Before installation Fig.52 11. Level the boiler using the adjustable feet. Adjustment range for the feet: 20 mm MW-4000300-2 7702684 - v04 - 05092019...
-
Page 46: Connecting Diagrams
6 Connecting diagrams Connecting diagrams One boiler + one direct circuit + one domestic hot water tank 6.1.1 Hydraulic connection Fig.53 Boiler + 1 direct circuit + 1 domestic hot water tank MW-3000018-06 1 Boiler flow 27 Non-return valve 1a Heating flow direct circuit 30 Calibrated and sealed safety unit 2 Heating pump direct circuit France: (7 bar (0.7 MPa) - with opening on the... - Page 47 6 Connecting diagrams 6.1.2 Electrical connection Fig.54 Boiler + 1 direct circuit + 1 domestic hot water tank 1 2 3 MW-3000114-08 2 Direct heating circuit pump 34 Modulating boiler pump (primary pump) 21 Outside temperature sensor 38 Remote control 26 DHW booster pump 167 Boiler control panel 33 Domestic hot water temperature sensor...
-
Page 48: One Boiler + One Underfloor Heating Circuit + One Direct Circuit + One Domestic Hot Water Tank
6 Connecting diagrams One boiler + one underfloor heating circuit + one direct circuit + one domestic hot water tank 6.2.1 Hydraulic connection Fig.55 Boiler + 1 underfloor heating circuit + 1 direct circuit + 1 domestic hot water tank MW-3000019-06 1 Boiler flow 34 Modulating boiler pump (primary pump) -
Page 49: Electrical Connection
6 Connecting diagrams 6.2.2 Electrical connection Fig.56 Boiler + 1 underfloor heating circuit + 1 direct circuit + 1 domestic hot water tank AVS75 1 2 3 1 2 3 MW-3000115-08 1a Heating flow sensor 61 Mixed circuit flow temperature sensor 2 Heating pump direct circuit 93 Mixed circuit heating pump 21 Outside temperature sensor... -
Page 50: Boilers In Cascade + One Underfloor Heating Circuit + One Direct Circuit + One Domestic Hot Water Tank
6 Connecting diagrams Boilers in cascade + one underfloor heating circuit + one direct circuit + one domestic hot water tank 6.3.1 Hydraulic connection Fig.57 Boilers in cascade + 1 underfloor heating circuit + 1 direct circuit + 1 domestic hot water tank MW-3000020-06 2 Heating pump direct circuit France: 65 °C safety thermostat with manual reset... -
Page 51: Electrical Connection
6 Connecting diagrams 6.3.2 Electrical connection Fig.58 Boilers in cascade + 1 underfloor heating circuit + 1 direct circuit + 1 domestic hot water tank 1 2 3 AVS75 1 2 3 93 44 (OCI345) (OCI345) MW-3000040-08 2 Heating pump direct circuit Other countries: safety device to safeguard against 21 Outside temperature sensor overheating of the underfloor heating, in accordance... -
Page 52: Connecting Boilers In Cascade With A Oci 345 Module
6 Connecting diagrams Important Relay the pumps if the current exceeds 1 A max. per output. 6.3.3 Connecting boilers in cascade with a OCI 345 module Connect the boilers included in the boiler cascade with OCI 345 modules (electronic devices that handle communication through a BUS link). The OCI 345 modules must be connected to each boiler with three connectors. -
Page 53: Configuration For A Master Boiler And Slave Boilers
6 Connecting diagrams 4. Set the following parameters on boiler 2: Tab.22 Settings on boiler 2 (slave boiler) Parameter number Parameter Adjustment required 5710 Temps / mode CH1 6600 Device address 6640 Clock mode Slave without remote setting 6.3.5 Configuration for a master boiler and slave boilers 1. -
Page 54: Controlling A Boiler In 0-10 V Mode
6 Connecting diagrams Controlling a boiler in 0-10 V mode 6.4.1 Electrical connection Fig.60 Boiler in 0–10 V mode AVS75 MW-3000041-06 34 Primary pump 310 AVS75: Option 38 Remote control with or without room temperature sensor Important Relay the pumps if the current exceeds 1 A max. per output. 6.4.2 Configuring the boiler control in 0–10 V 1. -
Page 55: Installation
7 Installation Installation General Installation must be carried out in accordance with the prevailing regulations, codes of practice and the recommendations in this manual. Accessing the internal boiler components Fig.61 1. Remove the front panel by pulling firmly on the notches provided. MW-4000259-2 Fig.62 2. - Page 56 7 Installation Fig.63 3. Disconnect the earth wire. MW-4000261-1 Fig.64 4. Pull and lift the top panel. MW-4000262-1 Fig.65 5. Unhook the panel holding the control panel then place it on the boiler. MW-4000263-1 7702684 - v04 - 05092019...
-
Page 57: Hydraulic Connections
7 Installation Fig.66 6. For IX 245–130 and IX 245–150 only: remove the detachable panel if necessary. The disassembly instructions can be found on the detachable panel. MW-4000264-2 Hydraulic connections 7.3.1 Connecting the heating circuit Respect the installations shown in the hydraulic diagrams. Caution The heating pipe must be mounted in accordance with the provisions applicable. - Page 58 7 Installation IX 245–130 and IX 245–150 Fig.67 1. Remove the anti-dust plug located on heating return. 2. Connect the pipe to the heating return. Fig.68 3. Remove the anti-dust plug on the heating flow. 4. Mount the filling and drain valves to the boiler's inlet and outlet (valves not provided).
- Page 59 7 Installation IX 245–200 and IX 245–250 Important The brackets are supplied with the boiler. Fig.70 1. Remove the dust cap located on the boiler's heating inlet and outlet. 2. Apply a sealing product (paste, oakum or Teflon) to the thread then screw the heating circuit flow bracket onto the boiler's heating flow output.
-
Page 60: Connecting The Expansion Vessel
7 Installation Fig.72 5. Fit the circulating pump on the heating return pipe (circulating pump not provided). MW-5000810-2 7.3.2 Connecting the expansion vessel 1. Determine the volume of the expansion vessel depending on the volume of the installation. 2. Connect the expansion vessel to the heating circuit return pipe. Volume of the expansion vessel for the installation Tab.26 Volume of the expansion vessel depending on the volume of the installation... -
Page 61: Gas Connection
7 Installation Gas connection 7.4.1 IX 245–130 and IX 245–150 Warning Close the main gas valve before starting work on the gas pipes. The gas pipes are not provided. Danger The diameters of the pipes must be defined in accordance with the standards in force in your country. - Page 62 7 Installation The pipes must deliver a maximum pressure drop in compliance with the values given in the table below. Tab.27 Configurations and recommendations for the flue system Configuration Description – B Connection to a chimney using a connection kit (single pipe in a flue, combustion air taken from the boil er room).
-
Page 63: Coaxial Pipes
7 Installation 7.5.2 Coaxial pipes Fig.76 IX 245–130 and IX 245–150 Fig.77 IX 245–200 and IX 245–250 MW-4000269-1 This type of pipe is used to discharge exhaust gases and draw in combustion air, whether outside the building or in the flue gas pipes. The 90°... -
Page 64: Lengths Of The Air/Flue Gas Pipes
7 Installation Caution The calculation of the length of the flue gas pipe must be made by a qualified technician during the installation design phase, in accordance with the requirements of the prevailing standards. 7.5.5 Lengths of the air/flue gas pipes Warning The discharge and intake pipes must be certified for the adapted configuration and their pressure drops must comply with the... - Page 65 7 Installation Fig.80 Through-roof flue system B Important For B configurations, the lengths given in the tables are valid for horizontal pipes with a maximum length of 1 metre. For each additional metre of horizontal pipe, subtract 1.2 m from the vertical length L Tab.30 Flue gas system connection type B...
-
Page 66: Electrical Connections
7 Installation Fig.82 Maximum length of the connections 130 - 150 kW 200 - 250 kW Tab.32 Maximum length for configuration C Configuration Unit IX 245–130 IX 245–150 IX 245–200 IX 245–250 Ø 110 Ø 110 Ø 160 Ø 160 L <... -
Page 67: Recommended Cable Cross Section
7 Installation Danger Position the various electrical cables in such a way that they never touch the heating pipes. Keep the various electrical cables far enough from the heating pipes so that they cannot be damaged by the effect of the heat. 7.6.2 Recommended cable cross section Decide on the cable according to the following information:... -
Page 68: Description Of The Power Supply Terminal Block
7 Installation Fig.85 2. Insert the stripped part of the wire into the corresponding connector. Caution The length to be stripped must be between 10 and 12 mm. Fig.86 3. Release the pressure on the spring. The wire is attached. 4. -
Page 69: Description Of The Sensor Terminal Block
7 Installation 3 Power supply auxiliary circuit 2 6 Domestic hot water pump – QX3 4 Room thermostat H5 (230 V) 7 Safety contact 5 Heating circuit pump – QX1 8 Boiler pump – QX2 Important Terminals 5, 6 and 8 are associated with the QX1, QX3 and QX2 parameters of the Configuration menu Caution All connections are made to the terminal blocks provided for that purpose in the boiler connection box. -
Page 70: 245-200 And Ix 245-250
7 Installation Fig.89 1. Open the plug on the automatic air vent. 2. Fill the heating system until you reach a pressure of between 0.15 and 0.2 MPa (1.5 and 2 bar). 3. Check the tightness of the hydraulic connections. 4. -
Page 71: Completing Installation
7 Installation Completing installation 1. Reconnect the earth wire and put the front panel back in place. 2. Discard the various packaging items. 7702684 - v04 - 05092019... -
Page 72: Commissioning
8 Commissioning Commissioning General Commissioning the boiler is done for first time use, after a prolonged shut- down (more than 28 days) or after any event that would require complete re-installation of the boiler. Commissioning of the boiler allows the user to review the various settings and checks to be made to start up the boiler in complete safety. -
Page 73: Checking The Hydraulic Circuit
8 Commissioning 6. Check the connection of the optional equipment. 7. Check the length of the cables and that they are firmly secured in the cable clamps. 8.3.3 Checking the hydraulic circuit 1. Check the siphon, which must be completely filled with water. 2. -
Page 74: Gas Settings
8 Commissioning Fig.92 3. Access the 312:Deaeration apprx 10min function. The 312:Deaeration apprx 10min parameter appears. 4. Turn the button to select 312:Deaeration apprx 10min. Fonction d’arrêt régulation Régime manuel Fonction de purge MENU MW-5000815-1 Fig.93 5. Confirm the selection by pressing the button. -
Page 75: Setting The Air/Gas Ratio (Maximum Heat Input)
8 Commissioning Tab.36 Fan speed for gas type G25 Parameter Output Unit IX 245– IX 245– IX 245– IX 245– 9524 Required speed LF minimum 1550 1800 1450 1570 9524 Required speed LF minimum for boil 1550 1800 1450 1570 ers in cascade 9529 Required speed HF maximum... - Page 76 8 Commissioning Fig.95 3. Confirm the selection by pressing the button. The function 303 appears. Fonction de ramonage Fonction d’arrêt régulateur MENU MW-4000283-FR-01 Fig.96 4. Turn the button to select Full load. 5. Press the button to adjust the setting. 6.
-
Page 77: Setting The Air/Gas Ratio (Reduced Heat Input)
8 Commissioning 8. Connect the flue gas analyser to the measurement point. Important Ensure that the opening around the sensor is completely sealed when taking measurements. IX 245–130 and IX 245–150: insert the sensor at least 8 cm into the flue gas measurement point. 9. - Page 78 8 Commissioning Fig.99 3. Confirm the selection by pressing the button. The 303 function appears. Fonction de ramonage Fonction d’arrêt régulateur MENU MW-4000283-FR-01 Fig.100 4. Turn the button to select Partial load. 5. Confirm the selection by pressing the button. 6.
-
Page 79: Gas Valve Basic Settings
8 Commissioning 8.4.4 Gas valve basic settings Tab.43 Settings values for a new gas valve Boiler model Nominal heat input: Minimum heat input: Number of turns for the gas flow rate set Number of turns for the OFFSET set tings screw tings screw IX 245–130 4 + 1/4... - Page 80 8 Commissioning Fig.103 2. Close the mains gas valve. 3. Disconnect the gas valve electrical connection. 4. Unscrew the nut connecting the gas supply tube to the flange on the gas valve. 5. Remove the 4 screws from the flange connecting the gas valve to the gas supply tube.
-
Page 81: Operation
9 Operation Operation Use of the control panel 9.1.1 Modifying the user parameters Fig.105 1. Press the key to access the parameters. MENU Important Press the key to return to the main display. MENU The user parameters can now be accessed. Use the button to select and modify them. -
Page 82: Stopping The Boiler
9 Operation Fig.108 2. Start up the boiler by pressing the ON/OFF switch. 3. Press the key to access the shortcuts menu. 4. Select the Standby/operation parameter by turning the button. 5. Press the button to start up the boiler. symbol disappears. -
Page 83: Special Functions
9 Operation Special functions Tab.44 Number and Name of the Description function 301:Manual control The boiler operates in heating mode according to the programmed temperature set point val Adjustment range: 25 to 90 °C 303:Chimney sweep function Full load: boiler at its maximum heat output, Part load: reduced heat output, Heating full load: heating function at its maximum heat output. -
Page 84: 10 Settings
10 Settings 10 Settings 10.1 List of parameters 10.1.1 Shortcuts menu Tab.45 Functions accessible with the shortcut key Parameter Description Adjustment range Standby/operation Boiler standby/Start-up. Standby : Boiler put on standby. The symbol is displayed. The boiler's operating modes are deactivated. The frost protection function is activated. -
Page 85: List Of User Parameters
10 Settings Information Description Unit Minimum outside temperature value memorised °C Outside temp min Important The outside sensor must be connected. Maximum outside temperature value memorised °C Outside temp max Important The outside sensor must be connected. Hot water temp 1 Domestic hot water temperature °C Important... - Page 86 10 Settings Tab.50 Time program menu Parameter number Parameter Description Heating circuit Heating circuit 2 Heating circuit 3 Selecting the days or group of days for the timer pro Select days gram. Mon-Sun Selecting a default timer program. 1st Time ON Start of timer period 1.
-
Page 87: List Of Installer Parameters
10 Settings Tab.53 Temps / mode CH1 – Temps / mode CH2 – Temps / mode CH3 menu Parameter number Parameter Description Factory setting Heating Heating Heating cir circuit 1 circuit 2 cuit 3 1000 1300 The control unit is installed on the boiler: Off : heating is deactivated. - Page 88 10 Settings Parameter Parameter Description Factory set number ting Used as Operator unit 1 : The control system unit is installed on the boiler. Room unit 1 : The control system unit is configured as a room tem perature unit for heating circuit 1. Operator unit Room unit 2 : The control system unit is configured as a room tem...
- Page 89 10 Settings Parameter number Parameter Description Unit Factory set ting Heating Heating Heating circuit 1 circuit 2 circuit 3 1050 1350 Room influence Influence of the room temperature and the outside temperature on calculating the flow temperature: ---%: Simple regulation in ac cordance with outside weather conditions: 1…99%: Regulation in accordance with out...
- Page 90 10 Settings Parameter Parameter Description Factory setting number 1620 Release Start-up enabled: Time hot water Time hot water : This setting provides domestic hot water prep aration with a dedicated timer program. Time setting central heating : Domestic hot water is released with the same timer program as the heating circuits.
- Page 91 10 Settings Tab.60 Configuration menu Parameter Parameter Description Factory set number ting 5710 Temps / mode CH1 Activation of heating circuit 1: 5715 Temps / mode CH2 Activation of heating circuit 2: 5721 Temps / mode CH3 Activation of heating circuit 3: 5730 Hot water sensor Selection of the domestic hot water sensor:...
- Page 92 10 Settings Parameter Parameter Description Factory set number ting 5890 Relay output QX1 None heating Circulating pump Q4 : Domestic hot water circulating pump. pump CH1 El imm heater HW K6 Collector pump Q5 : Circulating pump for the solar collector circuit. Cons circuit pump VK1 Q15 : The VK1 consumer circuit pump can be used for an additional boiler consumer.
- Page 93 10 Settings Parameter Parameter Description Factory set number ting 5931 Sensor input BX2 None : No function on the sensor input. None Hot water sensor B31 : Sensor in the bottom section of the domestic hot water tank. Collector sensor B6 : Solar collector sensor. HW circulation sensor B39 : Circulation / DHW preparation sensor.
- Page 94 10 Settings Parameter Parameter Description Factory set number ting 5977 Function input H5 None Room Optg mode change CHs+HW : Heating and domestic hot water circuit thermostat changeover mode. Optg mode changeover HW : Domestic hot water circuit changeover mode. Optg mode changeover CHs : The regimes of the heating circuits are switched to parameter mode on line 900-1200-1500.
- Page 95 10 Settings Parameter Parameter Description Factory set number ting 6200 Save sensors Records the sensors used in the appliance. 6212 Check no. heat Information on the manufacturer source 1 6213 Check no. heat source 2 6215 Check no. storage tank 6217 Check no.
- Page 96 10 Settings Parameter Description Factory setting Extension module 1 Extension module 2 Extension module 3 6050 : Funct value 1 6058 : Funct value 1 6066 : Funct value 1 Definition of parameters for collec H2 module 1 H2 module 2 H2 module 3 tor specifications 6051 : Voltage value 2...
- Page 97 10 Settings Parameter Parameter Description Factory set number ting 7147 Type of venting Venting cycle operating mode: None None Heating circuit continuous Heating circuit cycled Hot water continuous Hot water cycled 7170 Telephone customer service 7231 Refill time current Value displayed week 7232 Refill time to date...
-
Page 98: Setting The Parameters
10 Settings Tab.66 Burner control menus Parameter num Parameter Description 9512 Required speed ignition Ignition speed set point adjustable on the operating interface. 9524 Required speed LF Rotation speed set point at partial load adjustable on the operating interface. 9529 Required speed HF Rotation speed set point at nominal load adjustable on the operating interface. -
Page 99: Changing The Operating Mode
10 Settings 10.2.3 Changing the operating mode Fig.113 1. Press the key to access the shortcuts menu. 2. Select the parameter Central heating mode CH1 by turning the button. 3. Press the button to confirm. 4. Select the appropriate operating mode. 5. -
Page 100: Setting The Domestic Hot Water Temperature Set Point
10 Settings 10.2.7 Setting the domestic hot water temperature set point Fig.115 1. Press the key to access the shortcuts menu. 2. Select the parameter Hot water temp setpoint by turning the button. 3. Press the button to confirm. 4. Turn the button to modify the temperature set point. - Page 101 10 Settings Fig.117 4. Select the Holiday period to be programmed by turning the button. 5. Confirm by pressing the button. Holiday heating CH1 Preselection Period 1 MENU MW-3000073-EN-02 Fig.118 6. Select the Start parameter by turning the button. 7. Confirm the menu selection by pressing the button 8.
-
Page 102: 10.2.10 Using The Fixed-Speed Boiler
10 Settings 10.2.10 Using the fixed-speed boiler Using the boiler according to heat input makes it possible to calibrate the gas valve. The heat input corresponds to the speed of the boiler in percentage of the nominal output. Fig.121 1. From the home screen, press the keys simultaneously. -
Page 103: 10.2.12 Locking/Unlocking Parameter Modification
10 Settings 10.2.12 Locking/Unlocking parameter modification It is possible to lock all functions associated with the key to prevent MENU unauthorised persons from modifying the parameters. Locking parameter modification 1. Press the key to access the user parameters menu. MENU 2. -
Page 104: 10.2.13 Timer Programme
10 Settings Fig.127 7. Confirm the menu selection by pressing the button. 8. Select the setting On by turning the button. 9. Confirm the menu selection by pressing the button. The parameters can be modified. Operator unit Programming lock MENU MW-3000096-EN-02 10.2.13 Timer programme Important... - Page 105 10 Settings Pre-setting selected Hours programmed Time setting 1 6:00 to 23:00 Time setting 2 06:00...08:00 – 17:00...23:00 Time setting 3 06:00...08:00 – 11:00...13:00 – 17:00...23:00 Default time ranges Tab.69 Time ranges according to the groups of days selected Program line 514 (heating), 574 (domestic hot water) Groups of days Pre-set programs On 1 - Off 1...
- Page 106 10 Settings Fig.130 5. Confirm the parameter selection by pressing the button. The current selection flashes. 6. Select a weekly interval by turning button. 7. Confirm the weekly interval selection by pressing the button. Time central heating CH1 Select days Mon - Sun MENU MW-3000130-EN-02...
- Page 107 10 Settings Fig.133 3. Select the Time central heating CH1 menu by turning the button. Important For heating circuits 2 and 3, select the parameters Time central heating CH2 or Time setting 3/CHP. For the domestic hot water circuit, select the parameter Time ---------------------------------------------------- hot water.
- Page 108 10 Settings Fig.137 12. Select the parameter 1st Time OFF (502, 522, 542 or 562) by turning button. Time central heating CH1 Mon - Sun: 1st Time OFF 22:00 MENU MW-3000136-EN-02 Fig.138 13. Confirm the menu selection by pressing the button.
- Page 109 10 Settings Fig.139 3. Select the Time central heating CH1 menu by turning the button. Important For heating circuits 2 and 3, select the parameters Time central heating CH2 or Time setting 3/CHP. For the domestic hot water circuit, select the parameter Time ---------------------------------------------------- hot water.
- Page 110 10 Settings Resetting the timer programs to zero 1. Press the key to access the parameters. MENU Fig.143 2. Select the Time central heating CH1 menu by turning the button. Important For heating circuits 2 and 3, select the parameters Time central heating CH2 or Time setting 3/CHP.
-
Page 111: 10.2.14 Setting A Temporary Heating Flow Temperature
10 Settings 10.2.14 Setting a temporary heating flow temperature Fig.146 1. From the control panel main screen, turn the button to increase or reduce the temperature value. 2. Confirm the menu selection by pressing the button. Temporary setpoint MENU MW-3000143-EN-02 10.2.15 Managing boilers in cascade Boilers in cascade are controlled and managed by the master boiler. -
Page 112: 11 Maintenance
11 Maintenance 11 Maintenance 11.1 General We recommend having the boiler inspected and serviced at regular intervals. Caution Do not neglect to service the boiler. Contact a qualified professional or take out a maintenance contract for the obligatory annual servicing of the boiler. Failure to service the appliance voids the warranty. - Page 113 11 Maintenance 2. Close the gas inlet valve. 3. Close the valves on the heating circuits. 4. Access the internal boiler components. Fig.147 5. Disconnect the power and command cables on the fan. MW-2000783-01 Fig.148 6. Disconnect the ignition electrode and the flame detection sensor. MW-2000784-01 Fig.149 7.
- Page 114 11 Maintenance Fig.150 8. Remove the 2 connectors from the gas valve. MW-4000314-01 Fig.151 9. Remove the nuts holding the burner in place on the heat exchanger. 10. Remove the screws securing the gas inlet tube elbow. MW-2000786-02 Fig.152 11. Remove the assembly comprising the fan, Venturi, burner and gas valve to access the inside of the heat exchanger.
- Page 115 11 Maintenance IX 245–200 and IX 245–250 1. Switch off the mains supply to the boiler. 2. Close the gas inlet valve. 3. Close the valves on the heating circuits. 4. Access the internal boiler components. Fig.153 5. Disconnect the power and command cables on the fan. MW-2000804-01 Fig.154 6.
- Page 116 11 Maintenance Fig.156 8. Remove the gas valve connector. MW-2000807-01 Fig.157 9. Remove the hose pipe. 10. Remove the gas valve pipe. MW-2000808-01 Fig.158 11. Remove the hose collar. MW-2000809-01 7702684 - v04 - 05092019...
- Page 117 11 Maintenance Fig.159 12. Remove the air supply. MW-2000810-01 Fig.160 13. Remove the 2 nuts. MW-2000811-01 Fig.161 14. Remove the nuts holding the burner in place on the heat exchanger. MW-2000812-01 7702684 - v04 - 05092019...
-
Page 118: Cleaning The Heat Exchanger
11 Maintenance Fig.162 15. Remove the assembly comprising the fan, Venturi, burner and gas valve to access the inside of the heat exchanger. MW-2000813-01 11.2.3 Cleaning the heat exchanger 1. Remove the door. Fig.163 2. Vacuum up any combustion residue. MW-2000789-01 Fig.164 3. - Page 119 11 Maintenance Fig.165 4. Vacuum up the remaining residue. MW-2000791-01 Fig.166 5. Rinse with clean water. Warning Do not rinse the deflector insulation. MW-2000792-01 Fig.167 6. Spray with white vinegar or a cleaning product suitable for stainless steel. Warning This step must be carried out if there is a high level of fouling, and may be repeated several times.
-
Page 120: Checking The Burner
11 Maintenance Fig.169 9. Rinse with clean water. Warning Do not rinse the deflector insulation. MW-2000795-01 11.2.4 Checking the burner 1. Remove the burner. 2. Check whether the surface of the burner is damaged in any way. Replace the burner and its gasket if they are damaged. 3. -
Page 121: Cleaning The Siphon
11 Maintenance Fig.172 7. Check the distance between the ignition electrode and the ground electrode. Tab.75 Boiler model Distances and tolerances to be observed for the ignition elec trode and the ground electrode (mm) IX 245–130 4.5 +/-0.5 IX 245–150 4.5 +/-0.5 IX 245–200 4.5 +/-0.5... -
Page 122: Refitting The Burner
11 Maintenance 11.2.6 Refitting the burner IX 245–130 and IX 245–150 Important Replace the sealing gaskets to ensure perfect leak-tightness is maintained. Fig.175 1. Refit the assembly comprising the fan, Venturi, burner and gas valve. 2. Refit the nuts holding the burner in place on the exchanger. Important Observe the tightening torque. -
Page 123: Thermal Fuse In The Heat Exchanger
11 Maintenance Fig.177 4. Reattach the elbow for the air supply tube using the collar. 5. Reconnect the gas valve pipe. 6. Reconnect the hose pipe. 7. Reconnect the connector to the gas valve. 8. Reconnect the 2 wires between the safety thermostat on the combustion chamber door and the pin under the ignition electrode. -
Page 124: Cleaning The Plate Heat Exchanger (Optional Kit)
11 Maintenance Fig.179 2. IX 245–130 and IX 245–150 (coaxial pipes): if necessary, check the return into circulation of any combustion products. The sensor will then be connected to the outlet connected to the combustion air intake circuit. For more information, see Setting the air/gas ratio (maximum heat input), page 75 Checking combustion (reduced heat input) 1. - Page 125 11 Maintenance Fig.182 2. Connect the cleaning pump to the valves. MW-4000287-1 Fig.183 3. Open the valves. MW-4000288-1 Fig.184 4. Descale using a suitable product. 5. Flush through a neutralisation and passivation product. MW-4000289-1 Fig.185 6. Rinse the plate heat exchanger with water until a pH of between 6 and 9 is reached.
-
Page 126: Cleaning The Low-Loss Header (Optional Kit)
11 Maintenance Fig.186 7. Close the valves. 8. Disconnect the cleaning pump. MW-4000291-1 Fig.187 9. Open the two valves on the secondary side. MW-4000292-1 11.2.10 Cleaning the low-loss header (optional kit) IX 245–130 and IX 245–150 Fig.188 1. Lift the upper panel on the low-loss header kit. 2. - Page 127 11 Maintenance Fig.189 3. Lift the two side panels on the low-loss header kit. 4. Pull the two side panels on the low-loss header kit to remove them. MW-4000302-1 Fig.190 5. Remove the lower insulating shell. 6. Remove the magnetic ring. Fig.191 7.
- Page 128 11 Maintenance Fig.192 10. Close the vent valve, using the plug. Fig.193 11. Refit the magnetic ring. 12. Refit the insulation on the low-loss header. Fig.194 13. Refit the two side panels on the low-loss header kit. 14. Ensure the two side panels are securely seated by pressing firmly on them.
- Page 129 11 Maintenance Fig.195 15. Insert the upper panel on the low-loss header kit. 16. Ensure the upper panel is securely seated by pressing firmly on it. MW-4000308-1 IX 245–200 and IX 245–250 Fig.196 1. Remove the insulating shell. MW-4000309-2 7702684 - v04 - 05092019...
- Page 130 11 Maintenance Fig.197 2. Remove the 2 screw plugs. 3. Remove the 2 magnetic bars from their housings. Fig.198 4. Place a container with sufficient capacity underneath the low-loss header vent valve. 5. Open the vent valve. 6. Allow the flow to continue until no more dirt is present. Fig.199 7.
-
Page 131: Replacing The 6.3 A Fuses On The Electrical Terminal Blocks
11 Maintenance Fig.200 10. Refit the insulating shell on the low-loss header. MW-4000313-1 11.3 Replacing the 6.3 A fuses on the electrical terminal blocks Danger of electric shock Before any work, switch off the mains supply to the boiler. Fig.201 1. - Page 132 11 Maintenance Fig.202 2. Open the fuse-holder socket with the eyelet. 3. Take out the damaged fuse and replace it with an identical one (6.3 4. Check the fuse L, proceeding in the same way. 7702684 - v04 - 05092019...
-
Page 133: 12 Troubleshooting
12 Troubleshooting 12 Troubleshooting 12.1 Error codes Fig.203 A Error code B Secondary error code C Description of the error Important Press the key to return to the main display. MENU symbol continues to be displayed on the control panel. If the error is not resolved after one minute, the error code is displayed on the control panel a second time. - Page 134 12 Troubleshooting Description of the er Display Probable causes Check/Solution 40:Return sensor 1 Check that the return sensor has The return sensor is not correctly been correctly connected to the connected boiler PCB Use a suitable multimeter to check NTC return sensor the resistance (Ω) of the sensor ac...
- Page 135 12 Troubleshooting Description of the er Display Probable causes Check/Solution 83:BSB short-circuit Communication prob Check that the wire connecting the The wire connecting the control unit lem between the boil control unit to the boiler has been to the boiler is not connected prop er PCB and the con...
- Page 136 12 Troubleshooting Description of the er Display Probable causes Check/Solution 128:Loss of flame in Check that the gas inlet valve is open and that the gas pressure is Flame extinguished. The flame has gone out not too low. Also check that the combustion product discharge and air supply pipes are not blocked 130:Flue gas temp...
- Page 137 12 Troubleshooting Description of the er Display Probable causes Check/Solution 321:HW outlet The sensor is not correctly connec Check that the sensor has been sensor ted to the boiler sensor terminal correctly connected to the boiler block sensor terminal block Domestic hot water Use a suitable multimeter to check sensor damaged.
- Page 138 12 Troubleshooting Important This list is not exhaustive. Other error codes may be displayed. Contact the accredited technical support service. Error 110:Lockout SLT The code 110:Lockout SLT is displayed to signify that one of the following 3 components has been triggered: Tab.77 Component responsible Steps to be performed...
-
Page 139: Accessing The Error Memory
12 Troubleshooting Fig.206 3. Clip the HMI back onto its support. MW-4000275-2 12.2 Accessing the error memory Fig.207 1. Press the key to access the parameters. MENU 18. February 2014 14:13 MENU Tuesday 1.5 bar MENU MW-3000052-EN-02 Fig.208 2. Press the keys simultaneously for at least 6 seconds. - Page 140 12 Troubleshooting 2. Confirm by pressing the button. The error code disappears after a few seconds. 7702684 - v04 - 05092019...
-
Page 141: 13 Decommissioning
13 Decommissioning 13 Decommissioning 13.1 Decommissioning procedure Caution Only qualified professionals are authorised to carry out maintenance work on the boiler and the heating system. To switch off the boiler temporarily or permanently, proceed as follows: 1. Switch the boiler off. 2. -
Page 142: 14 Spare Parts
14 Spare parts 14 Spare parts 14.1 General If inspection or maintenance work bring to light the need to replace a component in the boiler: Provide the reference number given in the spare parts list when ordering a spare part. 7702684 - v04 - 05092019... -
Page 143: Spare Parts Lists
14 Spare parts Caution Only genuine spare parts may be used. 14.2 Spare parts lists 14.2.1 Spare parts lists for IX 245–130 and IX 245–150 Casing/Base frame for IX 245–130 and IX 245–150 Fig.209 7702684 - v04 - 05092019... - Page 144 14 Spare parts Tab.78 Casing/Base frame for IX 245–130 and IX 245–150 Marker Reference Description 300024451 Adjustable foot M8-45 7685265 Complete left panel 7685252 Complete right panel 200019243 Complete front panel 7688749 Foam front panel 144703 Panel cover 7684946 HMI support 300026529 Complete door with RAL9006 handle 7606342...
- Page 145 14 Spare parts Control unit for IX 245–130 and IX 245–150 Fig.210 Tab.79 Control unit for IX 245–130 and IX 245–150 Marker Reference Description 851097 Ignition cable 95320187 Cable clamp 222.01.0087 7689206 AVS riveted module support 7691322 Control panel gasket 7717049 LMS14 C PCB for 130 kW boiler 7717050...
- Page 146 14 Spare parts Heat exchanger for IX 245–130 and IX 245–150 Fig.211 Tab.80 Heat exchanger for IX 245–130 and IX 245–150 Marker Reference Description 7705874 NRG 137 fan 7104878 Ceramic panel 7705876 130 kW duo exchanger 7705877 150 kW duo exchanger 7705878 BLUEJET 70 mm 150 kW burner 7709502...
- Page 147 14 Spare parts Marker Reference Description 7101891 CTN S011021 SMD sensor 7705933 Ø 12 mm injector – G20 gas 300029470 Bimetal thermostat, 105 °C 7709521 Flow pipe 7718928 PN gas pipe 7709523 130 kW gas pipe 7705906 150 kW PN gas valve 7606350 D100 flue gas extension 7709514...
- Page 148 14 Spare parts Wiring for IX 245–130 and IX 245–150 Fig.212 BR BR BR G/Y BL BL MW-4000317-1 Tab.81 Wiring for IX 245–130 and IX 245–150 Marker Reference Description 7608991 24 V wiring – X20 X21 X42 7608992 230 V wiring – X10 X12 X13 7669775 24 V wiring –...
-
Page 149: Spare Parts Lists For Ix 245-200 And Ix 245-250
14 Spare parts 14.2.2 Spare parts lists for IX 245–200 and IX 245–250 Casing/Base frame for IX 245–200 and IX 245–250 Fig.213 Tab.82 Casing/Base frame for IX 245–200 and IX 245–250 Marker Reference Description 300024451 Adjustable foot M8-45 7709568 Complete left panel 7709566 Complete right panel 200019243... - Page 150 14 Spare parts Marker Reference Description 7688749 Foam front panel 144703 Panel cover 7684946 HMI support 300026529 Complete Advance door with RAL9006 handle 7705875 Complete flue gas pressure switch 53931 Retaining clip for air pressure switch 94994712 PVC pipe, Ø 16x12 mm 7615287 Control panel 7606186...
- Page 151 14 Spare parts Control unit for IX 245–200 and IX 245–250 Fig.214 Tab.83 Control unit for IX 245–200 and IX 245–250 Marker Reference Description 851097 Ignition cable 95320187 Cable clamp 222.01.0087 7689206 AVS riveted module support 7717051 LMS14 C PCB for 200 kW boiler 7717052 LMS14 C PCB for 250 kW boiler 7702684 - v04 - 05092019...
- Page 152 14 Spare parts Heat exchanger for IX 245–200 and IX 245–250 Fig.215 Tab.84 Heat exchanger for IX 245–200 and IX 245–250 Marker Reference Description 7709536 Flue gas outlet, Ø 150 mm 7709495 Air duct, 200 kW 7709496 Air duct, 250 kW 7709499 NRG 137 fan 7709510...
- Page 153 14 Spare parts Marker Reference Description 7709508 150 kW duo exchanger 96350203 Clips for quick connection Ø 25 mm 7709491 Burner (200 kW) 7709492 Burner (250 kW) 7709497 Pressure tube connector 7709509 Ignition electrode 7709511 Ionisation sensor 7709528 Return pipe 7709519 G 1/2"...
- Page 154 14 Spare parts Wiring for IX 245–200 and IX 245–250 Fig.216 BR G/Y BR BR BL BL MW-4000318-1 Tab.85 Wiring for IX 245–200 and IX 245–250 Marker Reference Description 7608991 24 V wiring – X20 X21 X42 7608992 230 V wiring – X2 X10 X12 X13 7709576 24 V wiring –...
-
Page 155: 15 Environmental
15 Environmental 15 Environmental 15.1 Energy savings Tips on saving energy: Keep the room in which the boiler is installed well ventilated. Do not block ventilation outlets. Do not cover the radiators. Do not hang curtains in front of the radiators. Install reflective panels behind the radiators to prevent heat losses. - Page 156 16 Disposal and recycling 16 Disposal and recycling Caution Only qualified professionals are permitted to remove and dispose of the boiler, in accordance with local and national regulations. Fig.217 If you need to remove the boiler, proceed as follows: 1. Switch off the boiler. 2.
- Page 157 17 Warranty 17 Warranty 17.1 General We would like to thank you for buying one of our appliances and for your trust in our product. In order to ensure continued safe and efficient operation, we recommend that the product is regularly inspected and maintained. Your installer and our service department can assist with this.
- Page 158 17 Warranty 7702684 - v04 - 05092019...
- Page 159 © Copyright All technical and technological information contained in these technical instructions, as well as any drawings and technical descriptions supplied, remain our property and shall not be multiplied without our prior consent in writing. Subject to alterations.
- Page 160 57, rue de la Gare - F-67580 Mertzwiller 03 88 80 27 00 SERVICE CONSOMMATEURS 0 825 120 520 0,15 € / min 03 88 80 27 99 www.dedietrich-thermique.fr VAN MARCKE 000 «БДP T » EPМ�� Weggevoerdenlaan 5 129164, Россия, г. Москва...
Need help?
Do you have a question about the IX 245-130 and is the answer not in the manual?
Questions and answers