Advertisement
Quick Links
Page 1
CONDUCTOR'S SPECIAL
INSTALLATION MANUAL
127H / 228H
WARNING: To ensure the longevity of your
system, reading and following these instructions
are recommended. Make sure to change filters
and to drain the moisture from your tank on a
regular basis.
BEFORE YOUR PROCEED! THE AIR SOURCE
IN THIS KIT IS NOT MEANT TO BE MOUNTED
OUTSIDE IN THE ELEMENTS! IT IS NOT
WEATHER PROOF AND WILL NOT BE
COVERED UNDER WARRANTY IF MOUNTED
OUTSIDE OR EXPOSED TO THE
ELEMENTS! MUST BE MOUNTED UPRIGHT.
Advertisement

Related Manuals for HornBlasters 127H


Summary of Contents for HornBlasters 127H
- Page 1 Page 1 CONDUCTOR'S SPECIAL INSTALLATION MANUAL 127H / 228H WARNING: To ensure the longevity of your system, reading and following these instructions are recommended. Make sure to change filters and to drain the moisture from your tank on a regular basis.
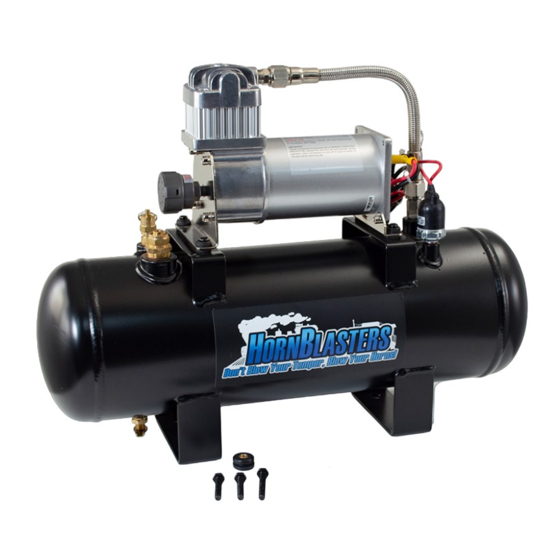
- Page 2 Page 2 HORNBLASTERS CONDUCTORS SPECIAL 127H/228H KIT CONTENTS • 1/2" Electric Solenoid Valve • Air Source Kit (127 / 228H) • Ear Plugs • HornBlasters Shocker XL Horns • Air line Cutter • 17’ 1/2” Airline • HornBlasters Universal Wiring Kit •...
- Page 3 • Use eye protection when operating drills or other power tools during the install. • Ensure the parking brake is engaged before you get underneath the vehicle. • Do not wire the system without the fuse holder. • Do not allow the compressor to run when the vehicle is off. www.hornblasters.com support@hornblasters.com...
-
Page 4: Recommended Tools
• 1/2” Wrench • Drill (3/16" & 7/16" bits) • 7/8” Wrench (4-Way Splitter on Valve) • Wire Cutter / Stripper / Crimper Compatible Add-on Kits (available @ www.HornBlasters.com) Description Part # Name Adds a quick disconnect to your system which allows... - Page 5 Page 5 Preparing For the Install Recommended Install Locations for Your Car (Compressor) • The trunk of your car/sedan/suv is a great spot for this air source kit. The trunk keeps the compressor out of the weather and is one of the best install locations for the compressor/tank combo. •...
- Page 6 Page 6 Preparing For the Install (continued) Recommended Install Locations for Trucks (Compressor) • The toolbox is a great location for the compressor. Do not use the toolbox as a grounding point. • Mounting the compressor/tank in the bed (if covered) is a great option.! Some full size trucks will have room behind the seats to mount the air system.
-
Page 7: Plumbing Diagram
Page 7 Plumbing Diagram Make sure the 5/16" lines are equal length! Plumbing the air line to the tank Bad Cut Good Cut Ensure each air line is fully seated over the compression fitting before tightening the nut down over it. If the line is not fully seated over the barb, it can slip off the fitting even with the nut in place. - Page 8 Page 8 6511 N 54th St +1 (813) 783-8058 Tampa, FL 33610 Fax: +1 (813) 783-2407 2-GALLON CONDCUTORS SPECIAL 127H/228H WIRING DIAGRAM 30A fuse Cut fuse in half at center point www.hornblasters.com support@hornblasters.com...
-
Page 9: Wiring Instructions
When you flip the switch on, the relay will switch on and allow the compressor run. Wiring your kit this way means that you MUST turn the switch off with the vehicle, otherwise the compressor could run overnight and drain your battery. www.hornblasters.com sales@hornblasters.com... - Page 10 Connecting the Train Horns to the Steering Wheel Page 10 Connecting the Train Horns to a Push Button...
- Page 11 Use a wire brush to clean these up if needed. ► Inspect your mounting hardware for the compressor/tank/horns. Ensure all components are still secured nice and tight. Drain Cock Drain Cock Closed Position Open Position www.hornblasters.com support@hornblasters.com...
-
Page 12: Troubleshooting
The liquid will bubble up anywhere a leak is present. Typically, fittings need to be tightened further or more Teflon tape needs to be applied to the thread. If you have a leak from the air line connections, re-cut the lines flush and re-seat them into the PTC fittings. www.hornblasters.com support@hornblasters.com... - Page 13 Check and ensure each air line is secure in the elbow fittings. If one line is loose or disconnected, the other horns will sound muffled due to the loss of air pressure. Can't find your issue listed above? Give our team a call @ (877)-209-8179 or shoot us an email to sales@hornblasters.com www.hornblasters.com support@hornblasters.com...
- Page 14 Page 14...
Need help?
Do you have a question about the 127H and is the answer not in the manual?
Questions and answers