Advertisement
Quick Links
ASSEMBLY INSTRUCTION
EMMA BED WITH STORAGE(King size
and Queen size)
ASSEMBLY RATING
The Assembly Rating is a 5-point
system that shows the degree of effort
needed in assembling a specific
product (with 1 being easy and 5 being
difficult).
For most products, two
persons are recommended.
EASY
DIFFICULT
PRODUCT CODE: HOBED00125
Requirement for Assembly
2 PERSONS RECOMMENDED
HOBED00126
1/10
Advertisement

Related Manuals for Furn Mill EMMA HOBED00125


Summary of Contents for Furn Mill EMMA HOBED00125
- Page 1 ASSEMBLY INSTRUCTION PRODUCT CODE: HOBED00125 EMMA BED WITH STORAGE(King size HOBED00126 and Queen size) Requirement for Assembly ASSEMBLY RATING The Assembly Rating is a 5-point system that shows the degree of effort needed in assembling a specific product (with 1 being easy and 5 being difficult).
-
Page 2: Hardware Detail
HARDWARE DETAIL ASSEMBLED PRODUCT HARDWARE QTY. 8 nos L-patti 40x40mm Screw 16 mm 48 nos 2/10... - Page 3 STEP01 Fix the Part -A(Headboard)and Part-C(Sideboard) using L-plate with the help of Screw 16mm as shown in fig. STEP02 Fix the Part-H (Footboard part) and last assembled part with L-plate and screws as shown in fig. 3/10...
- Page 4 STEP03 Now place Part-E (Battens) at bottom U-block as shown in Fig. STEP04 Now place Part-F(Bottom Panel) into last assembled part as shown in fig. 4/10...
- Page 5 STEP05 Now fix Part-D(Middle panel) with Part-A (Headboard) and Part-H(Footboard) STEP06 by L-patti and screws 16mm at position A1 and A2 respectively as shown in fig. Now place Part-C (Battens) at bottom U-block as shown in Fig. 5/10...
- Page 6 STEP07 Now place Part-E(Bottom panel) into last assembled part as shown in fig. STEP08 Now fix Part -C(Side panel) with Part-A (Headboard) and Part-H(Footboard) by L-plate and screws 16mm at position B1 and B2 respectively as shown in fig. 6/10...
- Page 7 STEP09 Now fix Part-G(middle partition) using L-patti and screws at position C1 and C2 as shown in fig. 7/10...
- Page 8 STEP10 Now fix Part-E (Strips) at upper U-block as shown in Fig. STEP11 Top Strip Now place Part-B (Top strip) and Part-I(Top panel) at last assembled as shown in Fig. 8/10...
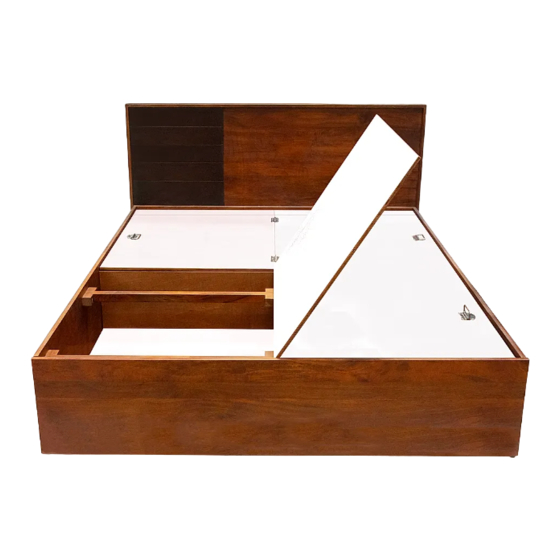
- Page 9 STEP12 Now rotate or open Part-I (Top panel) towards left as shown in Fig. STEP13 Your Bed is ready. 9/10...
-
Page 10: Care Instructions
Thank you for your purchase! We hope you will enjoy your new product for many years to come. Our commitment to providing quality products does not simply end when a purchase is made. We stand behind our products and will provide any support needed in order for you to fully enjoy your purchase.
Need help?
Do you have a question about the EMMA HOBED00125 and is the answer not in the manual?
Questions and answers