
Related Manuals for Banner A-GAGE High-Resolution MINI-ARRAY MAHE6A


Summary of Contents for Banner A-GAGE High-Resolution MINI-ARRAY MAHE6A
- Page 1 ® ® A-GAGE High-Resolution MINI-ARRAY Instruction Manual Original Instructions 64118 Rev. D 30 August 2019 © Banner Engineering Corp. All rights reserved 64118...
-
Page 2: Table Of Contents
8.2.1 ASCII Format Data Transmission ............................35 8.2.2 Binary Format Data Transmission ............................36 8.3 Max Meas Mode Command String ...............................37 8.4 Glossary ......................................38 9 Product Support and Maintenance ..........................39 9.1 Contact Us .....................................39 9.2 Banner Engineering Corp Limited Warranty ..........................39... -
Page 3: Product Description
® ® A-GAGE High-Resolution MINI-ARRAY 1 Product Description For Controllers with 2 Analog and 2 Discrete Outputs • Excels at high-speed, precise process monitoring and inspection applications • A comprehensive combination of scanning modes and outputs: ◦ 10 measurement (Scan Analysis) modes ◦... -
Page 4: Control Module Models
® ® A-GAGE High-Resolution MINI-ARRAY 1.2 Control Module Models Controller Model Solid-State Discrete Outputs Analog Outputs MAHCVP-1 2 PNP (2) 0 V to 10 V Sourcing MAHCVN-1 2 NPN (2) 0 V to 10 V Sourcing MAHCIP-1 2 PNP (2) 4 mA to 20 mA Sinking MAHCIN-1 2 NPN (2) 4 mA to 20 mA Sinking... -
Page 5: System Overview
® ® A-GAGE High-Resolution MINI-ARRAY 2 System Overview ® ® The A-GAGE High-Resolution MINI-ARRAY measuring light screen is ideal for applications such as on-the-fly product sizing and profiling, edge-guiding and center-guiding, loop tensioning control, hole detection, parts counting and similar uses. -
Page 6: Supplied System Software
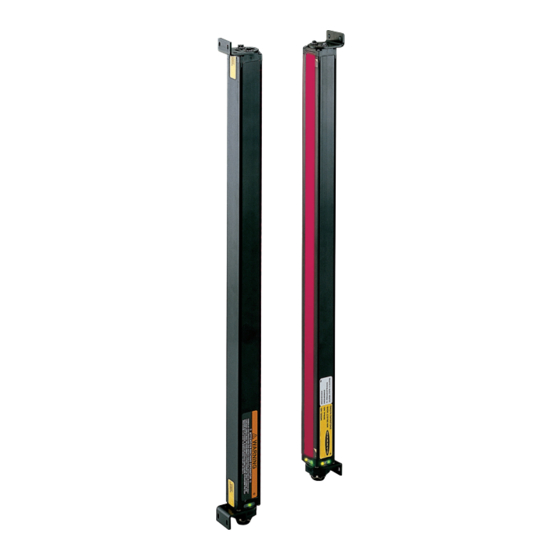
® ® A-GAGE High-Resolution MINI-ARRAY High-Resolution Emitter 7.6 mm (0.30") High-Resolution Receiver 5.1 mm (0.20") 2.5 mm (0.10") DIN-Rail-Mountable Control Module MAHCVP-1 HIGH RESOLUTION MINI-ARRAY CONTROLLER POWER +12V COM DRN T/R T/R TX TX – – BR BU BK WH 10-30VDC 10-30VDC –... - Page 7 ® ® A-GAGE High-Resolution MINI-ARRAY Figure 4. Maintaining Center of Opaque Rolled Goods Figure 5. Inspection Applications www.bannerengineering.com - Tel: + 1 888 373 6767...
-
Page 8: Installation Instructions
3 Installation Instructions 3.1 Emitter and Receiver Mounting Banner MINI-ARRAY emitters and receivers are small, lightweight, and easy to handle during mounting. The mounting brackets (supplied) allow ±30° rotation. From a common point of reference, make measurements to locate the emitter and receiver in the same plane with their midpoints directly opposite each other. -
Page 9: Control Module Mounting
® ® A-GAGE High-Resolution MINI-ARRAY 5. Make any necessary final mechanical adjustments, and hand-tighten the bracket hardware. 6. See System Diagnostics (p. 27) for information on alignment indicators and Control Module Configuration (p. 13) for information on the use of the alignment software which is supplied with the controller. 3.2 Control Module Mounting Install the controller inside an enclosure with a NEMA (or IEC) rating suitable for the operating environment. -
Page 10: Emitter And Receiver Wiring
® ® A-GAGE High-Resolution MINI-ARRAY POWER RS-485 – – 10-30V dc 10-30V dc – GATE ALIGN DISCRETE 16-30V dc EMITTER and SIGNAL OUTPUT#1 1 A max RECEIVER CABLES DISCRETE 4-20 mA 150 mA 4-20 mA OUTPUT#2 (ALARM) ANALOG ANALOG OUTPUT #2 OUTPUT #1 150 mA Load... -
Page 11: Outputs
® ® A-GAGE High-Resolution MINI-ARRAY 3.3.3 Outputs Control Module Analog Outputs (Terminals #10 and 16) Discrete Outputs (Terminals #9 and MAHCVN-1 0 V to 10 V Sourcing NPN open-collector Figure 7 (p. 9) 15 mA maximum 30 V dc maximum 150 mA maximum MAHCVP-1 0 V to 10 V Sourcing... - Page 12 ® ® A-GAGE High-Resolution MINI-ARRAY 2. Insert the Software CD into the CD drive. • If the program does not auto-start, browse to your CD drive, click Setup.exe, then select START, then select RUN. The Welcome dialog box displays. Select Next, and follow the prompts in the dialog boxes as they appear. •...
-
Page 13: Control Module Configuration
Configure the A-GAGE High-Resolution MINI-ARRAY control module using a Windows menu-style routine; the ® configuration routine requires the Banner-supplied HRMA software and a PC-compatible computer (running Windows Vista, or 7). Make a serial data connection between the computer and the DB9 connector on the control module. 4.1 Communications Setup 1. -
Page 14: Factory Settings
The emitter/receiver pairs have a wide field of view and are easy to align. The recommended distance between the emitter and receiver ranges from 380 mm to 1829 mm (15 in to 72 in). Shorter sensor separation can be achieved; consult Banner Engineering for details. -
Page 15: Blanking
® ® A-GAGE High-Resolution MINI-ARRAY The Alignment screen provides the following functions: Start, Stop, Step, Clear Blanking Fields, Restore Control module Settings, Auto Blanking, Abort Auto Blanking, Save to File, Read From File, Cancel, OK, and Edit. To access any of these sub-routines, first click Stop, then the selected option. - Page 16 ® ® A-GAGE High-Resolution MINI-ARRAY System Software Blanking Setup Routine 1. Position the object to be blanked in the path of the beams (this can be done at any time before beginning the blanking routine). 2. Perform the Ping routine to select the proper control module. 3.
-
Page 17: Programming Control Module Response
® ® A-GAGE High-Resolution MINI-ARRAY Figure 18. Edit channel blank state screen, showing beam #22 and beams #35-42 blanked; beams #65-80 are highlighted, ready to be selected for blanking 2. To set the blanking fields, click each grid box representing a beam you wish to blank. 3. -
Page 18: Selected Controller And Serial Communication
® ® A-GAGE High-Resolution MINI-ARRAY Analysis (Measurement) Serial Communication Changes the Mode Selection Selected Controller Serial Transmission identification Choose the measurement Identifies the specific Specifies the type of data transmitted and baud rate of the option that best tells you control module being from the control module to its host controller being configured. -
Page 19: Control Mode Selection
® ® A-GAGE High-Resolution MINI-ARRAY Baud Rate is the data communication rate between the control module and the computer used for configuration and also the process controller. Choose from three values: 9600, 19200, and 38400. Parity: Select Odd, Even, or None. All controllers on one EIA-485 party line should have the same parity settings. 4.3.2 Control Mode Selection The control mode determines the method used to control scanning of the light screen array. - Page 20 ® ® A-GAGE High-Resolution MINI-ARRAY Step #1 Step #2 Step #3 High-Resolution Beam #1 of 64 Beam #32 Beam #48 Emitter Blocked Blocked Clear MAHCN-1 High-Resolution Control Module Receiver – ALARM Error N MIN I-AR – 10-30V RS-485 — 10-30V ALIGN 30V(MA Error...
- Page 21 ® ® A-GAGE High-Resolution MINI-ARRAY Maximum Scan Time (in milliseconds) Double-Edge Scan Single-Edge Array Length Straight Scan Scan Step 2 Beams Step 4 Beams Step 8 Beams Step 16 Beams Step 32 Beams 325 mm (12.8 in) 10.6 488 mm (19.2 in) 15.0 11.5 650 mm (25.6 in)
-
Page 22: Scan Analysis Mode Selection
® ® A-GAGE High-Resolution MINI-ARRAY 4.3.4 Scan Analysis Mode Selection The control module may be programmed, if desired, for any Receiver one or two of seven Scan Analysis (measurement) Modes. Last Beam Made (LBM) Each selected mode may be assigned individually to an First Beam Made (FBM) Emitter Analog Output Configuration (Analysis... -
Page 23: Zero Value
® ® A-GAGE High-Resolution MINI-ARRAY Figure 22. Null/Span Configuration screen To Measure: Analog Voltage Output: Connect the voltmeter between terminals 10 or 16 (+) and 17 (–). Analog Current Output: Connect the ammeter between terminals 10 or 16 (–) and 1 (+). Null Span Analog Output Type... -
Page 24: Serial Communication With A Host Controller
® ® A-GAGE High-Resolution MINI-ARRAY Figure 23. Assigning an Analysis Mode to each Discrete output (PSF Configuration screen); Alarm and Trigger output options are available only for Discrete Output #2 Next to each discrete output assignment menu are Low Set Point and High Set Point boxes. The number in each box identifies a beam in the array (beam #1 being closest to the cabled end of the emitter and the receiver). -
Page 25: Transmission Type
® ® A-GAGE High-Resolution MINI-ARRAY ALL Mode: The status of each beam in the light screen array is transmitted for each scan. In ALL mode, blanked channels are transmitted as unblocked (or clear) beams. Max Meas Mode: The control module records the maximum measurement value registered while the light screen is blocked. That data may be transmitted to the host either when the array is clear at the end of the sensing event (select Send On Clear), or when prompted by the host (select Send On Request). -
Page 26: Quit And Exit
® ® A-GAGE High-Resolution MINI-ARRAY Figure 24. Measurement Output Screen 2. Select Run. The table displays the status for the selected measurement mode(s), including the Present value and the High and Low values for the Run period. 3. Select Stop to freeze the data. 4. -
Page 27: System Diagnostics
® ® A-GAGE High-Resolution MINI-ARRAY 5 System Diagnostics Perform System diagnostics by using the status and diagnostics indicators on the control module and sensors, or by using the diagnostics software routine, or by a combination of the two. 5.1 Diagnostic Indicators Bright, easy-to-see LED indicators on both sensors and on the front panel of the control module provide an ongoing display of the system’s operating status. -
Page 28: Diagnostics Routine
Figure 26. Diagnostics screen, accessible from the MINI-ARRAY menu The Diagnostics routine also displays the part number and date code of the controller, information that may be useful if Banner-assisted troubleshooting is required. www.bannerengineering.com - Tel: + 1 888 373 6767... -
Page 29: Specifications
(one each for emitter and receiver), ordered separately Overcurrent protection may be provided with external fusing or via Use only Banner cables, which incorporate a “twisted pair” for noise Current Limiting, Class 2 Power Supply. immunity Supply wiring leads <... -
Page 30: Emitter And Receiver Dimensions
® ® A-GAGE High-Resolution MINI-ARRAY 6.2 Emitter and Receiver Dimensions All measurements are listed in millimeters [inches], unless noted otherwise. 53.8 mm 38.1 mm (2.12") Square (1.50") 2.5 mm 47.2 mm (0.10") (1.86") 18.3 mm 10.2 mm (0.72") (0.40") 71 mm (2.8") R13 mm (0.5") Minimum Bend... -
Page 31: Emitter/Receiver Mounting Bracket Dimensions
® ® A-GAGE High-Resolution MINI-ARRAY 6.3 Emitter/Receiver Mounting Bracket Dimensions QD End NON-QD End 6.4 mm 3.8 mm 4.8 mm (2) ø6.8 mm (2) (0.25") (0.15") (0.19") ø30.5 mm (0.27") (1.20") ø13.2 mm (0.52") 57.2 mm (2.25") 38.1 mm (1.50") 44.5 mm (1.75") Slots have clearance... - Page 32 ® ® A-GAGE High-Resolution MINI-ARRAY Inputs Required Overcurrent Protection Sensor input: Emitter and receiver wire in parallel to five terminals. Gate input: Optically isolated, requires 10 V dc to 30 V dc (7.5 kΩ WARNING: Electrical connections must be impedance) for gate signal made by qualified personnel in accordance Remote alignment input: Optically isolated, requires 10 V dc to 30 V dc with local and national electrical codes and...
-
Page 33: Control Module Dimensions
® ® A-GAGE High-Resolution MINI-ARRAY 6.5 Control Module Dimensions All measurements are listed in millimeters [inches], unless noted otherwise. 115.0 mm (4.53") 106.0 mm 81.0 mm (4.17") (3.19") 96.0 mm (3.78") 5.0 mm (0.20") 35.0 mm (1.38") 69.0 mm DIN mounting slot (2.72 ") 5.5 mm Slot for M3.5 screws (2) -
Page 34: Accessories
® ® A-GAGE High-Resolution MINI-ARRAY 7 Accessories 7.1 Cordsets 5-Pin Mini-Style Cordsets with Shield—Single Ended Model Length Style Dimensions Pinout (Female) QDC-515C 4.57 m (15 ft) QDC-525C 7.62 m (25 ft) 7/8-16UNF Straight 1 = Black ø 26 2 = Blue QDC-550C 15.2 m (50 ft) 3 = Drain... -
Page 35: Additional Information
® ® A-GAGE High-Resolution MINI-ARRAY 8 Additional Information 8.1 Host Mode Command String As discussed in this manual, the control module has three control mode options: continuous, gate, and host. Host mode requires a serial transmission string from a separate device, typically a PC or process controller. The serial transmission medium can be either RS-485 or RS-232. -
Page 36: Binary Format Data Transmission
® ® A-GAGE High-Resolution MINI-ARRAY For ALL measurement mode, each data byte is presented in an Table 4: Definitions for ASCII Data Values For the ALL Measurement Mode eight-bit ASCII format that conveys the status of four consecutive Character Ch 4 Ch 3 Ch 2 Ch 1... -
Page 37: Max Meas Mode Command String
® ® A-GAGE High-Resolution MINI-ARRAY First Data Byte Second Data Byte Channel Bit Position Channel Bit Position For each bit position, 1 represents a blocked beam and 0 represents an unblocked beam. For example, for a 64-channel system with beams 1-6 blocked, beam 43 blocked and beams 62-64 blocked, the data transmitted from control module ‘A’... -
Page 38: Glossary
® ® A-GAGE High-Resolution MINI-ARRAY The command string is further defined: /*the below C code will define an array called msg which will contain the Max Meas Mode Command String*/ unsigned char msg[4]; /*declare four byte unsigned character array using C language */ msg[0]=248;... -
Page 39: Product Support And Maintenance
Banner Engineering Corp. warrants its products to be free from defects in material and workmanship for one year following the date of shipment. Banner Engineering Corp. will repair or replace, free of charge, any product of its manufacture which, at the time it is returned to the factory, is found to have been defective during the warranty period. This warranty does not cover damage or liability for misuse, abuse, or the improper application or installation of the Banner product.
Need help?
Do you have a question about the A-GAGE High-Resolution MINI-ARRAY MAHE6A and is the answer not in the manual?
Questions and answers