Advertisement
Quick Links
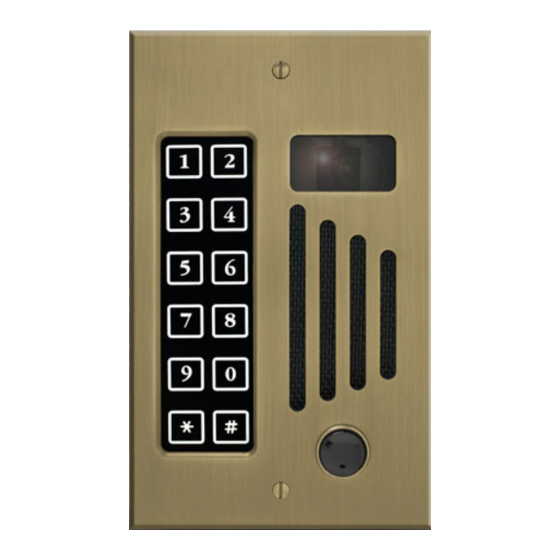
For Models
Communication
Viking W-1000 Doorbox uses "half-duplex"
communication, allowing for high speaker and
microphone volume, witout the possibility of
feedback
NOTE: See "Doorphone Adjustments and Programming" for volume
Manual Type 115
Viking W-1000, C-1000B
with Essex 265 controller
101-VIK
103-VIK
304-E265-VIK
107-VIK
305-E265-VIK
201-VIK
400-E265-VIK
203-VIK
401-E265-VIK
301-VIK
Specifications
Access Control
Essex "stand-alone" 5 button keypad
1 relay
5-6 users
16.5 VAC power supply included
adjustments and DIP switch settings.
302-VIK
INSTALLATION
INSTRUCTIONS
501 E. Goetz Ave.
Santa Ana, Ca 92707
www.eholovision.com
Ph. 714-434-6904
Fax 800-362-0002
HOLOVISION
Advertisement

Related Manuals for HOLOVISION 101-VIK


Summary of Contents for HOLOVISION 101-VIK
- Page 1 INSTALLATION INSTRUCTIONS Manual Type 115 Viking W-1000, C-1000B with Essex 265 controller For Models 101-VIK 302-VIK 103-VIK 304-E265-VIK 107-VIK 305-E265-VIK 201-VIK 400-E265-VIK 203-VIK 401-E265-VIK 301-VIK Specifications Communication Access Control Viking W-1000 Doorbox uses “half-duplex” Essex “stand-alone” 5 button keypad communication, allowing for high speaker and...
- Page 2 1 2 3 4 5 6 7 8 9 10 11 12 13 14 15 16 17 18 19 1 2 3 TALK BATT Holovision Face Plates shown with W-1000 installed 13.8 VAC 1.25A NOTE: See “Doorphone Adjustments and Programming” for volume adjustments and DIP switch settings on the doorphone.
- Page 3 1 2 3 4 5 6 7 8 9 10 11 12 13 14 15 16 17 18 19 1 2 3 TALK BATT TO STANDARD PHONES Holovision Face Plates shown with W-1000 installed 13.8 VAC 1.25A NOTE: See “Doorphone Adjustments and Programming” for volume adjustments and DIP switch settings on the doorphone.
- Page 4 13.8 VAC 1.25A 16.5 VAC 40 VA Holovision Face Plate shown with W-1000 installed NOTE 1: Remove the jumper wire & MOVs from left side terminal strip. Wire right side terminal strip “color for color”. NOTE 2: MOV (metal oxide varistor) is the small red component which is included. Its purpose is to absorb “inductive kick back”...
- Page 5 13.8 VAC Earth 1.25A 16.5 VAC 40 VA Holovision Face Plate shown with W-1000 installed NOTE : Remove the jumper wire & MOVs from left side terminal strip. Wire right side terminal strip “color for color”. TYPE 115 Page 5...
- Page 6 Doorphone Adjustments and Programming Microphone Volume In certain noisy locations (traffic or wind), the microphone volume may need to be decreased. A symptom of this is one-way talk path, in which the distant party cannot be heard over the speaker. A “MIC VOL” adjustment is provided on the doorphone for increasing or decreasing the microphone volume.
- Page 7 C-1000B Door Controller Programming Program Auxilliary Contacts* Step Action Make sure C-1000B is in Programmin Mode - See Page 8 Program Aux Contact activation time as follows: Enter time (seconds) follwed by #03 EXAMPLE: 01#03 programs Aux Contact for 1 seoncd. NOTE: Entering a time “00”...
- Page 8 Viking Operation OPERATION ANSWER A CALL FROM DOORBOX When the phones ring, pick up a phone to be connected to the visitor. When the C-1000B controller is used, you will hear a beep tone when the phone is answered - one beep for doorbox 1, and 2 beeps for doorbox 2.
- Page 9 Set Essex Relay Options GOAL: To use jumper pins on circuit board to configure standard relay options. In this configuation, Codes 1 and 2 operate Relay 1. Codes 3, 4, 5 operate Relay 2. Step Action Relay 1 and 2 activate. Only Relay 1 latch* Relay 1 Relay 2 Relay 1...
- Page 10 Programming of Essex Keypad GOAL: Set-up master and user codes Set Master Code Step Action Press “Program” switch once. (keypad will beep 4 times) Once “Program” switch is pressed, you have 2 minutes to complete Step 5. Press “1119”. (you will hear 3 beeps) Step 5 must be completed within 5 seconds of Step 3.
- Page 11 Programming of Essex Keypad Set User Code 4 Step Action Enter “Master Code”. Enter 117 (3 beeps). Enter User Code 4. Wait 5 seconds for 3 reset beeps. Set User Code 5 Step Action Enter “Master Code”. Enter 119 (3 beeps). Enter User Code 5.
- Page 12 Programming of Essex Keypad Set Activation Time Of Relay 1 (User codes 1 & 2 - see note below) Step Action Press “Program” switch (keypad will beep 4 times). Enter 1117 (3 beeps). Enter 1 for every 1 second latch time, and 5 for every 5 seconds. Examples: 6 seconds = 5, 1 8 seconds = 5, 1, 1, 1...
Need help?
Do you have a question about the 101-VIK and is the answer not in the manual?
Questions and answers