Table of Contents
Advertisement
Quick Links
Advertisement
Table of Contents

Related Manuals for OPTO-EDU A34.5017


Summary of Contents for OPTO-EDU A34.5017
-
Page 2: Table Of Contents
Table of Contents Precaution…………………………………...……………….2 Preparation………………………………………………..…3 Standard accessories……………...…………….4 Parts Names & Functions……………………..5 System requirements……………..….……..…6 Technical Specifications…………………………6 Connect Microscope to iOS/Android Device……..……….7 Download App……...…………………………..7 Connect to iOS/Android Device……………..7 Add Camera to App and Start Preview……………………9 Capture and Playback………………………………..……12 Capture photo………………………………...…12 Record video……………………………….……12 View Captured files……………………………13 Camera Settings……………………………………...……14 On-screen Display………………………………14... -
Page 3: Precaution
Welcome Thank you for your choice of our product - it is a high-tech while easy to use HD Wi-Fi Internet Digital Microscope. With this unit you will see a unique and “bigger” world on iOS/Android devices either by AP mode or via Internet. It’s easy to zoom in on stamps, coins, paper currency, plants, insects, skin, fabrics, rocks and minerals, and so much more. - Page 4 Do not point Microscope lens to the sun or strong light for a long time. Powerful light may hurt the light-sensitive electronics. Avoid touching the lens. The white LEDs which illuminate the Microscope target field are very bright. Do not stare directly into these LEDs as it may damage your eyes.
-
Page 5: Preparation
2. Preparation ■ ■ ■ ■ Standard accessories Wi-Fi Microscope Stand (optional) DC adaptor User manual... -
Page 6: Parts Names & Functions
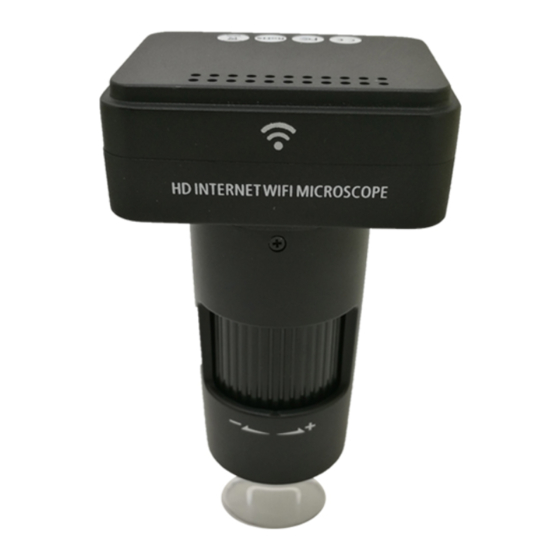
■ ■ ■ ■ Parts Names & Functions Part# Meaning Part# Meaning Reset LED dimmer Micro-SD slot DC-in Focus wheel 1/4-inch hole ON/OFF Charging indicator... -
Page 7: System Requirements
System Requirements ■ * iOS: 5.1 and later * Android: 4.3 and later Technical Specifications ■ ■ ■ ■ Magnification 10x~200x Ratio Still capture 1920x1080, 640x480, 320x240 resolution Video capture 1920x1080, 640x480, 320x240 resolution Focus Range Manual focus from 0mm to 50mm Video format Photo format JPEG... -
Page 8: Connect Microscope To Ios/Android Device
3. Connect Microscope to iOS/Android Device 1) Download App iOS: Search and install TinyCapture from App Store. Android: Search and download TinyCapture from play.google.com or the download link provided by seller and install it. Android 2) Connect the Wi-Fi Microscope to iOS/Android device. - Page 9 Wi-Fi Microscope name WIFI Microscope_xxxxxx (xxxxxx is the last 6 digits of the camera ID), as follows: The password to connect the device is 12345678. Please see page-21 on how to change the password.
-
Page 10: Add Camera To App And Start Preview
4. Add Camera to App and Start Preview 1) Start the app, click + at the right corner, then click Search, finally click OK to confirm. Input password, it is 8888 by default. Please see page-20 on how to change the password. - Page 11 2) The camera will be listed as follows. After clicked, it will list as online.
- Page 12 3) Click the online camera, you can then start preview. HD/VGA/QVGA Crossing Brightness Contrast Camera settings (P14) Photo capture Video capture Mirror Flip Speaker...
-
Page 13: Capture And Playback
5. Capture and Playback 1) Capture photo Click and then a photo will be taken! 2) Record video Click , and there will be a red dot in the icon , which means video is on recording. Press again to finish the recording (then the red dot will disappear). -
Page 14: View Captured Files
3) View recorded files From the main page, click Media at the bottom. Snapshot Files: Photos captured. You can save photo to album by pressing it for 2 seconds. Record Files: For Android, the files are stored under album. For iOS, you can access the files by iTunes (see Page-22). -
Page 15: Camera Settings
6. Camera Settings When a camera is online, click to enter the setting page as follows:... -
Page 16: On-Screen Display
1) On-Screen Display Here you can choose whether to display the on-screen info including time/date at the left-top corner and camera name at the left-bottom corner. -
Page 17: Wi-Fi Setting
2) Wi-Fi Settings Here you can configure the camera to connect to a router (network) and then you smart phone can access to the camera via Internet, which means you can visit the camera anywhere in the world so long your phone has access to Internet. - Page 18 After rebooting successfully, the camera will connect to the router (new network) and can access to Internet if the router has Internet access. Then your Smartphone can access to the camera via Internet. Even your Smartphone is far away from the camera, it can still access the camera so long your phone has Internet access.
-
Page 19: Sd Card Settings
3) SD Card Record Settings You can setup whether to start recording video by the inserted Micro-SD car. File Length means the video length of each clip. Loop Recording means when the SD card is full, recording will overwrite the card from the earliest file. Here you can format the Micro-SD card. -
Page 20: Time Settings
4) Time Settings You can sync the camera time with your phone time. -
Page 21: Change Camera Password
5) Change Camera Password This enables you to change the password that is used on the adding camera page as follows (the left one). The new password will become valid when the camera is reconnected. -
Page 22: Change Ap Password
6) Change AP Password This enables you to change the password used to connect your phone with camera by Wi-Fi (shown on Page-8). The password should be at least 8-digit. The new password will become valid when the camera is powered again. -
Page 23: Download Recorded Video By Itunes
7. Download Recorded Video by iTunes Connect your phone with computer by cable, start iTunes, choose TinyCaputre -> CameraFiles, and then choose Save to in order to download files to computer. Open the saved CameraFiles from computer, the recorded video files will be listed as follows. -
Page 24: Reset The Camera
8. Reset the Camera If you cannot find hotspot of the camera on the Wi-Fi list of your Smartphone, or the camera is somehow halted, you can reset it. To reset the camera, please use a pin to press the Reset button for around 5 seconds. -
Page 25: Troubleshooting
9. Troubleshooting Problem Solution After switched to WIFI 1) Rotate the LED dimmer to position, the LED does check if it is on. not light. 2) Charge the battery. The microscope is Reset the camera. halted. I cannot find the hotspot of the camera on the Reset the camera. - Page 26 This symbol on the product or in the instructions means that your electrical and electronic equipment should be disposed at the end of its life separately from your household waste. There are separate collection systems for recycling in the EU. For more information, please contact the local authority or your retailer where you purchased the product.
Need help?
Do you have a question about the A34.5017 and is the answer not in the manual?
Questions and answers